[laravel8.5.19] LaravelでPython3を実行する書き方

Laravelで作成するアプリケーションで、一部の言語に関する処理のところをPython(自然言語処理)で実行したい。
方法としては、1.PHP組み込み関数のexec関数を使用する、2.symfony/processライブラリを使う の2通りがあるようだ。
今回は「exec関数」を使用する。python実行のテストのみなので、以下簡略化して記述している。

### exec関数とは?
exec関数はPHPの組み込み関数で、外部プログラムを実行できる

### Laravelプロジェクトインストール
$ composer create-project –prefer-dist laravel/laravel laravel-python
$ cd laravel-python
$ composer require laravel/jetstream
$ php artisan jetstream:install livewire
$ npm install && npm run dev
$ php artisan migrate
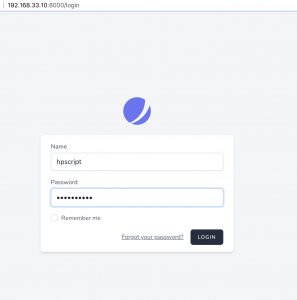
$ php artisan serve –host 192.168.33.10 –port 8000

### Routing
web.php
 L index.bladeからpostした際に、ExecControllerのexecutePython() メソッドでpythonを実行する

use App\Http\Controllers\ExecController;
use App\Http\Controllers\TestController;

Route::post('/python', [ExecController::class, 'executePython']);
Route::get('/test', [TestController::class, 'index']);
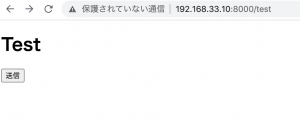
### View
index.blade.php
 L フォームのactionから、ExecController@executePythonにpostする

	<h1>Test</h1>
	<form action="python" method="post">
		@csrf
		<input type="submit" name="submit">
	</form>

### Controller
ExecController.php
L exec($command, $output);で実行する。
L $commandは、「python3 ${絶対パス}.py」で実行する
L laravelでは、app_path()でappディレクトリのpathを取得するので、app_path()とする
L execの第二引数である$outputは、コマンドで*.pyを実行した際の出力が返ってくる。

class ExecController extends Controller
{
    //
    public function executePython(Request $request){
    	$path = app_path() . "/Python/app.py";
    	$command = "python3 " . $path;
    	exec($command, $output);
    	dd($output);
    	// return view('index', compact('output'));
    }
}

※テストなのでdd($output)で出力を確認します。

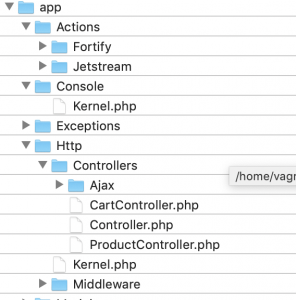
laravel-python/app/Python/app.py
※今回はlaravelプロジェクトのapp/Python/配下にapp.pyを作成した。絶対パスなので、どこれも良いっぽいが、appフォルダに作るのが一般的のよう。今回はテストなので単にprint()するだけにした

print("hello")

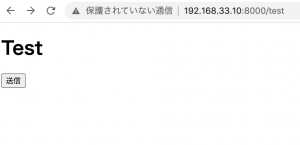
### Laravelでpythonを実行した実行結果
bladeで「送信」ボタンを押すと、pythonで*.pyを実行する

実行後
L 配列で返ってくる

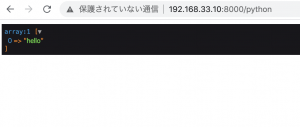
返ってきた変数(値)は、viewに再度返却できますね。
うおおおおおおおおおおおおおおおおおおおおおおおおお
やべえええええええええええええええええ
やりたいこと(自然言語処理)の9割くらいはイメージできた!!!!!!!!!!!!!

当初、Pythonの処理(nlpなど)の部分は、サブドメインを取得して別サーバを立ててDjangoで実装しようかと思ってたが、Laravelでpythonを実行できるなら、わざわざそんな冗長なことしなくて良いですね。
よっしゃああああああああああああああああああああああ
設計書作るぞーーーーーーーー

[Laravel 8.27.0] マルチテナントアーキテクチャで構築する1

マルチテナントアーキテクチャで開発したい

$ php -v
PHP 7.4.11 (cli) (built: Oct 21 2020 19:12:26) ( NTS )
$ composer create-project laravel/laravel multi –prefer-dist
$ cd multi
$ php artisan -V
Laravel Framework 8.27.0
$ composer require laravel/jetstream
$ php artisan jetstream:install livewire

multi tenant laravel
tenacy
https://tenancy.dev/
 L 簡単にマルチテナントを構築できるhyn/multi-tenant

### 概要
– テナントデータベースはテナント1つにつき1つとする
– テナントを作ると、テナントデータベース、専用ユーザが作られる。テナントを削除すると削除される
– システムのmigrationとテナントmigrationは分ける

### Tenancy Install
tenancy
mysql> CREATE DATABASE IF NOT EXISTS tenancy;
mysql> CREATE USER IF NOT EXISTS tenancy@localhost IDENTIFIED BY ‘hogehoge’;
mysql> GRANT ALL PRIVILEGES ON *.* TO tenancy@localhost WITH GRANT OPTION;
mysql> show databases;

config/database.php

    'connections' => [
        'system' => [
            'driver' => 'mysql',
            'host' => env('TENANCY_HOST', '127.0.0.1'),
            'port' => env('TENANCY_PORT', '3306'),
            'database' => env('TENANCY_DATABASE', 'tenancy'),
            'username' => env('TENANCY_USERNAME', 'tenancy'),
            'password' => env('TENANCY_PASSWORD', 'fugafuga'),
            'unix_socket' => env('DB_SOCKET', ''),
            'charset' => 'utf8mb4',
            'collation' => 'utf8mb4_unicode_ci',
            'prefix' => '',
            'strict' => true,
            'engine' => null,
        ],

.envからDBに関する情報を削除する

DB_CONNECTION=mysql
DB_HOST=127.0.0.1
DB_PORT=3306
DB_DATABASE=laravel
DB_USERNAME=root
DB_PASSWORD=

config/database.php
L mysqlからsystemに変更する

    'default' => env('DB_CONNECTION', 'system'),

$ composer require “hyn/multi-tenant:5.6.*”
./composer.json has been updated
Running composer update hyn/multi-tenant
Loading composer repositories with package information
Updating dependencies
Your requirements could not be resolved to an installable set of packages.

Problem 1
– hyn/multi-tenant[5.6.0, …, 5.6.1] require ramsey/uuid ^3.5 -> found ramsey/uuid[3.5.0, …, 3.x-dev] but the package is fixed to 4.1.1 (lock file version) by a partial update and that version does not match. Make sure you list it as an argument for the update command.
– hyn/multi-tenant[5.6.2, …, 5.6.4] require laravel/framework ^7.0 -> found laravel/framework[v7.0.0, …, 7.x-dev] but it conflicts with your root composer.json require (^8.12).
– Root composer.json requires hyn/multi-tenant 5.6.* -> satisfiable by hyn/multi-tenant[5.6.0, …, 5.6.4].

Use the option –with-all-dependencies (-W) to allow upgrades, downgrades and removals for packages currently locked to specific versions.

なにこれ? Laravel8系に対応してないってこと??

[aws ec2] maatwebsite/excel 3.1.26 requires phpoffice/phpspreadsheet ^1.15 -> satisfiable by phpoffice/phpspreadsheet[1.15.0, 1.16.0].

composer updateした時に、エラーになる。

$ composer update
Loading composer repositories with package information
Updating dependencies
Your requirements could not be resolved to an installable set of packages.

Problem 1
– maatwebsite/excel 3.1.26 requires phpoffice/phpspreadsheet ^1.15 -> satisfiable by phpoffice/phpspreadsheet[1.15.0, 1.16.0].
– maatwebsite/excel[3.1.20, …, 3.1.25] require phpoffice/phpspreadsheet ^1.14 -> satisfiable by phpoffice/phpspreadsheet[1.14.0, 1.14.1, 1.15.0, 1.16.0].
– maatwebsite/excel[3.1.18, …, 3.1.19] require phpoffice/phpspreadsheet ^1.10 -> satisfiable by phpoffice/phpspreadsheet[1.10.0, …, 1.16.0].
– maatwebsite/excel[3.1.7, …, 3.1.17] require phpoffice/phpspreadsheet ^1.6 -> satisfiable by phpoffice/phpspreadsheet[1.6.0, …, 1.16.0].
– maatwebsite/excel[3.1.0, …, 3.1.6] require phpoffice/phpspreadsheet ^1.4 -> satisfiable by phpoffice/phpspreadsheet[1.4.0, …, 1.16.0].
– maatwebsite/excel 3.2.x-dev requires phpoffice/phpspreadsheet ^1.11 -> satisfiable by phpoffice/phpspreadsheet[1.11.0, …, 1.16.0].
– maatwebsite/excel 3.1.x-dev requires phpoffice/phpspreadsheet ^1.16 -> satisfiable by phpoffice/phpspreadsheet[1.16.0].
– phpoffice/phpspreadsheet[1.4.0, …, 1.16.0] require ext-gd * -> it is missing from your system. Install or enable PHP’s gd extension.
– Root composer.json requires maatwebsite/excel ^3.1 -> satisfiable by maatwebsite/excel[3.1.0, …, 3.2.x-dev].

To enable extensions, verify that they are enabled in your .ini files:
– /etc/php.ini
– /etc/php.d/20-bz2.ini
– /etc/php.d/20-calendar.ini
– /etc/php.d/20-ctype.ini
– /etc/php.d/20-curl.ini
– /etc/php.d/20-dom.ini
– /etc/php.d/20-exif.ini
– /etc/php.d/20-fileinfo.ini
– /etc/php.d/20-ftp.ini
– /etc/php.d/20-gettext.ini
– /etc/php.d/20-iconv.ini
– /etc/php.d/20-json.ini
– /etc/php.d/20-mbstring.ini
– /etc/php.d/20-mysqlnd.ini
– /etc/php.d/20-pdo.ini
– /etc/php.d/20-phar.ini
– /etc/php.d/20-simplexml.ini
– /etc/php.d/20-sockets.ini
– /etc/php.d/20-sqlite3.ini
– /etc/php.d/20-tokenizer.ini
– /etc/php.d/20-xml.ini
– /etc/php.d/20-xmlwriter.ini
– /etc/php.d/20-xsl.ini
– /etc/php.d/20-zip.ini
– /etc/php.d/30-mysqli.ini
– /etc/php.d/30-pdo_mysql.ini
– /etc/php.d/30-pdo_sqlite.ini
– /etc/php.d/30-xmlreader.ini
You can also run `php –ini` inside terminal to see which files are used by PHP in CLI mode.

よく見ると
require ext-gd * -> it is missing from your system. Install or enable PHP’s gd extension.

ext-gdが足りないと書いてある。
$ sudo yum install php-gd.x86_64

$ sudo su –
$ cd /var/www/hoge
$ composer update
$ exit

めっちゃ焦るな。侮ってた自分がアホや。インフラエンジニアって大変やな。

[Laravel8.16.0] コントローラのメソッド名とviewsファイル名の命名規則

入力->確認->登録という画面遷移の時に、確認画面のControllerの関数名とtemplateのファイル名に迷った。

関数のメソッドは下のようにキャメルケースで書く。これはいつも通り。

public function createConfirm() {
        return view('admin.client.input_confirm');
    }

で、viewsはスネークケースで書くらしい。アンダーバー無しにつなげて書くのはNGらしい。今までずっとアンダーバー削除してた。
正) input_confirm.blade.php
誤) inputconfirm.blade.php

### まとめ
テーブル名
 L スネークケース(複数): users_table
モデル名
L アッパーキャメル(単数): UserData
migration名
L スネークケース(単数): xxx_crate_users_table
seeder名
L アッパーキャメル: UsersTableSeeder
Controllers名
L アッパーキャメル: UserDataController
views名
L スネークケース: users_add.blade.php
※PHPの関数名ではスネークケースで書くこともあるとのこと

なんか、HTMLのファイル名やルーティングでスネークスケールで書くのかなり抵抗あるけど、bladeならユーザに見えないからまあいいのか。そういえば、migrationも確かにスネークスケールですね。

[CircleCI 2.0] Laravel8.15.0で使用する

# 前準備
1. テスト用の.envファイル作成
$ cp .env.example .env.testing

2. .env.testingのAPP_KEY作成
$ php artisan key:generate –env=testing

.env.testing

DB_CONNECTION=mysql
DB_HOST=127.0.0.1
DB_PORT=3306
DB_DATABASE=circle_test
DB_USERNAME=hogehoge
DB_PASSWORD=fugafuga

DB_DATABASEは、circle_testする。

3. テストコード作成
$ php artisan make:test UserRegisterTest

4. デフォルトのテストコードは削除
$ rm ./tests/Feature/ExampleTest.php
$ rm ./tests/Unit/ExampleTest.php

tests/Feature/UserRegisterTest.php
L RefreshDatabaseを使用すると、各テスト前後にマイグレーションとロールバックを実行

namespace Tests\Feature;

use Illuminate\Foundation\Testing\RefreshDatabase;
use Illuminate\Foundation\Testing\WithFaker;
use Tests\TestCase;

class UserRegisterTest extends TestCase
{
    use RefreshDatabase;
    public function testExample()
    {
        $response = $this->get('/');

        $response->assertStatus(200);
    }
}

5. UnitTestのテスト
$ vendor/bin/phpunit –testdox
PHPUnit 9.4.3 by Sebastian Bergmann and contributors.

User Register (Tests\Feature\UserRegister)
✔ Example

Time: 00:00.646, Memory: 26.00 MB

OK (1 test, 1 assertion)

6. ユーザ登録のテスト
$ php artisan route:list | grep register
| | GET|HEAD | register | register | Laravel\Fortify\Http\Controllers\RegisteredUserController@create | App\Http\Middleware\EncryptCookies |
| | POST | register | | Laravel\Fortify\Http\Controllers\RegisteredUserController@store | App\Http\Middleware\EncryptCookies |

tests/Feature/UserRegisterTest.php

class UserRegisterTest extends TestCase
{
    use RefreshDatabase;

    public function testUserRegister()
    {
        $email = 'hogehoge@gmail.com';
        $this->post(route('register'), [
            'name' => 'user1',
            'email' => $email,
            'password' => 'password',
            'password_confirmation' => 'password'
        ])
            ->assertStatus(302);

        $this->assertDatabaseHas('users', ['email' => $email]);
    }
}

$ vendor/bin/phpunit –testdox
PHPUnit 9.4.3 by Sebastian Bergmann and contributors.

User Register (Tests\Feature\UserRegister)
✔ User register

Time: 00:00.463, Memory: 28.00 MB

OK (1 test, 2 assertions)

※functionはtestで始まる必要があり、userRegisterだと、No tests found in class “Tests\Feature\UserRegisterTest”となる。

これをCircleCIで行う

# CircleCIでのテスト
1. config/database.php
L circle_testingを追記する

        'circle_test' => [
            'driver' => 'mysql',
            'host' => '127.0.0.1',
            'port' => '3306',
            'database' => 'circle_test',
            'username' => 'root',
            'password' => '',
            'charset' => 'utf8mb4',
            'collation' => 'utf8mb4_unicode_ci',
            'prefix' => '',
            'strict' => true,
            'engine' => null,
        ],

2. GithubでPrivateのrepositoryを作成し、projectをgit pushします。
$ git init
$ git add .
$ git commit -m “first commit”
$ git remote add origin https://github.com/hoge/fuga.git

3. CircleCIにログインしてSetupProject

Add Configボタン押下

This package requires php ^7.3|^8.0 but your PHP version (7.1.33) does not satisfy that requirement.

config.ymlのdocker imageがphp:7.1になってるからエラー。ここを7.3以上に修正する必要がある。
– dockerはphp:7.4.7を、MySQLは8系を使う
https://circleci.com/docs/ja/2.0/circleci-images/
mysql8系から認証方法が変わったので、command: [–default-authentication-plugin=mysql_native_password]を追記

version: 2
jobs:
  build:
    docker:
      - image: circleci/php:7.4.7-apache-node-browsers
      - image: circleci/mysql:8.0
        command: [--default-authentication-plugin=mysql_native_password]
 
    environment:
      - APP_DEBUG: true
      - APP_ENV: testing
      - APP_KEY: base64:hogehogefugafuga
      - DB_CONNECTION: circle_test
      - MYSQL_ALLOW_EMPTY_PASSWORD: true
 
    working_directory: ~/repo
 
    steps:
      - checkout
 
      - run: sudo docker-php-ext-install pdo_mysql
 
      - restore_cache:
          keys:
          - v1-dependencies-{{ checksum "composer.json" }}
          - v1-dependencies-
 
      - run: composer install -n --prefer-dist
 
      - save_cache:
          paths:
            - ./vendor
          key: v1-dependencies-{{ checksum "composer.json" }}
 
      - run: php artisan migrate
      - run: php artisan db:seed
 
      - run: php ./vendor/bin/phpunit

$ git add .
$ git config –global core.autoCRLF false
$ git commit -m “circleci”
$ git remote add origin https://github.com/hoge/hoge.git
$ git push -u origin master

復習にちょっと時間がかかり過ぎてしまったが、まぁOKでしょう。というか、Djangoで開発するときも、ちゃんとCircleCI使えばよかった。
これを実装していきます。

[Laravel8.12.3] セッション時間を変更する

session.php

    'lifetime' => env('SESSION_LIFETIME', 120),

    'expire_on_close' => false,

デフォルトで120分にになっているので、ここを編集する
expire_on_closeをtrueにすると、ブラウザを閉じると、セッションが切れる

– セッションがきれた時はHandler.phpに書く
Exception/Handler.php

namespace App\Exceptions;

use Illuminate\Foundation\Exceptions\Handler as ExceptionHandler;

class Handler extends ExceptionHandler
{
    /**
     * A list of the exception types that are not reported.
     *
     * @var array
     */
    protected $dontReport = [
        //
    ];

    /**
     * A list of the inputs that are never flashed for validation exceptions.
     *
     * @var array
     */
    protected $dontFlash = [
        'password',
        'password_confirmation',
    ];

    /**
     * Register the exception handling callbacks for the application.
     *
     * @return void
     */
    public function register()
    {
        //
    }
}

[Laravel8.x] Laravel7.xとの違い

Laravel8系の変更点
– Jetstreamの導入
– モデルファクトリクラスの導入
– マイグレーション圧縮の導入
– ジョブバッチの導入
– レート制限の向上
– キューの向上
– ダイナミックBladeコンポーネントの導入
– Tailwindページネーションビューの導入
– 時間テストヘルパの導入
– artisan serveの向上
– イベントリスナの向上

一つ一つ見ていきましょう。

### Jetstream
ログイン、ユーザー登録、メール認証、二要素認証、セッション管理、Laravel SanctumによるAPIサポート、チーム管理
Tailwind CSSを使用してデザイン(bootstrapから変更)

### モデルのディレクトリ
app/Modelsが作られた
-> 確かにこれは良いですね。

### モデルファクトリクラス
functionの書き方から、クラスを使う書き方に変更

### マイグレーションの圧縮
マイグレーションファイルをphp artisan schema:dumpで一つのファイルに圧縮できる

### ジョブバッチ
ジョブの状況に応じて処理ができる

### リクエストレート制限の向上
何回までアクセスできるかなどを制御できる

### メンテナンスモード
許可IPアドレスからトークンに変更

### ディスパッチクロージャとcatchチェーン
Queue実行時にcatchが使えるようになった

### 動的Bladeコンポーネント
ユーザ情報を元にコンポーネントを変える場合、x-dynamic-component :component=”$componentName”と書く

### イベントリスナの向上
Event::listenメソッドを渡すだけで登録できる

### 時間テストのヘルパ
現時刻を操作できるヘルパ

### Artisan serveの向上
.envの変更が検出されると自動でリロードできる

### Tailwindページネーション
ページネータはTailwind CSSを使用する

### ルートの名前空間の工場

$ curl -sS https://getcomposer.org/installer | php
$ php composer.phar create-project –prefer-dist laravel/laravel testApp
$ php artisan –version
Laravel Framework 8.12.3

認証に関してはlivewire(js)とinertia(SinglePageApplication)が用意さてている

composer require laravel/jetstream

// Livewireスタックを使用するJetstreamをインストールする
php artisan jetstream:install livewire

// Inertiaスタックを使用するJetstreamをインストールする
php artisan jetstream:install inertia

Tailwindを復習してからlivewireで確認ってところだな。

[Laravel8.x] Amazon Linux2のVagrant/EC2開発環境構築

Laravel8.xをAmazon Linux 2 AMI(HVM), SSD Volume Type 64-bit(x86)で動かすことを想定して、Vagrant or EC2の開発環境構築をやっていきたい。
8系はPHP >= 7.3なので、7.4を入れるのがポイント。他は大体いつもの通りです。
EC2の場合はvagrant initは飛ばしてsshログインから始めてください。

### 1.vagrant initからsshログインまで
$ mkdir amazonlinux2
$ cd amazonlinux2
$ vagrant init gbailey/amzn2
$ vi vagrantfile
// 35行目ポートフォワーディング解除

config.vm.network "private_network", ip: "192.168.33.10"

$ vagrant up
$ vagrant ssh-config –host 192.168.33.10
$ vagrant ssh
// sshログイン後
$ cat /etc/*release
$ sudo yum update

### 2.Gitインストール(2.29.2)
$ sudo yum -y install gcc curl-devel expat-devel gettext-devel openssl-devel zlib-devel perl-ExtUtils-MakeMaker autoconf
// ダウンロード対象を確認(https://mirrors.edge.kernel.org/pub/software/scm/git/)
// 11月3日時点で最新のgit2.29.2を入れる
$ cd /usr/local/src/
$ sudo wget https://mirrors.edge.kernel.org/pub/software/scm/git/git-2.29.2.tar.gz
$ sudo tar xzvf git-2.29.2.tar.gz
$ sudo rm -rf git-2.29.2.tar.gz
$ cd git-2.29.2
$ sudo make prefix=/usr/local all
$ sudo make prefix=/usr/local install
$ git –version
git version 2.29.2

### 3.Node.jsインストール(v11.15.0)
// 11系を入れる
$ curl –silent –location https://rpm.nodesource.com/setup_11.x | sudo bash –
$ yum install -y gcc-c++ make
$ sudo yum install -y nodejs
$ node –version
$ npm –version

### 4.Apacheインストール(Apache/2.4.46)
$ sudo yum install httpd
$ sudo systemctl start httpd
$ sudo systemctl status httpd
$ sudo systemctl enable httpd
$ sudo systemctl is-enabled httpd
$ httpd -v

### 5.PHP7.4インストール ※laravel8.xはPHP >= 7.3
$ amazon-linux-extras
$ amazon-linux-extras info php7.4
$ sudo amazon-linux-extras install php7.4
$ yum list php* | grep amzn2extra-php7.4
$ sudo yum install php-cli php-pdo php-fpm php-json php-mysqlnd php-mbstring php-xml
$ php -v
PHP 7.4.11 (cli) (built: Oct 21 2020 19:12:26) ( NTS )
おっしゃーーーーーーーーーーーー  ここで一息入れてジンジャーエールを飲みます

### 6.MySQL(8.0.22)
$ sudo yum install https://dev.mysql.com/get/mysql80-community-release-el7-3.noarch.rpm
$ sudo yum install –enablerepo=mysql80-community mysql-community-server
$ sudo systemctl start mysqld
// パスワード変更
$ sudo cat /var/log/mysqld.log | grep “temporary password”
$ mysql -u root -p
mysql> ALTER USER ‘root’@’localhost’ IDENTIFIED BY ‘${temporary password}’;
mysql> SET GLOBAL validate_password.length=6;
mysql> SET GLOBAL validate_password.policy=LOW;
mysql> ALTER USER ‘root’@’localhost’ IDENTIFIED WITH mysql_native_password BY ‘${new password}’;
$ sudo systemctl enable mysqld
$ mysql -u root -p

### 7.Ansible(2.9.13)
$ sudo amazon-linux-extras install ansible2
$ ansible –version

### 8.Ruby(2.7.2)
$ git clone https://github.com/sstephenson/rbenv.git ~/.rbenv
$ git clone https://github.com/sstephenson/ruby-build.git ~/.rbenv/plugins/ruby-build
$ echo ‘export PATH=”$HOME/.rbenv/bin:$PATH”‘ >> ~/.bash_profile
$ echo ‘eval “$(rbenv init -)”‘ >> ~/.bash_profile
$ source ~/.bash_profile
// rbenvは時間がかかるので注意 痺れを切らさず待ちます
$ rbenv install 2.7.2
$ rbenv rehash
$ sudo yum install rubygems
$ gem update –system 2.7.2

### 9.AmazonLinux2 timezone変更
$ date
$ cat /etc/localtime
$ sudo vi /etc/sysconfig/clock

ZONE="Asia/Tokyo" 
UTC=false

$ sudo cp /etc/sysconfig/clock /etc/sysconfig/clock.org
$ strings /etc/localtime
$ date

お疲れ様でしたあああああああああああああああああああああ。githubに貼り付けときます。
今までPHP7.3で開発してたので、取り敢えず7.4が入ったあたりで満足した。
さて、いよいよcomposerでlaravel8.xをinstallしていきましょう。

[Laravel8.x] PHPのバージョン PHP >= 7.3

9月8日に8系がリリースされています。3月3日に7系がリリースされたばかりですから、非常に早いペースですね。
まず公式ドキュメントを確認してみましょう。

https://readouble.com/laravel/8.x/ja/releases.html

– Jetstreamの導入
– モデルファクトリクラスの導入
– マイグレーション圧縮の導入
– ジョブバッチの導入
– レート制限の向上
– キューの向上
– ダイナミックBladeコンポーネントの導入
– Tailwindページネーションビューの導入
– 時間テストへるぱの導入
– artisan serveの工場
– イベントリスナの向上

結構沢山ありますね。重要そうなJetstreamは必ず確認するとして、最初にPHPのバージョンから確認します。
まず、8系では PHP >= 7.3 となっています。
amazon linux 2でどこまで行けるか確認してみたいと思います。

$ cat /etc/*release
NAME=”Amazon Linux”
VERSION=”2″
ID=”amzn”
ID_LIKE=”centos rhel fedora”
VERSION_ID=”2″
PRETTY_NAME=”Amazon Linux 2″
ANSI_COLOR=”0;33″
CPE_NAME=”cpe:2.3:o:amazon:amazon_linux:2″
HOME_URL=”https://amazonlinux.com/”
Amazon Linux release 2 (Karoo)

$ sudo yum list | grep php
php-cli.x86_64 7.3.23-1.amzn2 @amzn2extra-ph7.3
// 省略

$ amazon-linux-extras info php7.4
php7.4 recommends php-cli # yum install php-cli
php7.4 recommends php-pdo # yum install php-pdo
php7.4 recommends php-fpm # yum install php-fpm
php7.4 recommends php-json # yum install php-json
php7.4 recommends php-mysqlnd # yum install php-mysqlnd

php7.4インストールできそうですね。環境を最新版に作り直さないとダメですね。