fqdnとは”Fully Qualified Domain Name”の略
トップレベルドメイン(TLD)までのすべてのラベルを含むドメイン名
routes/tenants.php
use Illuminate\Support\Facades\Route;

Route::get('/', function(){
	return view('tenants.home');
});
resources/views/tenants/home.php
<!DOCTYPE html>
<html lang="en">
<head>
	<meta charset="UTF-8">
	<meta name="viewport" content="width=device-width, initial-scale=1.0">
	<title>Document</title>
</head>
<body>
	<h1>Welcom!</h1>
	<p>This will be your <b>dashboard</b> for every tenant in your system.</p>
</body>
</html>
config/tenancy.php
L make sure that path would be right.
    'routes' => [
        'path' => base_path('routes/tenants.php'),
        'replace-global' => false,
    ],
### creating first tenant
$ php artisan make:command tenant/create
app/Console/Commands/tenant/create.php
namespace App\Console\Commands\tenant;

use Illuminate\Console\Command;

use Illuminate\Support\Str;

use Hyn\Tenancy\Models\Hostname;
use Hyn\Tenancy\Models\Website;
use Hyn\Tenancy\Repositories\HostnameRepository;
use Hyn\Tenancy\Repositories\WebsiteRepository;

class create extends Command
{
    /**
     * The name and signature of the console command.
     *
     * @var string
     */
    // protected $signature = 'command:name';
    protected $signature = 'tenant:create {fqdn}';

    /**
     * The console command description.
     *
     * @var string
     */
    protected $description = 'Given a unique tenant name, creates a new tenant in the sytem';

    /**
     * Create a new command instance.
     *
     * @return void
     */
    public function __construct()
    {
        parent::__construct();
    }

    /**
     * Execute the console command.
     *
     * @return int
     */
    public function handle()
    {

        $fqdn = sprintf('$s.$s', $this->argument('fqdn'), env('APP_DOMAIN'));

        $website = new Website;
        $website->uuid = env('TENANT_WEBSITE_PREFIX') . Str::random(6);
        app(WebsiteRepository::class)->create($website);

        $hostname = new Hostname;
        $hostname->fqdn = $fqdn;
        $hostname = app(HostnameRepository::class)->create($hostname);
        app(HostnameRepository::class)->attach($hostname, $website);
        // return 0;
    }
}
.env
TENANT_WEBSITE_PREFIX=tenancy_demo_
php artisan tenant:create demo
mysql> show tables;
+————————+
| Tables_in_tenancy_demo |
+————————+
| failed_jobs |
| hostnames |
| migrations |
| password_resets |
| users |
| websites |
+————————+
6 rows in set (0.31 sec)
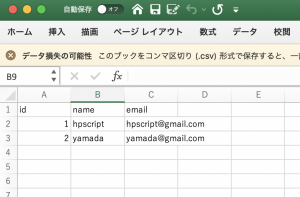
mysql> select * from websites;
+—-+———————+———————+———————+————+——————————–+
| id | uuid | created_at | updated_at | deleted_at | managed_by_database_connection |
+—-+———————+———————+———————+————+——————————–+
| 1 | tenancy_demo_NcmmUL | 2021-08-08 04:39:43 | 2021-08-08 04:39:43 | NULL | NULL |
| 2 | tenancy_demo_IbSPrJ | 2021-08-08 04:47:13 | 2021-08-08 04:47:13 | NULL | NULL |
+—-+———————+———————+———————+————+——————————–+
2 rows in set (0.37 sec)
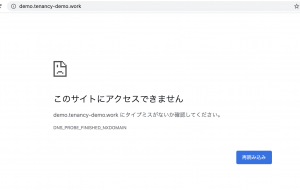
conf.dの名前解決がうまくいっていないような印象。
あれ? マルチテナントの場合、サブドメインの設定ってするんだっけ?