[Django3.0] staticの静的ファイルをS3に画像をアップロード

dev環境だとstaticに画像を置けば良かったが、prd環境だと画像保存がcollectstaticで上手くいかないのでS3を使いたい。まずはテストする。

$ django-admin startproject statictest
$ cd statictest
$ python3 manage.py startapp testApp

INSTALLED_APPS = [
    'django.contrib.admin',
    'django.contrib.auth',
    'django.contrib.contenttypes',
    'django.contrib.sessions',
    'django.contrib.messages',
    'django.contrib.staticfiles',
    'testApp',
]

statictest/urls.py

from django.contrib import admin
from django.urls import path, include

urlpatterns = [
    path('admin/', admin.site.urls),
    path('', include('testApp.urls'))
]

testApp/urls.py

from django.urls import path
from django.conf import settings
from . import views

urlpatterns = [
	path('', views.index, name='index'),
]

testApp/templates/testApp/index.html

{% load static %}
<!DOCTYPE html>
<html lang="en">
<head>
	<meta charset="UTF-8">
	<title>Document</title>
	<link rel="stylesheet" href="{% static 'testApp/css/base.css' %}">
</head>
<body>
	<header>
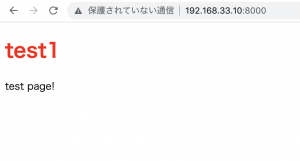
	<h1>test1</h1>
	</header>
	<div>
		test page!
	</div>
</body>
</html>

testApp/static/testApp/css/base.css

h1 {
	color: red;
}

views.py

from django.shortcuts import render
from django.http import HttpResponse

def index(request):
	return render(request, 'testApp/index.html')

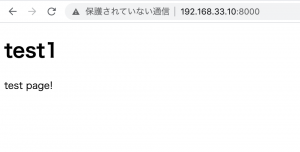
$ python3 manage.py runserver 192.168.33.10:8000

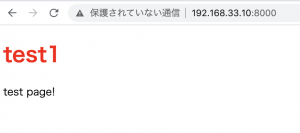
これをsettings.pyのDEBUG=Falseにすると、static fileを読み込まなくなる。

DEBUG = False

### AWS S3
– S3fullAccessのユーザ作成
accesskey, secretkey, regionを取得
– testapp-djangoのbucket作成

$ pip3 install boto3
$ pip3 install django-storages

settings.py

INSTALLED_APPS = [
    //
    'testApp',
    'storages' # 追加
]

# STATIC_URL = '/static/'

STATICFILES_DIRS = [os.path.join(BASE_DIR, 'testApp/static')]
AWS_ACCESS_KEY_ID = 'AKIAXXXXXXXXXXXXXX'
AWS_SECRET_ACCESS_KEY = 'YYYYYYYYYYYYYYYYYYYYYYYYYYYYYYYYYYYY'
AWS_STORAGE_BUCKET_NAME = 'static-test-reiwa'
AWS_S3_CUSTOM_DOMAIN = '%s.s3.amazonaws.com' % AWS_STORAGE_BUCKET_NAME
AWS_S3_OBJECT_PARAMETERS = {
    'CacheControl': 'max-age=86400',
}
AWS_LOCATION = 'static'
AWS_DEFAULT_ACL = None
STATIC_URL = 'https://%s/%s/' % (AWS_S3_CUSTOM_DOMAIN, AWS_LOCATION)
STATICFILES_STORAGE = 'storages.backends.s3boto3.S3Boto3Storage'

S3で対象のbucketをpublicにして、フォルダをmake publicに変更する

– STATICFILES_DIRS = [os.path.join(BASE_DIR, ‘static’)] だとファイルがないとエラーになるので注意。

なるほどー

[Django3.0] tesseractで画像の文字を解析するページを実装したい

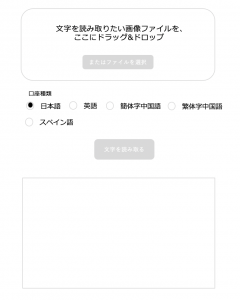
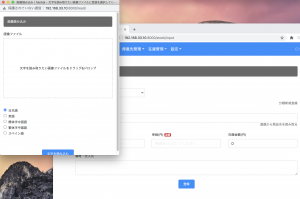
1) コーディングする前に、まず画面設計から作ります。
– イメージとしてはポップアップ

2) 続いて、Webpack&SASS環境でドラッグ&ドロップのFrontEndを書いていく
– 画像ファイルの制御は file.type.match(‘image.*’)とする。
– 例えばjpegなら、file typeは’image/jpeg’となる。

var imageType = 'image.*';

				if(! file.type.match(imageType)){
					alert('画像を選択してください');
					$('#input_file').val('');
					$('#drop_area').css('border', '1px dashed #aaa');
					return;
				}


良い感じ。これをDjangoに実装する

3) Django
### template
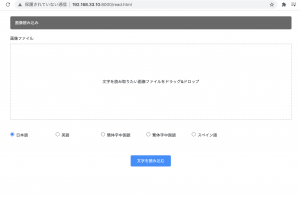
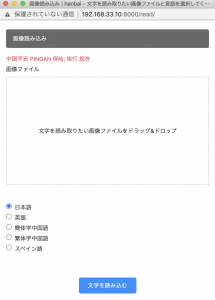
– aタグのリンクをwindow.openで設定する

<a href="javascript:window.open('/read', null, 'top=0,left=0,width=500px,height=650');">画像から商品名を読み取る</a>

– radioのvalueはlangの値を入れます。

<div class="row col-md-12 mt-10">
	  			<div class="form-check col-md-2">
				  <input class="form-check-input" type="radio" name="lang" value="jpn" id="lang" checked>
				  <label class="form-check-label" for="lang">日本語</label>
				</div>
				<div class="form-check col-md-2">
				  <input class="form-check-input" type="radio" name="lang" value="eng" id="lang">
				  <label class="form-check-label" for="lang">英語</label>
				</div>
				<div class="form-check col-md-2">
				  <input class="form-check-input" type="radio" name="lang" value="chi_sim" id="lang">
				  <label class="form-check-label" for="lang">簡体字中国語</label>
				</div>
				<div class="form-check col-md-2">
				  <input class="form-check-input" type="radio" name="lang" value="chi_tra" id="lang">
				  <label class="form-check-label" for="lang">繁体字中国語</label>
				</div>
				<div class="form-check col-md-2">
				  <input class="form-check-input" type="radio" name="lang" value="spa" id="lang">
				  <label class="form-check-label" for="lang">スペイン語</label>
				</div>
			</div>

views.py
– Postされた画像は request.FILES[‘*’]で受け取る。
– 条件分岐で、request.FILES[‘read_img’]とすると、MultiValueDictKeyErrorになるので、request.FILES.get(‘read_img’, False)とする。

from PIL import Image
import sys
import pyocr
def img_read(request):
	if(request.method == 'POST' and request.FILES.get('read_img', False)):
		tools = pyocr.get_available_tools()
		img = request.FILES['read_img']
		langs = request.POST['lang']
		img = Image.open(img)
		txt = tools[0].image_to_string(img,lang=langs,builder=pyocr.builders.TextBuilder(tesseract_layout=6))
		params = {
			'txt': txt,
		}
		return render(request, 'sales/img_read.html', params)
	else:
		return render(request, 'sales/img_read.html')

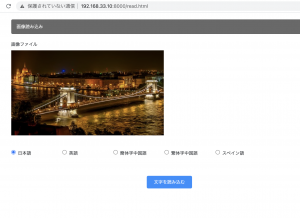
出来たーーーーーーーーーーーーーー^^
きゃっ♩ きゃっ🎵 きゃっ🎶
早速git pushしよー

[Django3.0]datepickerの範囲指定で検索して表示する

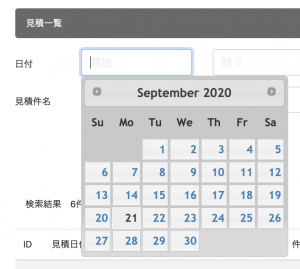
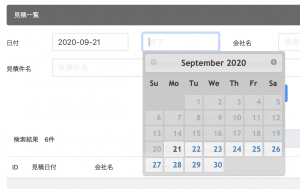
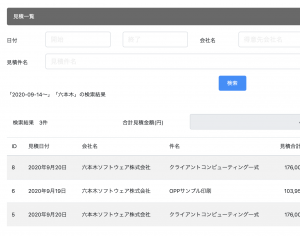
見積一覧ページで、「日付」「会社名」「件名」でページ内検索できるようにする。
なお、日付は、範囲指定か、以上以下で検索できるようにする

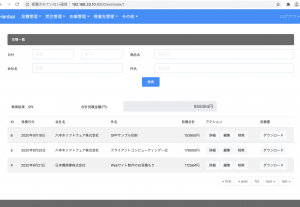
画面

### template

<form action="/estimate/1" method="post">
				{% csrf_token %}
				<div class="form-group row">
						<label for="datepicker_s" class="col-md-1 col-form-label">日付</label>
						<div class="col-md-2">
							<input name="datepicker_s" type="text" class="form-control align-bottom" id="start" placeholder="開始">
						</div>
						<div class="col-md-2">
							<input name="datepicker_e" type="text" class="form-control" id="end" placeholder="終了">
						</div>
						<label for="client_name" class="col-md-1 col-form-label">会社名</label>
						<div class="col-md-6">
							<input name="client_name" type="text" class="form-control" id="tel" placeholder="得意先会社名">
						</div>
				</div>

				<div class="form-group row">
						<label for="title" class="col-md-1 col-form-label">見積件名</label>
						<div class="col-md-11">
							<input type="text" class="form-control align-bottom" name="title" id="title" placeholder="見積件名">
						</div>
				</div>

				<div class="">
						<button class="btn search-btn text-center" type="submit">検索</button>
				</div>
			</form>

			<span>{{ query }}</span>

JS

$(function(){
			var format = 'yy-mm-dd';

			var start = $("[name=datepicker_s]").datepicker({
				dateFormat: 'yy-mm-dd'
			}).on("change", function(){
				end.datepicker("option", "minDate", getDate(this));
			});

			var end = $("[name=datepicker_e]").datepicker({
				dateFormat: 'yy-mm-dd'
			}).on("change", function(){
				start.datepicker("option", "maxDate", getDate(this));
			});

			function getDate(element){
				var date;
				try {
					date = $.datepicker.parseDate(format, element.value);
				} catch(error){
					date = null;
				}
				return date;
			}
		});

html側で「終了」が「開始」より前で指定できないようバリデーションがかかります。

### views.py
– 1.「開始」「終了」の入力があった場合、2.「開始」のみ入力があった場合、3.「終了」のみ入力があった場合、4.「開始」「終了」の入力がないPOSTの場合、5.「GET」の場合 でそれぞれレコードを取得します。
– ForeginKeyのクエリを検索する場合は、${model}__${column}で検索する。ここでは、顧客の会社名一部一致の検索のため、client__name__containsとしている。
– 検索内容を検索結果ページに表示させる

def estimate(request, num=1):
	if(request.method=='POST' and request.POST['datepicker_s'] and request.POST['datepicker_e']):
		data = Estimates.objects.filter(estimate_date__range=(request.POST['datepicker_s'], request.POST['datepicker_e']), client__name__contains=request.POST['client_name'], title__contains=request.POST['title']).order_by('-id')
		query = "「" + request.POST['datepicker_s'] + "〜" + request.POST['datepicker_e'] + "」"
		query += "「" + request.POST['client_name'] + "」" if request.POST['client_name'] else ""
		query += "「" + request.POST['title'] + "」" if request.POST['title'] else ""
		query += "の検索結果"
	elif(request.method=='POST' and request.POST['datepicker_s']):
		data = Estimates.objects.filter(estimate_date__gte=request.POST['datepicker_s'], client__name__contains=request.POST['client_name'], title__contains=request.POST['title']).order_by('-id')
		query = "「" + request.POST['datepicker_s'] + "〜」"
		query += "「" + request.POST['client_name'] + "」" if request.POST['client_name'] else ""
		query += "「" + request.POST['title'] + "」" if request.POST['title'] else ""
		query += "の検索結果"
	elif(request.method=='POST' and request.POST['datepicker_e']):
		data = Estimates.objects.filter(estimate_date__lte=request.POST['datepicker_e'], client__name__contains=request.POST['client_name'], title__contains=request.POST['title']).order_by('-id')	
		query = "「〜" + request.POST['datepicker_e'] + "」"
		query += "「" + request.POST['client_name'] + "」" if request.POST['client_name'] else ""
		query += "「" + request.POST['title'] + "」" if request.POST['title'] else ""
		query += "の検索結果"
	elif(request.method=='POST'):
		data = Estimates.objects.filter(client__name__contains=request.POST['client_name'], title__contains=request.POST['title']).order_by('-id')
		query += "「" + request.POST['client_name'] + "」" if request.POST['client_name'] else ""
		query += "「" + request.POST['title'] + "」" if request.POST['title'] else ""
	else:
		data = Estimates.objects.all().order_by('-id')
		query = ""
	page = Paginator(data, 3)
	count = data.count()
	total = data.aggregate(Sum('total'))
	params = {
		'data' : page.get_page(num),
		'count' : count,
		'total' : total,
		'query' : query,
	}
	return render(request, 'sales/estimate.html', params)

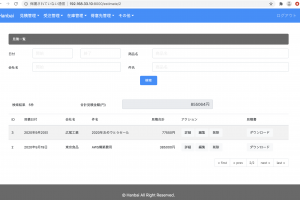
これで1ページ目は上手くいってるんだけど、2ページ目はpostではなくgetになってしまうから、上手くいかんな。どうしたらいいんだろうか。

[Django3.0]金額を3桁のカンマ区切りで表示させたい

カンマ区切りを追加するには、「humanize」を利用します。

settings.py

INSTALLED_APPS = [
    // 省略
    'sales',
    'widget_tweaks',
    'django.contrib.humanize', // 追加
]

NUMBER_GROUPING = 3

### view
template側では、humanizeを読み込んで、intcommaを追記します。

{% load humanize %}

<input type="text" disabled id="total" class="form-control col-md-4 text-right" value="{{total.total__sum | intcomma}}円" placeholder="" >

お、凄い良いです。
次はeditとdeleteを実装していきます。

因みに、今日は竹芝ポートシティのタリーズに来てます。なんか竹芝ポートシティの紹介ビデオ見てたらAR勉強したくなってきたなー

[Django3.0]ForeignKeyを使ったデータの取得・表示方法

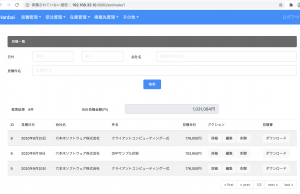
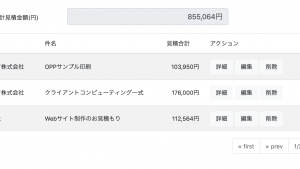
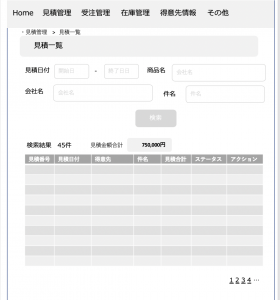
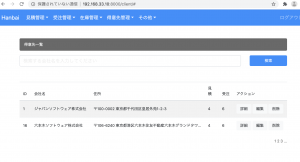
見積一覧ページで、sales_estimatesテーブルに入っている各見積りデータを表示させたい。

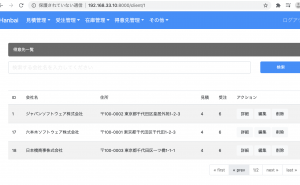
▼ワイヤーフレーム

機能要件
– 見積の会社名は、hasManyのリレーション関係にあるsales_clientsのnameから引っ張って表示させたい
– 最新の登録順に表示させる
– 見積件数が増えた場合を想定して、ページネーションを実装する
– 見積の合計金額を表示させる

### views.py
– ${model}.object.all()でデータを取得する
– order_by(‘-id’)でidをdescで取得する
– *.count()で対象のレコード件数を取得できる
– *.aggregate(Sum(‘${columnName}’))で対象カラムの合計値を取得できる

from django.db.models import Sum

def estimate(request, num=1):
	data = Estimates.objects.all().order_by('-id')
	page = Paginator(data, 3)
	count = data.count()
	total = data.aggregate(Sum('total'))
	params = {
		'data' : page.get_page(num),
		'count' : count,
		'total' : total,
	}
	return render(request, 'sales/estimate.html', params)

### estimate.html
– sumの値は、view側でも{{total.total__sum}}と書いてあげる必要がある

<div class="row col-md-12">
				<label class="col-form-label col-md-3">検索結果 {{ count }}件</label>
				<label for="total" class="col-md-2 col-form-label">合計見積金額(円)</label>
				<input type="text" disabled id="total" class="form-control col-md-4 text-right" value="{{total.total__sum}}円" placeholder="" >
			</div>

– 親テーブルの値である会社名を表示させるには、item.client.nameというように、foreignKeyとそのテーブルのカラム名を繋げてあげれば良い

{% for item in data %}
						<tr>
							<td>{{item.id}}</td>
							<td class="text-nowrap">{{item.estimate_date}}</td>
							<td class="text-nowrap">{{item.client.name}}</td>
							<td class="text-nowrap">{{item.title}}</td>
							<td class="text-right">{{item.total}}円</td>
							<td class="text-nowrap"><button class="btn btn-light">詳細</button> <button class="btn btn-light">編集</button> <button class="btn btn-light" onclick="location.href='#modal'">削除</button></td>
							<td class="text-nowrap"><button class="btn btn-light">ダウンロード</button></td>
						</tr>
						{% endfor %}

Djangoの場合、エラー時に参考にする記事の英語の割合が増えるので、やってて面白い。
さて、次は、見積金額を表示させる際に、3桁以上の場合はカンマをつけたいですね。

[Django3.0]ForeignKeyを使ったモデルとviews.pyの保存処理の書き方

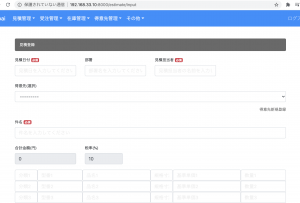
見積登録ページを作成するため、hasManyのモデルをmigrationした後にModelFormを作っていきます。
models.py
-> ForeignKeyでClients ModelのhasManyを設定しています。

class Estimates(models.Model):
	client = models.ForeignKey(Clients, null=True, blank=True, on_delete=models.PROTECT)
	estimate_date = models.DateField()
	position = models.CharField(max_length=50, null=True, blank=True)
	name = models.CharField(max_length=255, null=True, blank=True)
	title = models.CharField(max_length=255)
	classification1 = models.CharField(max_length=255, null=True, blank=True)
	// 省略
	total = models.IntegerField(null=True, blank=True)
	remark = models.TextField(max_length=300, null=True, blank=True)
	created_at = models.DateTimeField(auto_now_add=True)
	updated_at = models.DateTimeField(auto_now=True)

	def __str__(self):
		return self.title

forms.py

class EstimatesForm(forms.ModelForm):
	class Meta:
		model = Estimates
		fields = ['client', 'estimate_date', 'position', 'name', 'title', 'classification1', 'classification2', 'classification3', 'classification4', 'classification5', 'classification6', 'classification7', 'classification8', 'classification9', 'classification10', 'type1', 'type2', 'type3', 'type4', 'type5', 'type6', 'type7', 'type8', 'type9', 'type10', 'name1', 'name2', 'name3', 'name4', 'name5', 'name6', 'name7', 'name8', 'name9', 'name10', 'size1', 'size2', 'size3', 'size4', 'size5', 'size6', 'size7', 'size8', 'size9', 'size10', 'unit1', 'unit2', 'unit3', 'unit4', 'unit5', 'unit6', 'unit7', 'unit8', 'unit9', 'unit10', 'price1', 'price2', 'price3', 'price4', 'price5', 'price6', 'price7', 'price8', 'price9', 'price10', 'total', 'remark']

続いて、views.pyでestimate_input関数を書いていきます。

views.py

from .models import Estimates
from .forms import EstimatesForm

def estimate_input(request):
	params = {
		'form': EstimatesForm()
	}
	return render(request, 'sales/estimate_input.html')

## view
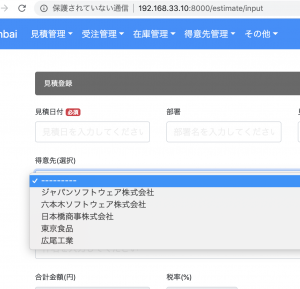
### Select文でリレーションの呼び出し
– viewはwidget_tweaksを使っています。
– form.${親テーブル} とするだけでselect文を作ってくれます。

estimate_input.html

<div class="form-group">
						<label for="client">得意先(選択)</label>
						{% render_field form.client class="form-control" %}
					</div>
– 見積の合計金額は、vue.jsでcomputedします。
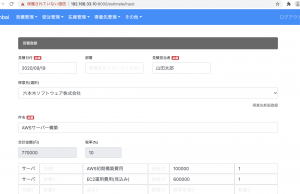
var app = new Vue({
			el: '#app',
			data: {
				tax:10,
				price_1:'',
				// 省略
			},
			computed: {
				add1: function(){
					return (this.price_1 * this.unit_1 + this.price_2 * this.unit_2 + this.price_3 * this.unit_3 + this.price_4 * this.unit_4 + this.price_5 * this.unit_5 + this.price_6 * this.unit_6 + this.price_7 * this.unit_7 + this.price_8 * this.unit_8 + this.price_9 * this.unit_9 + this.price_10 * this.unit_10 ) * (100 + this.tax) / 100;

				}
			}

### views.py
formで飛ばして、最後に保存します

def estimate_complete(request):
	if(request.method == 'POST'):
		data = EstimatesForm(request.POST)
		if data.is_valid():
			client = request.POST['client']
			estimate_date = request.POST['estimate_date']
			position = request.POST['position']
			name = request.POST['name']
			title = request.POST['title']
			classification1 = request.POST['classification1']
			// 省略
			total = request.POST['total']
			remark = request.POST['remark']
			estimates = Estimates(client_id=client, estimate_date=estimate_date, position=position, name=name, title=title, classification1=classification1, classification2=classification2, classification3=classification3, classification4=classification4, classification5=classification5, classification6=classification6, classification7=classification7, 
				classification8=classification8, classification9=classification9, classification10=classification10, type1=type1, type2=type2, type3=type3, type4=type4, type5=type5, type6=type6, type7=type7, type8=type8, type9=type9, type10=type10, name1=name1, name2=name2, name3=name3, name4=name4, name5=name5, name6=name6, name7=name7, name8=name8, 
				name9=name9, name10=name10, size1=size1, size2=size2, size3=size3, size4=size4, size5=size5, size6=size6, size7=size7, size8=size8, size9=size9, size10=size10, unit1=unit1, unit2=unit2, unit3=unit3, unit4=unit4, unit5=unit5, unit6=unit6, unit7=unit7, unit8=unit8, unit9=unit9, unit10=unit10, price1=price1, price2=price2, price3=price3,
				price4=price4, price5=price5, price6=price6, price7=price7, price8=price8, price9=price9, price10=price10, total=total, remark=remark)
			estimates.save()
			return render(request, 'sales/estimate_complete.html')
		else:
			params = {
				'form': EstimatesForm(request.POST),
			}
			return render(request, 'sales/estimate_input.html', params)
	return render(request, 'sales/estimate_complete.html')

### 結合テスト
修正しまくって、上手く動くようになるまで数日かかりました。
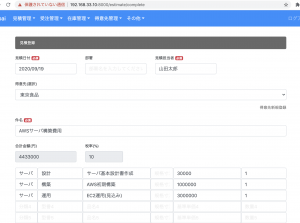
mysql側も確認し、ちゃんと入っています。
client_idには親テーブルのidが入っています。

mysql> select * from sales_estimates;
+—-+—————+———-+————–+—————–+—————–+—————–+—————–+—————–+—————–+—————–+—————–+—————–+—————–+——————+——–+——–+——-+——-+——-+——-+——-+——-+——-+——–+———————–+—————–+——-+——-+——-+——-+——-+——-+——-+——–+———–+——-+——-+——-+——-+——-+——-+——-+——-+——–+——-+——-+——-+——-+——-+——-+——-+——-+——-+——–+——–+——–+——–+——–+——–+——–+——–+——–+——–+———+——–+——–+—————————-+—————————-+———–+
| id | estimate_date | position | name | title | classification1 | classification2 | classification3 | classification4 | classification5 | classification6 | classification7 | classification8 | classification9 | classification10 | type1 | type2 | type3 | type4 | type5 | type6 | type7 | type8 | type9 | type10 | name1 | name2 | name3 | name4 | name5 | name6 | name7 | name8 | name9 | name10 | size1 | size2 | size3 | size4 | size5 | size6 | size7 | size8 | size9 | size10 | unit1 | unit2 | unit3 | unit4 | unit5 | unit6 | unit7 | unit8 | unit9 | unit10 | price1 | price2 | price3 | price4 | price5 | price6 | price7 | price8 | price9 | price10 | total | remark | created_at | updated_at | client_id |
+—-+—————+———-+————–+—————–+—————–+—————–+—————–+—————–+—————–+—————–+—————–+—————–+—————–+——————+——–+——–+——-+——-+——-+——-+——-+——-+——-+——–+———————–+—————–+——-+——-+——-+——-+——-+——-+——-+——–+———–+——-+——-+——-+——-+——-+——-+——-+——-+——–+——-+——-+——-+——-+——-+——-+——-+——-+——-+——–+——–+——–+——–+——–+——–+——–+——–+——–+——–+———+——–+——–+—————————-+—————————-+———–+
| 2 | 2020-09-19 | | 山田太郎 | AWS構築費用 | サーバ | サーバ | | | | | | | | | 設計 | 構築 | | | | | | | | | 基本設計書作成 | EC2初期構築 | | | | | | | | | 設計書 | | | | | | | | | | 1 | 1 | NULL | NULL | NULL | NULL | NULL | NULL | NULL | NULL | 50000 | 300000 | NULL | NULL | NULL | NULL | NULL | NULL | NULL | NULL | 385000 | | 2020-09-19 13:00:45.342104 | 2020-09-19 13:00:45.342128 | 19 |
+—-+—————+———-+————–+—————–+—————–+—————–+—————–+—————–+—————–+—————–+—————–+—————–+—————–+——————+——–+——–+——-+——-+——-+——-+——-+——-+——-+——–+———————–+—————–+——-+——-+——-+——-+——-+——-+——-+——–+———–+——-+——-+——-+——-+——-+——-+——-+——-+——–+——-+——-+——-+——-+——-+——-+——-+——-+——-+——–+——–+——–+——–+——–+——–+——–+——–+——–+——–+———+——–+——–+—————————-+—————————-+———–+
1 row in set (0.00 sec)

これ実装するのにすごい時間かかったけど、ここまで来たら、大分山を超えた感があります。後は基本的なところはauthとメールなど細かな機能でしょう。デバッグする際に、form.errors.itemsで画面にエラーメッセージを表示させてからスピードが上がりました。
[Django3.0]リダイレクトの書き方

views.pyでrenderではなくredirectと書く

urls.py

urlpatterns = [
	//
	path('client/', views.client_redirect, name='client_redirect'),
        // 
]

views.py

from django.shortcuts import render, redirect
def client_redirect(request):
	return redirect('/client/1')

次は検索フィルターの実装です。

[Django3.0]idを引数にしたurlの設定

顧客IDをurlのパスに設定して、顧客詳細ページや顧客編集ページを表示させたい。

e.g. http:*/client/detail/${clientId}

### urls.py、views.pyを修正する

/sales/urls.py

urlpatterns = [
	// 省略
	path('client/detail/<int:id>', views.client_detail, name='client_detail'),
	// 省略
]

/sales/views.py

def client_detail(request, id):
	client = Clients.objects.get(id=id)
	params = {
		'client' : client
	}
	return render(request, 'sales/client_detail.html', params)

/templates/sales/client_detail.html

// 省略
{% block title %}{{client.name}} | hanbai - 得意先詳細:{{client.name}}の詳細を表示しています{% endblock %}
// 省略

<table class="table">
					<tr>
						<td class="bg">会社名</td>
						<td>{{client.name}}</td>
						<td class="bg">会社名カナ</td>
						<td>{{client.name_kana}}</td>
					</tr>
					<tr>
						<td class="bg">事業所名</td>
						<td>{{client.office}}</td>
						<td class="bg">部署</td>
						<td>{{client.department}}</td>
					</tr>
					<tr>
						<td class="bg">担当者名</td>
						<td>{{client.charge}}</td>
						<td class="bg">役職</td>
						<td>{{client.position}}</td>
					</tr>
					<tr>
						<td class="bg">メールアドレス</td>
						<td colspan="3">{{client.charge_mail}}</td>
					</tr>
					<tr>
						<td class="bg">住所</td>
						<td colspan="3">{{client.zipcode}} {{client.prefecture}}{{client.address}}</td>
					</tr>
					<tr>
						<td class="bg">電話</td>
						<td>{{client.tel}}</td>
						<td class="bg">FAX</td>
						<td>{{client.fax}}</td>
					</tr>
					<tr>
						<td class="bg">代表者</td>
						<td>{{client.name_top}}</td>
						<td class="bg">役職</td>
						<td>{{client.position_top}}</td>
					</tr>
					<tr>
						<td class="bg">備考</td>
						<td colspan="3">{{client.remark}}</td>
					</tr>
				</table>
// 省略

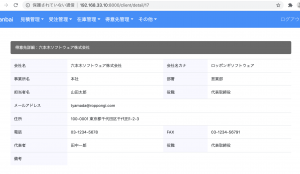
idを引数に上手く表示されています。

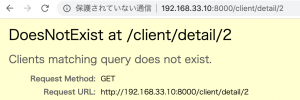
ただし、引数のidがレコードにないと、”Clients matching query does not exist.”と表示されてしまう。

### try & except
以下のように書けば、レコードがない場合、一覧ページに表示されます。

def client_detail(request, id):
	try:
		client = Clients.objects.get(id=id)
		params = {
			'client' : client
		}
		return render(request, 'sales/client_detail.html', params)
	except Clients.DoesNotExist:
		data = Clients.objects.all()
		params = {
			'data' : data
		}
		return render(request, 'sales/client.html', params)

クライアント一覧ページのリンクを以下のように修正して結合テストを行えばOK。

<button class="btn btn-light" onclick="location.href='/client/detail/{{item.id}}'">詳細</button>

ページング以外でGetパラメータを使用するのは抵抗がありますね。

[Django3.0]viewのループ処理でremodalにidを渡して各レコードを削除したい

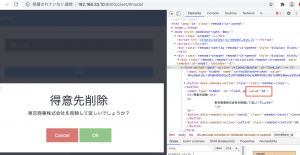
得意先リスト一覧ページで、各クライアントの行で削除ボタンを押下した時に、操作ミスによる削除を防ぐため、直ぐに削除するのではなく、remodalで一度確認画面をかまして削除するようにしたい。

### document.getElementsByNameで値を渡そうとした場合
渡す値が一つであれば、getElementsByName、getElementByIdなどで取得が出来る
ただし、forループで回している場合、同じ値を渡してしまい上手くいかない
*.html

{% for item in data %}
						<tr>
							<td id="hoge">{{item.id}}</td>
							<td class="text-nowrap">{{item.name}}</td>
							<td class="text-nowrap">〒{{item.zipcode}} {{item.prefecture}}{{item.address|truncatechars:20}}</td>
							<td>4</td>
							<td>6</td>
							<td class="text-nowrap"><button class="btn btn-light" onclick="location.href='/client/detail#{{item.id}}'">詳細</button> <button class="btn btn-light" onclick="location.href='/client/edit#{{item.id}}'">編集</button> <button class="btn btn-light" onclick="location.href='#modal'" name="target" value="{{item.id}}">削除</button></td>
						</tr>
						{% endfor %}

remodal & javascript

<div class="remodal" data-remodal-id="modal">
		<form method="post" action="/client/delete" id="form_id">
			{% csrf_token %}
			<button data-remodal-action="close" class="remodal-close"></button>
				<input type="hidden" id="client_id" name="client_id" value="00">
			    <h1>得意先削除</h1>
			    <p>
			    東京商事株式会社を削除して宜しいでしょうか?
			    </p>
			    <br>
			<button data-remodal-action="cancel" class="remodal-cancel">Cancel</button>
			<button data-remodal-action="confirm" class="remodal-confirm">OK</button>
		</form>
	</div>
	<script src="{% static 'sales/js/remodal.min.js' %}"></script>
	<script>
		var remodal = $('[data-remodal-id=modal]').remodal();

		$(document).on('opened', remodal, function () {
		     var target = document.getElementsByName('target').value;
		     console.log(target);
		});

		$(document).on('confirmation', remodal, function(){
			$('#form_id').submit();
		});
	</script>

### buttonをaタグで囲って、idを渡す
*.html

<a href="#modal"><button class="btn btn-light del" id="{{item.id}}">削除</button></a>

remodal & javascript

// remodal
<div class="remodal" data-remodal-id="modal">
		<form method="post" action="/client/delete" id="form_id">
			{% csrf_token %}
			<button data-remodal-action="close" class="remodal-close"></button>
				<input type="hidden" id="client_id">
			    <h1>得意先削除</h1>
			    <p>
			    東京商事株式会社を削除して宜しいでしょうか?
			    </p>
			    <br>
			<button data-remodal-action="cancel" class="remodal-cancel">Cancel</button>
			<button data-remodal-action="confirm" class="remodal-confirm">OK</button>
		</form>
	</div>

// javascript
$('.del').on('click', function(){
			var id = $(this).attr("id");
			document.getElementById("client_id").setAttribute("value", id);
		})

js側では、on clickでidの値を取得して、getElementById(“client_id”).setAttribute(“value”, id);でformのhiddenのinputにセットすると上手くいきます。idをセットする場所をinputではなくactionのリンク先につけてgetでidを取得しても良いでしょう。

laravelで同じような仕組みを作っていたので、githubでソースコードを確認して実装しました。ここはDjangoってよりもループ処理の時のremodalとJavaScriptの実装の仕方ですね。

[Django3.0]datetime型をviewで表示させる

デフォルトではY年n月j日H:i で表示される。
表示を変更するには、view側で以下のように書けば良い。

{{data.created_at|date:"Y/n/j H:i:s"}}

登録日時 2020/8/22 21:30:30 更新日時 2020年8月22日21:30

OK
${className}.objects.get(id=1) で取得して表示する方法はわかった。
次は、createの手順を行こう