[音声認識] Juliusのdictation-kit(日本語のGMM-HMMモデル)で検収

まず.wavファイルの音源を用意します。

「お疲れ様でした」という女性の声が入っています。

これをJuliusで音声認識します。
日本語のモデルはDictation-kitを使います。
https://github.com/julius-speech/dictation-kit
-> Githubのdictation-kitはトータルサイズが2Gで重いのでwgetでダウンロードしてunzipする方を使いたいと思います。

※dictation-kitをgit cloneする時
git-lfsを使うよう指示されます。
$ sudo yum install git-lfs
$ git lfs clone https://github.com/julius-speech/dictation-kit.git
no space left on device
$ df -h
Filesystem Size Used Avail Use% Mounted on
devtmpfs 2.0G 0 2.0G 0% /dev
tmpfs 2.0G 0 2.0G 0% /dev/shm
tmpfs 2.0G 520K 2.0G 1% /run
tmpfs 2.0G 0 2.0G 0% /sys/fs/cgroup
/dev/sda1 25G 25G 0 100% /
tmpfs 395M 0 395M 0% /run/user/1000
vagrant 234G 186G 49G 80% /vagrant
tmpfs 395M 0 395M 0% /run/user/0
これだと、直ぐにリソースが一杯になってしまい、使い切っていたのでframework系のファイル群を削除します😅

$ wget https://osdn.net/dl/julius/dictation-kit-4.5.zip
$ unzip ./dictation-kit-4.5.zip
$ cd dictation-kit-4.5

### 日本語のGMM-HMMモデルでJuliusを起動
am-dnn.jconf
L inputがmicになっているので、fileに変更します。

-input file

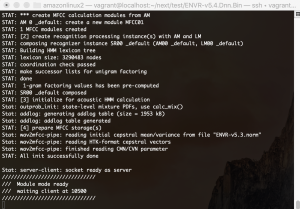
$ ../julius/julius/julius -C main.jconf -C am-gmm.jconf -nostrip -input rawfile
enter filename->test.wav
——
### read waveform input
enter filename->test2.wav
Stat: adin_file: input speechfile: test2.wav
STAT: 53499 samples (3.34 sec.)
STAT: ### speech analysis (waveform -> MFCC)
### Recognition: 1st pass (LR beam)
……………………………………………………………………………………………………………………………………………………………………………………………………………………………………………………………………………………………………..pass1_best: 別れ た 真似 し た 。
pass1_best_wordseq: 別れ+動詞 た+助動詞 真似+名詞 し+動詞 た+助動詞
pass1_best_phonemeseq: silB | w a k a r e | t a | m a n e | sh i | t a | silE
pass1_best_score: -7376.977051
### Recognition: 2nd pass (RL heuristic best-first)
STAT: 00 _default: 7136 generated, 1958 pushed, 182 nodes popped in 332
sentence1: 伴天連 様 でし た 。
wseq1: 伴天連+名詞 様+接尾辞 でし+助動詞 た+助動詞
phseq1: silB | b a t e r e N | s a m a | d e sh i | t a | silE
cmscore1: 0.477 0.083 0.314 0.446 0.411 1.000
score1: -7376.384766

——

おいおいオイ、「別れ た 真似 し た 。」になってるやんか。
いい加減にしろや✊ どうなってんねんコレ。

まあ、日本語モデルはdeepspeechとかには無いからjuliusでアプリ作るけどさ。

[音声認識] DeepSpeechでTranscriberを実装する

PyAudio has two modes: blocking, where data has to read from the stream; and non-blocking, where a callback function is passed to PyAudio for feeding the audio data stream.
DeepSpeech streaming APIを使う
audio機能を使うには、pyaudioをインストールする必要がある

$ sudo apt-get install portaudio19-dev
$ pip3 install pyaudio

# -*- coding: utf-8 -*-
#! /usr/bin/python3

import deepspeech
import wave
import numpy as np
import os
import pyaudio

model_file_path = 'deepspeech-0.9.3-models.pbmm'
model = deepspeech.Model(model_file_path)

context = model.createStream()

text_so_far = ''

def process_audio(in_data, frame_count, time_info, status):
	global text_so_far
	data16 = np.frombuffer(in_data, dtype=np.int16)
	model.feedAudioContent(context, data16)
	text = model.intermediateDecode(context)
	if text != text_so_far:
		print('Interim text = {}'.format(text))
		text_so_far = text
	return (in_data, pyaudio.paContinue)

audio = pyaudio.PyAudio()
stream = audio.open(
	format=pyaudio.paInt16,
	channels=1,
	rate=16000,
	input=True,
	frames_per_buffer=1024,
	stream_callback=process_audio
)
print('Please start speaking, when done press Ctr-c ...')
stream.start_stream()

try:
	while stream.is_active():
		time.sleep(0.1)
except KeyboardInterrupt:
	stream.stop_stream()
	stream.close()
	audio.terminate()
	print('Finished recording.')

	text = model.finishStream(context)
	print('Final text = {}'.format(text))

$ python3 transcribe.py
Traceback (most recent call last):
File “transcribe.py”, line 28, in
stream = audio.open(
File “/home/vagrant/deepspeech-venv/lib/python3.8/site-packages/pyaudio.py”, line 750, in open
stream = Stream(self, *args, **kwargs)
File “/home/vagrant/deepspeech-venv/lib/python3.8/site-packages/pyaudio.py”, line 441, in __init__
self._stream = pa.open(**arguments)
OSError: [Errno -9996] Invalid input device (no default output device)

vagrantだとテストできないな。。

>>> import pyaudio
>>> pa = pyaudio.PyAudio()
>>> pa.get_default_input_device_info()
OSError: No Default Input Device Available

結局ラズパイ環境を準備しないとダメか。。
DeepSpeechがかなり使えることはわかった。

[音声認識] DeepSpeechをPythonでテキスト出力(batch/stream)

$ python3 –version
Python 3.8.10

### batch API
– 全てのwavファイルを読み込んで処理

# -*- coding: utf-8 -*-
#! /usr/bin/python3

import deepspeech
import wave
import numpy as np

model_file_path = 'deepspeech-0.9.3-models.pbmm'
model = deepspeech.Model(model_file_path)

filename = 'audio/8455-210777-0068.wav'
w = wave.open(filename, 'r')
rate = w.getframerate()
frames = w.getnframes()
buffer = w.readframes(frames)

data16 = np.frombuffer(buffer, dtype=np.int16)
type(data16)
text = model.stt(data16)
print(text)

$ python3 app.py
TensorFlow: v2.3.0-6-g23ad988
DeepSpeech: v0.9.3-0-gf2e9c85
2021-08-28 08:55:38.538633: I tensorflow/core/platform/cpu_feature_guard.cc:142] This TensorFlow binary is optimized with oneAPI Deep Neural Network Library (oneDNN)to use the following CPU instructions in performance-critical operations: AVX2
To enable them in other operations, rebuild TensorFlow with the appropriate compiler flags.
your paret is sufficient i said

### stream API
– bufferサイズごとに処理

// 上部省略
context = model.createStream()

buffer_len = len(buffer)
offset = 0
batch_size = 16384
text = ''

while offset < buffer_len:
	end_offset = offset + batch_size
	chunk = buffer[offset:end_offset]
	data16 = np.frombuffer(chunk, dtype=np.int16)
	context.feedAudioContent(data16)
	text = context.intermediateDecode()
	print(text)
	offset = end_offset

$ python3 app.py
TensorFlow: v2.3.0-6-g23ad988
DeepSpeech: v0.9.3-0-gf2e9c85
2021-08-28 09:15:50.970216: I tensorflow/core/platform/cpu_feature_guard.cc:142] This TensorFlow binary is optimized with oneAPI Deep Neural Network Library (oneDNN)to use the following CPU instructions in performance-critical operations: AVX2
To enable them in other operations, rebuild TensorFlow with the appropriate compiler flags.

your paret
your paret is suff
your paret is sufficient i said

ほう、これは中々凄いですね。
あとはTranscriberか。

[音声認識] Wav2Letterのインストール

### Let’s get started
C++ compiler and CMake required.
$ sudo apt-get install cmake g++

Flashlight:
In order to build flashlight, we need to install Arrayfire.

$ wget https://arrayfire.s3.amazonaws.com/3.6.1/ArrayFire-no-gl-v3.6.1_Linux_x86_64.sh
$ chmod u+x ArrayFire-no-gl-v3.6.1_Linux_x86_64.sh
$ sudo bash ArrayFire-no-gl-v3.6.1_Linux_x86_64.sh –include-subdir –prefix=/opt
$ sudo echo /opt/arrayfire-no-gl/lib > /etc/ld.so.conf.d/arrayfire.conf
-bash: /etc/ld.so.conf.d/arrayfire.conf: Permission denie
あれ? うまくいかんな

flashlight
$ git clone https://github.com/flashlight/flashlight.git && cd flashlight
$ mkdir -p build && cd build
$ cmake .. -DCMAKE_BUILD_TYPE=Release -DFL_BACKEND=[backend]
CMake Error at CMakeLists.txt:76 (message):
Invalid FL_BACKEND specified

$ cmake .. -DCMAKE_BUILD_TYPE=Release -DFLASHLIGHT_BACKEND=CUDA
— -rdynamic supported.
CMake Error at CMakeLists.txt:76 (message):
$ nvcc -V

Command ‘nvcc’ not found, but can be installed with:

apt install nvidia-cuda-toolkit
Please ask your administrator.

CUDAが入ってないのか

[音声認識] DeepSpeech2

DeepSeech2 pytorch implementation
 L 『PyTorch』とは、Facebookが開発を主導したPython向けの機械学習ライブラリ
Github:

What is Deep Speech2?
end-to-end deep learning approach
Key to approach is our application of HPC techniques, resulting in a 7x speedup over our previous system
入力音声をMelspectrogram変換した後、CNNおよびRNNを適用し、最後にCTCでテキスト出力
  CTCの言語モデルを補正する事で、より自然な文章にすることができる
  python3 deepspeech2.py -i input.wav で使用

### install(安装)
$ git clone http://www.github.com/SeanNaren/deepspeech.pytorch
> 此外,需要安装几个库以便进行训练。我假设所有的东西都安装在Ubuntu上的Anaconda中。 如果你还没有安装pytorch,请安装。 为Warp-CTC绑定安装这个fork :
ubuntuにpytorchをインストールします。
$ pip3 install torchvision

beam search decoding for PyTorch
$ git clone –recursive https://github.com/parlance/ctcdecode.git
$ cd ctcdecode && pip3 install .

finally install deepspeech.pytorch
$ pip3 install -r requirements.txt
$ pip3 install -e .

### Training
– Datasets
$ cd data
$ python3 an4.py

Manifest CSV file
train.py take csv file called manifest file, which is a csv file containing the paths to wav files and label texts files.

$ cd ..
$ python3 train.py +configs=an4
train.py:19: UserWarning:
config_path is not specified in @hydra.main().
See https://hydra.cc/docs/next/upgrades/1.0_to_1.1/changes_to_hydra_main_config_path for more information.
@hydra.main(config_name=”config”)
/home/vagrant/.local/lib/python3.8/site-packages/hydra/_internal/defaults_list.py:251: UserWarning: In ‘config’: Defaults list is missing `_self_`. See https://hydra.cc/docs/upgrades/1.0_to_1.1/default_composition_order for more information
warnings.warn(msg, UserWarning)
Global seed set to 123456
Error executing job with overrides: [‘+configs=an4’]
Traceback (most recent call last):
File “train.py”, line 21, in hydra_main
train(cfg=cfg)
File “/home/vagrant/deepspeech2/deepspeech.pytorch/deepspeech_pytorch/training.py”, line 25, in train
checkpoint_callback = FileCheckpointHandler(
File “/home/vagrant/deepspeech2/deepspeech.pytorch/deepspeech_pytorch/checkpoint.py”, line 16, in __init__
super().__init__(
TypeError: __init__() got an unexpected keyword argument ‘prefix’

Set the environment variable HYDRA_FULL_ERROR=1 for a complete stack trace.

う〜ん、コンパイルまでは上手く行ってるような気がするけど、何か難しいな。。。

[音声認識] メモリを増やしてKaldiのインストール

メモリを1Gから4Gに増やして再度Kaldiをビルドしたいと思う

vagrant file
L 4096に増やします

  config.vm.provider "virtualbox" do |vb|
    # Display the VirtualBox GUI when booting the machine
    # vb.gui = true
  
    # Customize the amount of memory on the VM:
    vb.customize ["modifyvm", :id, "--memory", 4096]
  end

$ free
total used free shared buff/cache available
Mem: 4030612 134668 3550068 940 345876 3669028
Swap: 0 0 0
$ nproc
2
makeするときは、-j 2でCPUを2つ使用します。
$ sudo make -j 2
g++: fatal error: Killed signal terminated program cc1plus

これでもダメなのか。Kaldiは諦めて次のに行こう。

[音声認識] Kaldiによるspeech recognition その1

Github: kaldi
Homepage: KALDI

# What is Kaldi?
Kaldi is speech recognition toolkit written in C++
Ethiopian goatherder who discovered the coffee plant named Kaldi
Code level integration with Finite State Transducers
Extensive linear algebra support

# Downloading Kaldi
$ git clone https://github.com/kaldi-asr/kaldi.git kaldi –origin upstream
$ cd kaldi
INSTALL

Option 1 (bash + makefile):
  Steps:
    (1)
    go to tools/  and follow INSTALL instructions there.
    (2)
    go to src/ and follow INSTALL instructions there.

$ cd tools
$ extras/check_dependencies.sh
$ sudo apt-get install automake autoconf unzip sox gfortran libtool subversion python2.7
$ make

libtool: compile: g++ -DHAVE_CONFIG_H -I./../include -fno-exceptions -funsigned-char -g -O2 -std=c++11 -MT fst-types.lo -MD -MP -MF .deps/fst-types.Tpo -c fst-types.cc -fPIC -DPIC -o .libs/fst-types.o

ここで止まる
何でやねん

mklが入ってなかったようなので、もう一度やります
$ extras/check_dependencies.sh
$ extras/install_mkl.sh
$ make

g++: fatal error: Killed signal terminated program cc1plus
compilation terminated.
make[3]: *** [Makefile:460: fst-types.lo] Error 1
make[3]: Leaving directory ‘/home/vagrant/kaldi/kaldi/tools/openfst-1.7.2/src/lib’
make[2]: *** [Makefile:370: install-recursive] Error 1
make[2]: Leaving directory ‘/home/vagrant/kaldi/kaldi/tools/openfst-1.7.2/src’
make[1]: *** [Makefile:426: install-recursive] Error 1
make[1]: Leaving directory ‘/home/vagrant/kaldi/kaldi/tools/openfst-1.7.2’
make: *** [Makefile:64: openfst_compiled] Error 2

メモリが足りない時のエラーみたい

$ nproc
2
4GBにして、swapを増やし、CPU二つで並列でmakeしたい

[音声認識] DeepSpeechを試そう

DeepSeechとは?
– DeepSpeech is an open-source Speech to Text engine, trained by machine learning based on Baidu’s Deep Speech research paper and using TensorFlow.

DeepSpeech Document: deepspeech.readthedocs.io.

# create a virtualenv
$ sudo apt install python3-virtualenv
$ source deepspeech-venv/bin/activate

# install DeepSpeech
$ pip3 install deepspeech

# download pre-trained English model
$ curl -LO https://github.com/mozilla/DeepSpeech/releases/download/v0.9.3/deepspeech-0.9.3-models.pbmm
$ curl -LO https://github.com/mozilla/DeepSpeech/releases/download/v0.9.3/deepspeech-0.9.3-models.scorer

# Download example audio files
$ curl -LO https://github.com/mozilla/DeepSpeech/releases/download/v0.9.3/audio-0.9.3.tar.gz
$ tar xvf audio-0.9.3.tar.gz

$ deepspeech –model deepspeech-0.9.3-models.pbmm –scorer deepspeech-0.9.3-models.scorer –audio audio/2830-3980-0043.wav
Loading model from file deepspeech-0.9.3-models.pbmm
TensorFlow: v2.3.0-6-g23ad988
DeepSpeech: v0.9.3-0-gf2e9c85
2021-08-24 22:27:18.338821: I tensorflow/core/platform/cpu_feature_guard.cc:142] This TensorFlow binary is optimized with oneAPI Deep Neural Network Library (oneDNN)to use the following CPU instructions in performance-critical operations: AVX2
To enable them in other operations, rebuild TensorFlow with the appropriate compiler flags.
Loaded model in 0.0447s.
Loading scorer from files deepspeech-0.9.3-models.scorer
Loaded scorer in 0.00898s.
Running inference.
experience proves this
Inference took 2.371s for 1.975s audio file.

なるほど、Juliusと似ているところがあるね
.wavファイルを作成せずにmicrophoneでrealtime speech recognitionを作りたいな。

[音声認識] pythonでjuliusを読み込んでテキスト出力

$ ../julius/julius/julius -C julius.jconf -dnnconf dnn.jconf -module

モジュールモードで起動する

app.py

# -*- coding: utf-8 -*-
#! /usr/bin/python3

import socket
import time

HOST = '192.168.33.10'
PORT = 10500
DATASIZE = 1024

class Julius:

	def __init__(self):
		self.sock = None  # constructor

	def run(self):

		with socket.socket(socket.AF_INET, socket.SOCK_STREAM) as self.sock:
			self.sock.connect((HOST, PORT))

			text = ""
			fin_flag = False

			while True: # 無限ループ

				data = self.sock.recv(DATASIZE).decode('utf-8')

				for line in data.split('\n'):
					index = line.find('WORD="')
					if index != -1:
						rcg_text = line[index+6:line.find('"',index+6)]
						stp = ['&lt;s&gt;', '&lt;/s&gt;']
						if(rcg_text not in stp):
							text = text + ' ' + rcg_text

					if '</RECOGOUT>' in line: # </RECOGOUT>で1sentence終わり
						fin_flag = True

				if fin_flag == True:
					print(text)

					fin_flag = False
					text = ""

if __name__ == "__main__": # importしても実行されない

	julius = Julius()
	julius.run()

$ python3 app.py
plans are well underway already martin nineteen ninety two five dollars bail
director martin to commemorate kilometer journey to the new world five hundred years ago and wanted moving it to promote use of those detailed in exploration

ほう、なるほど
printではなくファイルに保存であれば、会議の議事録をメールで送るなども割と簡単に実装できそうやな。

さて資料作るか🥺

[音声認識] JuliusでError: adin_file: channel num != 1 (2)

$ ../julius/julius/julius -C julius.jconf -dnnconf dnn.jconf

### read waveform input
Error: adin_file: channel num != 1 (2)
Error: adin_file: error in parsing wav header at mozilla.wav
Error: adin_file: failed to read speech data: “mozilla.wav”
0 files processed

チャンネル数が1chでない=ステレオ のエラーに様です。
WAVファイルはWindows標準の音データファイルでRIFF形式で作られている。
RIFFにはchunkと呼ばれる考え方があり、wavはいくつかのチャンクを1つにまとめた集合体
識別子(4), Size(4), Data(n)

### モノラルとステレオ
モノラルというのは、左右から違う音が聴こえる音声
ステレオとは違い真ん中からしか聴こえない音声のこと

Soxをインストールします
$ sudo git clone git://sox.git.sourceforge.net/gitroot/sox/sox
$ cd sox
$ sudo yum groupinstall “Development Tools”
$ ./configure
-bash: ./configure: No such file or directory

$ yum install sox

$ sox mozilla.wav -c 1 test.wav
$ ../julius/julius/julius -C julius.jconf -dnnconf dnn.jconf
Error: adin_file: sampling rate != 16000 (44100)
Error: adin_file: error in parsing wav header at mozilla.wav
Error: adin_file: failed to read speech data: “mozilla.wav”

$ sox mozilla.wav -c 1 -r 16000 test1.wav
——
### read waveform input
Stat: adin_file: input speechfile: mozilla.wav
STAT: 0 samples (0.00 sec.)
STAT: ### speech analysis (waveform -> MFCC)
WARNING: input too short (0 samples), ignored

ファイルを変えて再度やります。
id: from to n_score unit
—————————————-
[ 0 2] -0.890920 []
[ 3 43] 1.508327 plans [plans]
[ 44 52] 0.579483 are [are]
[ 53 83] 2.098300 well [well]
[ 84 141] 1.983006 underway [underway]
[ 142 219] 1.388610 already [already]
[ 220 309] 1.076294 martin [martin]
[ 310 364] 1.698448 nineteen [nineteen]
[ 365 398] 2.135265 ninety [ninety]
[ 399 472] 1.064299 two [two]
[ 473 504] 1.476521 five [five]
[ 505 561] 0.660421 dollars [dollars]
[ 562 608] 2.348794 bail [bail]
[ 609 736] 0.248682
[
]
re-computed AM score: 920.427368
=== end forced alignment ===

=== begin forced alignment ===
— word alignment —
id: from to n_score unit
—————————————-
[ 0 71] 0.859664 []
[ 72 111] 1.162892 director [director]
[ 112 164] 1.981413 martin [martin]
[ 165 180] 1.593118 to [to]
[ 181 221] 2.427887 commemorate [commemorate]
[ 222 267] 1.872279 kilometer [kilometer]
[ 268 306] 2.526583 journey [journey]
[ 307 319] 2.079670 to [to]
[ 320 327] 2.000595 the [the]
[ 328 348] 3.200890 new [new]
[ 349 386] 2.590411 world [world]
[ 387 414] 2.556754 five [five]
[ 415 443] 1.544829 hundred [hundred]
[ 444 464] 0.974130 years [years]
[ 465 531] 1.067814 ago [ago]
[ 532 546] 1.595085 and [and]
[ 547 583] 1.752286 wanted [wanted]
[ 584 642] 1.655993 moving [moving]
[ 643 658] 2.205574 it [it]
[ 659 670] 2.086497 to [to]
[ 671 704] 2.005465 promote [promote]
[ 705 732] 1.775316 use [use]
[ 733 755] 1.450466 of [of]
[ 756 773] 1.704210 those [those]
[ 774 856] 1.187828 detailed [detailed]
[ 857 887] 1.474861 in [in]
[ 888 990] 2.152141 exploration [exploration]
[ 991 1010] 0.570776
[
]
re-computed AM score: 1743.703125
=== end forced alignment ===

精度には問題があるが、一連の流れとしてはOKかな。