[Laravel8.12.3] セッション時間を変更する

session.php

    'lifetime' => env('SESSION_LIFETIME', 120),

    'expire_on_close' => false,

デフォルトで120分にになっているので、ここを編集する
expire_on_closeをtrueにすると、ブラウザを閉じると、セッションが切れる

– セッションがきれた時はHandler.phpに書く
Exception/Handler.php

namespace App\Exceptions;

use Illuminate\Foundation\Exceptions\Handler as ExceptionHandler;

class Handler extends ExceptionHandler
{
    /**
     * A list of the exception types that are not reported.
     *
     * @var array
     */
    protected $dontReport = [
        //
    ];

    /**
     * A list of the inputs that are never flashed for validation exceptions.
     *
     * @var array
     */
    protected $dontFlash = [
        'password',
        'password_confirmation',
    ];

    /**
     * Register the exception handling callbacks for the application.
     *
     * @return void
     */
    public function register()
    {
        //
    }
}

Tailwind CSSのナビゲーション

### live-server
$ npm install live-server
$ npx live-server public –host=0.0.0.0
// ポートが8080になるので注意

<!DOCTYPE html>
<html lang="en">
<head>
	<meta charset="UTF-8">
	<meta name="viewport" content="width=device-width, initial-scale=1.0">
	<title>Document</title>
	<link href="https://unpkg.com/tailwindcss@^1.0/dist/tailwind.min.css" rel="stylesheet">
	<script src="https://cdn.jsdelivr.net/npm/vue/dist/vue.js"></script>
</head>
<body>
	<div id="app">
		<div>
			<header>
				<div>
					<h1>HR</h1>
						<button>
							<svg class="h-6 w-6 fill-current" viewBox="0 0 24 24">
								<path d="M24 6h-24v-4h24v4zm0 4h-24v4h24v-4zm0 8h-24v4h24v-4z"/>
							</svg>
						</button>
				</div>
			</header>
		</div>
	</div>
	<script>
		cost app = new Vue({
			el: "#app",
			data: {

			}
		});
	</script>
</body>
</html>

<!DOCTYPE html>
<html lang="en">
<head>
	<meta charset="UTF-8">
	<meta name="viewport" content="width=device-width, initial-scale=1.0">
	<meta http-equiv="X-UA-Compatible" content="ie=edge">
	<title>Document</title>
	<link href="https://unpkg.com/tailwindcss@^1.0/dist/tailwind.min.css" rel="stylesheet">
	<script src="https://cdn.jsdelivr.net/npm/vue/dist/vue.js"></script>
</head>
<body>
	<div id="app">
		<div class="bg-gray-500">
			<header class="container mx-auto text-white">
					<div class="flex justify-between items-center fixed w-full left-0 h-16 bg-gray-500 px-2 md:static">
						<h1 class="text-4xl font-semibold md:text-xl">HR</h1>
						<div>
							<button @click="isOpen = !isOpen" class="focus:outline-none">
								<svg class="h-6 w-6 fill-current" viewBox="0 0 24 24">
									<path v-show="!isOpen" d="M24 6h-24v-4h24v4zm0 4h-24v4h24v-4zm0 8h-24v4h24v-4z"/>
									<path v-show="isOpen" d="M24 20.188l-8.315-8.209 8.2-8.282-3.697-3.697-8.212 8.318-8.31-8.203-3.666 3.666 8.321 8.24-8.206 8.313 3.666 3.666 8.237-8.318 8.285 8.203z"/>
								</svg>
							</button>
						</div>
					</div>
					<div :class="isOpen ? 'block' : 'hidden'" class="fixed left-0 w-full mt-16 bg-gray-500 h-full overflow-y-scroll md:overflow-visible md:block md:static md:mt-0">
					<ul class="md:flex md:justify-end md:items-center pb-24 md:pb-0">
						<li class="border-b md:border-none"><a href="#" class="block px-8 py-2 my-4 hover:bg-gray-600 rounded">HRとは</a></li>
						<li class="border-b md:border-none"><a href="#" class="block px-8 py-2 my-4 hover:bg-gray-600 rounded">機能一覧</a></li>
						<li class="border-b md:border-none"><a href="#" class="block px-8 py-2 my-4 hover:bg-gray-600 rounded">料金プラン</a></li>
						<li class="border-b md:border-none"><a href="#" class="block px-8 py-2 my-4 hover:bg-gray-600 rounded">お知らせ</a></li>
						<li class="my-4"><a href="#" class="block px-8 py-2 my-4 bg-orange-500 hover:bg-gray-400 rounded-full">お問い合わせ</a></li>
					</ul>
					</div>
			</header>
		</div>
		<div class="container mx-auto mt-16 md:mt-0">
			<p>コンテンツ領域</p>
		</div>
	</div>
	<script>
		const app = new Vue({
			el: "#app",
			data: {
				isOpen: false,
			}
		});
	</script>
</body>
</html>

なるほど、ハンバーガーは難しいね

Tailwind CSSとは

Bootstrapでは事前に準備されているボタン、メニュー、パンくずリストなどのコンポーネントは準備されておらず、utility classを使って独自のコンポーネントを作成し、デザインを行っていく。
その為、bootstrapよりオリジナリティの高いサイトを構築できる。

<button class="bg-indigo-700 font-semibold text-white py-2 px-4 rounded">ボタン</button>

– 文字の大きさは9種類、色の数はかなりの数のutility classが準備されている。

### cdnを利用する場合

<link href="https://unpkg.com/tailwindcss@^1.0/dist/tailwind.min.css" rel="stylesheet">

### npmを使用する場合
$ npm init -y
$ npm install tailwindcss
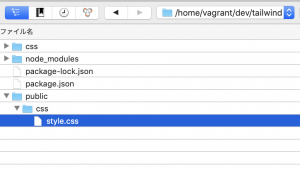
/css/style.css を作成

@tailwind base;

@tailwind components;

@tailwind utilities;

/public/css フォルダを作成
$ npx tailwind build ./css/style.css -o ./public/css/style.css

package.jsonにbuildコマンドを追加

"scripts": {
    "test": "echo \"Error: no test specified\" && exit 1",
    "build": "tailwind build css/style.css -o public/css/style.css"
  },

/public/index.html

<!DOCTYPE html>
<html lang="en">
<head>
	<meta charset="UTF-8">
	<meta name="viewport" content="width=device-width, initial-scale=1.0">
	<title>Document</title>
	<link rel="stylesheet" href="css/style.css">
</head>
<body>
	<h1>Hello Tailwind</h1>
</body>
</html>

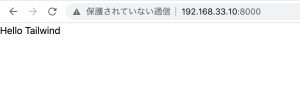
<h1 class="text-4xl text-green-700 text-center font-semibold">Hello Tailwind</h1>

文字の大きさにはtext-xs, txt-sm, text-base … など10の値がある
文字の太さはfont-hairline, font-thin, font-light … など9つの値がある
色はtext-{色}-{色の濃さ}で設定を行う text-green-100, text-green-200 ..など濃さは9個設定できる

<button class="bg-indigo-700 font-semibold text-white py-2 px-4 rounded">ボタン</button>

css/sytle.css

@tailwind base;
@tailwind components;
.btn {
	@apply font-semibold text-white py-2 px-4 rounded;
}
@tailwind utilities;

$ npm run build

<div class="text-center mt-10">
	<button class="bg-indigo-700 font-semibold text-white py-2 px-4 rounded">ボタン</button>
	<button class="bg-red-700 btn hover:bg-red-500">ボタン</button>
</div>

### 設定ファイルの追加
$ npx tailwind init
tailwind.config.js

module.exports = {
  future: {
    // removeDeprecatedGapUtilities: true,
    // purgeLayersByDefault: true,
  },
  purge: [],
  theme: {
    extend: {
      colors: {
        cyan: '#9cdbff',
      }
    },
  },
  variants: {},
  plugins: [],
}

$ npm run build

<button class="bg-cyan btn hover:bg-red-500 focus:outline-none focus:shadow-outline">ボタン</button>

なるほど、良く出来ている

[Laravel8.x] Laravel7.xとの違い

Laravel8系の変更点
– Jetstreamの導入
– モデルファクトリクラスの導入
– マイグレーション圧縮の導入
– ジョブバッチの導入
– レート制限の向上
– キューの向上
– ダイナミックBladeコンポーネントの導入
– Tailwindページネーションビューの導入
– 時間テストヘルパの導入
– artisan serveの向上
– イベントリスナの向上

一つ一つ見ていきましょう。

### Jetstream
ログイン、ユーザー登録、メール認証、二要素認証、セッション管理、Laravel SanctumによるAPIサポート、チーム管理
Tailwind CSSを使用してデザイン(bootstrapから変更)

### モデルのディレクトリ
app/Modelsが作られた
-> 確かにこれは良いですね。

### モデルファクトリクラス
functionの書き方から、クラスを使う書き方に変更

### マイグレーションの圧縮
マイグレーションファイルをphp artisan schema:dumpで一つのファイルに圧縮できる

### ジョブバッチ
ジョブの状況に応じて処理ができる

### リクエストレート制限の向上
何回までアクセスできるかなどを制御できる

### メンテナンスモード
許可IPアドレスからトークンに変更

### ディスパッチクロージャとcatchチェーン
Queue実行時にcatchが使えるようになった

### 動的Bladeコンポーネント
ユーザ情報を元にコンポーネントを変える場合、x-dynamic-component :component=”$componentName”と書く

### イベントリスナの向上
Event::listenメソッドを渡すだけで登録できる

### 時間テストのヘルパ
現時刻を操作できるヘルパ

### Artisan serveの向上
.envの変更が検出されると自動でリロードできる

### Tailwindページネーション
ページネータはTailwind CSSを使用する

### ルートの名前空間の工場

$ curl -sS https://getcomposer.org/installer | php
$ php composer.phar create-project –prefer-dist laravel/laravel testApp
$ php artisan –version
Laravel Framework 8.12.3

認証に関してはlivewire(js)とinertia(SinglePageApplication)が用意さてている

composer require laravel/jetstream

// Livewireスタックを使用するJetstreamをインストールする
php artisan jetstream:install livewire

// Inertiaスタックを使用するJetstreamをインストールする
php artisan jetstream:install inertia

Tailwindを復習してからlivewireで確認ってところだな。

jQueryとCSSでタブメニューを切り替える

yahooトップのタブのように、クリックしてもページ遷移しないタブを作りたい。

### jQueryとCSSで作る場合
index.html
– jqueryの制御は後から書きます。

<!DOCTYPE html>
<html lang="en">
<head>
	<meta charset="UTF-8">
	<title>Document</title>
	<link rel="stylesheet" href="styles.css" type="text/css">
	<script
  src="https://code.jquery.com/jquery-3.5.1.js"
  integrity="sha256-QWo7LDvxbWT2tbbQ97B53yJnYU3WhH/C8ycbRAkjPDc="
  crossorigin="anonymous"></script>
</head>
<body>
	<div class="tab">
		<ul class="tab-menu">
			<li class="tab-item active">タブ1</li>
			<li class="tab-item">タブ2</li>
			<li class="tab-item">タブ3</li>
		</ul>

		<div class="tab-box">
			<div class="tab-content show">コンテンツ1</div>
			<div class="tab-content">コンテンツ2</div>
			<div class="tab-content">コンテンツ3</div>
		</div>
	</div>
	<script>
	</script>
</body>
</html>

styles.css

* {
	box-sizing: border-box;
}
ul, li {
	padding: 0;
	margin: 0;
}
li {
	list-style: none;
}
.tab {
	width: 500px;
	max-width: 100%;
	margin: auto;
}
.tab-menu{
	display: flex;
}
.tab-item {
	text-align: center;
	padding: 10px 0;
	cursor: pointer;

	flex-grow: 1;

	border-top: 1px solid skyblue;
	border-left: 1px solid skyblue;
	border-right: 1px solid skyblue;
}
.tab-item:not(:first-child){
	border-left: none;
}
.tab-item.active {
	background: red;
	color: white;
}
.tab-box {
	height:200px;
	display: flex;
	justify-content: center;
	align-items: center;
	border: 1px solid skyblue;
}
.tab-content {
	display: none;
	font-size: 40px;
}
.tab-content.show {
	display: block;
}

jquery
– タブclick時にactiveとshowのclassをremoveして、clickされたタブのindexと同じindexにcontentのclassにshowを追加する
– タブとコンテンツの数、順番を一致させる必要がある

<script>
		$(function(){
			$('.tab-item').click(function(){
				$('.active').removeClass('active');
				$(this).addClass('active');
				$('.show').removeClass('show');

				const index = $(this).index();

				$('.tab-content').eq(index).addClass('show');
			})
		})
	</script>

### CSSのみで作る場合
index.html

<div class="tab">
		<input id="menu1" class="tab-input" name="menu" type="radio" checked="checked">
		<label for="menu1" class="tab-item">タブ1</label>
		<div class="tab-content">コンテンツ1</div>

		<input id="menu2" class="tab-input" name="menu" type="radio">
		<label for="menu2" class="tab-item">タブ2</label>
		<div class="tab-content">コンテンツ2</div>

		<input id="menu3" class="tab-input" name="menu" type="radio">
		<label for="menu3" class="tab-item">タブ3</label>
		<div class="tab-content">コンテンツ3</div>
	</div>

* {
	box-sizing: border-box;
}
input[type="radio"]{
	display:none;
}
.tab {
	width: 500px;
	max-width: 100%;
	margin: auto;
	display: flex;
	flex-flow: wrap;
}
.tab-item {
	display: block;
	flex-grow: 1;
	text-align: center;
	padding: 10px 0;
	cursor: pointer;
	order: -1;

	border-top: 1px solid skyblue;
	border-left: 1px solid skyblue;
	border-right: 1px solid skyblue;
}
.tab-item:not(:first-of-type){
	border-left: none;
}
.tab-input:checked + .tab-item {
	background: red;
	color: white;
}
.tab-content {
	width: 100%;
	height: 200px;
	display: none;
	justify-content: center;
	align-items:center;
	font-size: 40px;
	border: 1px solid skyblue;
}

.tab-input:checked + .tab-item + .tab-content {
	display: flex;
}

input formとradioボタンで切り替えるってなんか違和感あるけど、うまく表示されますね。
思ったより簡単でワロタ。

[Laravel8.x] Amazon Linux2のVagrant/EC2開発環境構築

Laravel8.xをAmazon Linux 2 AMI(HVM), SSD Volume Type 64-bit(x86)で動かすことを想定して、Vagrant or EC2の開発環境構築をやっていきたい。
8系はPHP >= 7.3なので、7.4を入れるのがポイント。他は大体いつもの通りです。
EC2の場合はvagrant initは飛ばしてsshログインから始めてください。

### 1.vagrant initからsshログインまで
$ mkdir amazonlinux2
$ cd amazonlinux2
$ vagrant init gbailey/amzn2
$ vi vagrantfile
// 35行目ポートフォワーディング解除

config.vm.network "private_network", ip: "192.168.33.10"

$ vagrant up
$ vagrant ssh-config –host 192.168.33.10
$ vagrant ssh
// sshログイン後
$ cat /etc/*release
$ sudo yum update

### 2.Gitインストール(2.29.2)
$ sudo yum -y install gcc curl-devel expat-devel gettext-devel openssl-devel zlib-devel perl-ExtUtils-MakeMaker autoconf
// ダウンロード対象を確認(https://mirrors.edge.kernel.org/pub/software/scm/git/)
// 11月3日時点で最新のgit2.29.2を入れる
$ cd /usr/local/src/
$ sudo wget https://mirrors.edge.kernel.org/pub/software/scm/git/git-2.29.2.tar.gz
$ sudo tar xzvf git-2.29.2.tar.gz
$ sudo rm -rf git-2.29.2.tar.gz
$ cd git-2.29.2
$ sudo make prefix=/usr/local all
$ sudo make prefix=/usr/local install
$ git –version
git version 2.29.2

### 3.Node.jsインストール(v11.15.0)
// 11系を入れる
$ curl –silent –location https://rpm.nodesource.com/setup_11.x | sudo bash –
$ yum install -y gcc-c++ make
$ sudo yum install -y nodejs
$ node –version
$ npm –version

### 4.Apacheインストール(Apache/2.4.46)
$ sudo yum install httpd
$ sudo systemctl start httpd
$ sudo systemctl status httpd
$ sudo systemctl enable httpd
$ sudo systemctl is-enabled httpd
$ httpd -v

### 5.PHP7.4インストール ※laravel8.xはPHP >= 7.3
$ amazon-linux-extras
$ amazon-linux-extras info php7.4
$ sudo amazon-linux-extras install php7.4
$ yum list php* | grep amzn2extra-php7.4
$ sudo yum install php-cli php-pdo php-fpm php-json php-mysqlnd php-mbstring php-xml
$ php -v
PHP 7.4.11 (cli) (built: Oct 21 2020 19:12:26) ( NTS )
おっしゃーーーーーーーーーーーー  ここで一息入れてジンジャーエールを飲みます

### 6.MySQL(8.0.22)
$ sudo yum install https://dev.mysql.com/get/mysql80-community-release-el7-3.noarch.rpm
$ sudo yum install –enablerepo=mysql80-community mysql-community-server
$ sudo systemctl start mysqld
// パスワード変更
$ sudo cat /var/log/mysqld.log | grep “temporary password”
$ mysql -u root -p
mysql> ALTER USER ‘root’@’localhost’ IDENTIFIED BY ‘${temporary password}’;
mysql> SET GLOBAL validate_password.length=6;
mysql> SET GLOBAL validate_password.policy=LOW;
mysql> ALTER USER ‘root’@’localhost’ IDENTIFIED WITH mysql_native_password BY ‘${new password}’;
$ sudo systemctl enable mysqld
$ mysql -u root -p

### 7.Ansible(2.9.13)
$ sudo amazon-linux-extras install ansible2
$ ansible –version

### 8.Ruby(2.7.2)
$ git clone https://github.com/sstephenson/rbenv.git ~/.rbenv
$ git clone https://github.com/sstephenson/ruby-build.git ~/.rbenv/plugins/ruby-build
$ echo ‘export PATH=”$HOME/.rbenv/bin:$PATH”‘ >> ~/.bash_profile
$ echo ‘eval “$(rbenv init -)”‘ >> ~/.bash_profile
$ source ~/.bash_profile
// rbenvは時間がかかるので注意 痺れを切らさず待ちます
$ rbenv install 2.7.2
$ rbenv rehash
$ sudo yum install rubygems
$ gem update –system 2.7.2

### 9.AmazonLinux2 timezone変更
$ date
$ cat /etc/localtime
$ sudo vi /etc/sysconfig/clock

ZONE="Asia/Tokyo" 
UTC=false

$ sudo cp /etc/sysconfig/clock /etc/sysconfig/clock.org
$ strings /etc/localtime
$ date

お疲れ様でしたあああああああああああああああああああああ。githubに貼り付けときます。
今までPHP7.3で開発してたので、取り敢えず7.4が入ったあたりで満足した。
さて、いよいよcomposerでlaravel8.xをinstallしていきましょう。

[Laravel8.x] PHPのバージョン PHP >= 7.3

9月8日に8系がリリースされています。3月3日に7系がリリースされたばかりですから、非常に早いペースですね。
まず公式ドキュメントを確認してみましょう。

https://readouble.com/laravel/8.x/ja/releases.html

– Jetstreamの導入
– モデルファクトリクラスの導入
– マイグレーション圧縮の導入
– ジョブバッチの導入
– レート制限の向上
– キューの向上
– ダイナミックBladeコンポーネントの導入
– Tailwindページネーションビューの導入
– 時間テストへるぱの導入
– artisan serveの工場
– イベントリスナの向上

結構沢山ありますね。重要そうなJetstreamは必ず確認するとして、最初にPHPのバージョンから確認します。
まず、8系では PHP >= 7.3 となっています。
amazon linux 2でどこまで行けるか確認してみたいと思います。

$ cat /etc/*release
NAME=”Amazon Linux”
VERSION=”2″
ID=”amzn”
ID_LIKE=”centos rhel fedora”
VERSION_ID=”2″
PRETTY_NAME=”Amazon Linux 2″
ANSI_COLOR=”0;33″
CPE_NAME=”cpe:2.3:o:amazon:amazon_linux:2″
HOME_URL=”https://amazonlinux.com/”
Amazon Linux release 2 (Karoo)

$ sudo yum list | grep php
php-cli.x86_64 7.3.23-1.amzn2 @amzn2extra-ph7.3
// 省略

$ amazon-linux-extras info php7.4
php7.4 recommends php-cli # yum install php-cli
php7.4 recommends php-pdo # yum install php-pdo
php7.4 recommends php-fpm # yum install php-fpm
php7.4 recommends php-json # yum install php-json
php7.4 recommends php-mysqlnd # yum install php-mysqlnd

php7.4インストールできそうですね。環境を最新版に作り直さないとダメですね。