[AR] model-viewerのglTFで何も表示されない時

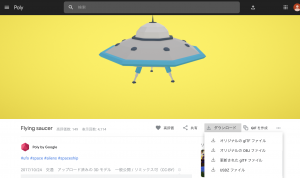
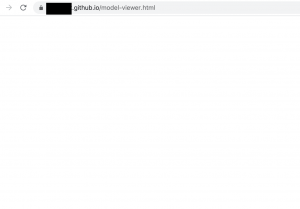
PolyでglTFをdownloadして、何も表示されない時
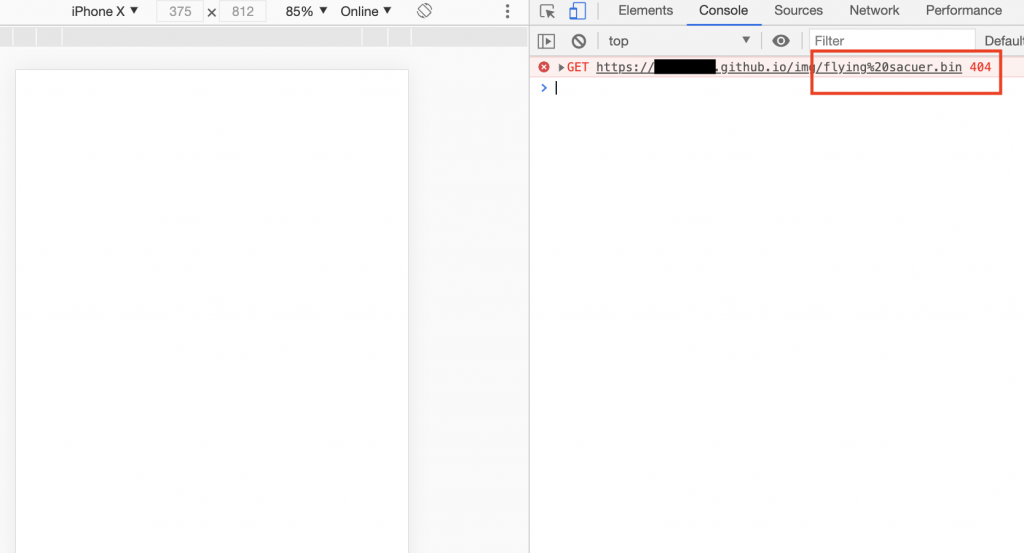
-> google dev toolのconsoleでエラー内容を確認します。
-> binファイルが404(Not found)と表示されています。

gltfファイルで、読み込もうとしているパスを確認します。
sacuer.gltf
230行目で”flying%20sacuer.bin”を読み込もうとしていることがわかります。

"buffers" : [
      {
         "byteLength" : 93648,
         "name" : "buffer-0",
         "uri" : "flying%20sacuer.bin"
      }
   ],

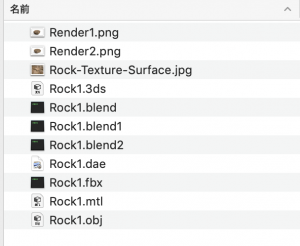
flying_sacuer.binをsacuer.gltfと同じフォルダに格納して、更新します。
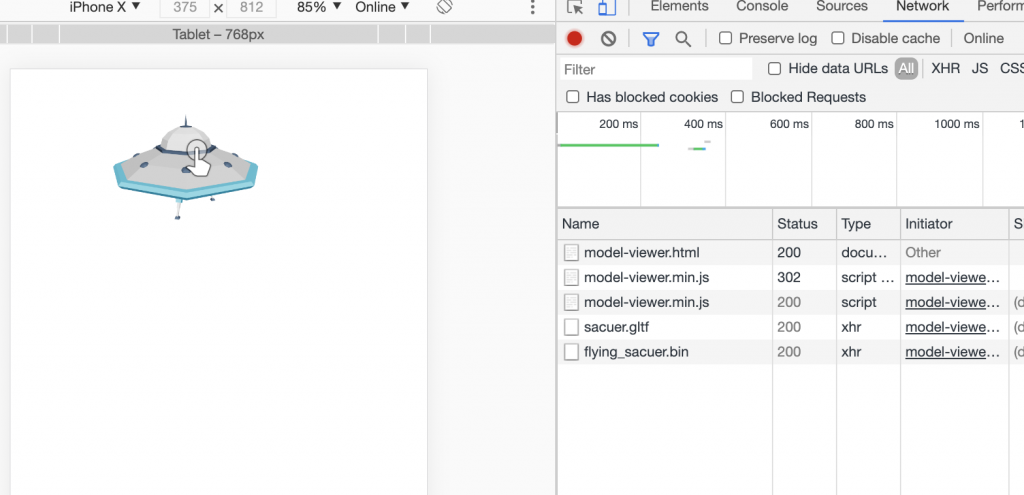
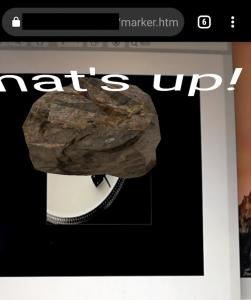
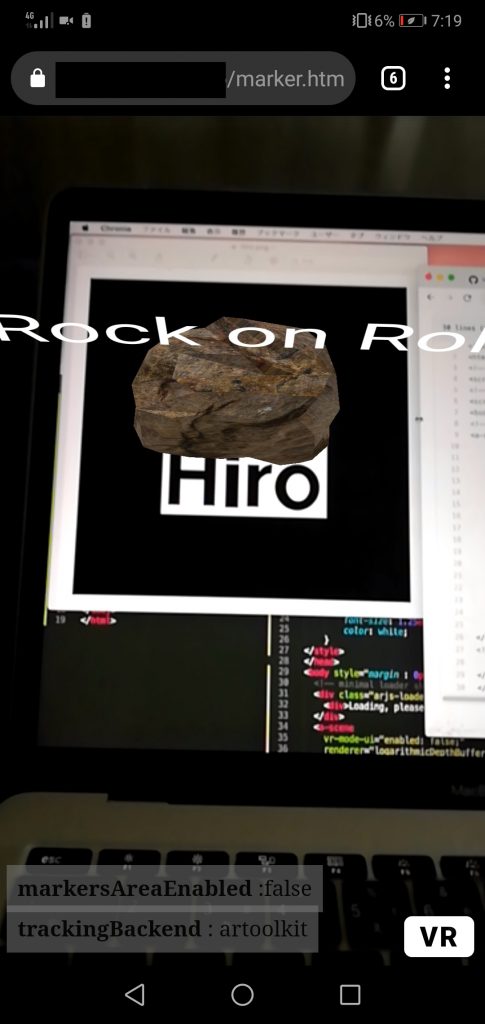
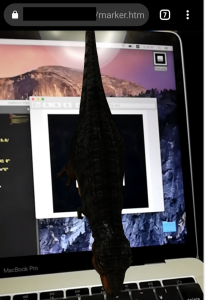
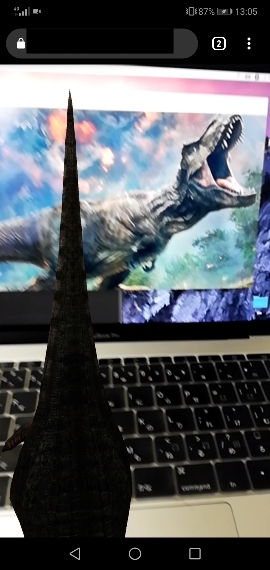
スマホで動作検証します。

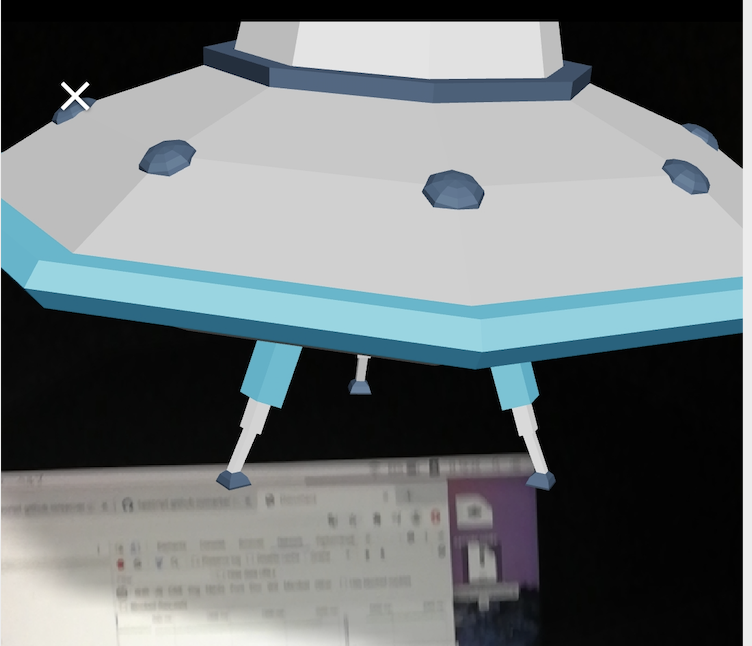
glTF、usdzファイルだけでなく、binファイルも配置しないと駄目ってことですね。

ただこれ、マーカレスだけど、何かに反応して表示されるって訳じゃないんだな。
やりたい事とはちょっと違うか。。

[AR] model-viewerをglTFで試してみる

Androidで見るにはglbもしくはglTF形式、iosで見るにはUSDZ形式のモデルが必要
Googleが運営しているpolyから、glTFダウンロードできる3Dモデルをダウンロードします。

<!DOCTYPE html>
<html lang="en">
<head>
	<meta charset="UTF-8">
	<title>Document</title>
</head>
<body>
	<script
		type="module"
		src="https://unpkg.com/@google/model-viewer/dist/model-viewer.js">
	</script>
	<model-viewer  
    ar
    alt="sacuer"
    src="img/sacuer.gltf" 
    ios-src="" 

    style="width:800px;height:1000px;"                  

    background-color="#70BCD1"
    shadow-intensity="0.7"
    camera-controls
    interaction-prompt="auto"
    auto-rotate ar magic-leap>
	</model-view>
</body>
</html>

ん? gltfファイルではなくて、glbでなくてはいけないのか??
glTF:The GL Transmission Format
.glb形式:本来のJSON部分も含めて全てが1つのバイナリファイルになっている

どうやら、glTFとglbは違うみたいね。

[AR.js] Hiroではなくオリジナルマーカーを作成

AR.js Maker Trainingというサイトにいきます。

マーカとなる画像を用意します。適当にターンテーブルにしたいと思う。

– .pattファイルをダウンロードする。
– pattファイルをimgフォルダにアップロード
– a-marker preset=”hiro”となっていたところを”a-marker type=’pattern’ url=’img/pattern-marker.patt'”に変更

<a-marker type='pattern' url='img/pattern-marker.patt'>
        <a-entity 
            //省略
        >
        </a-entity>
             <a-text value="what's up!" position="0 0.8 0" align="center"></a-text>
    </a-marker>

– スマホでカメラを起動してターンテーブルを読み取る
– 外縁のcolorは白だと読み取りずらいみたいで、黒だと反応が良い

よし、ちょっとカッコイイ画像探すか
というか、qrコードリーダでカメラを呼び出して、.pattファイルを認識すればイイんやな。意外と簡単やな。

[AR.js] フリー素材のobj mtlファイルからMarker BasedのARを作る

free3dというサイトから素材を取得します。
https://free3d.com/ja/

試しにlow-poly-rockを選択しました。
https://free3d.com/ja/3d-model/low-poly-rock-4631.html

downloadしたファイル全部をrockフォルダに格納します。

サーバから読み取ります。※手っ取り早くgithub.ioから

– obj, mtlファイルは相対パスだと上手くいかないので、先頭に”https://arjs-cors-proxy.herokuapp.com/”をつけて絶対パスにしたら上手くいった。

<!doctype HTML>
<html>
<script src="https://aframe.io/releases/1.0.0/aframe.min.js"></script>
<script src="https://cdn.rawgit.com/jeromeetienne/AR.js/2.2.0/aframe/build/aframe-ar.js"></script>
<body style='margin:0px; overflow:hidden;'>
<a-scene embedded arjs>
    <a-marker preset="hiro">
        <a-entity 
            obj-model="obj: url(https://arjs-cors-proxy.herokuapp.com/https://fuga.github.io/rock/Rock1.obj);
        mtl: url(https://arjs-cors-proxy.herokuapp.com/https://fuga.github.io/rock/Rock1.mtl)"
            scale="0.2 0.2 0.2"
            rotation="-90 0 0"
        >
        </a-entity>
             <a-text value="Rock on Roll" position="0 0.8 0" align="center"></a-text>
    </a-marker>
    <a-entity camera></a-entity>
</a-scene>
</body>
</html>

お、良い感じ。
マーカーもhiroだとExileになってしまうので、別のに変えたい。

[AR] AR.jsのlocation basedとmarker based

githubそのままだが、緯度経度をスカイツリー(latitude: 35.710063; longitude: 139.8107)にして試す。

<!DOCTYPE html>
<html>
  <head>
    <meta charset="utf-8" />
    <meta http-equiv="X-UA-Compatible" content="IE=edge" />
    <title>GeoAR.js demo</title>
    <script src="https://aframe.io/releases/1.0.4/aframe.min.js"></script>
    <script src="https://unpkg.com/aframe-look-at-component@0.8.0/dist/aframe-look-at-component.min.js"></script>
    <script src="https://raw.githack.com/AR-js-org/AR.js/master/aframe/build/aframe-ar-nft.js"></script>
  </head>

  <body style="margin: 0; overflow: hidden;">
    <a-scene
      vr-mode-ui="enabled: false"
      embedded
      arjs="sourceType: webcam; debugUIEnabled: false;"
    >
      <a-text
        value="This content will always face you."
        look-at="&#91;gps-camera&#93;"
        scale="120 120 120"
        gps-entity-place="latitude: 35.710063; longitude: 139.8107;"
      ></a-text>
      <a-camera gps-camera rotation-reader> </a-camera>
    </a-scene>
  </body>
</html>

marker based

<!DOCTYPE html>
<html>
    <script src="https://aframe.io/releases/1.0.0/aframe.min.js"></script>
    <!-- we import arjs version without NFT but with marker + location based support -->
    <script src="https://raw.githack.com/AR-js-org/AR.js/master/aframe/build/aframe-ar.js"></script>
    <body style="margin : 0px; overflow: hidden;">
        <a-scene embedded arjs>
        <a-marker preset="hiro">
            <a-entity
            position="0 -1 0"
            scale="0.05 0.05 0.05"
            gltf-model="https://arjs-cors-proxy.herokuapp.com/https://raw.githack.com/AR-js-org/AR.js/master/aframe/examples/image-tracking/nft/trex/scene.gltf"
            ></a-entity>
        </a-marker>
        <a-entity camera></a-entity>
        </a-scene>
    </body>
</html>

marker basedは恐竜ではなく、オリジナルのAR作ってみたいな。

[AR] AR.jsを触ってみよう

Github:https://github.com/AR-js-org/AR.js

<script src="https://cdn.jsdelivr.net/gh/aframevr/aframe@1c2407b26c61958baa93967b5412487cd94b290b/dist/aframe-master.min.js"></script>
<script src="https://raw.githack.com/AR-js-org/AR.js/master/aframe/build/aframe-ar-nft.js"></script>

<style>
  .arjs-loader {
    height: 100%;
    width: 100%;
    position: absolute;
    top: 0;
    left: 0;
    background-color: rgba(0, 0, 0, 0.8);
    z-index: 9999;
    display: flex;
    justify-content: center;
    align-items: center;
  }

  .arjs-loader div {
    text-align: center;
    font-size: 1.25em;
    color: white;
  }
</style>

<body style="margin : 0px; overflow: hidden;">
  <!-- minimal loader shown until image descriptors are loaded -->
  <div class="arjs-loader">
    <div>Loading, please wait...</div>
  </div>
  <a-scene
    vr-mode-ui="enabled: false;"
    renderer="logarithmicDepthBuffer: true;"
    embedded
    arjs="trackingMethod: best; sourceType: webcam;debugUIEnabled: false;"
  >
    <!-- we use cors proxy to avoid cross-origin problems -->
    <a-nft
      type="nft"
      url="https://arjs-cors-proxy.herokuapp.com/https://raw.githack.com/AR-js-org/AR.js/master/aframe/examples/image-tracking/nft/trex/trex-image/trex"
      smooth="true"
      smoothCount="10"
      smoothTolerance=".01"
      smoothThreshold="5"
    >
      <a-entity
        gltf-model="https://arjs-cors-proxy.herokuapp.com/https://raw.githack.com/AR-js-org/AR.js/master/aframe/examples/image-tracking/nft/trex/scene.gltf"
        scale="5 5 5"
        position="50 150 0"
      >
      </a-entity>
    </a-nft>
    <a-entity camera></a-entity>
  </a-scene>
</body>

なんだこれ。

拡張現実の用途としては、
### AR 用途例
– パイロットの訓練プログラム(airflight)
– ARによる遠隔手術(medical)
– 内部の臓器確認(medical)
– ハリーポッター(game)
– スポーツ観戦 アメフト・サッカー・野球・バスケ・ゴルフ(sports)
– テクノスポーツ(sports)
– クリアサイト・グラウンドビュー(car)
– 通り建物のナビゲーション(car)
– dressing(fashion)
– リップクリーム(fashion)
– ARメジャー(home)
– 家電スイッチ操作(home)
– 実物大家具(home)
– 立体表示(education)
– 道案内(travel)
– 距離、所要時間、方角(travel)
– 城再現(travel)
– AR占い(product)
– AR動画(ad)

うん、口紅のARサービスは良いね。
洋服のAR作ってみるか、Java Springと組み合わせて。
その前に色々な技術的課題がありそうやな。

[VR] A-FrameでVR開発の雰囲気を体感しよう

– VRは、C+やC#で開発することが多い
– Unityを使う
– JSのAPIであるWebVRでVRヘッドセットの位置・向き・傾きや加速度などの情報を取得できる
– VRコンテンツをWebで作る場合、ThreeJSを採用するしてWebGLで作っていくことが多い
– A-Frameというフレームワークがある

早速A-Frameを使っていきましょう。

<!DOCTYPE html>
<html lang="en">
<head>
	<meta charset="UTF-8">
	<title>A-Frame</title>
	<script src="https://aframe.io/releases/0.9.2/aframe.min.js"></script>
</head>
<body>
	<a-scene>
		<a-box position="-0.5 4 -3" rotation="0 45 0" color="#ffaaaa"></a-box>
		<a-plane position="0 0 -4" rotation="-84 177 -78" width="6" height="6" color="#aaaaff"></a-plane>
		<a-sky color="#ffffee"></a-sky>
		<a-camera position="0 2 3.7"></a-camera>
	</a-scene>
</body>
</html>

dynamic-bodyとstatic-bodyを追加

<a-box dynamic-body position="-0.5 8 -3" rotation="0 45 0" color="#ffaaaa"></a-box>
		<a-plane static-body position="0 0 -4" rotation="-84 177 -78" width="6" height="6" color="#aaaaff"></a-plane>

文字を追加する
a-textは日本語対応していないので、以下のサイトでfontを作成する必要がある
https://msdf-bmfont.donmccurdy.com/

<a-scene>
		<a-box src="" dynamic-body position="-0.5 8 -3" rotation="0 45 0" color="#fff4ee"></a-box>
		<a-plane static-body position="0 0 -4" rotation="-84 177 -78" width="6" height="6" color="#aaaaff"></a-plane>
		<a-text position="-5 1 -3" scale="2 2 2" value="ストップ安" font="custom-msdf.json"
        font-image="custom-msdf.png" color="black" negate="false"></a-text>
		<a-sky color="#ffff"></a-sky>
		<a-camera position="0 2 3.7"></a-camera>
	</a-scene>

コンポーネントは色々あるみたい。
どっちかというと、触ってみたいのは拡張現実の方かな。

[tesseract4.1.1] 免許証とマイナンバーはどこまで読み取れるのか

tesseractで免許証、マイナンバーは読み取れるのか?

$ tesseract -v
tesseract 4.1.1-rc2-25-g9707

// 運転免許 表
$ tesseract car_1.jpg output -l jpn
sl率 4*********** *

11*018 148ョlコ

// 運転免許 裏
$ tesseract car_2.jpg output -l jpn

// マイナンバー 表
$ tesseract my_1.jpg output -l jpn
個人番号
カード

性別 男

// マイナンバー 裏
$ tesseract my_2.jpg output -l jpn
れます

まともに読み取れたのは免許証番号ぐらい。
なるほど、精度の問題か。

[HTML5] mp4再生の書き方

– movはsafariにしか対応していないので、mp4にする
– controlsでコントロールパネル表示

<video src="test.mp4" controls width="400px" height="200px"></video>

– 自動再生するには”autoplay” を入れるだけ
– クリックすると、遷移させるには普通にaタグ

<a href="/test.html"><video src="test.mp4" autoplay muted controls width="100%" height="500px"></video></a>

OK

[amazon linux2] PHP7.4でQRコードを生成する

$ require endroid/qr-code
Problem 1
– endroid/qr-code[3.9.0, …, 3.9.3] require ext-gd * -> it is missing from your system. Install or enable PHP’s gd extension.

$ yum list | grep gd
php-gd.x86_64 7.4.11-1.amzn2 amzn2extra-php7.4

$ sudo yum install php-gd.x86_64
$ composer require endroid/qr-code

app.php

<?php
require_once(__DIR__.'/vendor/autoload.php');

use Endroid\QrCode\QrCode;

$qrCode = new QrCode('hello qr code');

// header('Content-Type:'.$qrCode->getContentType());
// echo $qrCode->writeString();
$qrCode->writeFile(__DIR__.'/qrcode.png');

echoでブラウザで表示し、writeFileで画像を保存

OK, Let’s Go