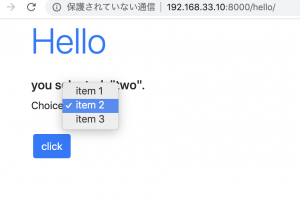
### ChoiceField
/hello/forms.py
class HelloForm(forms.Form):
	data = [
		('one', 'item 1'),
		('two', 'item 2'),
		('three', 'item 3')
	]
	choice = forms.ChoiceField(label='Choice', choices=data)
/hello/views.py
	def post(self, request):
		ch = request.POST['choice']
		self.params['result'] = 'you selected: "' + ch + '".'
		self.params['form'] = HelloForm(request.POST)
		return render(request, 'hello/index.html', self.params)
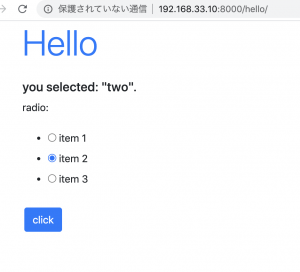
### ラジオボタン
– radioもChoiceFieldを使って作成する
– forms.ChoiceField(choices=value, widget=forms.RadioSelect())
/hello/forms.py
class HelloForm(forms.Form):
	data = [
		('one', 'item 1'),
		('two', 'item 2'),
		('three', 'item 3')
	]
	choice = forms.ChoiceField(label='radio', choices=data, widget=forms.RadioSelect())
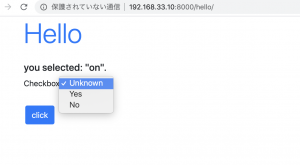
### 選択リスト
– forms.ChoiceField(choices=value, widget=forms.Select())
/hello/forms.py
class HelloForm(forms.Form):
	data = [
		('one', 'item 1'),
		('two', 'item 2'),
		('three', 'item 3'),
		('four', 'item 4'),
		('five', 'item 5'),
	]
	choice = forms.ChoiceField(label='radio', choices=data, widget=forms.Select(attrs={'size':5}))
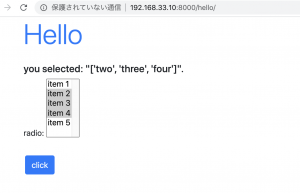
### 複数選択
– forms.MultipleChoiceField(choices=value, widget=forms.SelectMultiple())
/hello/forms.py
class HelloForm(forms.Form):
	data = [
		('one', 'item 1'),
		('two', 'item 2'),
		('three', 'item 3'),
		('four', 'item 4'),
		('five', 'item 5'),
	]
	choice = forms.MultipleChoiceField(label='radio', choices=data, widget=forms.SelectMultiple(attrs={'size':6}))
– 複数項目はgetlistで取得する
/hello/views.py
	def post(self, request):
		ch = request.POST.getlist('choice')
		self.params['result'] = 'you selected: "' + str(ch) + '".'
		self.params['form'] = HelloForm(request.POST)
		return render(request, 'hello/index.html', self.params)
views.py側でfor文をかける
def post(self, request):
ch = request.POST.getlist('choice')
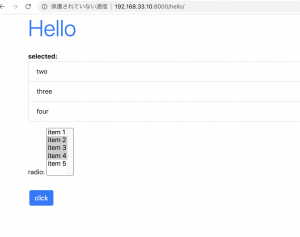
result = '<ol class="list-group"><b>selected:</b>'
for item in ch:
result += '<li class="list-group-item">' + item + '</li>'
result += '</ol>'
self.params['result'] = result
self.params['form'] = HelloForm(request.POST)
return render(request, 'hello/index.html', self.params)
forms.pyでデータ型を用意して、views.pyでそれを利用するってイメージか。