laravelのformでdbにinsertする手順を整理したい
1. *.blade.php formのactionで次画面に遷移する
2. routingでpostを設定する
3. controllerのstore(Request $request)でpostされたdataをDBに保存する
こんなところだろうか。実際に試してみたい。
随机应变 ABCD: Always Be Coding and … : хороший

laravelのformでdbにinsertする手順を整理したい
1. *.blade.php formのactionで次画面に遷移する
2. routingでpostを設定する
3. controllerのstore(Request $request)でpostされたdataをDBに保存する
こんなところだろうか。実際に試してみたい。
LaravelのEloquent ORMを使用するのであれば、controllerからinsertする。
まず公式ドキュメントを見てみましょう。
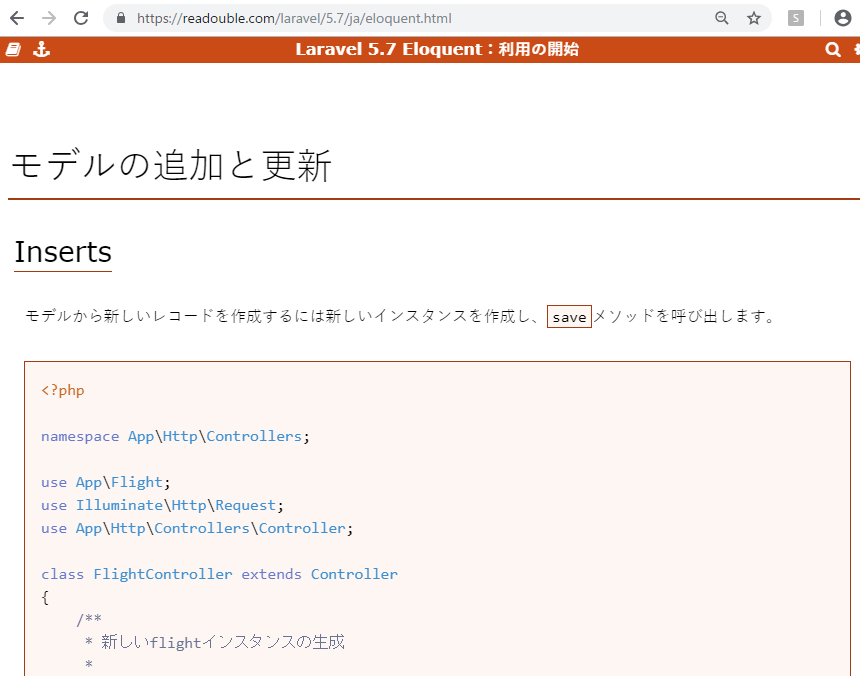
https://readouble.com/laravel/5.7/ja/eloquent.html
ページ中段の「モデルの追加と更新」
– Inserts
モデルから新しいレコードを作成するには新しいインスタンスを作成し、saveメソッドを呼び出す。
namespace App\Http\Controllers;

use App\Flight;
use Illuminate\Http\Request;
use App\Http\Controllers\Controller;

Class FlightController extends Controller
{
	public function store(Request $request)
	{
		$flight = new Flight;
		$flight->name = $reqeust->name;
		$flight->save();
	}
}
HTTPリクエストのnameのパラメータをApp\Flightモデルのname属性に代入。saveメソッドが呼ばれると、レコードがDBに挿入とある。
namespaceを定義した後、use App\Flight;でFlightのmodelを呼び出しています。
結論から言うと、insert intoのシングルクエリで複数テーブルへのinsertはできないらしい。


なにいいいいいいいいい!?
tips♪
Oracleだとinsert allで出来るよう。mysqlはあまりニーズがないのかな?このあたりの経緯を説明できたらプロって感じがしますね。(=私はアマチュアです)
insert all
 into table1(id, coin, price) values (1, 'BTC/JPY', 437130)
 into table2(id, coin, price) values (2, 'ETH/JPY', 11703)
 into table3(id, coin, price) values (3, 'XRP/JPY', 39.04)
select * from dual;
mysqlにデータが入っており、controllerからmodelを呼び出してviewの*.blade.phpに表示させたい。
何をするか?こんなところでしょうか??(色々試していたら2日かかった)
1. mysqlにデータを入れる
2. modelから1で入れたテーブルを読み込む
3. controllerでmodelを読み込む
4. viewでmysqlのデータを表示する
1. mysqlにデータを入れる
まず、mysqlのtableにデータを挿入します。
INSERT INTO company(company_name, type, status) VALUES ('富士通', 1, 1),('リク ルート', 1, 1),('日本ユニシス', 1, 1);
2. modelから1で入れたテーブルを読み込む
app/Company.php
namespace App;

use Illuminate\Database\Eloquent\Model;

class Company extends Model
{
    protected $table = 'company';
}
3. controllerでmodelを読み込む
use App\Company;でmodelを読み込みます。 App\Models\Company;だとエラーが出ます。ディレクトリがそのままと考えてよいでしょう。
namespace App\Http\Controllers;

use Illuminate\Http\Request;
use App\Company;

class CompanyIndexController extends Controller
{
    public function index(){
    	$data = new Company();
    	$table = $data::all();
    	return view('companyindex', ['data'=> $table]);
    }
}
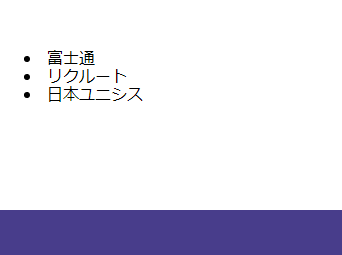
4. viewでmysqlのデータを表示する
companyindex.blade.php
@foreachでcontrollerからpostする
$d->${カラム名}
@section('content')
      @foreach($data as $d)
      <li>{{$d->company_name}}</li>
      @endforeach
@endsection
反映されました。OK~~~~~~~~~~~~♪♪♪
さあ、次はbaldeからinputです。
mysqlで複数データをinsertしたいとします。sql文はどう書けばいいのでしょうか?
insert into values の後を複数で繋げます。
INSERT INTO {table_name} (column_name1, column_name2) VALUES ('value1','value2'), ('value3', 'value4');
では実際にやってみましょう。まずsql文を作ります。データは適当に用意します。
INSERT INTO company(company_name, type, status) VALUES ('富士通', 1, 1),('リクルート', 1, 1),('日本ユニシス', 1, 1);
select * from でデータが入っているか確認します。
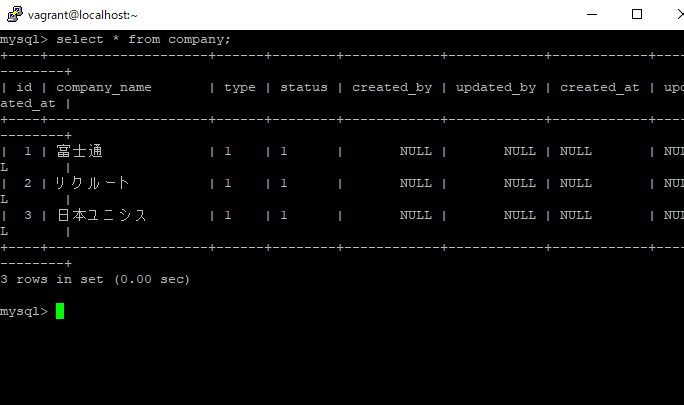
複数データが入っています。
踏み台サーバーの英語:bastion
英語名のbastionをそのままAWSのインスタンス名に使用することが多いかと思います。
踏み台サーバのセキュリティ
踏み台サーバーは、例えば アクセスする地域が限定されていてアクセスできない場合に、許可されている地域のサーバ経由でアクセスするなど、悪いイメージがあるかもしれませんが、アプリケーションのセキュリティ対策としては有効な手段の一つとなっています。
踏み台サーバーとは?
踏み台サーバーとは中継サーバーで、踏み台サーバーを経由してでないとターゲットのサーバーにアクセスできないようセキュリティグループを設定する。
踏み台サーバーからアクセスすれば、接続先のWebサーバに踏み台サーバから接続してきたと思わせることができる。
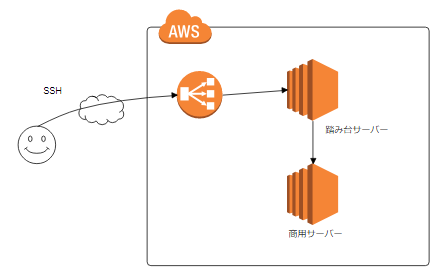
– パブリックIPをインスタンスに割り当てる必要がない
– アクセス制御の対象を踏み台サーバに限定できるため、運用負荷を軽減
AWSでの設定方法
1. VPCの作成
2. Subnetの作成(踏み台サーバ、アプリサーバ、データストア)
3. Internet Gateway
4. Route Tableの確認、設定
5. Security Groupの作成(踏み台サーバ、アプリケーションサーバ、DB用)
6. 踏み台サーバの構築
※セキュリティグループをそれぞれ作成する
indexとは何か?indexという言葉が頭に入ってこない。index.htmlと混合する。などなど。
indexは「あかさたな」でいうア行、サ行など、検索のショートカットと感がれば分かり易い。
MySQLでどんなケースだとINDEXを設定するのか?
– レコード(n)が多く、検索(O(n))に時間がかかっている
– それによってアプリケーションのパフォーマンスに影響が出る
イメージしやすいと思うが、select文での検索(O(n))の時間は Olog(n)となり、レコードの処理に時間がかかる。indexをおくと、全件検索しなくて済むので、処理時間が短くなる。
indexの種類は幾つかあるが、mysqlではB-TreeIndexが使用されている。
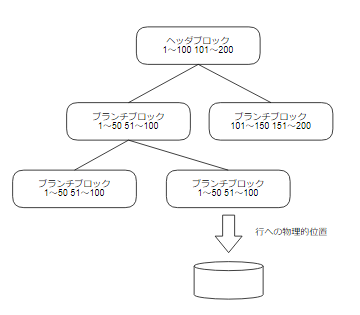
(あ、この図、検索アルゴリズムの本などで見たことある!!クイックソートだ。)
ということで、関連する書籍を「情報検索アルゴリズム」などのワードでamazonで調べると良いだろう。
インデックスをはると、クイックソートの並び替えが短縮されるので、処理が短くなるという算段だ。
インデックスの追加は
ALTER TABLE table_name ADD INDEX index_name(column_name);
ソフトウェアの開発プロセス、開発手法というと、ウォーターフォールが一般的であろう。しかし、近年はアジャイル、スクラムといった開発手法が注目されているし、DevOpsなどのワードも一般的だ。ここで開発プロセスを整理したい。
ウォーターフォール型の開発
1. 基本設計→外部設計→内部設計→プログラム設計→プログラミング→テストという工程に分けて順に段階を追う。
– 管理しやすいが、行程を後戻りできない。
アジャイル開発
1.大きな単位でシステムを区切るのではなく、小単位で実装とテストを繰り返して開発を進めていく
– 開発期間が大幅に短縮され、不具合発生時の後戻り工数が少ない。ただし、厳密な方針を固めてないので、ぶれやすい。進捗を把握しにくく、コントロールが難しい。
では具体的に実装タスクをブレイクダウンしてみましょう。
1.実装
– 実装・GHEプルリク
– コードレビュー
– 修正対応
2.単体テスト
一つの関数の判定
– テスト仕様書
– コードレビュー
– 修正対応
3.結合テスト
– テスト仕様書作成
– テスト仕様書レビュー
– レビュー指摘対応
– テスト実施(不良対応)
– テスト結果確認
– 確認の指摘対応
4.受け入れテスト
– テスト仕様書作成
– テスト仕様書レビュー
– テスト実施
– 不良対応
– 不良対応確認
5.商用リリース
– 手順書作成
– 手順書レビュー
– 指摘対応
– リリース実施
大まかな流れを記載したが、開発タスクのサイズや方針によって変わってくると思う。
Laravel5.7で静的HTMLファイルを配置する場合
/resources/views配下の*.blade.php はcontrollerで呼び出しているので、viewsディレクトリではなく、/public配下に*.htmlを配置する。
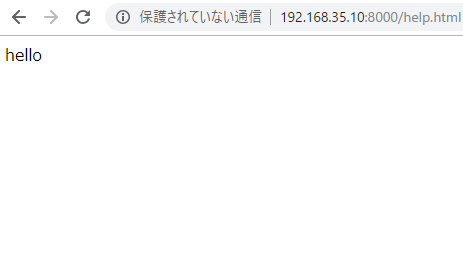
例: help.htmlを置いてみます。
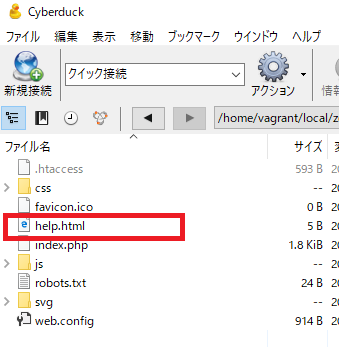
help.html
hello
htmlを確認すると、反映されています。
公式ドキュメントのBladeテンプレートの継承に習って構築していきます。
https://readouble.com/laravel/5.7/ja/blade.html
レイアウト定義
Bladeビューとして定義する。マスターのテンプレート名は迷いますね。公式ドキュメントではapp.blade.phpと記載がありますが、これは悩みますな。
とりあえず入れてみます。
/resources/views/app.blade.php
<!DOCTYPE html>
<html>
  <head>
  	<meta http-equiv="Content-Type" charset="utf-8">
    <title>@yield('title')</title>
    <meta name="description" content="Zeusはメール配信管理システムです。" />
    <link href="https://cdnjs.cloudflare.com/ajax/libs/normalize/8.0.0/normalize.css" rel="stylesheet">
    <link rel="stylesheet" href="{{ asset('/css/style.css') }}">
    <link rel="stylesheet" href="{{ asset('/css/main.css') }}">
    <link rel="shortcut icon" href="/assets/img/favicon.png">
    <script src=""></script>
  </head>
  <body>
   <!-- 共通ヘッダー -->
   <div id="header">
    <h1><a href="/"><img src="/asset/img/log.png" alt="" />Zeus</a></h1>
    <ul id="helpNav">
        <li><a href="/top.html">ホーム</a></li>
        <li><a href="/logout.html">ログアウト</a></li>
    </ul>
    <ul id="gNav">
        <li class="menu__single"><a href="/profile">アカウント一覧</a>
        <ul class="second_level">
          <li><a href="/profile">プロフィール詳細</a></li>
          <li><a href="/account/index">アカウント一覧</a></li>
          <li><a href="/account/input">アカウント新規登録</a></li>
          <li><a href="/company/index">原稿管理会社一覧</a></li>
        </ul>
        </li>
        <li class="menu__single"><a href="/manu/index">原稿一覧</a>
        <ul class="second_level">
          <li><a href="/manu/index">原稿一覧</a></li>
        </ul>
        </li>
        <li class="menu__single"><a href="/help.index">Zeusについて</a>
          <ul class="second_level">
            <li><a href="/help.index">ヘルプ</a></li>
            <li><a href="/manual/zeus.pdf">マニュアル</a></li>
            <li><a href="/rules.html">利用規約</a></li>
            <li><a href="/login">ログイン</a></li>
          </ul>
        </li>
        </ul>
    </div>
    <!-- / 共通ヘッダー -->

    <div id="content">
      @yield('content');
    </div>

    <!-- 共通フッター -->
  	<footer>
  		hpscript
  	</footer>
    <!-- / 共通フッター -->
  </body>
</html>
継承するレイアウトを指定する
resources/views/top.blade.php
@extends('app')
@section('title', 'トップページ')

@section('content')
<div id="top-main">
         <h2>Zeus</h2>
         <p>原稿作成・入稿ツールです。<br>原稿の作成・保存・入稿作業にご利用いただくことができます。</p>
      </div>
      <div id="news_h">
            <p>お知らせ</p>
      </div>
      <div id="news_t">
            <p>2018/10/17 ツールをリニューアルしました。</p>
      </div>
@endsection
ああああああああああ、これはマジで凄い。
Laravelびっくりした。
便宜的にlayoutフォルダの下に格納した方が良さそうですね。