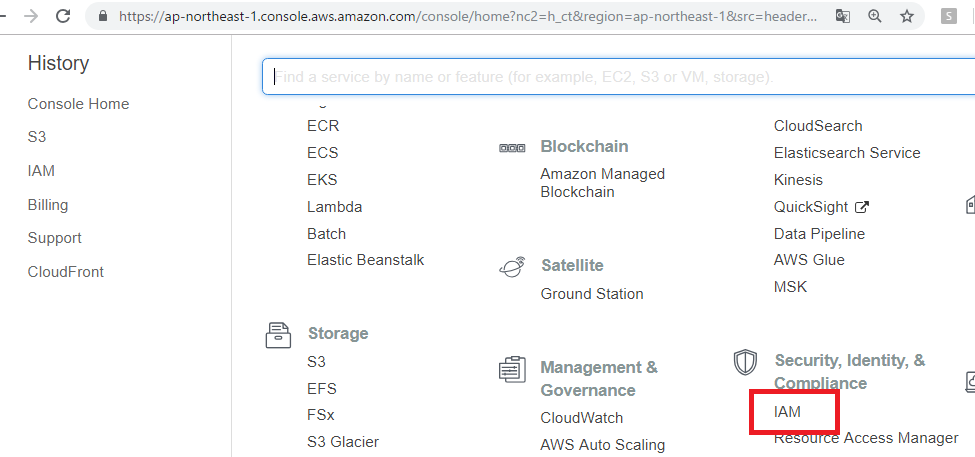
Create a read-only user on IAM.
Select IAM on the service list page
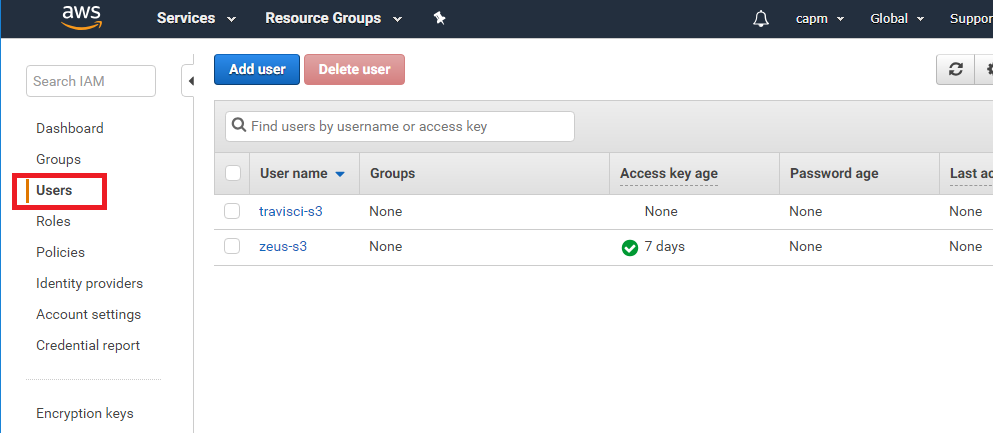
Select users from the left menu of the IAM dashboard
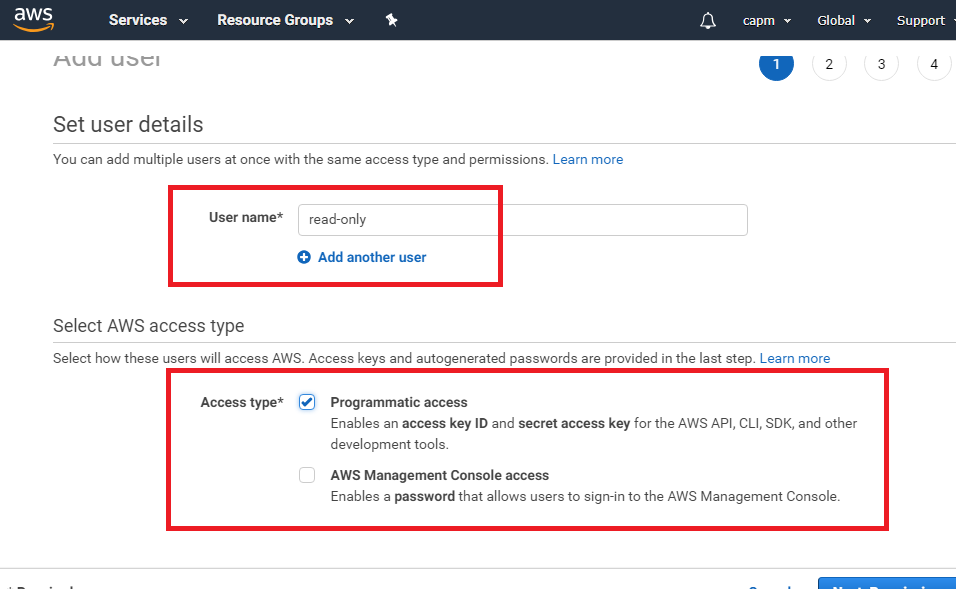
Click add user button
set username and programmatic access for access type
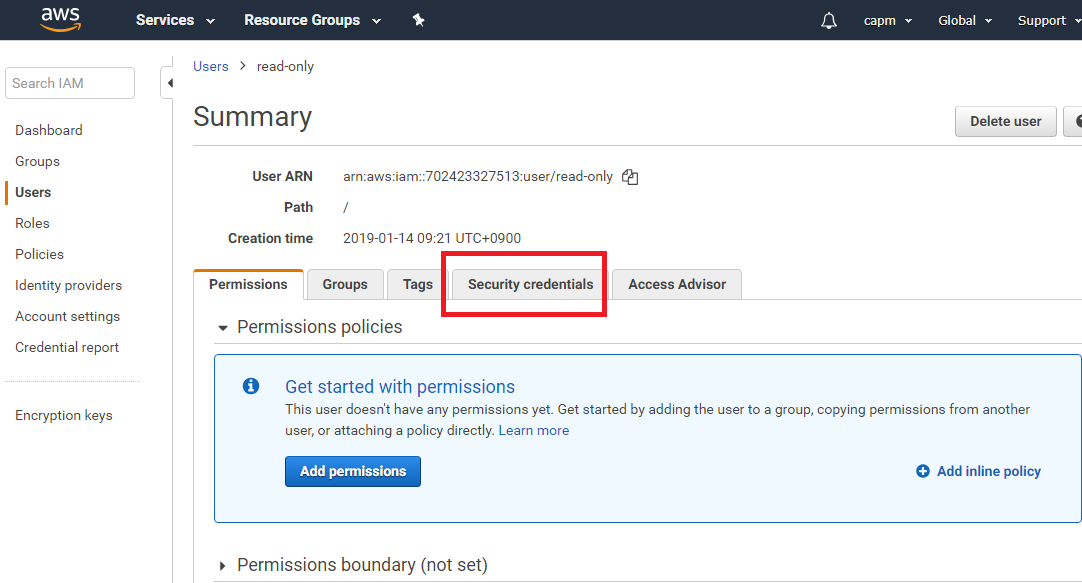
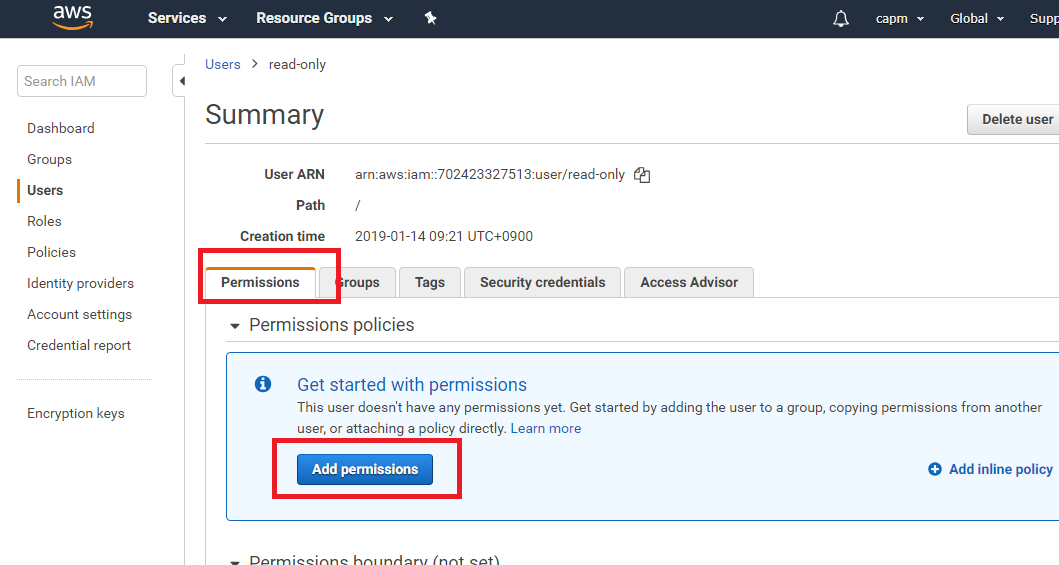
At this point the user has no permissions.
On the user detail page you just created, open the security crudential tab
Click Access keys to create a new access key and secret key.
Well, finally it’s coming to set permissions. Select add permissions button from the permission tab.
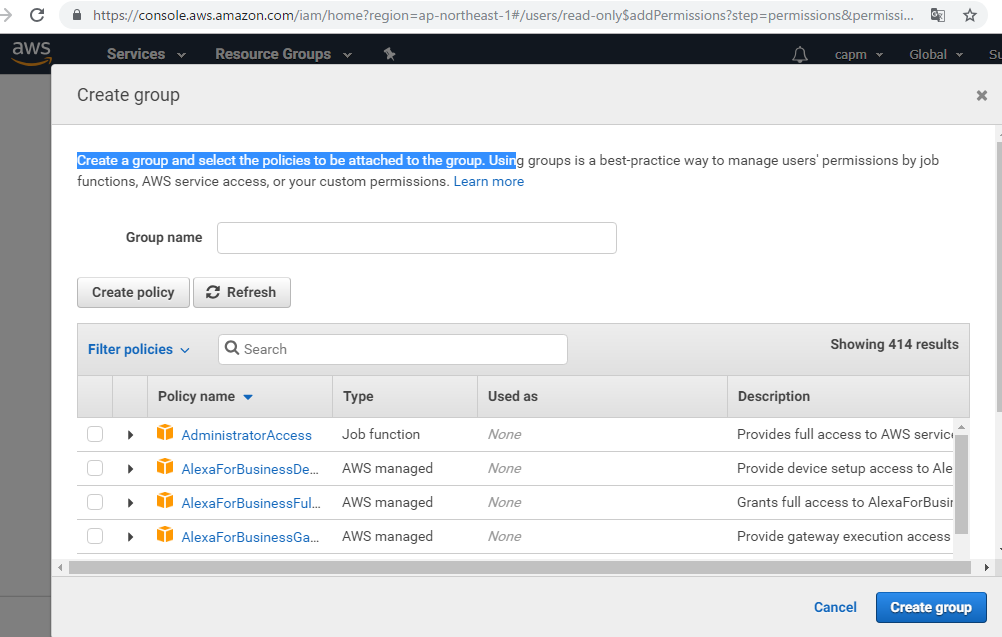
From add user to group, press create group.
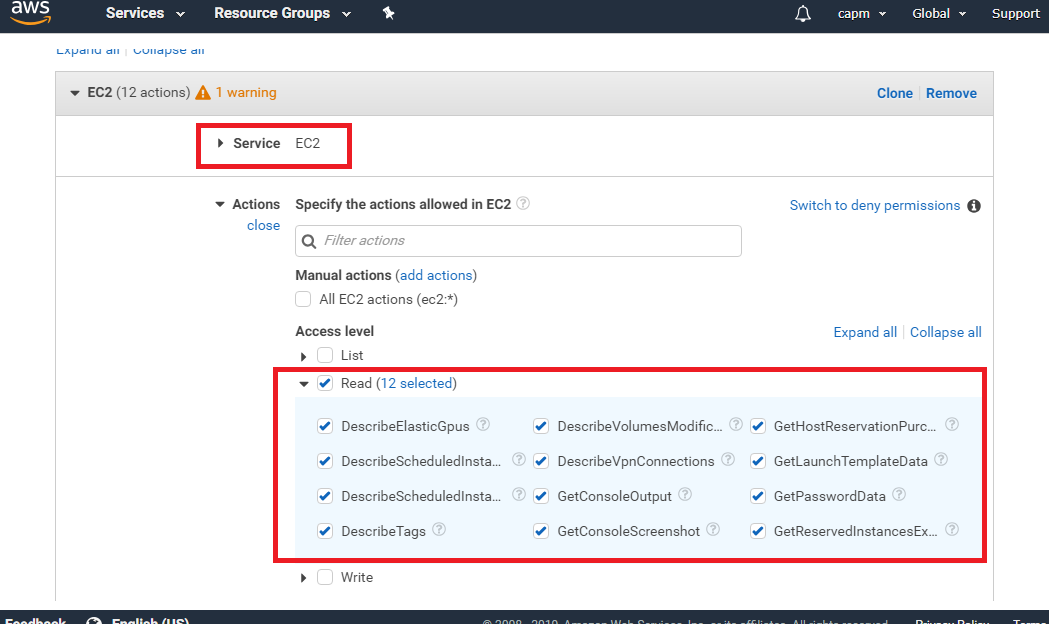
In management console Create policy, chose service for EC2 and Access level should be Read.
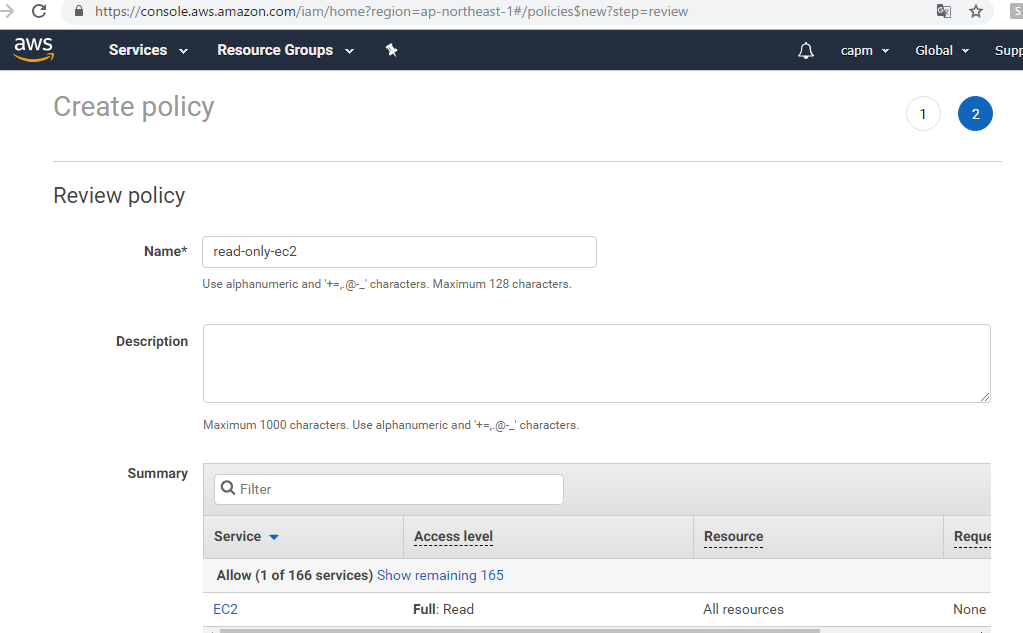
Put name for read-only-ec2 and create policy.
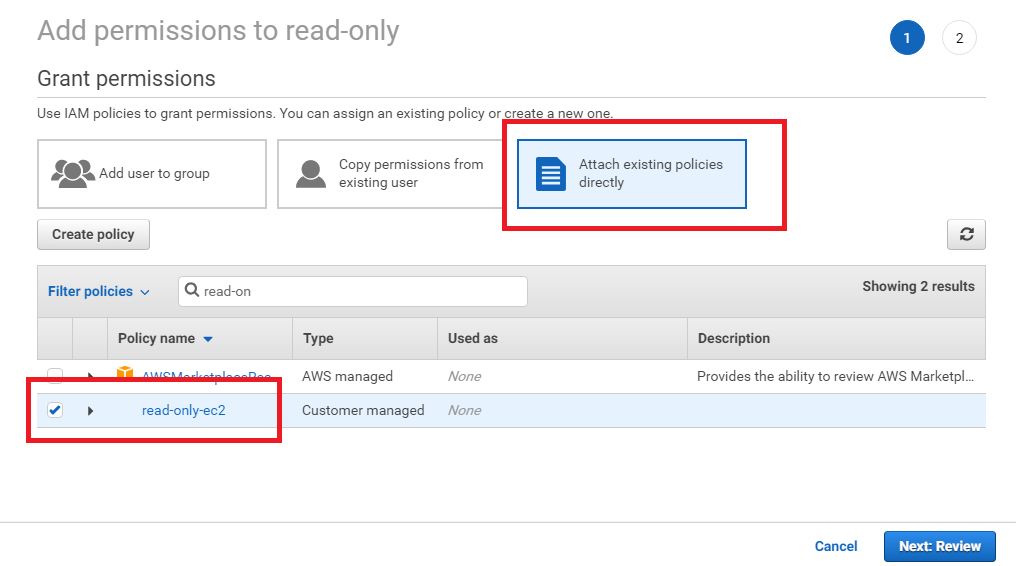
finally attache user to just created read-only-ec2 policy.
Then, user permission has changed to access EC2.
I explained how to make ReadOnly IAM users using IAM. There are many things IAM can do, such as creating groups, writing policies in detail, and creating Role. I think that AWS is the only cloud that can control privilege so far. Want to make good and secure system.