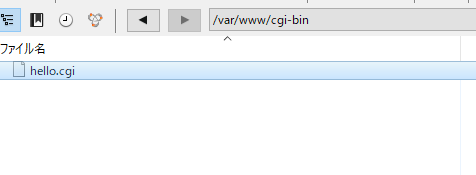
ec2でperlを動かそう

/var/www/cgi-bin

[ec2-user@ cgi-bin]$ ls
hello.cgi
[ec2-user@ cgi-bin]$ sudo chmod +x hello.cgi

#!/usr/bin/perl --
print "Content-type: text/html \n\n";
print "Hello";

きた

mysql
mysql> create database perldb;
Query OK, 1 row affected (0.02 sec)

mysql> use perldb;
Database changed
mysql> create table t1(
-> a int,
-> b varchar(10)
-> );
Query OK, 0 rows affected (0.04 sec)

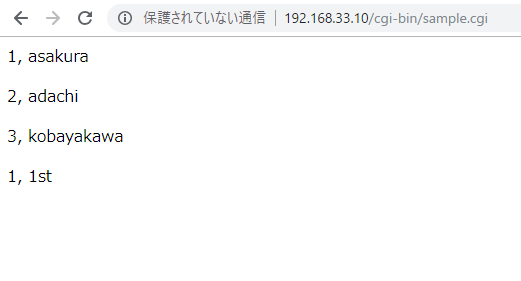
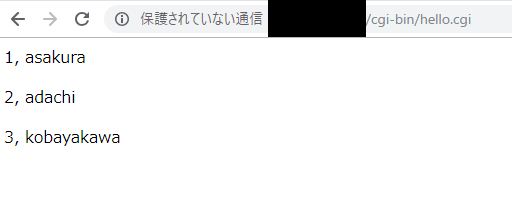
mysql> insert into t1 values(1, ‘asakura’),(2, ‘adachi’),(3, ‘kobayakawa’);
Query OK, 3 rows affected (0.00 sec)
Records: 3 Duplicates: 0 Warnings: 0

mysql> select * from t1;
+——+————+
| a | b |
+——+————+
| 1 | asakura |
| 2 | adachi |
| 3 | kobayakawa |
+——+————+
3 rows in set (0.01 sec)

$ perl hoge.pl
Can’t locate DBI.pm in @INC (@INC contains: /usr/local/lib64/perl5 /usr/local/share/perl5 /usr/lib64/perl5/vendor_perl /usr/share/perl5/vendor_perl /usr/lib64/perl5 /usr/share/perl5 .) at hoge.pl line 4.
BEGIN failed–compilation aborted at hoge.pl line 4.

sudo yum -y install perl-DBI perl-DBD-MySQL

きた!OKKKKKKKKKKKKKKKK

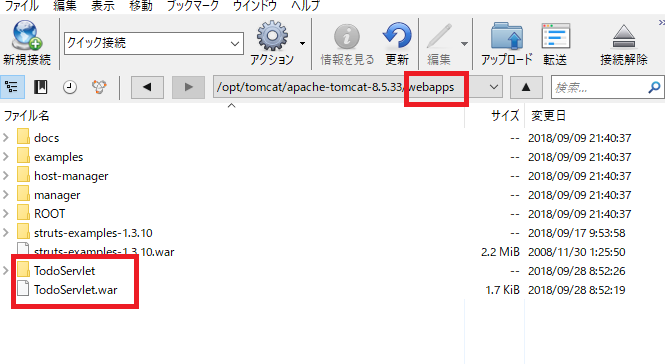
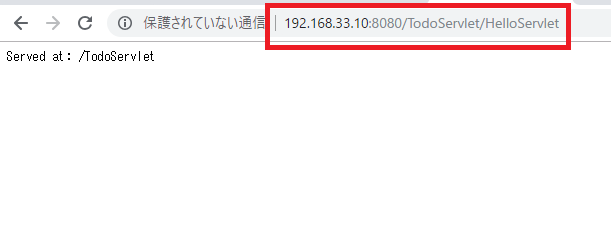
次はservlet mysqlだ。ここわなー

perlでmysqlからselectする(cgi編)

#!/usr/bin/perl --

use strict;
use DBI;

our $DB_NAME = "perldb";
our $DB_USER = "hoge";
our $DB_PASS = "hogehoge";
our $DB_HOST = "localhost";
our $DB_PORT = "3306";

my $dbh = DBI->connect("dbi:mysql:dbname=$DB_NAME;host=$DB_HOST;port=$DB_PORT","$DB_USER","$DB_PASS") or die "$!\n Error: failed to connect to DB.\n";
my $sth = $dbh->prepare("SELECT * FROM t1;");
$sth->execute();

print "Content-Type: text/html; charset=Shift_JIS\n\n";
while (my $ary_ref = $sth->fetchrow_arrayref) {
  print "<p>$ary_ref->[0], $ary_ref->[1]</p>\n";
}

$sth->finish;
$dbh->discconect;

なんや、OKだ。

次は、このままec2にperlを載せたい。

perlでmysqlからselectする(コマンドライン編)

#!/usr/bin/perl

use strict;
use DBI;

# MySQL
our $DB_NAME = "perldb";
our $DB_USER = "hoge";
our $DB_PASS = "hogehoge";
our $DB_HOST = "localhost";
our $DB_PORT = "3306";

my $dbh = DBI->connect("dbi:mysql:dbname=$DB_NAME;host=$DB_HOST;port=$DB_PORT","$DB_USER","$DB_PASS") or die "$!\n Error: failed to connect to DB.\n";
my $sth = $dbh->prepare("SELECT * FROM t1;");
$sth->execute();
while (my $ary_ref = $sth->fetchrow_arrayref) {
  my ($a, $b) = @$ary_ref;
  print "$a, $b\n";
}
$sth->finish;
$dbh->disconnect;

おおおおおおお、selectできるやんけ。
[vagrant@localhost cgi-bin]$ perl hoge.pl
1, asakura
2, adachi
3, kobayakawa
1, 1st

ということは、cgiも行けるかな(ワクワク)^^

Perl・MySQLのドライバーをインストールする

DBIモジュールとMySQLのDBDモジュールをインストール

[vagrant@localhost ~]$ sudo yum -y install perl-DBI perl-DBD-MySQL

mysql
create database perldb;
use perldb;
create table t1(
a int,
b varchar(10)
);

insert into t1 values(1, ‘asakura’),(2, ‘adachi’),(3, ‘kobayakawa’);
select * from t1;

use DBI;

$user = 'root';
$passwd = '';
$db = DBI->connect('DBI:mysql:perldb:localhost', $user, $passwd);
$sth = $db->prepare("INSERT INTO t1 VALUES (1,'1st')");
$sth->execute;
$sth->finish;
$db->disconnect;

mysql> select * from t1;
+——+————+
| a | b |
+——+————+
| 1 | asakura |
| 2 | adachi |
| 3 | kobayakawa |
| 1 | 1st |
+——+————+
4 rows in set (0.00 sec)

eclipseのファイルをvagrantのtomcat8.5にデプロイする

コマンドラインでtomcatを起動しておきます。
[vagrant@localhost tomcat]$ sudo /opt/tomcat/apache-tomcat-8.5.33/bin/shutdown.sh

elipseの対象パッケージからwar.fileをexportする。

war.fileをtomcatのwebapp配下に配置します。※ここはgitでいいでしょうね。
数秒するとwarから自動的にフォルダが生成されます。

eclipseからvagrantにデプロイできました。素晴らしい!

eclipseで利用するtomcatのバージョンとvagrantにインストールするtomcatのバージョンは合わせておく必要があります。さて、ではmysqlとの接続をやっていきたいですね。

vagrant上のtomcatでservletを動かしたい

まず、tomcatのフォルダにeclipseで作成したservletを置いてみる。

tomcat起動
sudo /opt/tomcat/apache-tomcat-8.5.33/bin/startup.sh

Type ステータスレポート
メッセージ /TodoServlet3/HelloServlet/
説明 The origin server did not find a current representation for the target resource or is not willing to disclose that one exists.

あああ、tomcat 8だからかな~ 困った。

jspでpostした内容を改めてjspで表示する

.jsp

<body>
	Hello, <%= request.getAttribute("userName") %>
	
	<form method="post" action="./HelloServlet">
	please type your name:<input type="text" name="name">
	<button type="submit">submit</button>
	</form>
</body>

servlet
doGetとdoPost userNameがnullから空の時はuserName == “Guest”

protected void doGet(HttpServletRequest request, HttpServletResponse response) throws ServletException, IOException {
		// TODO Auto-generated method stub
		// response.getWriter().append("Served at: ").append(request.getContextPath());
		String name = (String) request.getAttribute("userName");
		
		if (name == null || "".equals(name)){
			request.setAttribute("userName", "Guest");
		}
		
		
		String view = "/WEB-INF/view/index.jsp";
		RequestDispatcher dispatcher = request.getRequestDispatcher(view); 
		
		dispatcher.forward(request, response);
	}

	/**
	 * @see HttpServlet#doPost(HttpServletRequest request, HttpServletResponse response)
	 */
	protected void doPost(HttpServletRequest request, HttpServletResponse response) throws ServletException, IOException {
		// TODO Auto-generated method stub
		request.setCharacterEncoding("utf-8");
		
		String name = request.getParameter("name");
		request.setAttribute("userName", name);
		
		doGet(request, response);
	}

なるほど、servletの基本動作はわかってきました。

こういう書き方もできる。

<body>
<% String userName = (String) request.getAttribute("userName"); %>
	Hello, <%= userName %> 
	
	<% if("Guest".equals(userName)) {%>>
	<form method="post" action="./HelloServlet">
	please type your name:<input type="text" name="name">
	<button type="submit">submit</button>
	</form>
	<% } %>
</body>

とりあえずgit init, git add, git commit, git remote add, git pushしておきましょう。

eclipseはokなんだが、これをvagrantのtomcatで動かしたい。

jspからservletにpostしてみよう

.jsp

<body>
	<%= request.getAttribute("word") %>
	
	<form method="post" action="./HelloServlet">
	please type something:<input type="text" name="form1">
	<button type="submit">submit</button>
	</form>
</body>

servlet

protected void doPost(HttpServletRequest request, HttpServletResponse response) throws ServletException, IOException {
		// TODO Auto-generated method stub
		String value = request.getParameter("form1");
		System.out.println(value);
		
		doGet(request, response);
	}

あああ、これはセクシーだ。

サーブレットからjspに値を渡す

HelloServlet.java

protected void doGet(HttpServletRequest request, HttpServletResponse response) throws ServletException, IOException {
		// TODO Auto-generated method stub
		// response.getWriter().append("Served at: ").append(request.getContextPath());
		request.setAttribute("word", "this is jsp..");
		
		String view = "/WEB-INF/view/index.jsp";
		RequestDispatcher dispatcher = request.getRequestDispatcher(view); 
		
		dispatcher.forward(request, response);
	}
<%@ page language="java" contentType="text/html; charset=ISO-8859-1"
    pageEncoding="ISO-8859-1"%>
<!DOCTYPE html PUBLIC "-//W3C//DTD HTML 4.01 Transitional//EN" "http://www.w3.org/TR/html4/loose.dtd">
<html>
<head>
<meta http-equiv="Content-Type" content="text/html; charset=ISO-8859-1">
<title>Hello, Java World!</title>
</head>
<body>
	<%= request.getAttribute("word") %>
</body>
</html>

遂にここまできたか。。

servletのメリット

一度実行されたServletは、1つのスレッドとして実行環境のメモリ上に常駐しますので、2回目以降の実行においては、新たなプロセスを生成せずに、すでにあるものを実行できるため、応答速度に優れている。

なるほど。

複数のクライアントから同時にリクエストがあっても、片方を待たせることなく並行して処理を行うことができるため、やはり応答速度に優れている。

ほう。

デメリット
-> Servletに対応したインターネット・サービス・プロバイダ(ISP)がほとんどない
これは大きいね。

->Java技術者そのものの不足
これも同意