2019年7月13日(土)
セッション 10:00~18:45 (予定)
懇親会 18:45~20:00 (予定)
@東大
https://ccse.jp/2019/
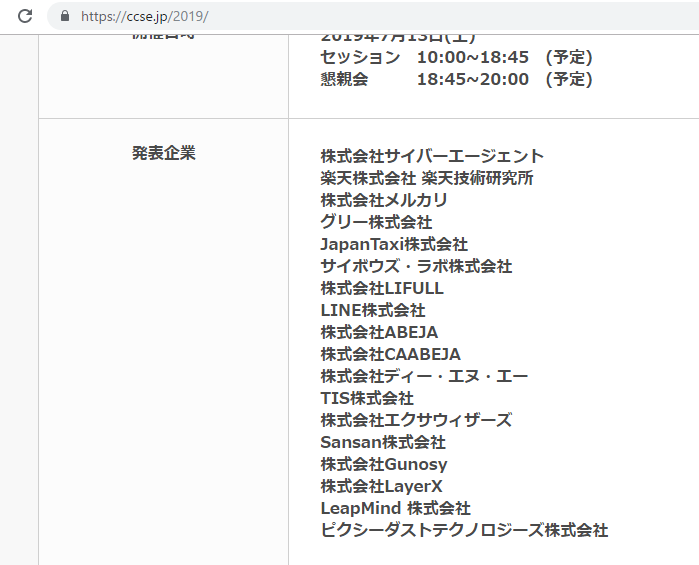
とりあえず、一応行っておきますかー
随机应变 ABCD: Always Be Coding and … : хороший
2019年7月13日(土)
セッション 10:00~18:45 (予定)
懇親会 18:45~20:00 (予定)
@東大
https://ccse.jp/2019/

とりあえず、一応行っておきますかー
DINはuniquloで使われているフォントだそうです。
https://www.uniqlo.com/jp/stylingbook/pc/user_styling

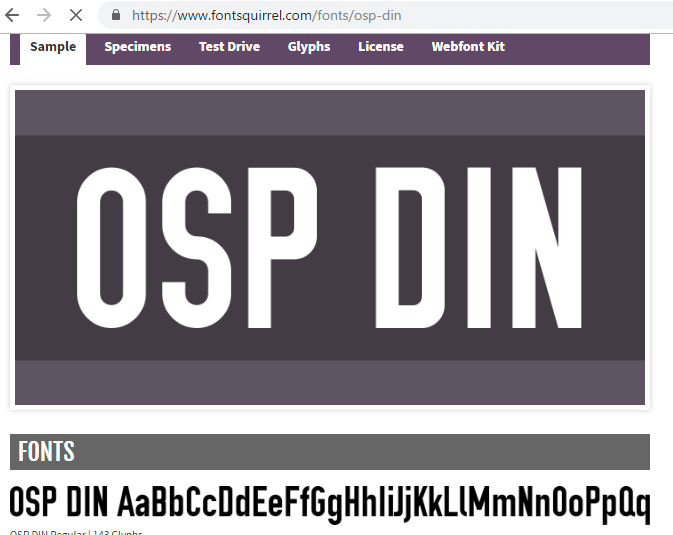
縦に細長いですね。Dinにもいろいろある様です。
「Din 1451 Alt」
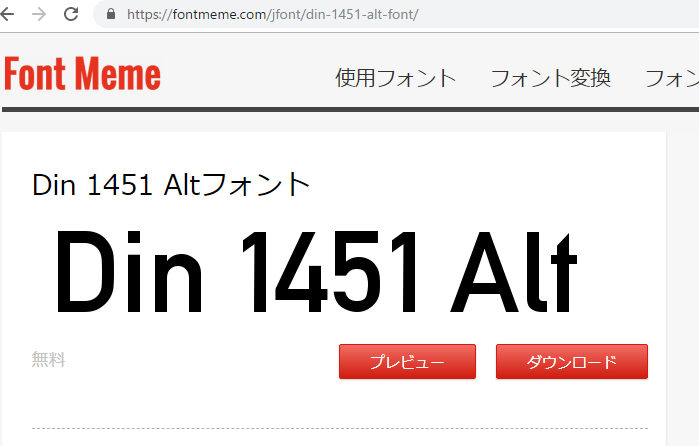
更に細長い?
「OSP DIN」
「Bebas Neue」

“DIN” is a german font.
Originally, the font was made for industrial use, and it was said that the purpose was to unify the font such as the model number description in the industry to this “DIN”. So, “DIN” is an abbreviation of “Deutches Institut fur Normung” and Deutsches Institut fur Normung is the officcial name of DIN.
これは目的によるな~
ではユニクロのfontを見てみましょう。
https://www.uniqlo.com/jp/css/default.css
[ccs]
body{
font:13px ‘ヒラギノ角ゴPro W3′,’Hiragino Kaku Gothic Pro’,’游ゴシック’,’Yu Gothic’,’游ゴシック体’,’YuGothic’,メイリオ,Meiryo,sans-serif;
color: #000000;
background: #e6e6e6;
}
[/ccs]
なるほど、ヒラギノ角ゴPro W3か。iPhoneと一緒ですね。
ところで、webデザインの大手ってどこでしょう? IMK?
imjのサイトを見てみましょう。あ、どーでもいいですが、知り合いimjで働いてますね。

で、imsのfont-familyはというと
https://www.imjp.co.jp/resources/css/common.css
body, input, textarea, select, option, button {
  background: #fff;
  font-family: "Gotham SSm A", "Gotham SSm B", "メイリオ", Meiryo, "ヒラギノ角ゴ Pro W3", "Hiragino Kaku Gothic Pro", Osaka, "MS Pゴシック", "MS PGothic", sans-serif;
  font-style: normal;
  line-height: 1.7;
  color: #000;
  font-size: 14px;
}
Gotham SSm A???????????????
なにいいいいいいいいいいいいいいいいいいいいいいいいいいいいい
Futura is a Latin-language sans-serif typeface announced by Paul Renner, who worked as a part-time lecturer at the Bauhaus in Germany in 1923. Futura is a Latin word meaning “future”.
Adobe Fonts: Futura
https://fonts.adobe.com/fonts/futura-pt
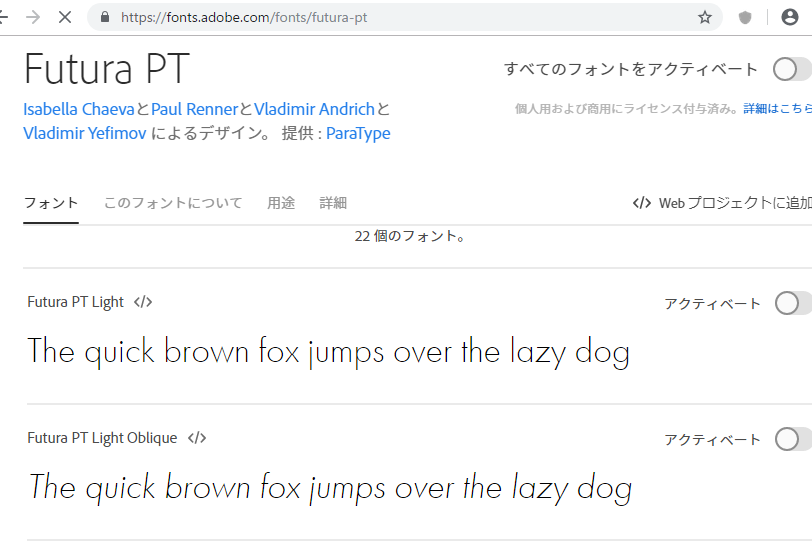
Futura is one of the most popular fonts in the world, and is used in many corporate logs.
ほう、会社のロゴはfuturaにしようかな。
A, M, V, Wが非対称で、〇が円になっているとのこと。
CCS3でfuturaは使えるようです。
CCS3で使える欧文フォント
– Futura
– Neue Helvetica
– Avenir
– Sackers Gothic
– DIN Next
– Garamond #3
– Trade Gothic
– Neue Frutiger
– VAG Rounded
– Univers
何?DINもCCS3で使えるんかい!!!
ザッポス伝説を勧められたので、電車の中で読み、昨日読了した。
ザッポスは、靴のスタートアップでCEOは台湾の日系アメリカ人と勘違いしていたが、実はハーバードの台湾系のアメリカ人のようだ。
この本、ページ数が400くらいあり、ボリュームが結構あるのだが、中身は面白かった。経営者の本の中では最も面白いと言っても過言ではないほど。
印象に残ったところは P65.
> どうやって顧客から注文を取るのか、私たちには作戦がありました。まず、ウェブサイトを無料で制作すると地元の商工会議所にアプローチします。次に、(一銭ももらっていないとは言わずに)商工会議所が顧客だと地元企業に話し、できるだけたくさんの地元企業と契約を結べば、お金はすぐにも転がり込んでくるという考えでした。
P.67
>モールと契約できれば、モール内にある各店舗に営業をかけて、モールが契約したのだから各店も右に倣うべし、と説得しやすくなるからです。
頭いいですね。成功している人の話を聞いた方が圧倒的に効率がいいと思いました。
P.111
>ザッポスの社員となった翌日、私はラスベガスで開催されたWSA(ワールドシューアソシエーション)主催の靴の展示会に行きました。
展示会なら飛び込みする必要がない
P.116、117、118
-着くテーブルを選ぶのは、自分で決められる最も重要なこと
-着いたテーブルで勝ち目がないとわかったら、テーブルを替わっても構わない
-強い手なら弱く見せ、弱い手なら強く見せる
-リスクが最小ではなく、期待値が大きいものを選ぶ
-長い目でみるゲームであることを忘れない。重要なのは最終結果である。
-ゲームの仕方を理解しないでゲームをしないこと
-スタミナと集中力が最もあるプレーヤーがたいてい勝つ
-希望を抱くな
-アドバイスを恐れない事
P.155
-謙虚であれ
P.168
カスタマー・サービスをザッポスの中心にとらえました
P.176
在庫の獲得
P.350
講演活動をしなければ決して起こらなかったでしょう
非常にクレバーですね。
>強い手なら弱く見せ、弱い手なら強く見せる
これは最近のテーマでもあります。「女で馬鹿っぽいのはただの馬鹿ではない」とよく言いますが、これは心理を突いてますね。
そして、本を読んで最も驚いたのは、訳者が「本荘修二」さんだったこと。ああああああああああああああああ
そういうことか。すげーびっくりした。
スタートアップコミュニティで本荘さんを知らない人はいないでしょう。
といことで、ザッポスというサイトがなかったので、生まれて初めてアマゾンでスニーカーを注文してみました。

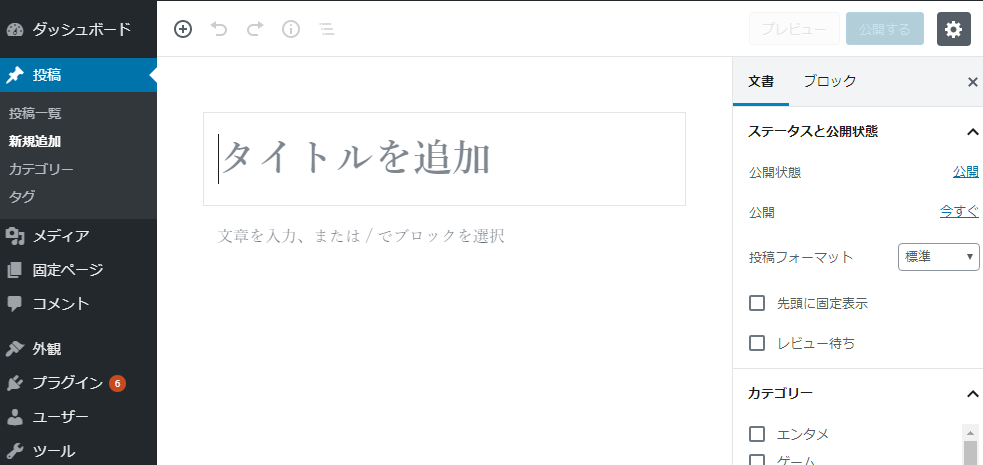
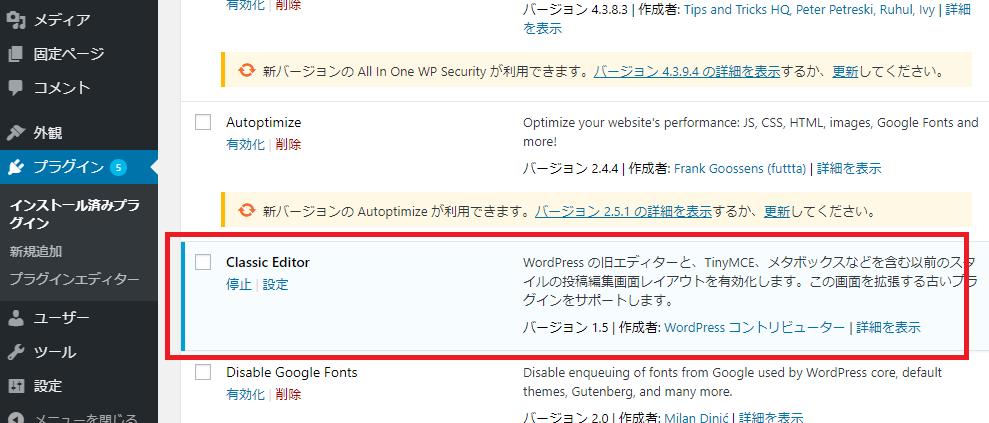
プラグインでclassic editorをインストールします

classic editor を有効化します。
戻ったーーーーーーーーーーーーーーー
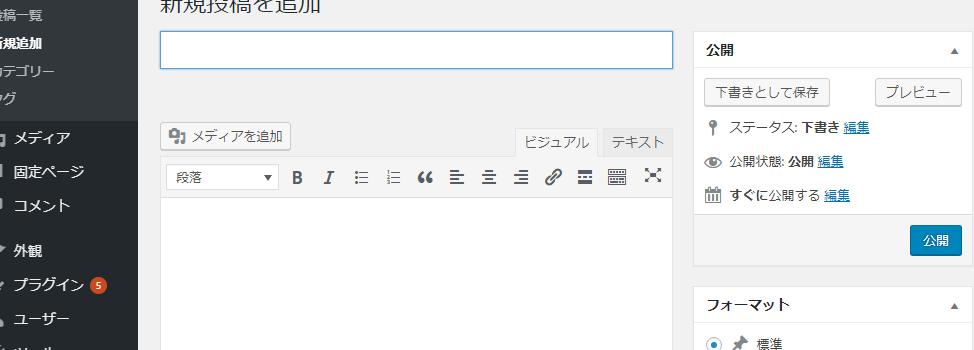
絶対こっちの方が生産性が高い。
asはカラムに別名をつける
select sales as tokyosales from uriage where branch='tokyo';
select (kokugo + eigo) / as average from test;
なるほど。
select name as namae, price as kakaku, design as design, quality as hinshitsu, price+design+quality as gokei from product;
なるほど、int型ならこんなこともできるのね。
selectした後に実行するのと、selectの中で実行するの、どちらがいいのかはよくわらかりませんな。
Perl
———————————
数値比較
> : より大きい
>= : より大きいか等しい
< : より小さい
<= : より小さいか等しい
== : 等しい
!= : 等しくない
<=> : 比較
文字列比較
gt: より大きい
ge: より大きいか等しい
lt: より小さい
le: より小さいか等しい
eq: 等しい
ne: 等しくない
cmp: 比較
PHP
———————————
== : 等しい
=== : 同じ
!= : 等しくない
!=== : 同じでない
> : より大きい
< : より小さい
>= : 以上
<= : 以下
<=> : より小さい等しいより多き
ん?なんだこの<=>って??あんまり見ないけど。
Shell
———————————
eq : equal to
ge : greater than or equal to
gt : greater than
le : less than or equal to
lt : less than
ne : not equal to
シェルは文字列か。なんか注意が必要ですな
mysql> select * from staff inner join dept on staff.deptid = dept.id;
+——+——–+——–+——+———–+
| id | name | deptid | id | name |
+——+——–+——–+——+———–+
| 1 | yamada | 1 | 1 | Develop |
| 3 | kudou | 6 | 6 | Marketing |
| 4 | nishi | 1 | 1 | Develop |
| 5 | tagawa | 3 | 3 | Legal |
+——+——–+——–+——+———–+
4 rows in set (0.00 sec)
mysql> select * from dept inner join staff on dept.id = staff.deptid;
+——+———–+——+——–+——–+
| id | name | id | name | deptid |
+——+———–+——+——–+——–+
| 1 | Develop | 1 | yamada | 1 |
| 6 | Marketing | 3 | kudou | 6 |
| 1 | Develop | 4 | nishi | 1 |
| 3 | Legal | 5 | tagawa | 3 |
+——+———–+——+——–+——–+
4 rows in set (0.00 sec)
nullは返ってこないのかな。
まず、テーブルを作ります。
mysql> create table staff(
-> id int,
-> name varchar(10),
-> deptid int
-> );
Query OK, 0 rows affected (0.20 sec)
mysql> insert into staff values(1, ‘yamada’, 1);
Query OK, 1 row affected (0.11 sec)
mysql> insert into staff values(2, ‘honda’, 4);
Query OK, 1 row affected (0.00 sec)
mysql> insert into staff values(3, ‘kudou’, 6);
Query OK, 1 row affected (0.03 sec)
mysql> insert into staff values(4, ‘nishi’, 1);
Query OK, 1 row affected (0.00 sec)
mysql> insert into staff values(5, ‘tagawa’, 3);
Query OK, 1 row affected (0.06 sec)
mysql> select * from staff;
+——+——–+——–+
| id | name | deptid |
+——+——–+——–+
| 1 | yamada | 1 |
| 2 | honda | 4 |
| 3 | kudou | 6 |
| 4 | nishi | 1 |
| 5 | tagawa | 3 |
+——+——–+——–+
5 rows in set (0.00 sec)
更にもう一つテーブルを作ります。
mysql> create table dept(id int, name varchar(10));
Query OK, 0 rows affected (0.15 sec)
mysql> insert into dept values(1, ‘Develop’);
Query OK, 1 row affected (0.07 sec)
mysql> insert into dept values(3, ‘Legal’);
Query OK, 1 row affected (0.01 sec)
mysql> insert into dept values(5, ‘Planning’);
Query OK, 1 row affected (0.02 sec)
mysql> insert into dept values(6, ‘Marketing’);
Query OK, 1 row affected (0.00 sec)
mysql> select * from dept;
+——+———–+
| id | name |
+——+———–+
| 1 | Develop |
| 3 | Legal |
| 5 | Planning |
| 6 | Marketing |
+——+———–+
4 rows in set (0.00 sec)
さーそれではleft.joinを使ってみましょう。
mysql> select * from staff left join dept on staff.deptid = dept.id;
+——+——–+——–+——+———–+
| id | name | deptid | id | name |
+——+——–+——–+——+———–+
| 1 | yamada | 1 | 1 | Develop |
| 4 | nishi | 1 | 1 | Develop |
| 5 | tagawa | 3 | 3 | Legal |
| 3 | kudou | 6 | 6 | Marketing |
| 2 | honda | 4 | NULL | NULL |
+——+——–+——–+——+———–+
5 rows in set (0.05 sec)
おおおおおおおおおおおおお。逆バージョン
mysql> select * from dept left join staff on dept.id = staff.deptid;
+——+———–+——+——–+——–+
| id | name | id | name | deptid |
+——+———–+——+——–+——–+
| 1 | Develop | 1 | yamada | 1 |
| 6 | Marketing | 3 | kudou | 6 |
| 1 | Develop | 4 | nishi | 1 |
| 3 | Legal | 5 | tagawa | 3 |
| 5 | Planning | NULL | NULL | NULL |
+——+———–+——+——–+——–+
5 rows in set (0.00 sec)
並び順がidではないだね。んーん。
カラムを指定する場合は、
mysql> select * from staff.id, staff.name, dept.name left join dept on staff.deptid = dept.id;
ERROR 1146 (42S02): Table ‘staff.id’ doesn’t exist
あれ、ちゃう。こうやな。
select staff.id, staff.name, dept.name from staff left join dept on staff.deptid = dept.id;
まずテーブルを作ります。
mysql> create database user;
Query OK, 1 row affected (0.09 sec)
mysql> use user;
Database changed
mysql> create table `user`(
-> `id` int(11) not null auto_increment,
-> `name` varchar(255) not null,
-> `email` varchar(255) not null,
-> `password` varchar(255) not null,
-> `created` datetime not null,
-> `modified` timestamp NOT NULL DEFAULT CURRENT_TIMESTAMP ON UPDATE CURRENT_TIMESTAMP,
-> `deleted` datetime DEFAULT null,
-> PRIMARY KEY(`id`)
-> ) ENGINE=InnoDB DEFAULT CHARSET=utf8
-> ;
Query OK, 0 rows affected (0.48 sec)
# ストアドプロシージャ
DELIMITER //
CREATE PROCEDURE testInsert(IN max INT)
    BEGIN
    DECLARE cnt INT Default 1;
        simple_loop: LOOP
            INSERT INTO user(name, email, password, created) VALUES (CONCAT('user', cnt), concat('test', cnt, '@test.com'), concat('test_password', cnt), NOW());
            SET cnt = cnt+1;
            If cnt=max THEN
                LEAVE simple_loop;
            END IF;
        END LOOP simple_loop;
    END //

   ## インサート
   CALL testInsert(10000000);

   ## ストアドプロシージャーの削除
   DROP PROCEDURE testInsert;
ストアドプロシージャーって何?