/tmp
If /tmp is restarted, the file will be completely lost.
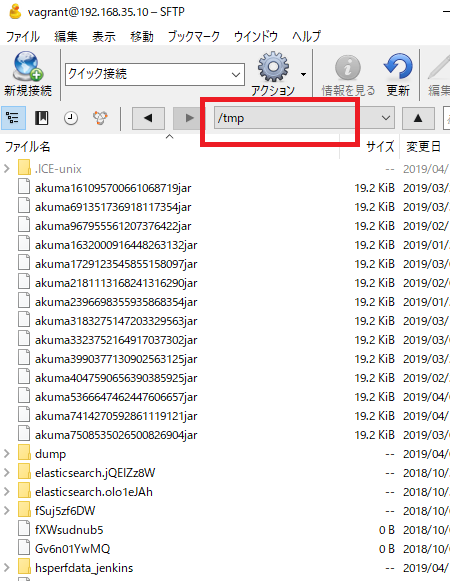
→ /tmp should always be available to programs that require temporary files.
The program should not assume that the file or directory remains in /tmp at the next boot.
/var/tmp
/var/tmp does not disappear after rebooting, but sometimes the file may disapper.

あれ、全然使われ方が違う!?
/var/tmp is used by programs that require temporary files and directories, and will not be deleted when the system is restarted. Therefore, the data of /var/tmp is held longer than the data of /tmp.
Files and directories placed in /var/tmp should not be deleted at system restart. Normally, data in /var/tmp is deleted by site-specific rules, but basically it is desirable to delete less frequently than /tmp.
[vagrant@localhost test]$ cd /etc/cron.daily
[vagrant@localhost cron.daily]$ ls
logrotate makewhatis.cron
[vagrant@localhost cron.daily]$ cat logrotate
cat: logrotate: 許可がありません
[vagrant@localhost cron.daily]$ sudo cat logrotate
#!/bin/sh
/usr/sbin/logrotate /etc/logrotate.conf
EXITVALUE=$?
if [ $EXITVALUE != 0 ]; then
/usr/bin/logger -t logrotate “ALERT exited abnormally with [$EXITVALUE]”
fi
exit 0
[vagrant@localhost cron.daily]$ sudo cat makewhatis.cron
#!/bin/bash
LOCKFILE=/var/lock/makewhatis.lock
# the lockfile is not meant to be perfect, it’s just in case the
# two makewhatis cron scripts get run close to each other to keep
# them from stepping on each other’s toes. The worst that will
# happen is that they will temporarily corrupt the database…
[ -f $LOCKFILE ] && exit 0
# if MAKEWHATISDBUPDATES variable is set to “n” or “N”, then the
# update will not passed
MDU=`sed -n -e ‘s/^[[:blank:]]*MAKEWHATISDBUPDATES[[:blank:]]*\(.\)[[:blank:]]*$/\1/p’ < /etc/man.config`
([ "$MDU" == "n" ] || [ "$MDU" == "N" ]) && exit 0
trap "{ rm -f $LOCKFILE ; exit 255; }" EXIT
touch $LOCKFILE; restorecon $LOCKFILE
# Rebuild the database if makewhatis was since last full run,
# otherwise just update with new pages
if [ ! -f /var/cache/man/whatis ] ||
find /usr/sbin/makewhatis -newer /var/cache/man/whatis |grep -q .
then
makewhatis -w
else
makewhatis -U -w
fi
exit 0
[vagrant@localhost rc.d]$ sudo cat rc.sysinit
#!/bin/bash
#
# /etc/rc.d/rc.sysinit - run once at boot time
#
# Taken in part from Miquel van Smoorenburg's bcheckrc.
#
HOSTNAME=$(/bin/hostname)
set -m
if [ -f /etc/sysconfig/network ]; then
. /etc/sysconfig/network
fi
if [ -z "$HOSTNAME" -o "$HOSTNAME" = "(none)" ]; then
HOSTNAME=localhost
fi
if [ ! -e /proc/mounts ]; then
mount -n -t proc /proc /proc
mount -n -t sysfs /sys /sys >/dev/null 2>&1
fi
if [ ! -d /proc/bus/usb ]; then
modprobe usbcore >/dev/null 2>&1 && mount -n -t usbfs /proc/bus/usb /proc/bus/usb
else
mount -n -t usbfs /proc/bus/usb /proc/bus/usb
fi
#remount /dev/shm to set attributes from fstab #669700
mount -n -o remount /dev/shm >/dev/null 2>&1
#remount /proc to set attributes from fstab #984003
mount -n -o remount /proc >/dev/null 2>&1
. /etc/init.d/functions
PLYMOUTH=
[ -x /bin/plymouth ] && PLYMOUTH=yes
# Check SELinux status
SELINUX_STATE=
if [ -e “/selinux/enforce” ] && [ “$(cat /proc/self/attr/current)” != “kernel” ]; then
if [ -r “/selinux/enforce” ] ; then
SELINUX_STATE=$(cat “/selinux/enforce”)
else
# assume enforcing if you can’t read it
SELINUX_STATE=1
fi
fi
if [ -n “$SELINUX_STATE” -a -x /sbin/restorecon ] && __fgrep ” /dev ” /proc/mounts >/dev/null 2>&1 ; then
/sbin/restorecon -R -F /dev 2>/dev/null
fi
disable_selinux() {
echo $”*** Warning — SELinux is active”
echo $”*** Disabling security enforcement for system recovery.”
echo $”*** Run ‘setenforce 1’ to reenable.”
echo “0” > “/selinux/enforce”
}
relabel_selinux() {
# if /sbin/init is not labeled correctly this process is running in the
# wrong context, so a reboot will be required after relabel
AUTORELABEL=
. /etc/selinux/config
echo “0” > /selinux/enforce
[ -n “$PLYMOUTH” ] && plymouth –hide-splash
if [ “$AUTORELABEL” = “0” ]; then
echo
echo $”*** Warning — SELinux ${SELINUXTYPE} policy relabel is required. ”
echo $”*** /etc/selinux/config indicates you want to manually fix labeling”
echo $”*** problems. Dropping you to a shell; the system will reboot”
echo $”*** when you leave the shell.”
start rcS-emergency
else
echo
echo $”*** Warning — SELinux ${SELINUXTYPE} policy relabel is required.”
echo $”*** Relabeling could take a very long time, depending on file”
echo $”*** system size and speed of hard drives.”
/sbin/fixfiles -F restore > /dev/null 2>&1
fi
rm -f /.autorelabel
# at this point fsck was already executed see bz1236062
[ -f /forcefsck ] && rm -f /forcefsck
echo $”Unmounting file systems”
umount -a
mount -n -o remount,ro /
echo $”Automatic reboot in progress.”
reboot -f
}
# Print a text banner.
echo -en $”\t\tWelcome to ”
read -r system_release < /etc/system-release
if [[ "$system_release" == *"Red Hat"* ]]; then
[ "$BOOTUP" = "color" ] && echo -en "\\033[0;31m"
echo -en "Red Hat"
[ "$BOOTUP" = "color" ] && echo -en "\\033[0;39m"
PRODUCT=$(sed "s/Red Hat \(.*\) release.*/\1/" /etc/system-release)
echo " $PRODUCT"
elif [[ "$system_release" == *Fedora* ]]; then
[ "$BOOTUP" = "color" ] && echo -en "\\033[0;34m"
echo -en "Fedora"
[ "$BOOTUP" = "color" ] && echo -en "\\033[0;39m"
PRODUCT=$(sed "s/Fedora \(.*\) \?release.*/\1/" /etc/system-release)
echo " $PRODUCT"
elif [[ "$system_release" =~ "CentOS" ]]; then
[ "$BOOTUP" = "color" ] && echo -en "\\033[0;36m"
echo -en "CentOS"
[ "$BOOTUP" = "color" ] && echo -en "\\033[0;39m"
PRODUCT=$(sed "s/CentOS \(.*\) \?release.*/\1/" /etc/system-release)
echo " $PRODUCT"
else
PRODUCT=$(sed "s/ release.*//g" /etc/system-release)
echo "$PRODUCT"
fi
# Only read this once.
cmdline=$(cat /proc/cmdline)
# Initialize hardware
if [ -f /proc/sys/kernel/modprobe ]; then
if ! strstr "$cmdline" nomodules && [ -f /proc/modules ] ; then
sysctl -w kernel.modprobe="/sbin/modprobe" >/dev/null 2>&1
else
# We used to set this to NULL, but that causes ‘failed to exec’ messages”
sysctl -w kernel.modprobe=”/bin/true” >/dev/null 2>&1
fi
fi
touch /dev/.in_sysinit >/dev/null 2>&1
# Set default affinity
if [ -x /bin/taskset ]; then
if strstr “$cmdline” default_affinity= ; then
for arg in $cmdline ; do
if [ “${arg##default_affinity=}” != “${arg}” ]; then
/bin/taskset -p ${arg##default_affinity=} 1
/bin/taskset -p ${arg##default_affinity=} $$
fi
done
fi
fi
nashpid=$(pidof nash 2>/dev/null)
[ -n “$nashpid” ] && kill $nashpid >/dev/null 2>&1
unset nashpid
apply_sysctl
/sbin/start_udev
# Load other user-defined modules
for file in /etc/sysconfig/modules/*.modules ; do
[ -x $file ] && $file
done
# Load modules (for backward compatibility with VARs)
if [ -f /etc/rc.modules ]; then
/etc/rc.modules
fi
mount -n /dev/pts >/dev/null 2>&1
[ -n “$SELINUX_STATE” ] && restorecon -F /dev/pts >/dev/null 2>&1
# Configure kernel parameters
update_boot_stage RCkernelparam
apply_sysctl
# Set the hostname.
update_boot_stage RChostname
action $”Setting hostname ${HOSTNAME}: ” hostname ${HOSTNAME}
[ -n “${NISDOMAIN}” ] && domainname ${NISDOMAIN}
# Sync waiting for storage.
{ rmmod scsi_wait_scan ; modprobe scsi_wait_scan ; rmmod scsi_wait_scan ; } >/dev/null 2>&1
# Device mapper & related initialization
if ! __fgrep “device-mapper” /proc/devices >/dev/null 2>&1 ; then
modprobe dm-mod >/dev/null 2>&1
fi
if [ -f /etc/crypttab ]; then
init_crypto 0
fi
if ! strstr “$cmdline” nompath && [ -f /etc/multipath.conf -a \
-x /sbin/multipath ]; then
modprobe dm-multipath > /dev/null 2>&1
/sbin/multipath -v 0
if [ -x /sbin/kpartx ]; then
action_silent $”Add partition mappings: ” /sbin/dmsetup ls –target multipath –exec “/sbin/kpartx -a -p p”
fi
fi
if ! strstr “$cmdline” nodmraid && [ -x /sbin/dmraid ]; then
modprobe dm-mirror >/dev/null 2>&1
dmraidsets=$(LC_ALL=C /sbin/dmraid -s -c -i)
if [ “$?” = “0” ]; then
for dmname in $dmraidsets; do
if [[ “$dmname” == isw_* ]] && \
! strstr “$cmdline” noiswmd; then
continue
fi
action_silent $”Activate software (ATA)RAID: ” /sbin/dmraid -ay -i –rm_partitions -p “$dmname”
/sbin/kpartx -a -p p “/dev/mapper/$dmname”
done
fi
fi
# Start any MD RAID arrays that haven’t been started yet
[ -r /proc/mdstat -a -r /dev/md/md-device-map ] && action $”Run MD devices: ” /sbin/mdadm -IRs
if [ -x /sbin/lvm ]; then
if [ ! -f /.nolvm ] && ! strstr “$cmdline” nolvm ; then
action $”Setting up Logical Volume Management:” /sbin/lvm vgchange -a ay –sysinit –ignoreskippedcluster
else
echo $”Logical Volume Management disabled at boot.”
fi
fi
if [ -f /etc/crypttab ]; then
init_crypto 0
fi
if [ -f /fastboot ] || strstr “$cmdline” fastboot ; then
fastboot=yes
fi
if [ -f /fsckoptions ]; then
fsckoptions=$(cat /fsckoptions)
fi
if [ -f /forcefsck ] || strstr “$cmdline” forcefsck ; then
fsckoptions=”-f $fsckoptions”
elif [ -f /.autofsck ]; then
[ -f /etc/sysconfig/autofsck ] && . /etc/sysconfig/autofsck
if [ “$AUTOFSCK_DEF_CHECK” = “yes” ]; then
AUTOFSCK_OPT=”$AUTOFSCK_OPT -f”
fi
if [ -n “$AUTOFSCK_SINGLEUSER” ]; then
[ -n “$PLYMOUTH” ] && plymouth –hide-splash
echo
echo $”*** Warning — the system did not shut down cleanly. ”
echo $”*** Dropping you to a shell; the system will continue”
echo $”*** when you leave the shell.”
[ -n “$SELINUX_STATE” ] && echo “0” > /selinux/enforce
start rcS-emergency
[ -n “$SELINUX_STATE” ] && echo “1” > /selinux/enforce
[ -n “$PLYMOUTH” ] && plymouth –show-splash
fi
fsckoptions=”$AUTOFSCK_OPT $fsckoptions”
fi
if [ “$BOOTUP” = “color” ]; then
fsckoptions=”-C $fsckoptions”
else
fsckoptions=”-V $fsckoptions”
fi
READONLY=
if [ -f /etc/sysconfig/readonly-root ]; then
. /etc/sysconfig/readonly-root
fi
if strstr “$cmdline” readonlyroot ; then
READONLY=yes
[ -z “$RW_MOUNT” ] && RW_MOUNT=/var/lib/stateless/writable
[ -z “$STATE_MOUNT” ] && STATE_MOUNT=/var/lib/stateless/state
fi
if strstr “$cmdline” noreadonlyroot ; then
READONLY=no
fi
if [ “$READONLY” = “yes” -o “$TEMPORARY_STATE” = “yes” ]; then
mount_empty() {
if [ -e “$1” ]; then
echo “$1” | cpio -p -vd “$RW_MOUNT” &>/dev/null
mount -n –bind “$RW_MOUNT$1” “$1”
fi
}
mount_dirs() {
if [ -e “$1” ]; then
mkdir -p “$RW_MOUNT$1”
find “$1” -type d -print0 | cpio -p -0vd “$RW_MOUNT” &>/dev/null
mount -n –bind “$RW_MOUNT$1” “$1”
fi
}
mount_files() {
if [ -e “$1” ]; then
cp -a –parents “$1” “$RW_MOUNT”
mount -n –bind “$RW_MOUNT$1” “$1″
fi
}
# Common mount options for scratch space regardless of
# type of backing store
mountopts=
# Scan partitions for local scratch storage
rw_mount_dev=$(blkid -t LABEL=”$RW_LABEL” -l -o device)
# First try to mount scratch storage from /etc/fstab, then any
# partition with the proper label. If either succeeds, be sure
# to wipe the scratch storage clean. If both fail, then mount
# scratch storage via tmpfs.
if mount $mountopts “$RW_MOUNT” > /dev/null 2>&1 ; then
rm -rf “$RW_MOUNT” > /dev/null 2>&1
elif [ x$rw_mount_dev != x ] && mount $rw_mount_dev $mountopts “$RW_MOUNT” > /dev/null 2>&1; then
rm -rf “$RW_MOUNT” > /dev/null 2>&1
else
mount -n -t tmpfs $RW_OPTIONS $mountopts none “$RW_MOUNT”
fi
for file in /etc/rwtab /etc/rwtab.d/* /dev/.initramfs/rwtab ; do
is_ignored_file “$file” && continue
[ -f $file ] && cat $file | while read type path ; do
case “$type” in
empty)
mount_empty $path
;;
files)
mount_files $path
;;
dirs)
mount_dirs $path
;;
*)
;;
esac
[ -n “$SELINUX_STATE” -a -e “$path” ] && restorecon -R “$path”
done
done
# Use any state passed by initramfs
[ -d /dev/.initramfs/state ] && cp -a /dev/.initramfs/state/* $RW_MOUNT
# In theory there should be no more than one network interface active
# this early in the boot process — the one we’re booting from.
# Use the network address to set the hostname of the client. This
# must be done even if we have local storage.
ipaddr=
if [ “$HOSTNAME” = “localhost” -o “$HOSTNAME” = “localhost.localdomain” ]; then
ipaddr=$(ip addr show to 0.0.0.0/0 scope global | awk ‘/[[:space:]]inet / { print gensub(“/.*”,””,”g”,$2) }’)
for ip in $ipaddr ; do
HOSTNAME=
eval $(ipcalc -h $ip 2>/dev/null)
[ -n “$HOSTNAME” ] && { hostname ${HOSTNAME} ; break; }
done
fi
# Clients with read-only root filesystems may be provided with a
# place where they can place minimal amounts of persistent
# state. SSH keys or puppet certificates for example.
#
# Ideally we’ll use puppet to manage the state directory and to
# create the bind mounts. However, until that’s all ready this
# is sufficient to build a working system.
# First try to mount persistent data from /etc/fstab, then any
# partition with the proper label, then fallback to NFS
state_mount_dev=$(blkid -t LABEL=”$STATE_LABEL” -l -o device)
if mount $mountopts $STATE_OPTIONS “$STATE_MOUNT” > /dev/null 2>&1 ; then
/bin/true
elif [ x$state_mount_dev != x ] && mount $state_mount_dev $mountopts “$STATE_MOUNT” > /dev/null 2>&1; then
/bin/true
elif [ ! -z “$CLIENTSTATE” ]; then
# No local storage was found. Make a final attempt to find
# state on an NFS server.
mount -t nfs $CLIENTSTATE/$HOSTNAME $STATE_MOUNT -o rw,nolock
fi
if [ -w “$STATE_MOUNT” ]; then
mount_state() {
if [ -e “$1” ]; then
[ ! -e “$STATE_MOUNT$1” ] && cp -a –parents “$1” “$STATE_MOUNT”
mount -n –bind “$STATE_MOUNT$1” “$1”
fi
}
for file in /etc/statetab /etc/statetab.d/* ; do
is_ignored_file “$file” && continue
[ ! -f “$file” ] && continue
if [ -f “$STATE_MOUNT/$file” ] ; then
mount -n –bind “$STATE_MOUNT/$file” “$file”
fi
for path in $(grep -v “^#” “$file” 2>/dev/null); do
mount_state “$path”
[ -n “$SELINUX_STATE” -a -e “$path” ] && restorecon -R “$path”
done
done
if [ -f “$STATE_MOUNT/files” ] ; then
for path in $(grep -v “^#” “$STATE_MOUNT/files” 2>/dev/null); do
mount_state “$path”
[ -n “$SELINUX_STATE” -a -e “$path” ] && restorecon -R “$path”
done
fi
fi
if mount | grep -q /var/lib/nfs/rpc_pipefs ; then
mount -t rpc_pipefs sunrpc /var/lib/nfs/rpc_pipefs && service rpcidmapd restart
fi
fi
if [[ ” $fsckoptions” != *” -y”* ]]; then
fsckoptions=”-a $fsckoptions”
fi
_RUN_QUOTACHECK=0
if [ -f /forcequotacheck ] || strstr “$cmdline” forcequotacheck ; then
_RUN_QUOTACHECK=1
fi
if [ -z “$fastboot” -a “$READONLY” != “yes” ]; then
STRING=$”Checking filesystems”
echo $STRING
fsck -T -t noopts=_netdev -A $fsckoptions
rc=$?
if [ “$rc” -eq “0” ]; then
success “$STRING”
echo
elif [ “$rc” -eq “1” ]; then
passed “$STRING”
echo
elif [ “$rc” -eq “2” -o “$rc” -eq “3” ]; then
echo $”Unmounting file systems”
umount -a
mount -n -o remount,ro /
echo $”Automatic reboot in progress.”
reboot -f
fi
# A return of 4 or higher means there were serious problems.
if [ $rc -gt 1 ]; then
[ -n “$PLYMOUTH” ] && plymouth –hide-splash
failure “$STRING”
echo
echo
echo $”*** An error occurred during the file system check.”
echo $”*** Dropping you to a shell; the system will reboot”
echo $”*** when you leave the shell.”
str=$”(Repair filesystem)”
PS1=”$str \# # “; export PS1
[ “$SELINUX_STATE” = “1” ] && disable_selinux
start rcS-emergency
echo $”Unmounting file systems”
umount -a
mount -n -o remount,ro /
echo $”Automatic reboot in progress.”
reboot -f
elif [ “$rc” -eq “1” ]; then
_RUN_QUOTACHECK=1
fi
fi
remount_needed() {
local state oldifs
[ “$READONLY” = “yes” ] && return 1
state=$(LC_ALL=C awk ‘/ \/ / && ($3 !~ /rootfs/) { print $4 }’ /proc/mounts)
oldifs=$IFS
IFS=”,”
for opt in $state ; do
if [ “$opt” = “rw” ]; then
IFS=$oldifs
return 1
fi
done
IFS=$oldifs
return 0
}
# Remount the root filesystem read-write.
update_boot_stage RCmountfs
if remount_needed ; then
action $”Remounting root filesystem in read-write mode: ” mount -n -o remount,rw /
fi
# Clean up SELinux labels
if [ -n “$SELINUX_STATE” ]; then
restorecon /etc/mtab /etc/ld.so.cache /etc/blkid/blkid.tab /etc/resolv.conf >/dev/null 2>&1
fi
# If relabeling, relabel mount points.
if [ -n “$SELINUX_STATE” -a “$READONLY” != “yes” ]; then
if [ -f /.autorelabel ] || strstr “$cmdline” autorelabel ; then
restorecon $(awk ‘!/^#/ && $4 !~ /noauto/ && $2 ~ /^\// { print $2 }’ /etc/fstab) >/dev/null 2>&1
fi
fi
if [ “$READONLY” != “yes” ] ; then
# Clear mtab
(> /etc/mtab) &> /dev/null
# Remove stale backups
rm -f /etc/mtab~ /etc/mtab~~
# Enter mounted filesystems into /etc/mtab
mount -f /
mount -f /proc >/dev/null 2>&1
mount -f /sys >/dev/null 2>&1
mount -f /dev/pts >/dev/null 2>&1
mount -f /dev/shm >/dev/null 2>&1
mount -f /proc/bus/usb >/dev/null 2>&1
fi
# Mount all other filesystems (except for NFS and /proc, which is already
# mounted). Contrary to standard usage,
# filesystems are NOT unmounted in single user mode.
# The ‘no’ applies to all listed filesystem types. See mount(8).
if [ “$READONLY” != “yes” ] ; then
action $”Mounting local filesystems: ” mount -a -t nonfs,nfs4,smbfs,ncpfs,cifs,gfs,gfs2,glusterfs -O no_netdev
else
action $”Mounting local filesystems: ” mount -a -n -t nonfs,nfs4,smbfs,ncpfs,cifs,gfs,gfs2,glusterfs -O no_netdev
fi
# Check to see if a full relabel is needed
if [ -n “$SELINUX_STATE” -a “$READONLY” != “yes” ]; then
if [ -f /.autorelabel ] || strstr “$cmdline” autorelabel ; then
relabel_selinux
fi
else
if [ -d /etc/selinux -a “$READONLY” != “yes” ]; then
[ -f /.autorelabel ] || touch /.autorelabel
fi
fi
# Update quotas if necessary
if [ X”$_RUN_QUOTACHECK” = X1 -a -x /sbin/quotacheck ]; then
action $”Checking local filesystem quotas: ” /sbin/quotacheck -anug
fi
if [ -x /sbin/quotaon ]; then
action $”Enabling local filesystem quotas: ” /sbin/quotaon -aug
fi
# Initialize pseudo-random number generator
if [ -f “/var/lib/random-seed” ]; then
cat /var/lib/random-seed > /dev/urandom
else
[ “$READONLY” != “yes” ] && touch /var/lib/random-seed
fi
if [ “$READONLY” != “yes” ]; then
chmod 600 /var/lib/random-seed
dd if=/dev/urandom of=/var/lib/random-seed count=1 bs=4096 2>/dev/null
fi
if [ -f /etc/crypttab ]; then
init_crypto 1
fi
# Configure machine if necessary.
if [ -f /.unconfigured ]; then
if [ -x /bin/plymouth ]; then
/bin/plymouth quit
fi
if [ -x /usr/bin/system-config-keyboard ]; then
/usr/bin/system-config-keyboard
fi
if [ -x /usr/bin/passwd ]; then
/usr/bin/passwd root
fi
if [ -x /usr/sbin/system-config-network-tui ]; then
/usr/sbin/system-config-network-tui
fi
if [ -x /usr/sbin/timeconfig ]; then
/usr/sbin/timeconfig
fi
if [ -x /usr/sbin/authconfig-tui ]; then
/usr/sbin/authconfig-tui –nostart
fi
if [ -x /usr/sbin/ntsysv ]; then
/usr/sbin/ntsysv –level 35
fi
# Reread in network configuration data.
if [ -f /etc/sysconfig/network ]; then
. /etc/sysconfig/network
# Reset the hostname.
action $”Resetting hostname ${HOSTNAME}: ” hostname ${HOSTNAME}
fi
rm -f /.unconfigured
fi
# Clean out /.
rm -f /fastboot /fsckoptions /forcefsck /.autofsck /forcequotacheck /halt \
/poweroff /.suspended &> /dev/null
# Do we need (w|u)tmpx files? We don’t set them up, but the sysadmin might…
_NEED_XFILES=
[ -f /var/run/utmpx -o -f /var/log/wtmpx ] && _NEED_XFILES=1
# Clean up /var.
rm -rf /var/lock/cvs/* /var/run/screen/*
find /var/lock /var/run ! -type d -exec rm -f {} \;
rm -f /var/lib/rpm/__db* &> /dev/null
rm -f /var/gdm/.gdmfifo &> /dev/null
[ “$PROMPT” != no ] && plymouth watch-keystroke –command “touch /var/run/confirm” –keys=Ii &
# Clean up utmp/wtmp
> /var/run/utmp
touch /var/log/wtmp
chgrp utmp /var/run/utmp /var/log/wtmp
chmod 0664 /var/run/utmp /var/log/wtmp
if [ -n “$_NEED_XFILES” ]; then
> /var/run/utmpx
touch /var/log/wtmpx
chgrp utmp /var/run/utmpx /var/log/wtmpx
chmod 0664 /var/run/utmpx /var/log/wtmpx
fi
[ -n “$SELINUX_STATE” ] && restorecon /var/run/utmp* /var/log/wtmp* >/dev/null 2>&1
# Clean up various /tmp bits
[ -n “$SELINUX_STATE” ] && restorecon /tmp
rm -f /tmp/.X*-lock /tmp/.lock.* /tmp/.gdm_socket /tmp/.s.PGSQL.*
rm -rf /tmp/.X*-unix /tmp/.ICE-unix /tmp/.font-unix /tmp/hsperfdata_* \
/tmp/kde-* /tmp/ksocket-* /tmp/mc-* /tmp/mcop-* /tmp/orbit-* \
/tmp/scrollkeeper-* /tmp/ssh-* \
/dev/.in_sysinit
# Make ICE directory
mkdir -m 1777 -p /tmp/.ICE-unix >/dev/null 2>&1
chown root:root /tmp/.ICE-unix
[ -n “$SELINUX_STATE” ] && restorecon /tmp/.ICE-unix >/dev/null 2>&1
# Start up swapping.
update_boot_stage RCswap
action $”Enabling /etc/fstab swaps: ” swapon -a -e
if [ “$AUTOSWAP” = “yes” ]; then
curswap=$(awk ‘/^\/dev/ { print $1 }’ /proc/swaps | while read x; do get_numeric_dev dec $x ; echo -n ” “; done)
swappartitions=$(blkid -t TYPE=swap -o device)
if [ x”$swappartitions” != x ]; then
for partition in $swappartitions ; do
[ ! -e $partition ] && continue
majmin=$(get_numeric_dev dec $partition)
echo $curswap | grep -qw “$majmin” || action $”Enabling local swap partitions: ” swapon $partition
done
fi
fi
# Set up binfmt_misc
/bin/mount -t binfmt_misc none /proc/sys/fs/binfmt_misc > /dev/null 2>&1
# Boot time profiles. Yes, this should be somewhere else.
if [ -x /usr/sbin/system-config-network-cmd ]; then
if strstr “$cmdline” netprofile= ; then
for arg in $cmdline ; do
if [ “${arg##netprofile=}” != “${arg}” ]; then
/usr/sbin/system-config-network-cmd –profile ${arg##netprofile=}
fi
done
fi
fi
# Now that we have all of our basic modules loaded and the kernel going,
# let’s dump the syslog ring somewhere so we can find it later
[ -f /var/log/dmesg ] && mv -f /var/log/dmesg /var/log/dmesg.old
dmesg -s 131072 > /var/log/dmesg
# create the crash indicator flag to warn on crashes, offer fsck with timeout
touch /.autofsck &> /dev/null
[ “$PROMPT” != no ] && plymouth –ignore-keystroke=Ii
if strstr “$cmdline” confirm ; then
touch /var/run/confirm
fi
# Let rhgb know that we’re leaving rc.sysinit
if [ -x /bin/plymouth ]; then
/bin/plymouth –sysinit
fi
これか!?
# Clean up various /tmp bits
[ -n "$SELINUX_STATE" ] && restorecon /tmp
rm -f /tmp/.X*-lock /tmp/.lock.* /tmp/.gdm_socket /tmp/.s.PGSQL.*
rm -rf /tmp/.X*-unix /tmp/.ICE-unix /tmp/.font-unix /tmp/hsperfdata_* \
       /tmp/kde-* /tmp/ksocket-* /tmp/mc-* /tmp/mcop-* /tmp/orbit-*  \
       /tmp/scrollkeeper-*  /tmp/ssh-* \
       /dev/.in_sysinit
こりゃシェルだなー、すげええええええええええええええええ