iptablesの無効化

iptablesとは一般的なLinuxに搭載されているパケットフィルタ
パケットとは、ネットワーク上を流れるデータの事。パケットフィルタとは、このパケットを選別して、通すものと通さないものを分けるということを意味
iptablesは商用製品に匹敵する、とても高機能かつ高性能なパケットフィルタ
サーバ自身を守ることはもちろん、パケット転送などにも対応しているため、ネットワークアダプタを二つ搭載したマシンの上で動作させパケット転送制御を行うことで、ネットワーク型ファイアウォールとしても使用可能

現在設定されているポリシー
Chain INPUT (policy ACCEPT)
target prot opt source destination
ACCEPT all — anywhere anywhere ctstate RELATED,EST ABLISHED
ACCEPT all — anywhere anywhere
INPUT_direct all — anywhere anywhere
INPUT_ZONES_SOURCE all — anywhere anywhere
INPUT_ZONES all — anywhere anywhere
DROP all — anywhere anywhere ctstate INVALID
REJECT all — anywhere anywhere reject-with icmp-ho st-prohibited

Chain FORWARD (policy ACCEPT)
target prot opt source destination
ACCEPT all — anywhere anywhere ctstate RELATED,EST ABLISHED
ACCEPT all — anywhere anywhere
FORWARD_direct all — anywhere anywhere
FORWARD_IN_ZONES_SOURCE all — anywhere anywhere
FORWARD_IN_ZONES all — anywhere anywhere
FORWARD_OUT_ZONES_SOURCE all — anywhere anywhere
FORWARD_OUT_ZONES all — anywhere anywhere
DROP all — anywhere anywhere ctstate INVALID
REJECT all — anywhere anywhere reject-with icmp-ho st-prohibited

Chain OUTPUT (policy ACCEPT)
target prot opt source destination
OUTPUT_direct all — anywhere anywhere

Chain FORWARD_IN_ZONES (1 references)
target prot opt source destination
FWDI_public all — anywhere anywhere [goto]

Chain FORWARD_IN_ZONES_SOURCE (1 references)
target prot opt source destination

Chain FORWARD_OUT_ZONES (1 references)
target prot opt source destination
FWDO_public all — anywhere anywhere [goto]

Chain FORWARD_OUT_ZONES_SOURCE (1 references)
target prot opt source destination

Chain FORWARD_direct (1 references)
target prot opt source destination

Chain FWDI_public (2 references)
target prot opt source destination
FWDI_public_log all — anywhere anywhere
FWDI_public_deny all — anywhere anywhere
FWDI_public_allow all — anywhere anywhere
ACCEPT icmp — anywhere anywhere

Chain FWDI_public_allow (1 references)
target prot opt source destination

Chain FWDI_public_deny (1 references)
target prot opt source destination

Chain FWDI_public_log (1 references)
target prot opt source destination

Chain FWDO_public (2 references)
target prot opt source destination
FWDO_public_log all — anywhere anywhere
FWDO_public_deny all — anywhere anywhere
FWDO_public_allow all — anywhere anywhere

Chain FWDO_public_allow (1 references)
target prot opt source destination

Chain FWDO_public_deny (1 references)
target prot opt source destination

Chain FWDO_public_log (1 references)
target prot opt source destination

Chain INPUT_ZONES (1 references)
target prot opt source destination
IN_public all — anywhere anywhere [goto]

Chain INPUT_ZONES_SOURCE (1 references)
target prot opt source destination

Chain INPUT_direct (1 references)
target prot opt source destination

Chain IN_public (2 references)
target prot opt source destination
IN_public_log all — anywhere anywhere
IN_public_deny all — anywhere anywhere
IN_public_allow all — anywhere anywhere
ACCEPT icmp — anywhere anywhere

Chain IN_public_allow (1 references)
target prot opt source destination
ACCEPT tcp — anywhere anywhere tcp dpt:ssh ctstate NEW

Chain IN_public_deny (1 references)
target prot opt source destination

Chain IN_public_log (1 references)
target prot opt source destination

Chain OUTPUT_direct (1 references)
target prot opt source destination

chain forward, chain inputなどがある

Chain INPUT (policy DROP)
Chain FORWARD (policy DROP)
Chain OUTPUT (policy ACCEPT)

ルーティングして、input, forward, outputしてアプリケーションに接続している。
あああああああああ、これやべーやつだ。

selinuxの無効化

selinuxとは
セキュリティ関連のLinuxカーネル制御機能。Linuxディストリビューションではなく、強制アクセス制御機能を加えるモジュール。
Security-Enhanced-Linuxの略称
SELinuxを利用すると細かいアクセス制御が可能になる。例えば、サービス毎に最小限の権限を与え管理することなどが可能になる
root権限ですら制限をかけることも可能

なるほど、awsのAMIみたいなもんか。

[vagrant@localhost ~]$ getenforce
Enforcing

詳細を見てみる
[root@localhost ~]# sestatus
SELinux status: enabled
SELinuxfs mount: /sys/fs/selinux
SELinux root directory: /etc/selinux
Loaded policy name: targeted
Current mode: enforcing
Mode from config file: enforcing
Policy MLS status: enabled
Policy deny_unknown status: allowed
Max kernel policy version: 31

statusがenabledになってますね。これを変更していきます。

vi /etc/sysconfig/selinux

SELINUX=disabled

[root@localhost ~]# getenforce
Disabled

rsync

rsync は、UNIXシステムにおいて、差分符号化を使ってデータ転送量を最小化し、遠隔地間のファイルやディレクトリの同期を行う

digコマンド

-「dig」コマンドはDNSサーバに問い合わせることで、ドメイン名からIPアドレスを調べるコマンド
– nslookupコマンドやhostsコマンドとよく似た機能

[vagrant@localhost app]$ dig www.google.co.jp
-bash: dig: コマンドが見つかりません

あれ? もう死にそうだー

centosの時刻を合わせる

[vagrant@localhost python]$ date
2018年 7月 28日 土曜日 22:37:15 JST

そんなあほな。
[vagrant@localhost python]$ sudo yum -y install ntp
[vagrant@localhost python]$ sudo ntpdate ntp.nict.jp
29 Jul 07:45:47 ntpdate[4594]: step time server 133.243.238.244 offset 32583.641597 sec
[vagrant@localhost python]$ date
2018年 7月 29日 日曜日 07:46:03 JST

.bashrc

bashrcとは

bashは「シェルの種類のひとつで、shをパワーアップしたシェル」。
(ログインした後に画面上から)bashを起動したときに読み込まれる設定ファイル
シェルはsh、bash、csh、ksh、tcsh、zshなど

vi ~/.bashrc

# .bashrc

# Source global definitions
if [ -f /etc/bashrc ]; then
        . /etc/bashrc
fi

# User specific aliases and functions

ログイン時に「.bashrc」は読み込まれません。
ログイン時には「.bash_profile」というファイルが読み込まれます。

 .bash_profile

# Get the aliases and functions
if [ -f ~/.bashrc ]; then
        . ~/.bashrc
fi

# User specific environment and startup programs

PATH=$PATH:$HOME/bin

export PATH
source ~/.bashrc

source ~/.bashrcとすると、.bashrcを読み込む。もちろん、source ~/.bash_profileで、bash_profileを読み込む

centosでgrepする

まず、vagrantにログインして、適当にディレクトリを作ります。

[vagrant@localhost ~]$ mkdir grep
[vagrant@localhost ~]$ cd grep
[vagrant@localhost grep]$ git version
git version 2.2.1

git hubから適当に機械学習のコードをgit cloneしてきます。

[vagrant@localhost grep]$ git clone https://github.com/nyk510/machine-learning.git
Cloning into 'machine-learning'...
remote: Counting objects: 112, done.
Receiving objects: 100% (112/112), 2.49 MiB | 673.00 KiB/s, done.
remote: Total 112 (delta 0), reused 0 (delta 0), pack-reused 112
Resolving deltas: 100% (55/55), done.
[vagrant@localhost grep]$ ls
machine-learning
[vagrant@localhost machine-learning]$ ls
black_scholes.py  figures  gibbs_sampling.py  prml  readme.md  requirements.txt

では、適当にblack_scholes.pyでSIGMAが使われている箇所を抜き出しています。

[vagrant@localhost machine-learning]$ grep SIGMA black_scholes.py
SIGMA = 0.30
d = -(np.math.log(S_0 / K) + ((r - SIGMA * SIGMA / 2.) * T)) / (SIGMA * np.power(T, 0.5))
V_c = S_0 * stats.norm.cdf(-d + SIGMA * np.power(T, .5)) - K * np.exp(-r * T) * stats.norm.cdf(-d)
V_p = K * np.exp(-r * (T - t)) * stats.norm.cdf(d) - S_0 * stats.norm.cdf(d - SIGMA * np.power(T - t, 0.5))
    s_j_t = S_0 * np.exp((r - SIGMA * SIGMA / 2.) * T + SIGMA * rand_n * np.power(T, 0.5))
    s_j_t = S_0 * np.exp((r - SIGMA * SIGMA / 2.) * T + SIGMA * rand_n * np.power(T, 0.5))

行番号をつけたい時は grepに -nをつける

[vagrant@localhost machine-learning]$ grep -n SIGMA black_scholes.py
18:SIGMA = 0.30
22:d = -(np.math.log(S_0 / K) + ((r - SIGMA * SIGMA / 2.) * T)) / (SIGMA * np.po      wer(T, 0.5))
23:V_c = S_0 * stats.norm.cdf(-d + SIGMA * np.power(T, .5)) - K * np.exp(-r * T)       * stats.norm.cdf(-d)
24:V_p = K * np.exp(-r * (T - t)) * stats.norm.cdf(d) - S_0 * stats.norm.cdf(d -       SIGMA * np.power(T - t, 0.5))
29:    s_j_t = S_0 * np.exp((r - SIGMA * SIGMA / 2.) * T + SIGMA * rand_n * np.p      ower(T, 0.5))
35:    s_j_t = S_0 * np.exp((r - SIGMA * SIGMA / 2.) * T + SIGMA * rand_n * np.p      ower(T, 0.5))

ファイル名のみ

[vagrant@localhost machine-learning]$ grep -l SIGMA *
black_scholes.py
grep: figures: ディレクトリです
grep: prml: ディレクトリです

ファイル名と行番号は”-rn”

[vagrant@localhost machine-learning]$ grep -rn import *.py
black_scholes.py:9:import numpy as np
black_scholes.py:10:import matplotlib.pyplot as plt
black_scholes.py:11:import scipy.stats as stats
gibbs_sampling.py:7:import numpy as np
gibbs_sampling.py:8:import matplotlib.pyplot as plt
gibbs_sampling.py:9:import scipy.stats as stats

あーこれこれ、やりたかったの。

vagrantにxpdfを入れる

yumコマンドで入れます。
[pre]
yum install xpdf
[/pre]

依存性関連をインストールしました:
desktop-file-utils.x86_64 0:0.15-9.el6
lcms-libs.x86_64 0:1.19-1.el6
libXmu.x86_64 0:1.1.1-2.el6
libXp.x86_64 0:1.0.2-2.1.el6
libpaper.x86_64 0:1.1.23-6.1.el6
openjpeg-libs.x86_64 0:1.3-16.el6_8
openmotif.x86_64 0:2.3.3-9.el6
poppler.x86_64 0:0.12.4-12.el6_9
poppler-data.noarch 0:0.4.0-1.el6
poppler-utils.x86_64 0:0.12.4-12.el6_9
urw-fonts.noarch 0:2.4-11.el6
xdg-utils.noarch 0:1.0.2-17.20091016cvs.el6
xorg-x11-fonts-ISO8859-1-100dpi.noarch 0:7.2-11.el6
xorg-x11-fonts-ISO8859-1-75dpi.noarch 0:7.2-11.el6

完了しました!

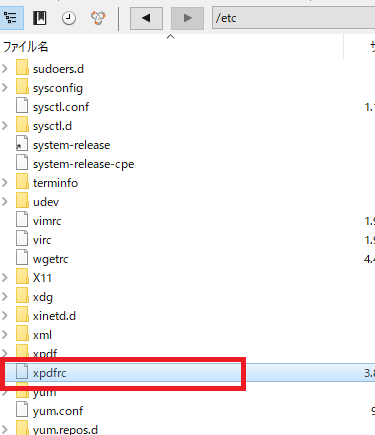
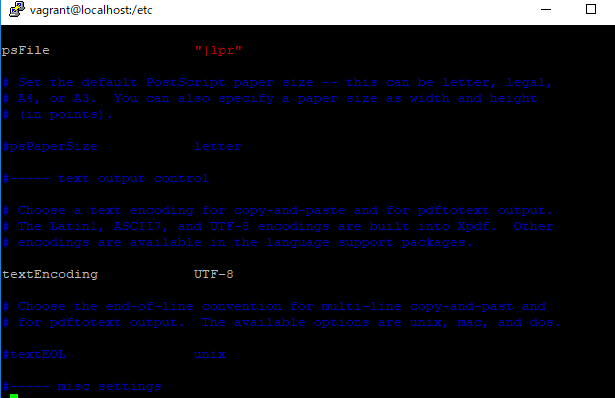
etcのディレクトリの xpdfrcを編集します。

# Choose a text encoding for copy-and-paste and for pdftotext output.
# The Latin1, ASCII7, and UTF-8 encodings are built into Xpdf. Other
# encodings are available in the language support packages.

textEncoding UTF-8

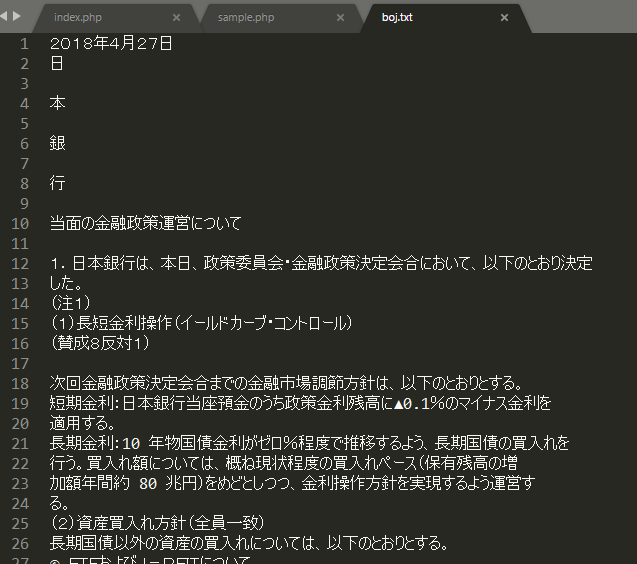
コマンドラインから、pdftotext origin.pdf create.txt でtxtファイルを作成する。

[vagrant@localhost translator]$ pdftotext boj.pdf boj.txt

うおおおおおおおおおおおおおおおおおお
テキストファイルになってる!!!!!!!!!!!
ヘッダーの「日本銀行」とフッターの「以上」が改行されているが、他は問題なさそう。すげー

xpdfをazureのvmに入れられるのかわからんが、まずはvagrantで構築していきましょう。
pdftotextはcrontabでやるにしても、コマンドラインではなく、phpファイルから実行できるんだろうか?

cronでgunzipを実行する

crontabでgunzipと書くだけです。

20 * * * * root cd /home/vagrant/cookie/cron; gunzip GeoLite2-Country.mmdb.gz

ほお~

sudo cat /var/log/cron
Apr 26 22:20:02 localhost CROND[17108]: (root) CMD (cd /home/vagrant/cookie/cron; gunzip GeoLite2-Country.mmdb.gz)

無償版は毎月3日に更新されるそう(真偽は不明です)なので、日本との時差を考慮して、毎月5日の1時15分にwgetして、1時20分にgunzipするよう設定します。

15 1 5 * * root cd /home/vagrant/cookie/cron; /usr/bin/wget "http://geolite.maxmind.com/download/geoip/database/GeoLite2-Country.mmdb.gz"
15 1 5 * * root cd /home/vagrant/cookie/cron; /usr/bin/wget "http://geolite.maxmind.com/download/geoip/database/GeoLite2-City.mmdb.gz"
20 1 5 * * root cd /home/vagrant/cookie/cron; gunzip GeoLite2-Country.mmdb.gz
20 1 5 * * root cd /home/vagrant/cookie/cron; gunzip GeoLite2-City.mmdb.gz

geolite側はこれでOK
次はmongodbに入れる前に、phpでipから、continent, country, cityを取得して配列にpushするところをやりたいと思います。

cronでwgetを実行する

wget:ノンインタラクティブなダウンローダー

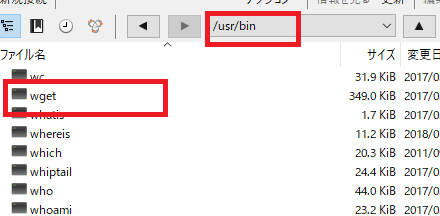
wgetがどこにあるか確認します。

/usr/bin/wget

bin:Binary codeのこと、実行可能プログラム置き場
/bin:FHSによって定められたシングルユーザを含めたどのユーザでも使えるコマンド
/usr/bin:ユーザーが一般的に使用するコマンド

続いて、crontabを編集します。

sudo vi /etc/crontab

任意のディレクトリ(ここでは/home/vagrant/cookie/cron)に、wgetでdownloadしたいとすると、まず、cdで移動する必要があります。そのため、以下のように書きます。
root cd で移動して、/usr/bin/wgetで、”http://hogehoge”をダウンロード
※ここでは、テスト用に毎時55分にwgetする

55 * * * * root cd /home/vagrant/cookie/cron; /usr/bin/wget "http://geolite.maxmind.com/download/geoip/database/GeoLite2-Country.mmdb.gz"
/etc/rc.d/init.d/crond start

編集後、crond start
/etc/rc.d/init.d/crond start

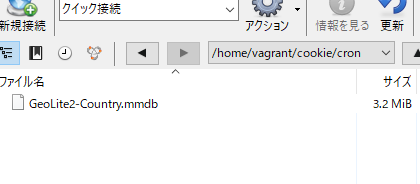
結果
->取れてる!!!

sudo cat /var/log/cron でログも確認

Apr 26 21:55:01 localhost CROND[17001]: (root) CMD (cd /home/vagrant/cookie/cron; /usr/bin/wget "http://geolite.maxmind.com/download/geoip/database/GeoLite2-Country.mmdb.gz")

OK牧場!