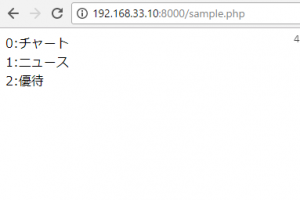
文字列を分割
<script>
	str = "チャート,ニュース,優待";
	array = str.split(",");
	for(var i in array){
		document.write(i + ":"+ array[i] + " <br>");
	}
</script>
ソフトウェアエンジニアの技術ブログ:Software engineer tech blog
随机应变 ABCD: Always Be Coding and … : хороший
文字列を分割
<script>
str = "チャート,ニュース,優待";
array = str.split(",");
for(var i in array){
document.write(i + ":"+ array[i] + " <br>");
}
</script>

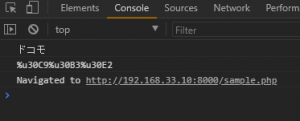
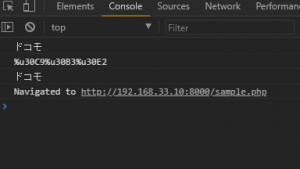
<script>
var career = 'ドコモ';
console.log(career);
var result = escape(career);
console.log(result);
</script>
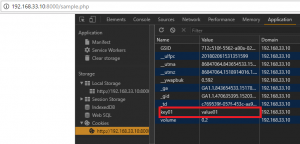
cookieをsetする
<script>
document.cookie ="key01=value01;";
</script>
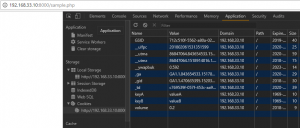
複数セット
<script>
document.cookie ="keyA=valueA;";
document.cookie ="keyB=valueB;";
</script>
<script>
var cookieString = document.cookie;
function getCookie(key){
var cookieString = document.cookie;
var cookieArray = cookiString.split(";");
for (var i=0; i<cookieKeyArray.length; i++){
var targetCookie = cookieKeyArray[i];
targetCookie = targetCookie.replace(/^\s+|\s+$/g, "");
var valueIndex = targetCookie.indexOf("=");
if(targetCookie.substring(0, valueIndex) == key){
returnn unescape(targetCookie.slice(valueIndex + 1));
}
}
return "";
}
</script>
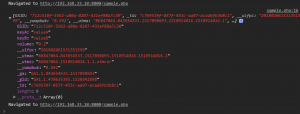
cookieを取得して配列にする
<script>
var str = document.cookie;
function getCookieArray(){
var arr = new Array();
if(document.cookie != ''){
var tmp = document.cookie.split('; ');
for(var i=0; i<tmp.length; i++){
var data = tmp[i].split('=');
arr[data[0]] = decodeURIComponent(data[1]);
}
}
return arr;
}
console.log(getCookieArray());
</script>
わかったような、わかってないような。
passの指定
document.cookie = 'data=123; path=/hoge/';
<script>
var expire = new Date();
expire.setTime(expire.getTime() + 1000 * 3600 * 24);
document.cookie = 'data=123; expires=' + expire.toUTCString();
</script>
locationオブジェクトのhostプロパティは、現在ページURLのホスト情報(ホスト名とポート番号)を参照
http://192.168.33.10:8000で、
location.hostnameは「192.168.33.10」
location.hostは「192.168.33.10:8000」
location.portは「8000」
location.hostnameで動かないな、と思っていたら、location.hostでしたね。
lengthをもっている配列ではないオブジェクトのforEach
Array.prototype.forEach.call(document.querySelectorAll('span'),function(node){
	console.log(node);
});
Array.prototype.forEach()
与えられた関数を、配列の各要素に対して一度ずつ実行します。
function logArrayElement(element, index, array){
	console.log("a[" + index + "] = " + element);
}

[2, 5, 9].forEach(logArrayElements);
google.maps.LatLng
LatLngクラスは位置座標のインスタンスを作成するためのクラス。
var latLng = new google.maps.LatLng(35.71, 139.8107, false)
google.maps.Marker
マーカー(アイコン)
var marker = new google.maps.Marker({
	map: _map,
	position: new google.maps.LatLng(35.693235, 139.757864),
	animation: google.maps.Animation.DROP
});
parseFloat
引数として与えられた文字列を解析して浮動小数点数を返す。
InfoWindow.setContent()はInfoWindowクラスのメソッド
infoWindowはそのままですが、情報ウィンドウ
var infoWindow = new google.maps.InfoWindow({
	position: new google.maps.LatLng( 35.708194, 139.808565 ) ,
	content: "SYNCER" ,
});

infoWindow.open(map);

infoWindow.setContent("Hello!!");
open: 新しい副ブラウザウィンドウを生成し、参照されているリソースをロード
var win = window.open(url, name)
失敗した場合、var winはnull
var win;
var features = "menubar=yes,location=yes,resizable=yes,scrollbars=yes,status=yes";
{
  win = window.open("http://www.cnn.com/", "cnn", features);
}
XMLHttpRequestはサーバーに対してHTTPリクエストを発行するオブジェクト。ブラウザを更新しない。
firefox, operaの場合は、単にXMLHttpRequestクラスのオブジェクトを作るだけだが、IE6はActiveXObjectとして作成しなければならない。
ActiveXObject :
オートメーション オブジェクトへの参照を有効にして返します。
newObj = new ActiveXObject(servername.typename[, location])
ActiveXのXMLHTTPのバージョン: Msxml2.XMLHTTP, Microsoft.XMLHTTP
new ActiveXObject(‘Msxml2.XMLHTTP’);
new ActiveXObject(‘Microsoft.XMLHTTP’);
「readyState」プロパティはサーバからデータを受信するたびに値の更新が行われます。よってこの値を監視することでデータの受信が完了したかどうかを判別できます。
「readyState」プロパティの値が変化すると「onreadystatechange」イベントが発生します。そこで「onreadystatechange」イベント発生する度にチェックする関数を呼び出し、データの受信が完了していたらデータを表示する。
function checkStatus(){
if (xmlHttp.readyState == 4 && xmlHttp.status == 200){
alert(xmlHttp.responseText);
}
}
httpRequest = false;
if(window.XMLHttpRequest){
	httpRequest = new XMLHttpReqeust();
	httpRequest.overrideMimeType('text/xml');
} else if(window.ActiveXObject){
	try {
		httpRequest = new ActiveXObject('Msxml2.XMLHTTP');
	} catch(e){
		httpRequest = new ActiveXObject('Microsoft.XMLHTTP');
	}
}

function request(page){
	if(page == "") return;
	httpRequest.abort();
	httpRequest.open('GET', 'http//webos-goodies.jp/archives/' + page+ '.html', true);
	httpRequest.onreadystatechange = function(){
		if(httpRequest.readyState == 4){
			if(httpRequest.status == 200){
				document.getElementById('page_text').value = httpRequest.responseText;
			}
		}
	}
	httpRequest.send(null);
}
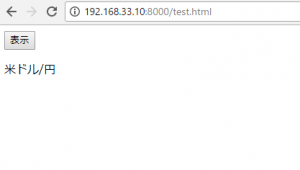
xmlを取得する
<test>
	<sample>米ドル/円</sample>
	<sample>ユーロ円</sample>
	<sample>豪ドル/円</sample>
</test>
<form>
	<input type="button" name="submit" value="表示" id=button>
</form>
<div id="result"></div>

<script>
function createXMLHttpRequest() {
  if (window.XMLHttpRequest) {
    return new XMLHttpRequest()
  } else if (window.ActiveXObject) {
    try {
      return new ActiveXObject("Msxml2.XMLHTTP")
    } catch (e) {
      try {
        new ActiveXObject("Microsoft.XMLHTTP")
      } catch (e2) {
        return null
      }
    }
  } else {
    return null
  }
}

function send(){
		var url = "sample.xml";
		var request = createXMLHttpRequest();
		request.open("GET", url, true);
		request.onreadystatechange = function(){
			if(request.readyState == 4 && request.status == 200){
				var result = document.getElementById("result");
      			var xml = request.responseXML;
      			var nodes = xml.getElementsByTagName("sample");
      			var text = nodes[0].firstChild.nodeValue;
      			result.innerHTML =text;
			}
		}
		request.send("");

}
window.onload = function(){
	document.getElementById("button").onclick = send;
}
</script>
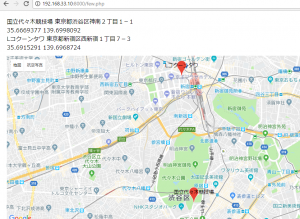
丹下健三でもみてみましょう。
まず、デフォルトのROADMAP
function initMap(){
      var position = {lat: <?php echo $lat_a; ?>, lng: <?php echo $lng_a; ?>};
  		map = new google.maps.Map(document.getElementById('map'),{
  			center: position,
  			zoom: 14,
        // mapTypeId: 'terrain'
  		});
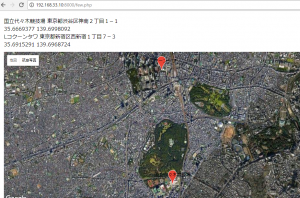
続いて、satellite
大文字だと表示されません。
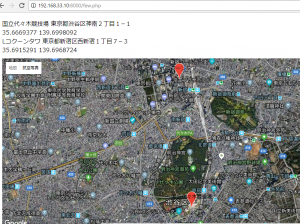
次は、hybrid
最後に、terrain
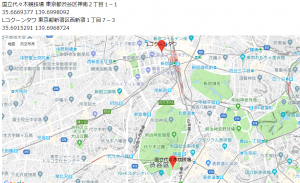
結論は、生で見よう。
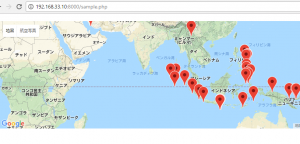
bodyにscriptを追加。
var script = document.createElement('script');
script.src = 'http://example.com/hoge.js';
document.body.appendChild(script);
window.はdomを収める
mapTypeId: ‘terrain’ 地形情報を使った地図
ROADMAP 道路や建物
SATELITE 衛星写真
HyBRID ROADMAPとSATELITE
TERRAIN 地形情報
デフォルトはROADMAP
<!DOCTYPE html>
<html>
<head>
<title>Simple Map</title>
<meta name="viewport" content="initial-scale=1.0">
<meta charset="utf-8">
<style>
#map {
height: 50%;
margin-top: 10px;
}
html, body {
height: 100%;
margin: 10px;
padding: 0;
}
</style>
</head>
<body>
<div id="map"></div>
<script>
var map;
function initMap(){
map = new google.maps.Map(document.getElementById('map'),{
zoom: 2,
center: new google.maps.LatLng(2.8, -187.3),
mapTypeId: 'terrain'
});
var script = document.createElement('script');
script.src = 'https://developers.google.com/maps/documentation/javascript/examples/json/earthquake_GeoJSONP.js';
document.getElementsByTagName('head')[0].appendChild(script);
}
window.eqfeed_callback = function(results) {
for (var i = 0; i < results.features.length; i++) {
var coords = results.features[i].geometry.coordinates;
var latLng = new google.maps.LatLng(coords[1],coords[0]);
var marker = new google.maps.Marker({
position: latLng,
map: map
});
}
}
</script>
<script async defer
src = "https:maps.googleapis.com/maps/api/js?key=notwatchk&callback=initMap">
</script>
</body>
</html>
