おおまかな流れです。
1. データベース設計(Excel、ER図など)
2. MySQLでデータベースを作成(create database ${database name})
3. .envファイルの編集
4. migrationファイルの作成(php artisan make:migration)
5. エディターでyyyy_mm_dd_hhmmss_{table name}_table.phpの編集
5-1. 作成するカラムを書く
5-2. 必要に応じてカラム修飾子をつける
5-3. 必要に応じてインデックスをカラムに貼る
6. migrateの実行(php artisan migrate)
さあやってごらん。

えー そういわれても。。。
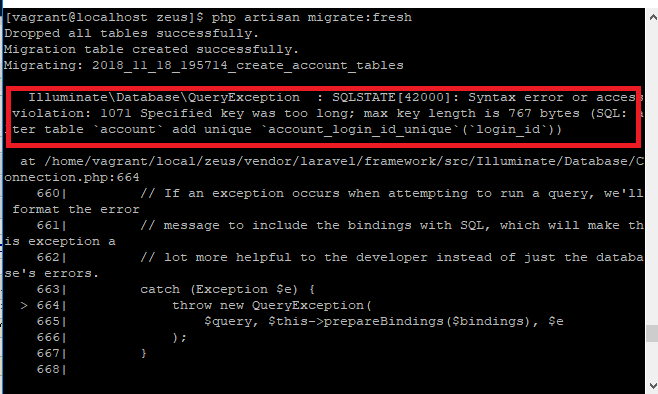
ということで、1.データベース設計、2.Mysqlのデータベース作成、3. .envファイルの編集はできている前提で、4以降のmigrationファイルの作成から、5.カラムの追加、6.migrationの実行まで細かく見ていきたいと思います。
サンプルとして、”exam”というテーブルを作りたいと思います。
sqlだとこうなります。
create table exam(
  id INT AUTO_INCREMENT,
  manu_id INT,
  judge CHAR(1),
  created_by INT,
  created_at DATETIME,
);
Lets go!

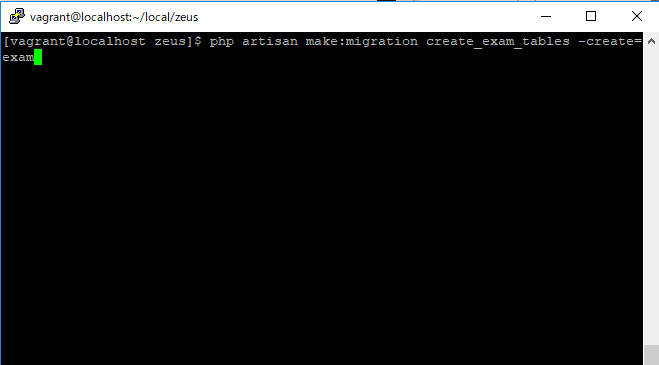
1. migrationファイルの作成
–create=${table name}として、オプションでtable名を指定します。
[vagrant@localhost zeus]$ php artisan make:migration create_exam_tables --create=exam
Created Migration: 2018_11_18_112643_create_exam_tables
2. エディターでyyyy_mm_dd_hhmmss_create_exam_table.phpの編集
/database/migrations のディレクトリ配下にmake:migrateで以下のようなファイルが生成されています。この中で、16行目のSchema::createのfunction(Blueprint $table){}の中にカラムを指定していきます。
use Illuminate\Support\Facades\Schema;
use Illuminate\Database\Schema\Blueprint;
use Illuminate\Database\Migrations\Migration;

class CreateExamTables extends Migration
{
    /**
     * Run the migrations.
     *
     * @return void
     */
    public function up()
    {
        Schema::create('exam', function (Blueprint $table) {
            $table->increments('id');
            $table->timestamps();
        });
    }

    /**
     * Reverse the migrations.
     *
     * @return void
     */
    public function down()
    {
        Schema::dropIfExists('exam');
    }
}
3. 作成するカラムを書く
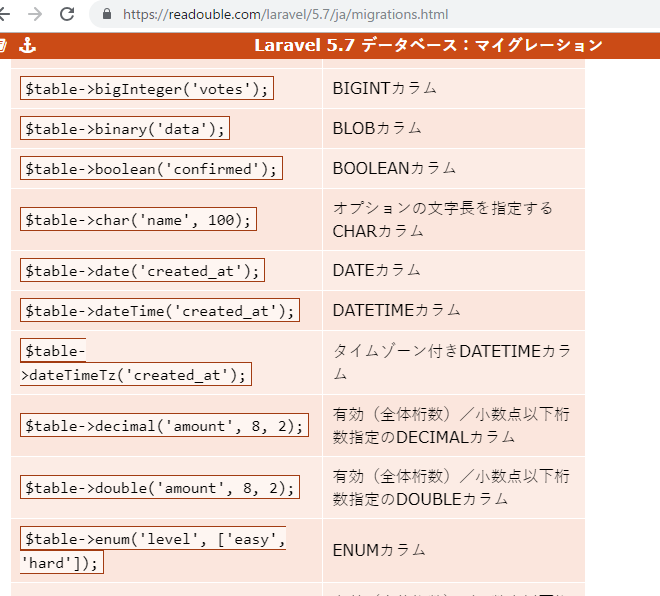
使用するカラムは公式ドキュメントを見ながら編集していきます。
https://readouble.com/laravel/5.7/ja/migrations.html
今回はINT->integer, CHAR->char, DATETIME->timestampsで記載していきます。
public function up()
    {
        Schema::create('exam', function (Blueprint $table) {
            $table->increments('id');
            $table->integer('manu_id');
            $table->char('judge');
            $table->timestamps('');
        });
    }
4. 必要に応じてカラム修飾子をつける
‘id’にAUTO_INCREMENTを付けます。
こちらも、公式ドキュメントを参考にします。
https://readouble.com/laravel/5.7/ja/migrations.html
public function up()
    {
        Schema::create('exam', function (Blueprint $table) {
            $table->increments('id')->autoIncrement();
            $table->integer('manu_id');
            $table->char('judge');
            $table->timestamps('');
        });
    }
5. 必要に応じてインデックスをカラムに貼る
今回はナシ
6. migrateの実行(php artisan migrate)
[vagrant@localhost zeus]$ php artisan migrate
Migrating: 2018_11_18_112643_create_exam_tables
Migrated: 2018_11_18_112643_create_exam_tables
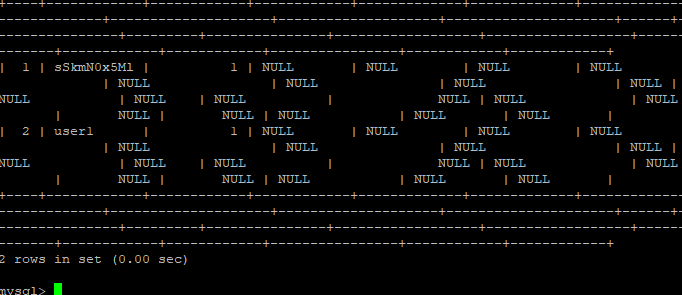
7. MySQLで確認
期待したテーブル、カラムが作成されたかmysqlのdescribe examで確認
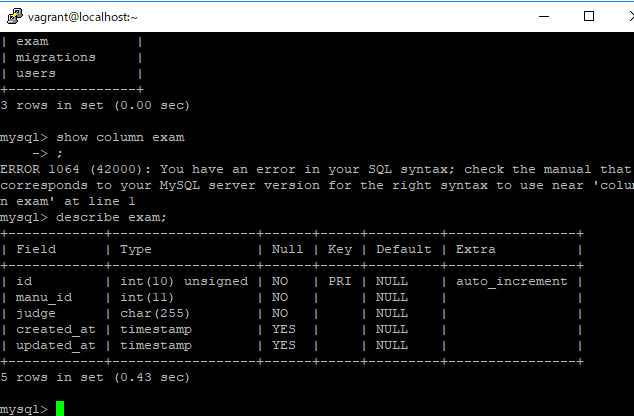
出来たぞー

idはちゃんとprimary key, autincrementになってます。
これを応用して、テーブルを作っていきましょう♪ (私はこれから10個位テーブルを作ります)