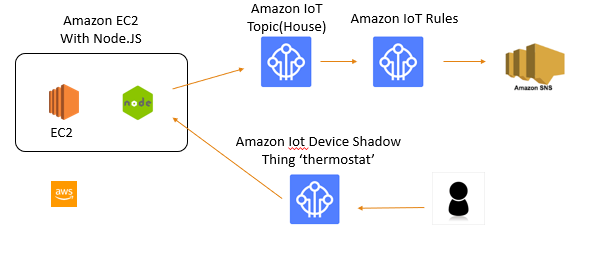
概念図
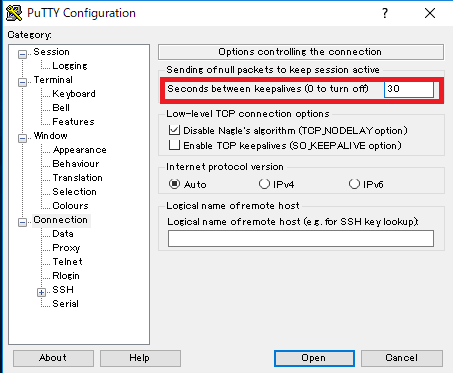
putty
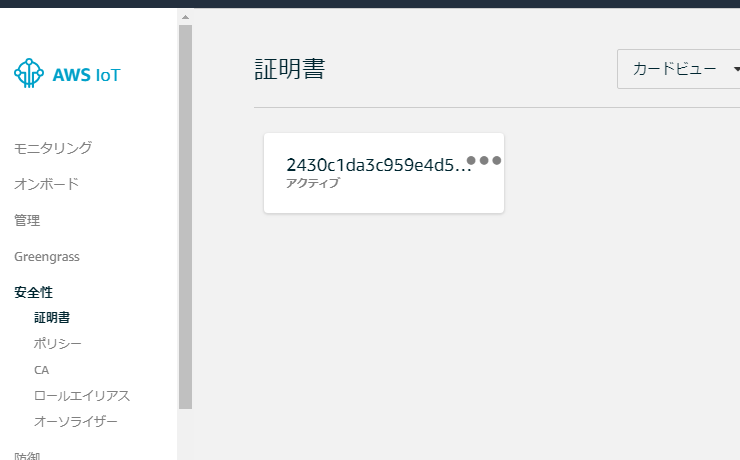
console
aws iot create-keys-and-certificate --set-as-active \
--certificate-pem-outfile certs/certificate.pem.crt \
--public-key-outfile certs/public.pem.key \
--private-key-outfile certs/private.pem.key \
--region us-west-2
ソフトウェアエンジニアの技術ブログ:Software engineer tech blog
随机应变 ABCD: Always Be Coding and … : хороший

概念図
putty
console
aws iot create-keys-and-certificate --set-as-active \ --certificate-pem-outfile certs/certificate.pem.crt \ --public-key-outfile certs/public.pem.key \ --private-key-outfile certs/private.pem.key \ --region us-west-2
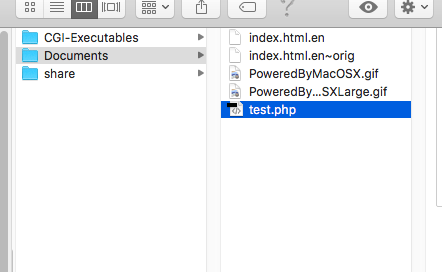
/Library/WebServer/Documents/ がlocalのルートになる。
sudo vi /private/etc/apache2/httpd.conf で、
#LoadModule php* のコメントを削除し、apache再起動で、phpが動くようになる。
<?php
$params = array(
    'apiKey' => 'API key',
    'projectId[]' => 'project id',
    'statusId' => array(1 => 1, 2 => 2, 3 => 3, 4 => 4),
    'sort' => 'updated',
    'count' => 100,
);
$url = 'https://{$hoge}.backlog.com/api/v2/issues?'.http_build_query($params, '','&');
$headers = array('Content-Type:application/x-www-form-urlencoded');
$context = array(
    'http' => array(
        'method' => 'GET',
        'header' => $headers,
        'ignore_errors' => true,
    )
);
$response = file_get_contents($url, false, stream_context_create($context));
$json = mb_convert_encoding($response, 'UTF8', 'ASCII,JIS,UTF-8,EUC-JP,SJIS-WIN');
$json = json_decode($json, true);
echo "<pre>";
var_dump($json);
echo "</pre>";
?>
複数projectなら、こんな感じで書く。
'projectId' => array(42107 => 42107, 42116 => 42116),
$jsonは連想配列で返ってくる。
foreachでいってみよう!
foreach($json as $value){
     echo $value["issueType"]["name"] ." ".$value["issueKey"]." ". $value["summary"]." " .$value["assignee"]["name"]. " ".$value["status"]["name"]." ".$value["priority"]["name"]."".$value["created"]." ".$value["dueDate"]." " .$value["updated"]." ".$value["createdUser"]["name"]."<br>";
}
うお。

tableで表示したい。その前に、日付フォーマット。date(‘m/d’, strtotime($value[“created”]))とする。
foreach($json as $value){
     echo $value["issueType"]["name"] ." ".$value["issueKey"]." ". $value["summary"]." " .$value["assignee"]["name"]. " ".$value["status"]["name"]." ".$value["priority"]["name"]."".date('m/d', strtotime($value["created"]))." ".date('m/d', strtotime($value["dueDate"]))." " .date('m/d', strtotime($value["updated"]))." ".$value["createdUser"]["name"]."<br>";
}
うお、nullだと01/01になる。。冗長だが。。
foreach($json as $value){
     if(!is_null($value["dueDate"])){
        echo $value["issueType"]["name"] ." ".$value["issueKey"]." ". $value["summary"]." " .$value["assignee"]["name"]. " ".$value["status"]["name"]." ".$value["priority"]["name"]."".date('m/d', strtotime($value["created"]))." ".date('m/d', strtotime($value["dueDate"]))." " .date('m/d', strtotime($value["updated"]))." ".$value["createdUser"]["name"]."<br>";
     } else {
        echo $value["issueType"]["name"] ." ".$value["issueKey"]." ". $value["summary"]." " .$value["assignee"]["name"]. " ".$value["status"]["name"]." ".$value["priority"]["name"]."".date('m/d', strtotime($value["created"]))." "." "." " .date('m/d', strtotime($value["updated"]))." ".$value["createdUser"]["name"]."<br>";
     }
}
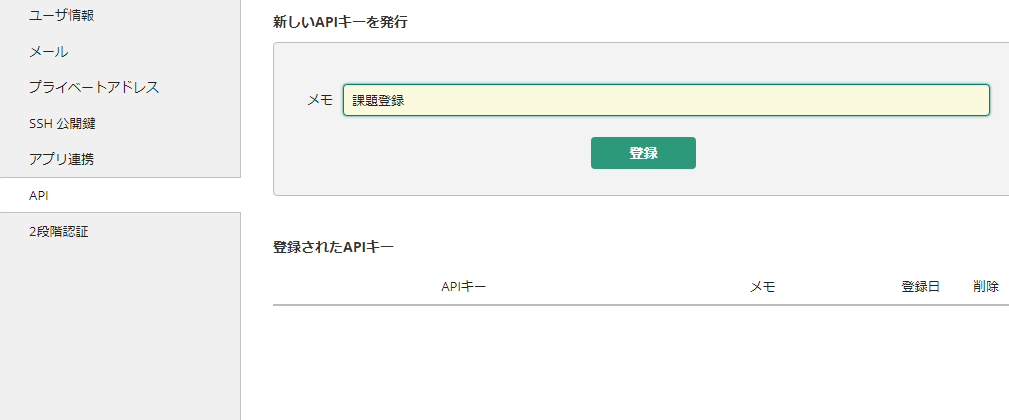
1. APIキーを取得
Backlogログイン -> 個人設定 -> API -> 新しいAPIキーを設定 -> APIキー発行
2. spaceIdを確認
https://{$spaceID}.backlog.com/
3. 課題の種別のID
https://{$spaceID}.backlog.com/ListIssueType.action?projectId={$課題の種別のID}
string(66) “{“errors”:[{“message”:”Not Found Space.”,”code”:6,”moreInfo”:””}]}”
スペースがない!?
https://hoge.backlog.jp/api/v2/issues?
よくみたら.jp ではなく、.com ならいけますな
https://hoge.backlog.com/api/v2/issues?
wget -O test.tar.gz https://github.com/livedoor/datasets/blob/master/ldgourmet.tar.gz?raw=true[vagrant@localhost embulk]$ ls
test.tar.gz
[vagrant@localhost embulk]$ tar xvfz test.tar.gz
areas.csv
categories.csv
prefs.csv
ratings.csv
rating_votes.csv
restaurants.csv
stations.csv
Embulkとは
~Pluggable Bulk Data Loader~
-並列データ転送ツール
-Fluentd開発者 古橋氏が開発
-Fluentdのバッチ版
-プラグインアーキテクチャ
An open-source plugin-based parallel bulk data loader that makes painful data integration work relaxed.
Founder & Software Architect, Treasure Data, inc.
CSV Files, S3, SequenceFile, HDFS, MySQL、Salesforce.com
⇒ bulk load =>
Hive, Elasticsearch, Cassandra, Redis
fluentdはstream、embulkはstorage
巨大データに対応(並列分散処理)
高速性、トランザクション制御
スキーマを使ったバリデーション
実行はコマンド
Input Plugin
RDBS ( mysql, postgres, jdbc… )
NoSQL ( redis, mongodb)
Cloud Service (redshift, s3 )
Files (CSV, JSON …)
Etc ( hdfs, http, elastic search, slack-history, google analitics )
Output Plugin
RDBS ( mysql, postgres, oracle, jdbc…)
Cloud Service ( redshift, s3, bigquery)
NoSQL ( redis, hdfs )
Files
Etc ( elastic search, hdfs, swift)
Filter Plugin
column (カラムを削る)
insert 指定した場所にホスト名などのカラム追加する
row 所定の条件に合致するローのみ抽出する
rearrange 一行のデータを複数行に再構成する
File parser Plugin
json
xml
csv
apache log
query_string
regex
File formatter Plugin
json
レコードの内容をjsonl(1 json 1行)の形式に整形するプラグイン
poi_excel
Excel(xls,xlsx)形式のデータに変換するプラグイン
mapreduce
EmbulkのタスクをHadoop上で実行するためのプラグイン
Executor Plugin
とりあえる、入れます。
[vagrant@localhost embulk]$ brew install embulk
[vagrant@localhost embulk]$ embulk –version
embulk 0.9.7
0.9.7ですね。
* 概要
– サーバーの構成管理ツール
必要なのはpython, hostからssh接続
server 'localhost', user: 'vagrant', roles: %w{web}
set :repo_url, 'git@github.com:mumoshu/finagle_sample_app'

fetch :repo_url
#=> "git@github.com:mumoshu/finagle_sample_app"

task :uptime do
	run_locally do
		output = capture "uptime"
	end
	on roles(:web) do
		output = caputer "uptime"
	end
end

# ソースコードの取得
set :application, 'finalge_sample_app'
set :repo_url, 'git@github.com:mumoshu/finagle_sample.git'

task :update do
	run_locall do
		application = fetch :application
		if test "[ -d #{application} ]"
			execute "cd #{application}; git pull"
		end
	else
		execute "git clone #{fetch :repo_url} #{application}"
	end
  end
end

task :archive => :update do
	run_locally do
		sbt_output = capture "cd #{fetch :application}; sbt pack-archive"

		sbt_output_without_escape_sequences = sbt_output.lines.map {|line| line.gsub(/\e\[\d{1,2}m/,''])}.join

		archive_relative_path = sbt_output_without_escape_sequences.match(/\[info\] Generating (?<archive_path>.+\.tar\.gz)\s*$[:archive_path]
		archive_name =archive_relative_path.match(/(?<archive_name>[^\/]+\.tar\.gz)$/)[:archive_name]
		archive_absolute_path = File.join(capter("cd #{fetch(:application)}; pwd").chomp, archive_relative_path)

		info archive_absolute_path
		info archive_name

		set :archive_absolute_path, archive_absolute_path
		set :archive_name, archive_name
	end
end

task :deploy => :archive do
	archive_path = fetch :archive_absolute_path
	archive_name = fetch :archive_name
	release_path = File.join(fetch(:deploy_to), fetch(:application))

	on roles(:web) do
		unless test "[ -d #{release_path} ]"
			execute "mkdir -p #{release_path}"
		end

		upload! archive_path, release_path

		execute "cd #{relase_path}; tar -zxvf #{archive_name}"

	end
end
Capistranoタスク自体は「コマンドを順番に実行する」だけなので、デプロイのためにシェルスクリプトでやっていたようなことはひと通りできる。
nohupでバックグラウンドプロセス化・upstart/monit/daemontools/godなどでデーモン化・プロセス監視・プロセスIDの管理などシェルスクリプトやRubyコードで表現できることであればできる。
Capistrano
Capistranoはおおまかに以下の3要素から構成
-capコマンド
-Capistranoのライブラリ
-デフォルトのデプロイタスク
Capistranoワークフロー
-Capistranoのインストール
-設定ファイルのひな形をつくる
-設定ファイルのカスタマイズ
-capコマンドを実行する
では、早速Capistranoをインストールしましょう。
[vagrant@localhost ruby]$ ruby -v
ruby 2.3.1p112 (2016-04-26 revision 54768) [x86_64-linux]
[vagrant@localhost ruby]$ gem install capistrano
Fetching: sshkit-1.17.0.gem (100%)
Successfully installed sshkit-1.17.0
Fetching: airbrussh-1.3.0.gem (100%)
Successfully installed airbrussh-1.3.0
Fetching: capistrano-3.11.0.gem (100%)
Successfully installed capistrano-3.11.0
Parsing documentation for sshkit-1.17.0
Installing ri documentation for sshkit-1.17.0
Parsing documentation for airbrussh-1.3.0
Installing ri documentation for airbrussh-1.3.0
Parsing documentation for capistrano-3.11.0
Installing ri documentation for capistrano-3.11.0
Done installing documentation for sshkit, airbrussh, capistrano after 5 seconds
3 gems installed
続いて設定ファイルのひな形をつくります。
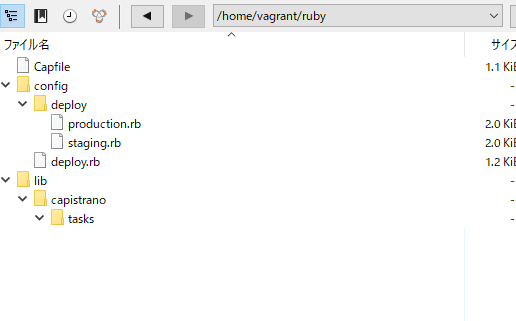
[vagrant@localhost ruby]$ cap install
mkdir -p config/deploy
create config/deploy.rb
create config/deploy/staging.rb
create config/deploy/production.rb
mkdir -p lib/capistrano/tasks
create Capfile
Capified
以下のようなファイル構成になる。
# config valid for current version and patch releases of Capistrano
lock "~> 3.11.0"

set :application, "my_app_name"
set :repo_url, "git@example.com:me/my_repo.git"

# Default branch is :master
# ask :branch, `git rev-parse --abbrev-ref HEAD`.chomp

# Default deploy_to directory is /var/www/my_app_name
# set :deploy_to, "/var/www/my_app_name"

# Default value for :format is :airbrussh.
# set :format, :airbrussh

# You can configure the Airbrussh format using :format_options.
# These are the defaults.
# set :format_options, command_output: true, log_file: "log/capistrano.log", color: :auto, truncate: :auto

# Default value for :pty is false
# set :pty, true

# Default value for :linked_files is []
# append :linked_files, "config/database.yml"

# Default value for linked_dirs is []
# append :linked_dirs, "log", "tmp/pids", "tmp/cache", "tmp/sockets", "public/system"

# Default value for default_env is {}
# set :default_env, { path: "/opt/ruby/bin:$PATH" }

# Default value for local_user is ENV['USER']
# set :local_user, -> { `git config user.name`.chomp }

# Default value for keep_releases is 5
# set :keep_releases, 5

# Uncomment the following to require manually verifying the host key before first deploy.
# set :ssh_options, verify_host_key: :secure
共有リポジトリ
> GitHub が、プロジェクトに関連するファイルをまとめて保管する単位
> これをチーム内で共有して、作業目的ごとにブランチ (Branch) と呼ばれるコピーを作り、適当なタイミングでブランチに対して行われた更新をオリジナル (Master Branch) に反映するというのが、GitHub を使った共同開発の 1 つのパターン
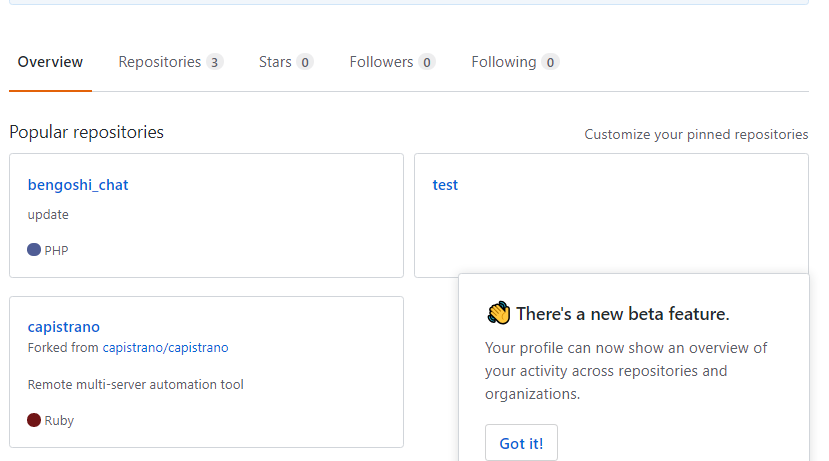
リポジトリのフォーク
> 共有されていないリポジトリに対して書き込むことはできないが、フォークしたリポジトリは自分の所有物なので、自由に更新ができる。
フォークは GitHub サーバー上でリポジトリの複製を作成する行為
クローンは、サーバー上のリポジトリを、クライアント環境に複製する行為
forkをすると、リポジトリを持ってこれるってわけですね。
クローンしたリポジトリ内で開発作業を行う
クローンで行った更新を、フォークしたリポジトリにコミット
フォークしたリポジトリからオリジナルのリポジトリにプルリクエスト (Pull Request) を送信