[PostgreSQL14.2] スキーマの作成

スキーマ(Schema)とは、1つのデータベースの中に複数設定することができる名前空間

$ psql –version
$ sudo -u postgres psql
postgres=# \l
List of databases
Name | Owner | Encoding | Collate | Ctype | Access privileges
———–+———-+———-+———+———+———————–
postgres | postgres | UTF8 | C.UTF-8 | C.UTF-8 |
template0 | postgres | UTF8 | C.UTF-8 | C.UTF-8 | =c/postgres +
| | | | | postgres=CTc/postgres
template1 | postgres | UTF8 | C.UTF-8 | C.UTF-8 | =c/postgres +
| | | | | postgres=CTc/postgres
testdb | postgres | UTF8 | C.UTF-8 | C.UTF-8 |
(4 rows)
# \c testdb
You are now connected to database “testdb” as user “postgres”.

postgres=# \dn
List of schemas
Name | Owner
——–+———-
public | postgres
(1 row)

postgres=# create schema bank1;
CREATE SCHEMA
postgres=# create schema bank2;
CREATE SCHEMA
postgres=# \dn
List of schemas
Name | Owner
——–+———-
bank1 | postgres
bank2 | postgres
public | postgres
(3 rows)

### 現在のスキーマ
postgres=# select current_schema();
current_schema
—————-
public
(1 row)

### スキーマの変更
postgres=# set search_path = bank1;
SET
postgres=# select current_schema();
current_schema
—————-
bank1
(1 row)

### スキーマを指定してテーブル作成
create table bank1.data (
id integer,
name varchar(256)
);

スキーマのテーブルができている
# \dt bank1.*
List of relations
Schema | Name | Type | Owner
——–+——+——-+———-
bank1 | data | table | postgres
(1 row)

PHPから接続する場合はスキーマ指定が必要
なるほど、スキーマの概念を理解した

ISMSとは

ISMSとは、個別の問題毎の技術対策の他に、組織のマネジメントとして、自らのリスクアセスメントにより必要なセキュリティレベルを決め、プランを持ち、資源を配分して、システムを運用すること

Apache Benchを使ってみる

-nには、Totalで発行するリクエスト数を指定
-cには、同時接続数を指定

$ ab -n -c <同時接続数>
Complete requestsがリクエストに成功

$ ab -n 100 -c 100 -P id:password https://*.co.jp/ 

$ ab -n 100 -c 100 https://www.google.com/
This is ApacheBench, Version 2.3 <$Revision: 1843412 $>
Copyright 1996 Adam Twiss, Zeus Technology Ltd, http://www.zeustech.net/
Licensed to The Apache Software Foundation, http://www.apache.org/

Benchmarking www.google.com (be patient)…..done

Server Software: gws
Server Hostname: www.google.com
Server Port: 443
SSL/TLS Protocol: TLSv1.2,ECDHE-ECDSA-CHACHA20-POLY1305,256,256
Server Temp Key: X25519 253 bits
TLS Server Name: www.google.com

Document Path: /
Document Length: 15095 bytes

Concurrency Level: 100
Time taken for tests: 5.690 seconds
Complete requests: 100
Failed requests: 99
(Connect: 0, Receive: 0, Length: 99, Exceptions: 0)
Total transferred: 1611214 bytes
HTML transferred: 1505980 bytes
Requests per second: 17.58 [#/sec] (mean)
Time per request: 5689.514 [ms] (mean)
Time per request: 56.895 [ms] (mean, across all concurrent requests)
Transfer rate: 276.55 [Kbytes/sec] received

Connection Times (ms)
min mean[+/-sd] median max
Connect: 534 1480 684.7 1113 2959
Processing: 189 1196 500.7 1350 3571
Waiting: 120 720 301.6 563 1339
Total: 723 2677 799.6 2599 5033

Percentage of the requests served within a certain time (ms)
50% 2599
66% 2936
75% 2958
80% 2977
90% 3549
95% 5022
98% 5032
99% 5033
100% 5033 (longest request)

Requests per second:17.58 [#/sec] (mean) が1秒間に捌けるリクエスト
Time per request: が1秒間に捌けるリクエスト

なるほど、apache benchの概念を理解した

負荷試験とツール

負荷テストツールには、Apache Bench, Apache JMeter, Locust, Tsung, Gatling, Vegetaなどがある。
Apache BentchとVegetaはシナリオテストができない。

### 負荷テストのアプローチ
– 性能テスト: システムが想定している負荷に対し、どの程度のスループットやレイテンシかを確認
– 限界テスト: 処理限界に近い、または超過した負荷に対し、エラーが出るかなど挙動を確認
– 耐久テスト: 長時間負荷をかけた際の挙動を確認

計画書作成、スペックを変更、ダミーデータ作成、負荷テストと負荷テストツールの作成、単一エンドポイントに対するテスト、オートスケールを有効にした場合のテスト、シナリオテスト、耐久テスト

スループットの限界値を見つけるために、同時にアクセスするユーザ数を徐々に上げていく

なるほど、かなり奥が深い

Linux 負荷監視コマンド

vstat: システム全体の負荷
top: CPU, メモリを食っているプロセスの特定
sar: 過去の負荷の履歴
mpstat -P ALL 1: CPUコアごとの負荷
dstat -taf 標準でインストールされているコマンド
free -m メモリ
iostat -dmxt 1: IO状況

CPU使用率は $ vmstat で 100 – id の値

$ vmstat
procs ———–memory———- —swap– —–io—- -system– ——cpu—–
r b swpd free buff cache si so bi bo in cs us sy id wa st
1 0 0 2193996 89188 931568 0 0 4835 383 460 846 9 10 80 1 0
free, buff, cacheが少ないと問題
us, syがカーネル、カーネル以外のCPU使用率

$ top
PID USER PR NI VIRT RES SHR S %CPU %MEM TIME+ COMMAND
726 root 20 0 874552 38992 20220 S 12.5 1.0 0:01.93 snapd
1 root 20 0 105056 12924 8252 S 0.0 0.3 0:02.41 systemd

$ sudo apt install dstat
$ dstat -taf
Terminal width too small, trimming output.
—-system—- –total-cpu-usage– -net/enp0s3–net/enp0s8 —paging–>
time |usr sys idl wai stl| recv send: recv send| in out >
17-08 06:52:38| 2 1 96 0 0| 0 0 : 0 0 | 0 0 >
17-08 06:52:39| 0 0 100 0 0| 180B 534B: 0 0 | 0 0 >
17-08 06:52:40| 0 1 97 2 0| 120B 220B: 0 0 | 0 0 >
17-08 06:52:41| 0 0 100 0 0| 120B 204B: 0 0 | 0 0 >^

cpu負荷をコアごと、IO負荷をディスクごと、ネットワーク転送量をインターフェイスごとに表示

https://qiita.com/aosho235/items/c4d6995743dd1dac16e1

RDS インスタンスタイプの決め方

db.r5.large などの表記で記載されているが、「r5」の部分がインスタンスタイプ、「large」がインスタンスサイズ

インスタンスタイプは、r系、m系、t系などがある。rdsもt系とm系が汎用で、t系はバースト可能クラス

### r系
・メモリ内の大きいデータセットを処理するワークロードに対して高速なパフォーマンスを実現するように設計されているメモリ最適化インスタンスに属するr系
・r6g.largeのような世代の数字の後ろにgのような文字がついているタイプは追加機能(gならばAWS Gravitonプロセッサ(最良のコストパフォーマンスを提供))
・small < medium < large < xlarge < 2xlarge < 4xlarge < ・・・ なるほど、用途で選ぶのね。

AWS EC2インスタンスタイプの決め方

EC2のインスタンスタイプは用途別に集められた「インスタンスファミリー」とCPUなどのスペックを示す「インスタンスサイズ」から構成される。このインスタンスファミリーの数字は世代を表している。
数字が大きければ大きいほど新しい
t2, t3ではt3の方が新しい

### インスタンスタイプの種類
「汎用」、「コンピューティング最適化」、「メモリ最適化」、「高速コンピューティング」、「ストレージ最適化」の5種類がある
一般的な業務システムに適しているのは「汎用」「コンピューティング最適化」

### 汎用
「T3」「T2」 バーストできる。CPUクレジットを貯めておき、突発的に負荷が高まったときに貯めたCPUクレジットを消費して対応できる。コストが安い

「M5」「M4」 ネットワークをバランスよく提供

### コンピューティング最適化
「C5」「C4」: 性能が高いプロフェッサを積んでいる。高速処理が必須の場合、コストパフォーマンスに優れる。

### 機械学習
GPUインスタンスは、P3

### SAP
X1はSAP から、Business Warehouse on HANA (BW) 、Data Mart Solutions on HANA 、Business Suite on HANA (SoH) 、Business Suite S/4HANA を実行するための認定を受けているインスタンスファミリー

なるほど、勉強になるね。

AWS KMSを使ってみる

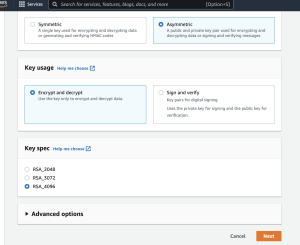
AWS KMSコンソールでキーを作成します。

Key policy, Cryptographic configuration, public keyが発行される

public key Publickey-*.pemをダウンロードして使用する。
user nameを設定しているので、ユーザのIDを指定してdecryptするのかな。
概要は何となく理解したが。

AWS KMSとは

データの暗号化/複合化に利用するKeyをセキュアに管理するのがAWS KMSです。
暗号化/複合化のためのキーをAWS KMSで簡単に生成でき、AWS KMS上にキーを保管することができる。

1. KMS上にCMKを作成
暗号化するときに利用するキーを生成するためのCMLを作成

2. CMKのKeyIDからデータキーを作成
CMLを元にしたKeyIDからデータキーを作成する
– 暗号化用のデータキー:データを暗号化するためのキー
– CMKを元に暗号化されたデータキー: データ複合化のために利用するキー

なるほど、使ってみないとわからんな。

FargateのvCPUを理解する

タスクサイズ -> タスクメモリ(MiB)
タスクサイズ -> タスクCPU(単位)
タスクサイズ -> コンテナの定義 -> メモリ制限 -> ハード制限
タスクサイズ -> コンテナの定義 -> メモリ制限 -> ソフト制限
タスクサイズ -> コンテナの定義 -> CPUユニット数

### ハード制限(Memory)
コンテナに適用されるハードウェアのメモリ制限。上限を超えると強制的に終了となる。
ウェブアプリケーションだと300~500MBがおすすめとのこと

### ソフト制限(memoryReservation)
システムメモリ競合時に維持されるメモリ上限 
状況に応じてハード制限(設定されている場合)かインスタンス自体の利用可能上限まで消費
memory (<= memoryReservation) <= instance memory Fargateの動作ベース https://docs.aws.amazon.com/ja_jp/AmazonECS/latest/developerguide/task-cpu-memory-error.html サポートされる CPU 値は、128CPU 単位 (0.125vCPUs) と10240CPU 単位 (10vCPUs)の間 ### CPU value 256(.25vCPU): 512, 1024, 2048 512(.5vCPU): 1024, 2048, 3072, 4096 1024(1vCPU): 2048, 3072, 4096, 5120, 6144, 7168 2048(2vCPU): Between 4096 and 16384 in increments of 1024 4096(4vCPU): Between 8192 and 30720 in increments of 1024 うーむ、何をベースにvCPU, Memoryを決めたら良いかイマイチわからんな。。