[BlumaCSS] paginationを実装したい

blumaでpaginationを実装したい

			<nav class="pagination is-centered" role="navigation" aria-label="pagination">
				<a class="pagination-previous">Previous</a>
				<a class="pagination-next">Next page</a>
				<ul class="pagination-list">
					<li><a class="pagination-link" aria-label="Goto page 1">1</a></li>
					<li><span class="pagination-ellipsis">&hellip;</span></li>
					<li><a class="pagination-link"aria-label="Goto page 3">3</a></li>
					<li><a class="pagination-link is-current" aria-label="Page 4" aria-current="page">4</a></li>
					<li><a class="pagination-link"aria-label="Goto page 5">5</a></li>
					<li><span class="pagination-ellipsis">&hellip;</span></li>
					<li><a class="pagination-link" aria-label="Goto page 7">7</a></li>
				</ul>
			</nav>

CSSを一切書かずに事足りてしまうのが凄い

goでどうやって書くのかわからんが、まあ進みましょう。

[AWS] RaspberryPI4でKVSを利用

公式のドキュメントを見ながらやると
https://github.com/awslabs/amazon-kinesis-video-streams-producer-sdk-cpp/blob/master/docs/raspberry-pi.md

これだとうまくいかない
$ gst-device-monitor-1.0
$ gst-launch-1.0 v4l2src device=/dev/video0 ! h264parse ! video/x-h264,stream-format=avc,alignment=au ! kvssink stream-name=MyKinesisVideoStream storage-size=128 access-key=”***” secret-key=”***” aws-region=”ap-northeast-1″
> The audio recording device is represented by hw:card_number,device_numer. So to use the second device in the example, use hw:3,0 as the device in gst-launch-1.0 command.

これだとOK
$ gst-launch-1.0 -v v4l2src device=/dev/video0 ! videoconvert ! video/x-raw,format=I420,width=640,height=480,framerate=30/1 ! x264enc bframes=0 key-int-max=45 bitrate=500 tune=zerolatency ! video/x-h264,stream-format=avc,alignment=au ! kvssink stream-name=MyKinesisVideoStream storage-size=128 access-key=”***” secret-key=”***” aws-region=”ap-northeast-1″
> if your camera supports outputting h264 encoded stream directly, then you can use this command:

h264エンコードがすごく大事なのね

[GCP] SDKをインストールしてコマンドラインからログインしたい

$ cat /etc/lsb-release
DISTRIB_DESCRIPTION=”Ubuntu 20.04.1 LTS”
$ python3 –version
Python 3.8.5
$ curl -O https://dl.google.com/dl/cloudsdk/channels/rapid/downloads/google-cloud-sdk-363.0.0-linux-x86_64.tar.gz
$ tar -zxvf google-cloud-sdk-363.0.0-linux-x86_64.tar.gz
$ ./google-cloud-sdk/install.sh
$ ./google-cloud-sdk/bin/gcloud init
Your Google Cloud SDK is configured and ready to use!
$ pwd
/home/vagrant/gcp/

$ cd ~
$ sudo vi .bash_profile

source /home/vagrant/gcp/gcpgoogle-cloud-sdk/completion.bash.inc
source /home/vagrant/gcp/gcpgoogle-cloud-sdk/path.bash.inc

$ source ~/.bashrc
$ gcloud compute ssh instance-1

vagrant@instance-1:~$
$ python3 –version
Python 3.8.10
$ exit
logout
Connection to ***** closed

OK
あとはGCPへのデプロイとドメイン周りができれば基本的なところは通過

[GCP] GCEを起動したい

1. project
まず言語設定をEnglishにして、gce-testという

2. Compute Engine
VM InstancesでAPIをenableにする

3. Create Instance
Region: asia-northeast1(Tokyo)
Zone: asia-northeast1-a
Machine Series: E2(コストが安く、webサービス、業務アプリ、開発テスト用など) ※N2&N2Dは中規模むけ
Machine Type: e2-micro(2 vCPU, 1GB memory)
Boot disk: Ubuntu20.04LTS ※defaultだとDebianになっているので、 ubuntuに変更する
Access Scope: Allow default access
Firewall: Allow HTTP traffic
-> create
-> 設定した内容で作られているかinstancesのviewで確認できる

4. instance
internal IP: プロジェクト内部のIP
external IP: グローバルIP
sshをクリックすると、sshログインできる
$ cat /etc/lsb-release
DISTRIB_ID=Ubuntu
DISTRIB_RELEASE=20.04
DISTRIB_CODENAME=focal
DISTRIB_DESCRIPTION=”Ubuntu 20.04.3 LTS”

なるほどー AWSでいうvpc, security group, subnet, igw, route tableとかの概念はないのかな…
次はコマンドラインから起動したい

[GCP] どんな機能があるのか?

1.コンピュート
Compute Engine, Container Engine, App engine
2.ストレージ
Cloud Storage, Cloud SQL, Cloud Bigtable, Cloud Datastore
3.ネットワーキング
Cloud Virtual Network, Cloud Load Balancing, Cloud CDN, Cloud DNS
4.ビックデータ
BiQuery, Cloud Dataflow, Cloud Dataproc, Cloud Pub/Sub
5.IoT
Cloud IoT Core
6.機械学習
Cloud Vision API, Cloud Translation API, Cloud Speech API, Cloud Machine Learning
7.管理ツール
Cloud Console, Cloud Shell, Stackdriver, Cloud IAM

プロジェクト単位で開発する

### リージョン
GCPのデータセンターが存在
リージョンの中に複数のゾーンが存在

全てのリージョンにまたがって、単一のサブネットが構成される

なんとなくイメージはつくが、まずはCompute Engineを動かしたい

ubuntuにold versionのpsqlをインストールして動かす

focalfossaにpsql8.4を入れて、laravel5.7から接続する

$ sudo apt-get install wget ca-certificates
$ wget –quiet -O – https://www.postgresql.org/media/keys/ACCC4CF8.asc | sudo apt-key add –
$ sudo sh -c ‘echo “deb http://apt.postgresql.org/pub/repos/apt/ `lsb_release -cs`-pgdg main” >> /etc/apt/sources.list.d/pgdg.list’
$ sudo apt-get update
$ sudo apt –fix-broken install -o Dpkg::Options::=”–force-overwrite”
$ sudo apt-get install postgresql-8.4

$ psql –version
psql (PostgreSQL) 8.4.22

$ sudo apt install -y php
$ sudo apt-get install php7.4-dom php-pgsql
$ curl -sS https://getcomposer.org/installer | php
$ php composer.phar create-project –prefer-dist laravel/laravel blog “5.7.*”

.env

DB_CONNECTION=psql
DB_HOST=127.0.0.1
DB_PORT=5432
DB_DATABASE=test
DB_USERNAME=root
DB_PASSWORD=password

postgres-# sudo -u postgres psql
postgres-# create role root with createdb createrole login SUPERUSER password ‘password’;
postgres-# create database test

\c test

$ psql –version
psql (PostgreSQL) 8.4.22
$ php artisan -V
Laravel Framework 5.7.29

test=# \d
List of relations
Schema | Name | Type | Owner
——–+——————-+———-+——-
public | migrations | table | root
public | migrations_id_seq | sequence | root
public | password_resets | table | root
public | users | table | root
public | users_id_seq | sequence | root
(5 rows)

イレギュラーですな

[音声認識] wav2vecによるwav fileの認識サンプル

まずenglishのwave fileを用意します。

app.py

# -*- coding: utf-8 -*-
#! /usr/bin/python3

import librosa
import torch
from transformers import Wav2Vec2ForCTC, Wav2Vec2Tokenizer

audio, rate = librosa.load("sample.wav", sr = 16000)

tokenizer = Wav2Vec2Tokenizer.from_pretrained("facebook/wav2vec2-base-960h")
model = Wav2Vec2ForCTC.from_pretrained("facebook/wav2vec2-base-960h")

input_values = tokenizer(audio, return_tensors="pt").input_values

logits = model(input_values).logits

prediction = torch.argmax(logits, dim = -1)

transcription = tokenizer.batch_decode(prediction)[0]

print(transcription)

$ python3 app.py
// 省略
FOUR SCORE AND SEVEN YEARS AGO OUR FATHERS BROUGHT FORTH ON THIS CONTINENT A NEW NATION CONCEIVED IN LIBERTY AND DEDICATED TO THE PROPOSITION THAT ALL MEN ARE CREATED EQUAL

なるほど、これは凄い
tokenizerとmodelを日本語でやりたい

from asrecognition import ASREngine

asr = ASREngine("ja", model_path="jonatasgrosman/wav2vec2-large-xlsr-53-japanese")

audio_paths = ["itou.wav"]
transcriptions = asr.transcribe(audio_paths)

$ python3 app.py
/home/vagrant/.local/lib/python3.8/site-packages/transformers/configuration_utils.py:340: UserWarning: Passing `gradient_checkpointing` to a config initialization is deprecated and will be removed in v5 Transformers. Using `model.gradient_checkpointing_enable()` instead, or if you are using the `Trainer` API, pass `gradient_checkpointing=True` in your `TrainingArguments`.
warnings.warn(
Killed

うむ、うまくいかないが近づいている様な気がする
vagrantだとうまくいかないので、vpsでやることにした

micによるliveだと、こちらで出来ますね
https://github.com/oliverguhr/wav2vec2-live

[音声認識] wav2vecを使いたい

最近のトレンドはtransformarを用いた自然言語処理とのことで、wav2vecを使いたい

### ライブラリのinstall
$ pip3 install transformers datasets librosa

main.py

# -*- coding: utf-8 -*-
#! /usr/bin/python3

import librosa
import matplotlib.pyplot as plt
from IPython.display import display, Audio
import librosa.display
import numpy as np 

import torch
from transformers import Wav2Vec2Processor, Wav2Vec2ForCTC
from datasets import load_dataset
import soundfile as sf

processor = Wav2Vec2Processor.from_pretrained("facebook/wav2vec2-base-960h")
model = Wav2Vec2ForCTC.from_pretrained("facebook/wav2vec2-base-960h")

def map_to_array(batch):
	speech, sr_db = sf.read(batch["file"])
	batch["speech"] = speech
	batch['sr_db'] = sr_db
	return batch

ds = load_dataset("patrickvonplaten/librispeech_asr_dummy","clean",split="validation")
ds = ds.map(map_to_array)

librosa.display.waveplot(np.array(ds['speech'][0]), sr=ds['sr_db'][0])
plt.savefig('01')
display(Audio(np.array(ds['speech'][0]), rate=ds['sr_db'][0]))

input_values = processor(ds["speech"][0], return_tensors="pt").input_values
logits = model(input_values).logits
predicted_ids = torch.argmax(logits, dim=-1)

transcription = processor.decode(predicted_ids[0])

print(transcription)

$ python3 main.py
// 省略
A MAN SAID TO THE UNIVERSE SIR I EXIST

なんだこれええええええええええええええええええ
音声をvector graphicにしてるのはわかるが、、、

[Amazon Kinesis Video Stream] VideoJSでHTML側で取得して表示

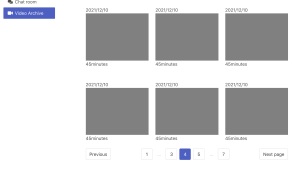
KVSのHLSStreamingSessionURLを取得してvideojsでストリーミング表示する

credentials.js

const AWS_ACCESS_KEY_ID = '';
const AWS_SECRET_ACCESS_KEY = '';
const AWS_REGION = 'ap-northeast-1';
const AWS_STREAM_NAME = 'MyKinesisVideoStream';

html

<head>
    <meta charset="UTF-8">
    <meta name="viewport" content="width=device-width, initial-scale=1.0">
    <title>Document</title>
    <link href="https://vjs.zencdn.net/7.15.4/video-js.css" rel="stylesheet" />
    <script src="https://sdk.amazonaws.com/js/aws-sdk-2.642.0.min.js"></script>
    <script src="credentials.js"></script>
</head>
<body>
    <video id="videojs" class="player video-js vjs-default-skin" data-setup='{"fluid":true}' controls autoplay muted></video>

    <script src="https://vjs.zencdn.net/7.15.4/video.min.js"></script>
    <script>
        window.addEventListener("unhandledrejection", function(event){
            console.warn("WARNING: Unhandled promise rejection." + event.reason);
            location.reload()
        });
        window.onerror = (message, file, lineNo, colNo, error) => {
            console.error('window.onerror', message, file, lineNo, colNo, error);
            location.reload()
        }

        async function getURL(){
            const accessKeyId = AWS_ACCESS_KEY_ID;
            const secretAccessKey = AWS_SECRET_ACCESS_KEY;
            const region = AWS_REGION;
            const streamName = AWS_STREAM_NAME;

            const options = {
                accessKeyId: accessKeyId,
                secretAccessKey: secretAccessKey,
                region: region,
            }
            const kinesisVideoClient = new AWS.KinesisVideo(options);
            const kinesisVideoArchivedMediaClient = new AWS.KinesisVideoArchivedMedia(options);

            const e = await kinesisVideoClient.getDataEndpoint({
                APIName: 'GET_HLS_STREAMING_SESSION_URL',
                StreamName: streamName
            }).promise();
            kinesisVideoArchivedMediaClient.endpoint = new AWS.Endpoint(e.DataEndpoint);

            const d = await kinesisVideoArchivedMediaClient.getHLSStreamingSessionURL({
                DisplayFragmentTimestamp: 'ALWAYS',
                StreamName: streamName
            }).promise();
            return d.HLSStreamingSessionURL;
        }

        document.addEventListener('DOMContentLoaded', async() => {
            const url = await getURL();
            const player = videojs('videojs');
            player.src({
                src: url,
                type: 'application/x-mpegURL'
            });
            player.on('error', function(){
                console.log(player.error());
                location.reload();
            });
            setInterval(() => {
                const t = player.currentTime();
                console.log("current Time is "+ t +" seconds");
            }, 5000)
        });
    </script>
</body>
</html>

### mac
kvsのsdkをdownloadした状態とする
https://github.com/awslabs/amazon-kinesis-video-streams-producer-sdk-cpp.git
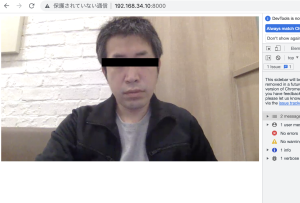
macのカメラからKVSに映像を送る
$ gst-launch-1.0 avfvideosrc device-index=0 ! videoconvert ! video/x-raw,format=I420,width=1280,height=720 ! vtenc_h264_hw allow-frame-reordering=FALSE realtime=TRUE max-keyframe-interval=45 bitrate=512 ! h264parse ! video/x-h264,stream-format=avc,alignment=au,profile=baseline ! kvssink stream-name=MyKinesisVideoStream storage-size=512 access-key=”${access-key}” secret-key=”${secret-key}” aws-region=”ap-northeast-1″

$ php -S 192.168.34.10:8000
http://192.168.34.10:8000/

ちょっと待ってくれ
なんか凄い事やってる様な気がする…🥺

HTML内でソースコードをhighlightさせたい

// header
<link rel="stylesheet" href="https://cdnjs.cloudflare.com/ajax/libs/highlight.js/9.18.1/styles/dracula.min.css">

// footer
<script src="https://cdnjs.cloudflare.com/ajax/libs/highlight.js/9.18.1/highlight.min.js"></script>
  <script>hljs.initHighlightingOnLoad();</script>

bluma cssを使っていると、paddingが設定されているので、0で!importantで設定する

pre {
  margin: 0 0; 
  padding: 0 !important; 
  border-radius: 0px; 
  white-space: pre-wrap;
  max-width: 100%;
}

### 使い方
preとcodeで囲う

        <h6 class="has-text-weight-medium">Result</h6>
        <pre><code>{
  "data": {
    "speech": {
      "id": 2,
      "text": "  びっくりしました。\n",
      "time": "2021/11/01 15:04:12"
    }
  }
}
        </code></pre>

highlightの箇所があってませんが、まあそれらしく表示されているのでOKとしましょう。