[Go Revel] テンプレートでナビテーションを一元管理する

Go Revelでnavigationとside menuをテンプレート化したい
-> classでページによってis-activeと付与する箇所は、テンプレート側でセットできるようにする。

/app/views/menu.html

  <section class="main-content columns is-fullheight">
  <aside class="column is-3 is-narrow-mobile is-fullheight section is-hidden-mobile">
    <p class="menu-label is-hidden-touch">MENU</p>
    <ul class="menu-list">
      <li>
        <a href="/home" class="{{.home}}">
          <span class="icon"><i class="fa fa-home"></i></span> Home
        </a>
      </li>
      <li>
        <a href="#" class="">
          <span class="icon"><i class="fa fa-table"></i></span> Channel
        </a>

        <ul>
          <li>
            <a href="#" class="{{.ch1}}">
              <span class="icon is-small"><i class="fa fa-link"></i></span> Ch1
            </a>
          </li>
          <li>
            <a href="#" class="{{.ch2}}">
              <span class="icon is-small"><i class="fa fa-link"></i></span> Ch2
            </a>
          </li>
          <li>
            <a href="#" class="{{.ch3}}">
              <span class="icon is-small"><i class="fa fa-link"></i></span> Ch3
            </a>
          </li>
        </ul>
      </li>
      <li>
        <a href="#" class="{{.mypage}}">
          <span class="icon"><i class="fa fa-id-card"></i></span> MyPage
        </a>
      </li>
      <li>
        <a href="#" class="{{.doc}}">
          <span class="icon"><i class="fa fa-file-alt"></i></span> Document
        </a>
      </li>
      <li>
        <a href="#" class="{{.chat}}">
          <span class="icon"><i class="fa fa-comments"></i></span> Chat room
        </a>
      </li>
    </ul>
  </aside>

/app/views/App/Index.html

{{template "nav.html" .}}
{{set . "home" "is-active"}}
{{template "menu.html" .}}

/app/views/App/mypage.html

{{template "nav.html" .}}
{{set . "mapage" "is-active"}}
{{template "menu.html" .}}

昔1000ページぐらいのサイトを運営してた時に、12/31に1000ページのall right reserved 20XXを1000ページ修正してたの思い出した🤮🤮🤮
絶対テンプレートを使う

Pythonでlistから最も近い数字を抽出し、辞書の値をprint

numpyを使う

# -*- coding: utf-8 -*-
import numpy as np

def getNearestValue(list, num):
	idx = np.abs(np.asarray(list) - num).argmin()
	return list[idx]

# 辞書
d = {}
d[0.743722677230835] = 'value1'
d[0.9442239999771118] = 'value2'
d[0.8997899889945984] = 'value3'
print(d)

# リスト
list = []
list.append(0.743722677230835)
list.append(0.9442239999771118)
list.append(0.8997899889945984)

# 最も近い数字
nearest = getNearestValue(list, 0.9602155685424805)

# 最も近い数字のvalue
print(nearest)
print(d[nearest])

$ python3 test.py
{0.743722677230835: ‘value1’, 0.9442239999771118: ‘value2’, 0.8997899889945984: ‘value3’}
0.9442239999771118
value2

やりたいことはできた。
これをNLPでやる。

[自然言語処理] python x transformerで感情分析

$ pip3 install fugashi
$ pip3 install ipadic

sentiment.py

# -*- coding: utf-8 -*-
from transformers import AutoTokenizer, AutoModelForSequenceClassification
from transformers import pipeline

tokenizer = AutoTokenizer.from_pretrained("daigo/bert-base-japanese-sentiment")
model = AutoModelForSequenceClassification.from_pretrained("daigo/bert-base-japanese-sentiment")

print(pipeline("sentiment-analysis", model="daigo/bert-base-japanese-sentiment", tokenizer="daigo/bert-base-japanese-sentiment")("私は幸福である。"))

$ python3 sentiment.py
[{‘label’: ‘ポジティブ’, ‘score’: 0.9843042492866516}]

単語やニュートラルな文章はポジティブに判定されやすい

“もうダメだ” にして再実行
$ python3 sentiment.py
[{‘label’: ‘ネガティブ’, ‘score’: 0.9892264604568481}]

なるほど
処理時間がかかるのがスネに傷やな

[自然言語処理] word2vecによる類似単語を検索

$ pip3 install gensim==3.8.1

### word2vecのファイルをDL
$ wget http://public.shiroyagi.s3.amazonaws.com/latest-ja-word2vec-gensim-model.zip

$ unzip latest-ja-word2vec-gensim-model.zip

app.py

# -*- coding: utf-8 -*-
from gensim.models import word2vec

model = word2vec.Word2Vec.load('word2vec.gensim.model')
results = model.wv.most_similar(positive=['日本'])
for result in results:
	print(result)

$ python3 app.py
(‘韓国’, 0.7088127732276917)
(‘台湾’, 0.6461570262908936)
(‘日本国内’, 0.6403890252113342)
(‘欧米’, 0.6350583434104919)
(‘日本国外’, 0.6200590133666992)
(‘台湾出身’, 0.6174061894416809)
(‘中華圏’, 0.612815260887146)
(‘日本の経済’, 0.6088820099830627)
(‘日本の歴史’, 0.6070738434791565)
(‘韓国国内’, 0.6054152250289917)

gensimはバージョンを指定しないとエラーになるので注意が必要

OK
これを繋げていく

[自然言語処理] pythonによる文章自動生成

transformersを使います
$ pip3 install transformers==4.3.3 torch==1.8.0 sentencepiece==0.1.91

# -*- coding: utf-8 -*-
import transformers

tokenizer = transformers.AutoTokenizer.from_pretrained("colorfulscoop/gpt2-small-ja")
model = transformers.AutoModelForCausalLM.from_pretrained("colorfulscoop/gpt2-small-ja")

input = tokenizer.encode("昔々あるところに", return_tensors="pt")
output = model.generate(input, do_sample=True, top_p=0.95, top_k=50, num_return_sequences=3)

print(tokenizer.batch_decode(output))

[‘昔々あるところには、お祭りの女神さんが現れ、そこでお姫様の姫様’, ‘昔々あるところに、ある。ある夏の日、彼は旅人と出会い、その目的がどう’, ‘昔々あるところに、一億年も前には人間たちが住んでいた。いまや、それはこの’]

おおお、なんか色々出来そうではある…
途中の処理を考える必要はあるが

[自然言語処理] pythonとasariで感情分析を行う

$ pip3 install asari

from asari.api import Sonar

sonar = Sonar()
sonar.ping(text="広告が多すぎる♡")

$ python3 asari.py
Traceback (most recent call last):
File “asari.py”, line 1, in
from asari.api import Sonar
File “/home/vagrant/dev/nlp/asari.py”, line 1, in
from asari.api import Sonar
ModuleNotFoundError: No module named ‘asari.api’; ‘asari’ is not a package

—-
Requirement already satisfied: joblib>=0.11 in /home/vagrant/.local/lib/python3.8/site-packages (from scikit-learn>=0.19.1->asari) (1.0.1)
Requirement already satisfied: threadpoolctl>=2.0.0 in /home/vagrant/.local/lib/python3.8/site-packages (from scikit-learn>=0.19.1->asari) (2.2.0)
Requirement already satisfied: six>=1.5 in /usr/lib/python3/dist-packages (from python-dateutil>=2.7.3->pandas>=0.22.0->asari) (1.14.0)
Installing collected packages: pytz, pandas, Janome, asari
Successfully installed Janome-0.4.1 asari-0.0.4 pandas-1.3.4 pytz-2021.3

python2系じゃないと動かないのか?

python2系の環境で再度やり直します。
$ pip install scikit-learn==0.20.4
$ pip install Janome==0.3.7

[{‘text’: ‘広’, ‘top_class’: ‘positive’, ‘classes’: [{‘class_name’: ‘negative’, ‘confidence’: 0.28345109397418017}, {‘class_name’: ‘positive’, ‘confidence’: 0.7165489060258198}]}, {‘text’: ‘告’, ‘top_class’: ‘positive’, ‘classes’: [{‘class_name’: ‘negative’, ‘confidence’: 0.3450436370027103}, {‘class_name’: ‘positive’, ‘confidence’: 0.6549563629972897}]}, {‘text’: ‘が’, ‘top_class’: ‘negative’, ‘classes’: [{‘class_name’: ‘negative’, ‘confidence’: 0.9006654377630458}, {‘class_name’: ‘positive’, ‘confidence’: 0.09933456223695437}]}, {‘text’: ‘多’, ‘top_class’: ‘negative’, ‘classes’: [{‘class_name’: ‘negative’, ‘confidence’: 0.9364137330979464}, {‘class_name’: ‘positive’, ‘confidence’: 0.06358626690205357}]}, {‘text’: ‘す’, ‘top_class’: ‘positive’, ‘classes’: [{‘class_name’: ‘negative’, ‘confidence’: 0.2124141523260128}, {‘class_name’: ‘positive’, ‘confidence’: 0.7875858476739873}]}, {‘text’: ‘ぎ’, ‘top_class’: ‘negative’, ‘classes’: [{‘class_name’: ‘negative’, ‘confidence’: 0.5383816766180572}, {‘class_name’: ‘positive’, ‘confidence’: 0.4616183233819428}]}, {‘text’: ‘る’, ‘top_class’: ‘negative’, ‘classes’: [{‘class_name’: ‘negative’, ‘confidence’: 0.6881484923868434}, {‘class_name’: ‘positive’, ‘confidence’: 0.3118515076131566}]}]

# -*- coding: utf-8 -*-
from asari.api import Sonar

sonar = Sonar()
text="広告が多すぎる"
res = sonar.ping(text="広告多すぎる♡")
print(res)

$ python3 app.py
{‘text’: ‘広告多すぎる♡’, ‘top_class’: ‘negative’, ‘classes’: [{‘class_name’: ‘negative’, ‘confidence’: 0.9086981552962491}, {‘class_name’: ‘positive’, ‘confidence’: 0.0913018447037509}]}

なるほど、janomeとscikit-learnはversionを指定すると動く

[Lazy Load] 画像の遅延ロードの書き方

class=”lazyload”とし、画像はdata-srcで読み込む。
lazyloadはcdnで読み込み、scriptでlazyload();とする。

	<img class="lazyload" data-src="img/1.jpg" width="300" height="200"><br><br><br><br>
	<img class="lazyload" data-src="img/2.jpg" width="300" height="200"><br><br><br><br>
	<img class="lazyload" data-src="img/3.jpg" width="300" height="200">
	<script src="https://cdn.jsdelivr.net/npm/lazyload@2.0.0-rc.2/lazyload.min.js"></script>
	<script>
    lazyload();
	</script>

Googleのdevtoolで確認すると、3枚あるのが2枚しか読み込まれていないことがわかる。

なかなかやりおる

[RaspberryPI4] DeepSpeechをmicで動かす

### ラズパイのUBSマイクの設定
$ sudo vim /etc/modprobe.d/alsa-base.conf

options snd slots=snd_usb_audio,snd_bcm2835
options snd_usb_audio index=0
options snd_bcm2835 index=1
$ sudo vim ~/.profile
一番最後の行に追加
export ALSADEV=”plughw:0,0″

$ sudo apt-get install alsa-utils sox libsox-fmt-all
$ sudo sh -c “echo snd-pcm >> /etc/modules”

ラズパイ再起動

### マイクから音声認識
$ source dev/deepspeech-train-venv/bin/activate
$ cd deepspeech
$ git clone https://github.com/mozilla/DeepSpeech-examples
$ cd DeepSpeech-examples/DeepSpeech-examples
$ pip install -r requirements.txt
$ sudo apt install portaudio19-dev
$ pip3 install halo webrtcvad –upgrade
$ python3 DeepSpeech-examples/mic_vad_streaming/mic_vad_streaming.py -m deepspeech-0.7.1-models.tflite -s deepspeech-0.7.1-models.scorer

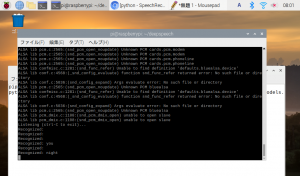
こんな感じになる
Listening (ctrl-C to exit)…
Recognized:
Recognized:
Recognized:
Recognized: you
Recognized:
Recognized: night

きたあああああああああああああああああああああ
さあ サーバーサイドやろう
とりあえず満足

https://github.com/mozilla/DeepSpeech-examples/blob/r0.9/mic_vad_streaming/mic_vad_streaming.py
line188行目でtextをrecognized:としているので、ここでテキストとして保存すれば良い

        else:
            if spinner: spinner.stop()
            logging.debug("end utterence")
            if ARGS.savewav:
                vad_audio.write_wav(os.path.join(ARGS.savewav, datetime.now().strftime("savewav_%Y-%m-%d_%H-%M-%S_%f.wav")), wav_data)
                wav_data = bytearray()
            text = stream_context.finishStream()
            print("Recognized: %s" % text)
            stream_context = model.createStream()

[RaspberryPI4]DeepSpeechを動かしたい

まずラズパイ4とモニターを秋葉原で購入して起動
キーボードから日本語入力ができるように設定

$ mkdir dev
$ cd dev
$ python3 -m venv deepspeech-train-venv
$ source dev/deepspeech-train-venv/bin/activate
$ mkdir deepspeech
$ cd deepspeech
$ pip install deepspeech

$ curl -LO https://github.com/mozilla/STT/releases/download/v0.7.1/deepspeech-0.7.1-models.tflite
$ curl -LO https://github.com/mozilla/STT/releases/download/v0.7.1/deepspeech-0.7.1-models.pbmm
$ curl -LO https://github.com/mozilla/STT/releases/download/v0.7.1/deepspeech-0.7.1-models.scorer

$ curl -LO https://github.com/mozilla/STT/releases/download/v0.7.1/audio-0.7.1.tar.gz
$ tar xvf audio-0.7.1.tar.gz

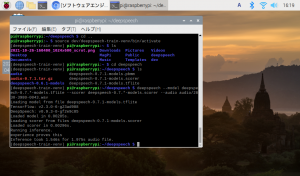
$ deepspeech –model deepspeech-0.7.*-models.tflite –scorer deepspeech-0.7.*-models.scorer –audio audio/2830-3980-0043.wav
Loading model from file deepspeech-0.7.1-models.tflite
TensorFlow: v2.3.0-6-g23ad988
DeepSpeech: v0.9.3-0-gf2e9c85
Loaded model in 0.00285s.
Loading scorer from files deepspeech-0.7.1-models.scorer
Loaded scorer in 0.00296s.
Running inference.
experience proves this
Inference took 1.546s for 1.975s audio file.

venvを使わないと以下のようなエラーになるので注意が必要
The script deepspeech is installed in ‘/home/pi/.local/bin’ which is not on PATH.
Consider adding this directory to PATH or, if you prefer to suppress this warning, use –no-warn-script-location.

OK 続いてdeeepspeechをmicでやりたい

[ubunut] apache2でサブドメインをnodeのexpressを動かしたい

### ローカル環境
挙動テスト用に簡単にインストールしてコードを書きます。
$ node –version
v14.17.6

$ npm install express

var express = require('express')
var app = express()
app.get('/', function(req, res){
	res.send('hello world')
})

app.listen(3000)

http://192.168.34.10:3000/

### vps
$ curl -sL https://deb.nodesource.com/setup_14.x -o nodesource_setup.sh
$ sudo bash nodesource_setup.sh
$ sudo apt install nodejs
$ node -v
v14.18.1
$ cd /var/www/app
$ sudo npm install express
$ sudo touch app.js
$ sudo vi app.js // 上記と同じ

$ sudo vi /etc/apache2/sites-available/virtual.host.conf

<VirtualHost *:80>
DocumentRoot /var/www/app
ServerName ****-test.site
ServerAlias www.****-test.site
ProxyPass / http://***.**.***.**:3000/
ProxyPassReverse / http://***.**.***.**:3000/
# Other directives here

</VirtualHost>

Invalid command ‘ProxyPass’, perhaps misspe>

$ sudo a2enmod proxy_http
$ sudo systemctl restart apache2

$ node app.js

var express = require('express')
var app = express()
app.get('/', function(req, res){
	res.send('hello node')
})

app.listen(3000)

OK

$ sudo vi /etc/apache2/sites-available/virtual.host.conf

<VirtualHost *:80>
DocumentRoot /var/www/app
ServerName ****-test.site
ServerAlias www.sample-test.site
ProxyPass / http://***.**.**.***:3000
ProxyPassReverse / http://***.**.**.***:3000
# Other directives here

</VirtualHost>

<VirtualHost *:80>
DocumentRoot /var/www/node
ServerName ***.****-test.site
# Other directives here

</VirtualHost>

こうすることで、一つのディレクトリはnodeで動かし、サブドメインの方はapacheで動かすということもできる

OKKKKKKKKKKK
さ、ラズパイやろう