[PHP7.4.11] Composerの仕組み

ComposerとはPHPのパッケージ管理システム。
ライブラリをzip等でダウンロードせずに利用できる。

$ php -v
PHP 7.4.11 (cli) (built: Oct 21 2020 19:12:26) ( NTS )
$ composer
______
/ ____/___ ____ ___ ____ ____ ________ _____
/ / / __ \/ __ `__ \/ __ \/ __ \/ ___/ _ \/ ___/
/ /___/ /_/ / / / / / / /_/ / /_/ (__ ) __/ /
\____/\____/_/ /_/ /_/ .___/\____/____/\___/_/
/_/
Composer version 2.0.4 2020-10-30 22:39:11

composer.json

{
	"require": {
		"ircmaxell/random-lib": "1.0.0"
	}
}

$ composer install

require_once "vendor/autoload.php";

$factory = new RandomLib\Factory;
$generator = $factory->getMediumStrengthGenerator();

$randomInt = $generator->generateInt(5, 15);
echo $randomInt;

echo "\n";

$randomString = $generator->generateString(32, 'abcdef');
echo $randomString;

$ php app.php
12
cffccdccbcaadcffbbddbffbdadbfefd

requrire_onceした後にclassを作って読み込めば良いのね

/vendor/ircmaxell/random-lib/lib/RandomLib/Factory.php


public function getGenerator(\SecurityLib\Strength $strength) {
        $sources    = $this->getSources();
        $newSources = array();
        foreach ($sources as $source) {
            if ($strength->compare($source::getStrength()) <= 0) {
                $newSources[] = new $source;
            }
        }
        $mixer = $this->findMixer($strength);
        return new Generator($newSources, $mixer);
    }

    // 省略

    public function getMediumStrengthGenerator() {
        return $this->getGenerator(new Strength(Strength::MEDIUM));
    }

generateIntのclassも同様に、RandomLib/Generator.phpで書かれていますね。
なるほど。

[Apache] Logをローテーションさせたい

Apacheのログが増えると容量がどんどん増えていくため、ログをローテーションさせたい
-> rotatelogでローテーションさせる事ができる

$ cat /etc/logrotate.d/httpd

/var/log/httpd/*log {
    missingok
    notifempty
    sharedscripts
    delaycompress
    postrotate
        /bin/systemctl reload httpd.service > /dev/null 2>/dev/null || true
    endscript
}

$ sudo su
$ cd /var/log/httpd
$ cat error_log-20210207

$ cat /etc/httpd/conf/httpd.conf
ErrorLog “logs/error_log”
-> ErrorLog “|/usr/sbin/rotatelogs /var/log/httpd/error_log.%Y-%m-%d 86400 540”
CustomLog “logs/access_log” combined
-> CustomLog “|/usr/sbin/rotatelogs /var/log/httpd/access_log.%Y%m%d 86400 540” combined

shellで例えば30日前などのaccess log, errorログを削除していく。
アプリログの場合でも、同様に指定したディレクトリのログをシェルで削除して行けば良い。

なるほど、注意しなければいけないポイントがわかった。

[AWS EBS] EC2でEBSの使用率が100%になった場合

EC2でEBSの使用率が100%になった場合、
1. AWSコンソールのEBSVolumes -> Action-> modify volume
2. EC2サーバにSSHログインし、”sudo xfs_growfs -d /”でボリューム拡張を反映
https://docs.aws.amazon.com/AWSEC2/latest/UserGuide/recognize-expanded-volume-linux.html

### EBSが100%になった時
$ df -h
ファイルシス サイズ 使用 残り 使用% マウント位置
devtmpfs tmpfs tmpfs tmpfs /dev/xvda1 tmpfs
482M 0 482M 0% /dev
492M 0 492M 0% /dev/shm 492M 25M 467M 6% /run
492M 0 492M 0% /sys/fs/cgroup
8.0G 8.0G 12M 100% /
99M 0 99M 0% /run/user/1000

-> サーバーにアクセスできなくなる。
-> MySQLが落ちる

サーバーのエラーログ
—–
(28)No space left on device: [client 61.206.21.97:9568] AH00646: Error writing to logs/access_log, referer:

## 対応法
sshログイン
$ lsblk
NAME MAJ:MIN RM SIZE RO TYPE MOUNTPOINT
xvda 202:0 0 12G 0 disk
└─xvda1 202:1 0 12G 0 part /
// 8Gから12Gに増やしたことが確認できるが、この時点ではまだ反映されていない
$ df -hT
ファイルシス タイプ サイズ 使用 残り 使用% マウント位置
devtmpfs devtmpfs 482M 0 482M 0% /dev
tmpfs tmpfs 492M 0 492M 0% /dev/shm
tmpfs tmpfs 492M 25M 467M 6% /run
tmpfs tmpfs 492M 0 492M 0% /sys/fs/cgroup
/dev/xvda1 xfs 8.0G 8.0G 12M 100% /
tmpfs tmpfs 99M 0 99M 0% /run/user/1000
$ sudo xfs_growfs -d /
meta-data=/dev/xvda1 isize=512 agcount=4, agsize=524159 blks
= sectsz=512 attr=2, projid32bit=1
= crc=1 finobt=1 spinodes=0
data = bsize=4096 blocks=2096635, imaxpct=25
= sunit=0 swidth=0 blks
naming =version 2 bsize=4096 ascii-ci=0 ftype=1
log =internal bsize=4096 blocks=2560, version=2
= sectsz=512 sunit=0 blks, lazy-count=1
realtime =none extsz=4096 blocks=0, rtextents=0
data blocks changed from 2096635 to 3145211
$ df -h
ファイルシス サイズ 使用 残り 使用% マウント位置
devtmpfs 482M 0 482M 0% /dev
tmpfs 492M 0 492M 0% /dev/shm
tmpfs 492M 25M 467M 6% /run
tmpfs 492M 0 492M 0% /sys/fs/cgroup
/dev/xvda1 12G 8.0G 4.1G 67% /
tmpfs 99M 0 99M 0% /run/user/1000

### MySQL再起動
$ sudo systemctl restart mysqld.service
$ sudo systemctl start mysqld.service
$ sudo systemctl enable mysqld.service
$ systemctl status mysqld.service

Mackerelでファイル使用率が90%以上になってたのに、見逃してた。。
やっちまったわ。

[React] WebpackでReactの環境を構築する

$ node -v
v14.15.0
$ npm -v
6.14.8
$ cd sample

### npm
$ npm -y init
$ npm -D install webpack webpack-cli
$ npx webpack -v
webpack 5.21.2
webpack-cli 4.5.0
$ npm -D i sass-loader node-sass style-loader css-loader
$ npm -D i mini-css-extract-plugin optimize-css-assets-webpack-plugin
$ npm i -D webpack-dev-server
$ npm install –save-dev @babel/core @babel/preset-env @babel/preset-react babel-loader
$ npm install –save-dev react react-dom

package.json

  "scripts": {
    "test": "echo \"Error: no test specified\" && exit 1",
    "start": "webpack-dev-server",
    "dev": "webpack --mode development",
    "build": "webpack --mode production",
    "watch": "webpack --mode development --watch --color --progress"
  },

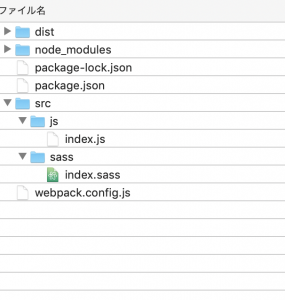
ディレクトリ構成
webpack.config.js

var webpack = require('webpack');
var path = require('path');
const MiniCssExtractPlugin = require('mini-css-extract-plugin');

module.exports = (env, argv)=> {

	const IS_DEVELOPMENT = argv.mode === 'development';

	return {
		mode: argv.mode,

		entry: {
			'index': './js/index.js',
		},

		devltool: IS_DEVELOPMENT ? 'source-map': 'none',

		output: {
			filename: '[name].js',
			path: path.resolve(__dirname,'../dist'),
		},

		plugins: [
			new MiniCssExtractPlugin({
				filename: '[name].css',
				path: path.resolve(__dirname,'../dist'),
			})
		],

		resolve: {
			extensions: [".ts"]
		},

		module: {
			rules: [
				{
					test:/\.ts$/,
					use: "ts-loader"
				},
				{
					test:/\.js$/,
					use: [
						{
							loader:"babel-loader",
							options: {
								presets: [
									"@babel/preset-env"
								]
							}
						}
						
					]
				},
				{
					test:/index\.scss$/,
					use: [
						MiniCssExtractPlugin.loader,
						{
							loader:'css-loader',
							options: {
								url: false,
							}
						},
						{
							loader: "postcss-loader",
							options: [
								require("autoprefixer")({
									grid: true,
								})
							]
						}
					]
				}
			]
		},

	}
};

$ webpack –mode development
[webpack-cli] ValidationError: Invalid options object. Mini CSS Extract Plugin has been initialized using an options object that does not match the API schema.
– options has an unknown property ‘path’. These properties are valid:
ん?
なんでや。。

var debug = process.env.NODE_ENV !== "production";
var webpack = require('webpack');
var path = require('path');
const MiniCssExtractPlugin = require('mini-css-extract-plugin');

module.exports = {
	context:path.join(__dirname, "src"),
	entry: "./js/client.js",
	output: {
		path: __dirname + "/dest/js",
		filename: "client.min.js"
	},
	module: {
		rules: [
			{
				test: /\.css$/i,
	        	use: ['style-loader', 'css-loader'],
			},
			{
			test: /\.jsx?$/,
				exclude: /(node_modules|bower_components)/,
				use: [{
					loader: 'babel-loader',
					options: {
						presets: ['@babel/preset-react', '@babel/preset-env']
					}
				}]
		},
		{
                test: /\.scss$/,
                use: [
                    { loader: MiniCssExtractPlugin.loader },
                    { loader: 'css-loader' },
                    { loader: 'sass-loader' },
                ],
            }
		]
	},
	
	devServer: {
	        contentBase: __dirname + '/src',
	        host: "0.0.0.0"
	},
	plugins: debug ? [] : [
		new webpack.optimize.OccurrenceOrderPlugin(),
		new webpack.optimize.UglifyJsPlugin({ mangle: false, sourcemap: false}),
	]
};

$ webpack-cli serve –mode development
ℹ 「wds」: Project is running at http://0.0.0.0:8080/
ℹ 「wds」: webpack output is served from /
ℹ 「wds」: Content not from webpack is served from /home/vagrant/dev/sample/src
ℹ 「wdm」: asset client.min.js 364 KiB [emitted] (name: main)
runtime modules 432 bytes 3 modules
cacheable modules 335 KiB
modules by path ../node_modules/webpack-dev-server/client/ 20.9 KiB 10 modules
modules by path ../node_modules/html-entities/lib/*.js 61 KiB 5 modules
modules by path ../node_modules/url/ 37.4 KiB 3 modules
modules by path ../node_modules/querystring/*.js 4.51 KiB
../node_modules/querystring/index.js 127 bytes [built]
../node_modules/querystring/decode.js 2.34 KiB [built]
../node_modules/querystring/encode.js 2.04 KiB [built]
modules by path ../node_modules/webpack/hot/*.js 1.42 KiB
../node_modules/webpack/hot/emitter.js 75 bytes [built]
../node_modules/webpack/hot/log.js 1.34 KiB [built]
../node_modules/webpack/hot/ sync nonrecursive ^\.\/log$ 170 bytes [built]
webpack 5.21.2 compiled successfully in 1271 ms
ℹ 「wdm」: Compiled successfully.

ん!
とりあえず作り始めるか。
[React] 基礎

<body>
	<div id="root"></div>
</body>
<script crossorigin src="https://unpkg.com/react@17/umd/react.production.min.js"></script>
<script crossorigin src="https://unpkg.com/react-dom@17/umd/react-dom.production.min.js"></script>
<script src="https://cdnjs.cloudflare.com/ajax/libs/babel-standalone/6.26.0/babel.min.js"></script>
<script type="text/babel">
ReactDOM.render(
  <h1>Hello world</h1>,
  document.getElementById('root')
);
</script>

jsxはjsの拡張構文でタグを含められる
コンパイルすれば、babelは使用しなくて良い

<body>
	<div id="content">
		
	</div>
</body>
<script crossorigin src="https://unpkg.com/react@17/umd/react.production.min.js"></script>
<script crossorigin src="https://unpkg.com/react-dom@17/umd/react-dom.production.min.js"></script>
<script src="https://cdnjs.cloudflare.com/ajax/libs/babel-standalone/6.26.0/babel.min.js"></script>
<script type="text/babel">
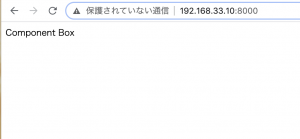
class ComponentBox extends React.Component{
	render(){
		return (
			<div className="ComponentBox">
			Component Box
			</div>
		);
	}
};
ReactDOM.render(
	<ComponentBox/>,
	document.getElementById('content')
);
</script>
</html>

<script type="text/babel">
class Layout extends React.Component{
	render(){
		return (
			<h1>welcome!</h1>
		);
	}
};
const app = document.getElementById('app');
ReactDOM.render(
	<Layout/>, app
);
</script>

こういうこともできる

class Layout extends React.Component{
	constructor(){
		super();
		this.name = "Hpscript";
	}
	render(){
		return (
			<h1>It's {this.name}</h1>
		);
	}
};

なるほどー

[GCP] GCEを使ってみる

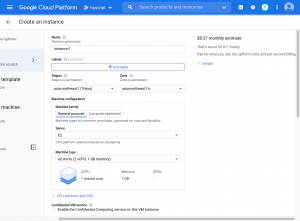
defaultでDebianとなっている。

とりあえず、ubuntu20.04にしておく。
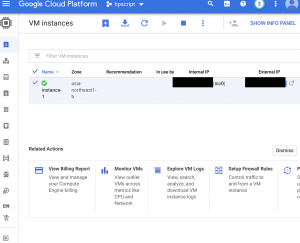
createすると、internal ipとexternal ipが作られる

connect sshを押下すると、ターミナルが自動で起動する。

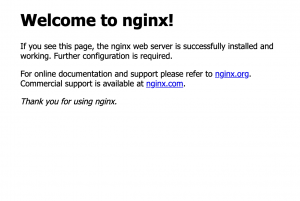
$ sudo apt-get install nginx
external ipを叩く

なるほど、GCPだろうが何だろうが、OSは同じですね。
vpc, subnet, route tableに変わるようなものはあるのだろうか?
AWSと二刀流が良いですが、慣れるまでは実験的に使っていきたいですな。

[GCP] 入門1

GCPを使ってる企業が相当増えてる印象
AzureもMicrosoft系で開発してる企業は使っているがGCPほど広がっていない印象
むしろ、GCPを使えないと時代遅れになりそう

ということで、GCPを学ぶことにした。

### GCPの特徴
– Googleが運営
– Big Queryが優秀らしい
– App Engineは自動スケール
– Machine Learningも先行している

Google Cloud Shellで操作をする
Google Compute Engine (GCE) が、AWSでいうEC2
なるほど、GCEから始めたい

[Terraform 0.14.6] S3を作る

$ terraform –version
Terraform v0.14.6
$ mkdir terraform
$ cd ~
.aws/credentials

[default]
AWS_ACCESS_KEY_ID=
AWS_SECRET_ACCESS_KEY=

main.tf

provider "aws" {
  profile    = "default"
  region     = "ap-northeast-1"
}

resource "aws_instance" "example" {
    ami = "ami-*"
    instance_type = "t2.micro"
}

$ terraform plan

An execution plan has been generated and is shown below.
Resource actions are indicated with the following symbols:
+ create

Terraform will perform the following actions:

# aws_instance.example will be created
+ resource “aws_instance” “example” {
+ ami = “ami-*”
+ arn = (known after apply)
+ associate_public_ip_address = (known after apply)
+ availability_zone = (known after apply)
+ cpu_core_count = (known after apply)
+ cpu_threads_per_core = (known after apply)
+ get_password_data = false
+ host_id = (known after apply)
+ id = (known after apply)
+ instance_state = (known after apply)
+ instance_type = “t2.micro”
+ ipv6_address_count = (known after apply)
+ ipv6_addresses = (known after apply)
+ key_name = (known after apply)
+ outpost_arn = (known after apply)
+ password_data = (known after apply)
+ placement_group = (known after apply)
+ primary_network_interface_id = (known after apply)
+ private_dns = (known after apply)
+ private_ip = (known after apply)
+ public_dns = (known after apply)
+ public_ip = (known after apply)
+ secondary_private_ips = (known after apply)
+ security_groups = (known after apply)
+ source_dest_check = true
+ subnet_id = (known after apply)
+ tenancy = (known after apply)
+ vpc_security_group_ids = (known after apply)

+ ebs_block_device {
+ delete_on_termination = (known after apply)
+ device_name = (known after apply)
+ encrypted = (known after apply)
+ iops = (known after apply)
+ kms_key_id = (known after apply)
+ snapshot_id = (known after apply)
+ tags = (known after apply)
+ throughput = (known after apply)
+ volume_id = (known after apply)
+ volume_size = (known after apply)
+ volume_type = (known after apply)
}

+ enclave_options {
+ enabled = (known after apply)
}

+ ephemeral_block_device {
+ device_name = (known after apply)
+ no_device = (known after apply)
+ virtual_name = (known after apply)
}

+ metadata_options {
+ http_endpoint = (known after apply)
+ http_put_response_hop_limit = (known after apply)
+ http_tokens = (known after apply)
}

+ network_interface {
+ delete_on_termination = (known after apply)
+ device_index = (known after apply)
+ network_interface_id = (known after apply)
}

+ root_block_device {
+ delete_on_termination = (known after apply)
+ device_name = (known after apply)
+ encrypted = (known after apply)
+ iops = (known after apply)
+ kms_key_id = (known after apply)
+ tags = (known after apply)
+ throughput = (known after apply)
+ volume_id = (known after apply)
+ volume_size = (known after apply)
+ volume_type = (known after apply)
}
}

Plan: 1 to add, 0 to change, 0 to destroy.

————————————————————————

Note: You didn’t specify an “-out” parameter to save this plan, so Terraform
can’t guarantee that exactly these actions will be performed if
“terraform apply” is subsequently run.

$ terraform apply
Error: Error launching source instance: MissingInput: No subnets found for the default VPC ‘vpc-*’. Please specify a subnet.

ちょっとvpcに問題があるので、S3にする

provider "aws" {
  profile    = "default"
  region     = "ap-northeast-1"
}

resource "aws_s3_bucket" "b" {
  bucket = "terraform-test-hpscript"
  acl    = "private"

  tags = {
    Name        = "My bucket"
    Environment = "Dev"
  }
}

$ terraform apply

An execution plan has been generated and is shown below.
Resource actions are indicated with the following symbols:
+ create

Terraform will perform the following actions:

# aws_s3_bucket.b will be created
+ resource “aws_s3_bucket” “b” {
+ acceleration_status = (known after apply)
+ acl = “private”
+ arn = (known after apply)
+ bucket = “terraform-test-hpscript”
+ bucket_domain_name = (known after apply)
+ bucket_regional_domain_name = (known after apply)
+ force_destroy = false
+ hosted_zone_id = (known after apply)
+ id = (known after apply)
+ region = (known after apply)
+ request_payer = (known after apply)
+ tags = {
+ “Environment” = “Dev”
+ “Name” = “My bucket”
}
+ website_domain = (known after apply)
+ website_endpoint = (known after apply)

+ versioning {
+ enabled = (known after apply)
+ mfa_delete = (known after apply)
}
}

Plan: 1 to add, 0 to change, 0 to destroy.

Do you want to perform these actions?
Terraform will perform the actions described above.
Only ‘yes’ will be accepted to approve.

Enter a value: yes

aws_s3_bucket.b: Creating…
aws_s3_bucket.b: Still creating… [10s elapsed]
aws_s3_bucket.b: Creation complete after 11s [id=terraform-test-hpscript]

なるほど、terraformの意味がわかった。確かに便利だわ。

Vagrant Amazon Linux2にTerraformをインストールする

$ TER_VER=`curl -s https://api.github.com/repos/hashicorp/terraform/releases/latest | grep tag_name | cut -d: -f2 | tr -d \”\,\v | awk ‘{$1=$1};1’`
$ echo ${TER_VER}
0.14.6
$ wget https://releases.hashicorp.com/terraform/${TER_VER}/terraform_${TER_VER}_linux_amd64.zip
$ unzip terraform_${TER_VER}_linux_amd64.zip
$ ls
$ sudo mv terraform /usr/local/bin/
$ terraform –version
Terraform v0.14.6

まじかよーーーー
1分で出来たやんか。。。。とりあえず、S3にbucket作成ぐらいはやっておきたい。

[Spring Boot2.4.2] XMLで文字列表示

MainController.java

package com.example.demo;

import org.springframework.context.support.ClassPathXmlApplicationContext;

public class MainController {
	public static void main(String[] args) {
		
		ClassPathXmlApplicationContext context =
				new ClassPathXmlApplicationContext("applicationContext.xml");
		
		ISyain syain = context.getBean("testSyain", ISyain.class);
		
		System.out.println(syain.getHello());
		context.close();		
	}
}

applicationContext.xml

<?xml version="1.0" encoding="UTF-8"?>
<beans xmlns="http://www.springframework.org/schema/beans"
	xmlns:xsi="http://www.w3.org/2001/XMLSchema-instance"
	xsi:schemaLocation="http://www.springframework.org/schema/beans
    http://www.springframework.org/schema/beans/spring-beans.xsd">

	<bean id="testSyain" class="com.example.demo.Syain"></bean>
</beans>

ISyain.java

package com.example.demo;

public interface ISyain {
	public String getHello();
}

Syain.java

package com.example.demo;

public class Syain implements ISyain {
	@Override
	public String getHello() {
		return "Hello World!";
	}
}

なるほどー