[AWS S3] バケットの画像パス一覧を取得する

S3に画像が置いてあり、view側では画像のファイル名のみわかっており、拡張子が不明だった場合に、view側からS3に画像があるか判定して、画像があれば拡張子を取得して表示する、という仕組みを作りたかった。

globやfile_get_contentsでワイルドカードを使って拡張子を取得しようとしたが上手くいかない。
よって、画像パス一覧を取得してDBに格納する方法に切り替える。

### バケットの画像パス一覧を取得

require_once "./vendor/autoload.php";

$prefix = "test/";
$s3client = new Aws\S3\S3Client([
    'credentials' => [
        'key' => $key,
        'secret' => $secret,
    ],
    'region' => 'ap-northeast-1',
    'version' => 'latest',
]);

$objects = $s3client->listObjects([
	'Bucket' => $bucket,
	'Prefix' => $prefix,
	'Delimiter' => "/"
]);

$list = array();
foreach($objects["Contents"] as $object) {
    if(substr($object['Key'],-1,1) != "/"){
        array_push($list, substr($object['Key'], 5));
    }
}

print("<pre>");
var_dump($list);
print("</pre>");

ここからDBにpdoで入れる方法を考えます。

[AWS AIM&S3] 特定のバケットのみ操作を許可するポリシー

1. ポリシー作成
まずrootユーザでpolicyを作成します。

{
  "Version": "2012-10-17",
  "Statement": [
    {
      "Effect": "Allow",
      "Action": "s3:*",
      "Resource": [
          "arn:aws:s3:::${BucketName}",
          "arn:aws:s3:::${BucketName}/*"
      ]
    }
  ]
}

2. ユーザ作成
続いて、ユーザに作成したpolicyをattachします。

3. ログイン
https://aws.amazon.com/jp/console/
アカウントID:
ユーザ名:
パスワード:

!!Danger!!
ログインして、S3に行こうとすると、「You don’t have permissions to list buckets」と表示される。
※jsonが間違っている訳ではないので注意が必要

以下のURLに直接アクセスしないとbucketは表示されない。
https://s3.console.aws.amazon.com/s3/buckets/${BucketName}?region=ap-northeast-1&tab=objects

あせったーーーーーーー
さー手順書作るかー

[aws/aws-sdk-php 3.166.2] 複数画像をphpでS3にアップロード

$ composer require aws/aws-sdk-php

require_once "vendor/autoload.php";

$bucket = '';
$key = '';
$secret = '';

$s3client = new Aws\S3\S3Client([
    'credentials' => [
        'key' => $key,
        'secret' => $secret,
    ],
    'region' => 'ap-northeast-1',
    'version' => 'latest',
]);

$file = "img/flower.jpg";

$result = $s3client->putObject(array(
	'Bucket' => $bucket,
	'Key' => 'test/flower.jpg',
	'ACL' => 'public-read',
	'SourceFile' => $file,
	'ContentType' => mime_content_type($file),
));

echo "<pre>";
var_dump($result);
echo "</pre>";

これをファイル複数一括で行いたい。
複数ファイルの取得はglobだったかな。

foreach(glob("img/*.*") as $file) {
    $files[] = $file;
}

$s3client = new Aws\S3\S3Client([
    'credentials' => [
        'key' => $key,
        'secret' => $secret,
    ],
    'region' => 'ap-northeast-1',
    'version' => 'latest',
]);

foreach($files as $file){
		$result[] = $s3client->putObject(array(
		'Bucket' => $bucket,
		'Key' => $file,
		'ACL' => 'public-read',
		'SourceFile' => $file,
		'ContentType' => mime_content_type($file),
	));
}

echo "<pre>";
var_dump($result);
echo "</pre>";

ちょっと時間かかるな。手動でやった方が良さげ。

画像ファイルのアップロード

基本

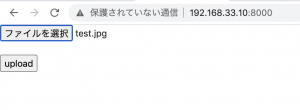
<form action="#" method="POST" enctype="multipart/form-data">
	  <input type="file" name="file"><br><br>
	  <input type="submit" value="upload">
	</form>

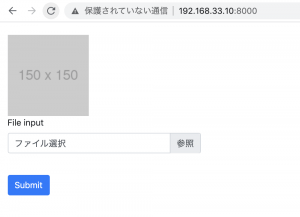
bootstrap

<form action="#" method="POST" enctype="multipart/form-data">
	  <div class="form-group">
	    <label for="inputFile">File input</label>
	    <div class="custom-file">
	    <input type="file" class="custom-file-input" id="inputFile">
	    <label  class="custom-file-label" for="inputFile" data-browse="参照">ファイル選択</label>
		</div>
	  </div>
	  <br>
	  <button type="submit" class="btn btn-primary">Submit</button>
	</form>
</div>
	<script src="https://cdn.jsdelivr.net/npm/bs-custom-file-input/dist/bs-custom-file-input.js"></script>
	<script>
		bsCustomFileInput.init();
	</script>

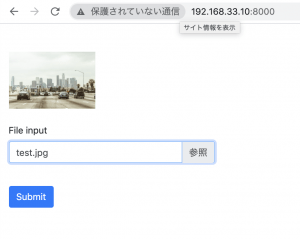
画像変更

	<form action="#" method="POST" enctype="multipart/form-data">
	 <img src="https://placehold.jp/200x150.png" class="img-icon">
	 <div class="preview"></div><br>
	  <div class="form-group">
	    <label for="inputFile">File input</label>
	    <div class="custom-file">
	    <input type="file" class="custom-file-input" id="inputFile" name="file1">
	    <label  class="custom-file-label" for="inputFile" data-browse="参照">ファイル選択</label>
		</div>
	  </div>
	  <br>
	  <button type="submit" class="btn btn-primary">Submit</button>
	</form>
</div>
	<script src="https://cdn.jsdelivr.net/npm/bs-custom-file-input/dist/bs-custom-file-input.js"></script>
	<script
  src="https://code.jquery.com/jquery-3.5.1.js"
  integrity="sha256-QWo7LDvxbWT2tbbQ97B53yJnYU3WhH/C8ycbRAkjPDc="
  crossorigin="anonymous"></script>
	<script>
		bsCustomFileInput.init();

		$(function(){
	  		$('form').on('change', 'input[name="file1"]', function(e) {
			    var file = e.target.files[0],
			        reader = new FileReader(),
			        $preview = $(".preview");
			        t = this;
		    if(file.type.indexOf("image") < 0){
		      return false;
		    }
		    document.getElementsByClassName("img-icon")[0].style.display = "none";
		    reader.onload = (function(file) {
		      return function(e) {
		        $preview.empty();
		        $preview.append($('<img>').attr({
		                  src: e.target.result,
		                  width: "250px",
		                  height: "200px",
		                  class: "preview",
		                  title: file.name
		              }));
		      };
	    	})(file);
		    reader.readAsDataURL(file);
		  });
		});
	</script>

object-fit: containにしておきます。

OK^^

[CSS] object-fitで画像のアスペクト比を変更せずに表示する

異なる画像サイズを一定サイズのカードで表示したい。元画像をそのまま指定したheight, widthで表示した場合、縦長、横長の画像は圧縮されてしまう。どうしたら良いか。

昔、先輩に教わったのだが、システムでは表示する際にデータを装飾することはあっても、基本的に元データそのものを加工・変更してはいけない。

ということで、表示を揃えるためにアップロードした画像をサーバーサイド側で切り抜くのは気が引けていた。
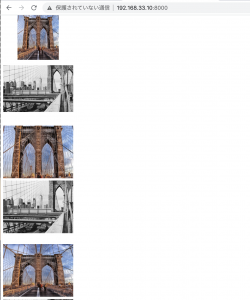
少し調べたら、CSSのobject-fitでアスペクト比を維持したまま処理できるらしい。

contain: アスペクト比を維持したままボックスに収まるよう拡大縮小
cover: アスペクト比を維持したまま、コンテンツボックスを埋めるよう拡大縮小

<!DOCTYPE html>
<html lang="en">
<head>
	<meta charset="UTF-8">
	<title>Document</title>
	<style>
		.contain img {
			width: 200px;
  			height: 150px;
  			object-fit: contain;
		}
		.cover img {
			width: 200px;
  			height: 150px;
  			object-fit: cover;
		}
		.fill img {
			width: 200px;
  			height: 150px;
  			object-fit: fill;
		}
	</style>
</head>
<body>
	<div class="contain">
		<img src="img/bridge1.jpg"><br>
		<img src="img/bridge2.jpg">
	</div>
	<br>
	<div class="cover">
		<img src="img/bridge1.jpg"><br>
		<img src="img/bridge2.jpg">
	</div>
	<br>
	<div class="fill">
		<img src="img/bridge1.jpg"><br>
		<img src="img/bridge2.jpg">
	</div>
	<script>
	</script>
</body>
</html>

coverだと、画像が切れる恐れがあるから、containが一番しっくり来るな。

[Laravel8.16.0] Google Analyticsの値をバッチ処理で挿入する

// 1.モデルを作成
$ php artisan make:model Analytic -m

// 2.migration file

    public function up()
    {
        Schema::create('analytics', function (Blueprint $table) {
            $table->id();
            $table->integer('sessions')->nullable();
            $table->integer('pageviews')->nullable();
            $table->timestamps();
        });
    }

$ php artisan migrate
mysql> describe analytics;

// 3.PDO部分を先に作ります

$date = new DateTime();
$date = $date->format('Y-m-d H:i:s');
$sessions = 100;
$pageviews = 200;

$username="*";
$password="*";
$dsn = 'mysql:host=localhost;dbname=test;charset=utf8';

try {
  $dbh = new PDO($dsn, $username, $password,array(PDO::ATTR_EMULATE_PREPARES => false,PDO::MYSQL_ATTR_INIT_COMMAND => "SET CHARACTER SET `utf8`"));
  $sql = "INSERT INTO analytics(
  sessions, pageviews, created_at
  ) VALUES (
    ".$sessions.", ".$pageviews.", '".$date."'
  )";

  $res = $dbh->query($sql);
} catch (PDOException $e) {
  exit('データベース接続失敗。'.$e->getMessage());
}

$dbh = null;

mysql> select * from analytics;
+—-+———-+———–+———————+————+
| id | sessions | pageviews | created_at | updated_at |
+—-+———-+———–+———————+————+
| 1 | 100 | 200 | 2020-12-05 00:37:52 | NULL |
+—-+———-+———–+———————+————+
1 row in set (0.00 sec)

// 4. GoogleAnalyticsAPIを連結
L バッチで処理する際は、required_once と p12ファイルを絶対パスで指定する必要がある。

require_once '/home/vagrant/dev/test/google-api-php-client/src/Google/autoload.php';
$service_account_email = '*.iam.gserviceaccount.com';
$key = file_get_contents('/home/vagrant/dev/test/analytics-*.p12');
$profile = '*';

$client = new Google_Client();
$analytics = new Google_Service_Analytics($client);

$cred = new Google_Auth_AssertionCredentials(
  $service_account_email,
  array(Google_Service_Analytics::ANALYTICS_READONLY),
  $key
);

$client->setAssertionCredentials($cred);
if($client->getAuth()->isAccessTokenExpired()){
  $client->getAuth()->refreshTokenWithAssertion($cred);
}

$result = $analytics->data_ga->get(
  'ga:' . $profile,
  'yesterday',
  'yesterday',
  'ga:sessions,ga:pageviews',
);
$sessions = $result -> rows[0][0];
$pageviews = $result -> rows[0][1];

mysql> select * from analytics;

$ sudo chmod 755 batch.php

// 5.Cronの設定
$ which php
/usr/bin/php

$ sudo vi /etc/crontab

*/1 * * * * /usr/bin/php /home/vagrant/dev/testApp/batch.php

mysql> select * from analytics;

$ sudo tail -f /var/log/cron でcronログ見るとエラーは出てないのに、mysqlにデータが入ってなくてなんでかと思ったが、required_once と p12ファイルを絶対パスで指定していなかったのが原因だったみたい。難儀なこっちゃ。

[Laravel8.16.0] コントローラのメソッド名とviewsファイル名の命名規則

入力->確認->登録という画面遷移の時に、確認画面のControllerの関数名とtemplateのファイル名に迷った。

関数のメソッドは下のようにキャメルケースで書く。これはいつも通り。

public function createConfirm() {
        return view('admin.client.input_confirm');
    }

で、viewsはスネークケースで書くらしい。アンダーバー無しにつなげて書くのはNGらしい。今までずっとアンダーバー削除してた。
正) input_confirm.blade.php
誤) inputconfirm.blade.php

### まとめ
テーブル名
 L スネークケース(複数): users_table
モデル名
L アッパーキャメル(単数): UserData
migration名
L スネークケース(単数): xxx_crate_users_table
seeder名
L アッパーキャメル: UsersTableSeeder
Controllers名
L アッパーキャメル: UserDataController
views名
L スネークケース: users_add.blade.php
※PHPの関数名ではスネークケースで書くこともあるとのこと

なんか、HTMLのファイル名やルーティングでスネークスケールで書くのかなり抵抗あるけど、bladeならユーザに見えないからまあいいのか。そういえば、migrationも確かにスネークスケールですね。

[Laravel8.16.0] laravel collective(v6.2.0)を使う

$ composer require laravelcollective/html

laravelは8系なのに、collectiveがv6.2.0って、全然追いついてないけど、使ってみます。
L collectiveはcsrfは自動

config/app.php

'providers' => [
   // 省略
   Collective\Html\HtmlServiceProvider::class,
]

'aliases' => [
  // 省略
  'Form' => Collective\Html\FormFacade::class,
  'Html' => Collective\Html\HtmlFacade::class,
],

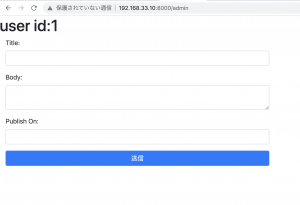
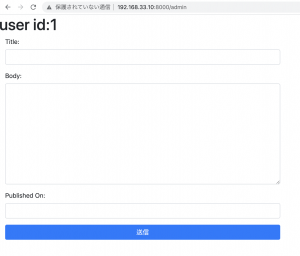
まず、普通のhtmlで書きます。

<!DOCTYPE html>
<html lang="en">
<head>
	<meta charset="UTF-8">
	<title>Document</title>
	<link rel="stylesheet" href="https://maxcdn.bootstrapcdn.com/bootstrap/4.0.0/css/bootstrap.min.css" integrity="sha384-Gn5384xqQ1aoWXA+058RXPxPg6fy4IWvTNh0E263XmFcJlSAwiGgFAW/dAiS6JXm" crossorigin="anonymous">
</head>
<body>
	<h1>user id:{{ $user-> role_id}}</h1>
	<div class="col-md-8">
	<form method="post" action="/admin/create">
		<div class="form-group">
			<label for="title">Title:</label>
			<input class="form-control" name="title" type="text" id="title">
		</div>

		<div class="form-group">
			<label for="body">Body:</label>
			<textarea class="form-control" name="body" type="text" id="body"></textarea>
		</div>

		<div class="form-group">
			<label for="published_at">Publish On:</label>
			<input class="form-control" name="published_at" type="text" id="published_at">
		</div>
		<div class="form-group">
			<input class="btn btn-primary form-control" type="submit" value="送信">
		</div>
	</form>
	</div>
</body>
</html>

続いて、collectiveを使います。

{!! Form::open(['url' => '/admin/create']) !!}
			<div class="form-group">
				{!! Form::label('title', 'Title:') !!}
				{!! Form::text('title', null, ['class' => 'form-control']) !!}
			</div>
			<div class="form-group">
				{!! Form::label('body', 'Body:') !!}
				{!! Form::textarea('body', null, ['class' => 'form-control']) !!}
			</div>
			<div class="form-group">
				{!! Form::label('published_at', 'Published On:') !!}
				{!! Form::text('published_at', null, ['class' => 'form-control']) !!}
			</div>
			<div class="form-group">
			{!! Form::submit('送信',['class' => 'btn btn-primary form-control']) !!}
			</div>
		{!! Form::close() !!}

ふむ、laravel8系でもcollective v6使えますね。安心した。
これを実装していきます。

[Laravel8.16.0] カラム追加・削除のmigrationファイルの書き方

usersテーブルで、first_name、last_nameを削除して、client_nameのカラムを作りたい
※「姓」・「名」を「名前」のカラム一つに統一したい

$ php artisan -V
Laravel Framework 8.16.0

migrationファイルの作成
$ php artisan make:migration change_name_columns_to_users_table –table=users

2020_12_04_040045_change_name_columns_to_users_table.php

    public function up()
    {
        Schema::table('users', function (Blueprint $table) {
            //
            $table->string('client_name')->nullable();
            $table->dropColumn('first_name');
            $table->dropColumn('last_name');
        });
    }

$ php artisan migrate

// migration確認
mysql> describe users;
mysql> select * from users

// git push
$ git add .
$ git commit -m “name columns changed”

‘first_name’、’last_name’もnullableで作っていたが、dropColumnの時は特にnullbaleとかはつけなくて良いみたい。
なるほど。

[UI・UX] 背景色とテキストカラーのコントラスト比の確認方法

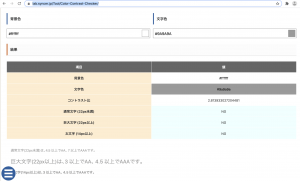
https://lab.syncer.jp/Tool/Color-Contrast-Checker/というサイトで、背景色とテキストのコントラスト比を確認できる。

例えば、背景色が、#ffffff(white)で、テキストが#9A9A9Aだと、コントラスト比が2.81で、Web Content Accessibility Guidelines (WCAG) 2.0の基準4.5に満たないとのこです。

Web Content Accessibility Guidelines
https://waic.jp/docs/UNDERSTANDING-WCAG20/visual-audio-contrast-contrast.html

テキスト及び文字画像の視覚的提示に、少なくとも 4.5:1 のコントラスト比がある。

なうほど、こういうのがあるんやな。勉強になります。