ImageNet Large Scale Visual Recognition Challenge

画像認識コンペティション
ILSVRC(ImageNet Large Scale Visual Recognition Challenge)

2017年の内容
1,Object localization for 1000 categories.
2,Object detection for 200 fully labeled categories.
3,Object detection from video for 30 fully labeled categories.

ILSVRC2012では、AlexNetが優勝
5つの畳み込み層をもち、3つの全結合層
パラメータ数は、約6000万個

ん? 6000万?
畳み込み層のカーネルサイズ、畳み込み層のカーネル数を調整している?
VGGNetのパラーメータは1億4千個?

input -> stem -> 5x Inception-resnet-A -> Reduction A -> 10 x Inception-resnet-B -> Reduction-B -> 5 x Inception-resnet-C -> Average Pooling -> Drop0ut -> Softmax

本郷・水道橋にある画像認識系のスタートアップって、この画像認識のモデルアルゴリズムも設計してるんだろうか。。

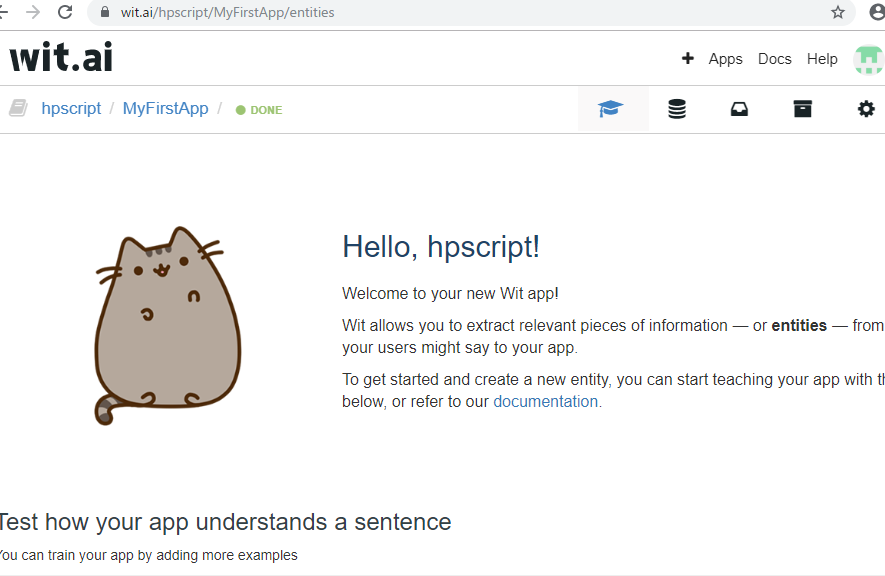
wit.ai

https://wit.ai/

githubアカウントでログインします。

Test how your app understands a sentence
“Engineers tested da Vinci’s bridge design” と入れます。

「インテント」と「エンティティ」を学習させる
bridgeをtargetとするentityをcreateする
value for tested.

このエンティティはUserが自由に定義するようですね。
エンティティを定義して学習させる、という一連のフローは理解できました。

pyaq

Github
https://github.com/intenseG/Pyaq

[vagrant@localhost igo]$ git clone https://github.com/intenseG/Pyaq.git
Initialized empty Git repository in /home/vagrant/python/igo/Pyaq/.git/
remote: Enumerating objects: 74, done.
remote: Total 74 (delta 0), reused 0 (delta 0), pack-reused 74
Unpacking objects: 100% (74/74), done.
[vagrant@localhost igo]$ cd Pyaq
[vagrant@localhost Pyaq]$ ls
LICENSE board.py learn.py pre_train search.py
README.md gtp.py model.py pyaq.py sgf.py

tensorflowが入っていることを確認します
[vagrant@localhost Pyaq]$ pip list

囲碁のデータセット
https://github.com/yenw/computer-go-dataset
http://www.yss-aya.com/ayaself/ayaself.html

pyaqの中身

#!/usr/bin/env python
# -*- coding: utf-8 -*-

from collections import Counter
import sys
from board import *
import gtp
import learn
import search


if __name__ == "__main__":
    args = sys.argv

    launch_mode = 0  # 0: gtp, 1: self, 2: learn
    byoyomi = 5.0
    main_time = 0.0
    quick = False
    random = False
    clean = False
    use_gpu = True

    for arg in args:
        if arg.find("self") >= 0:
            launch_mode = 1
        elif arg.find("learn") >= 0:
            launch_mode = 2
        elif arg.find("quick") >= 0:
            quick = True
        elif arg.find("random") >= 0:
            random = True
        elif arg.find("clean") >= 0:
            clean = True
        elif arg.find("main_time") >= 0:
            main_time = float(arg[arg.find("=") + 1:])
        elif arg.find("byoyomi") >= 0:
            byoyomi = float(arg[arg.find("=") + 1:])
        elif arg.find("cpu") >= 0:
            use_gpu = False

    if launch_mode == 0:
        gtp.call_gtp(main_time, byoyomi, quick, clean, use_gpu)

    elif launch_mode == 1:
        b = Board()
        if not random:
            tree = search.Tree("model.ckpt", use_gpu)

        while b.move_cnt < BVCNT * 2:
            prev_move = b.prev_move
            if random:
                move = b.random_play()
            elif quick:
                move = rv2ev(np.argmax(tree.evaluate(b)&#91;0&#93;&#91;0&#93;))
                b.play(move, False)
            else:
                move, _ = tree.search(b, 0, clean=clean)
                b.play(move, False)

            b.showboard()
            if prev_move == PASS and move == PASS:
                break

        score_list = &#91;&#93;
        b_cpy = Board()

        for i in range(256):
            b.copy(b_cpy)
            b_cpy.rollout(show_board=False)
            score_list.append(b_cpy.score())

        score = Counter(score_list).most_common(1)&#91;0&#93;&#91;0&#93;
        if score == 0:
            result_str = "Draw"
        else:
            winner = "B" if score > 0 else "W"
            result_str = "%s+%.1f" % (winner, abs(score))
        sys.stderr.write("result: %s\n" % result_str)

    else:
        learn.learn(3e-4, 0.5, sgf_dir="sgf/", use_gpu=use_gpu, gpu_cnt=1)

ImportError: /lib64/libc.so.6: version `GLIBC_2.15′ not found

ImportError: /lib64/libc.so.6: version `GLIBC_2.15′ not found
ん?

[vagrant@localhost python]$ ls -l /usr/lib64/libmagic*
lrwxrwxrwx. 1 root root 17 10月 1 20:48 2016 /usr/lib64/libmagic.so.1 -> libmagic.so.1.0.0
-rwxr-xr-x. 1 root root 119896 5月 11 06:03 2016 /usr/lib64/libmagic.so.1.0.0

[vagrant@localhost python]$ rpm -v
RPM バージョン 4.8.0
Copyright (C) 1998-2002 – Red Hat, Inc.
あれ、、

利用可能なパッケージ
名前 : glibc
アーキテクチャ : i686
バージョン : 2.12
リリース : 1.212.el6_10.3
容量 : 4.4 M
リポジトリー : updates
要約 : The GNU libc libraries
URL : http://sources.redhat.com/glibc/
ライセンス : LGPLv2+ and LGPLv2+ with exceptions and GPLv2+
説明 : The glibc package contains standard libraries which are
: used by multiple programs on the system. In order to save
: disk space and memory, as well as to make upgrading
: easier, common system code is kept in one place and shared
: between programs. This particular package contains the
: most important sets of shared libraries: the standard C
: library and the standard math library. Without these two
: libraries, a Linux system will not function.

なるほど、バージョン: 2.12となっています。
conda経由でインストールすると対応できるようです。

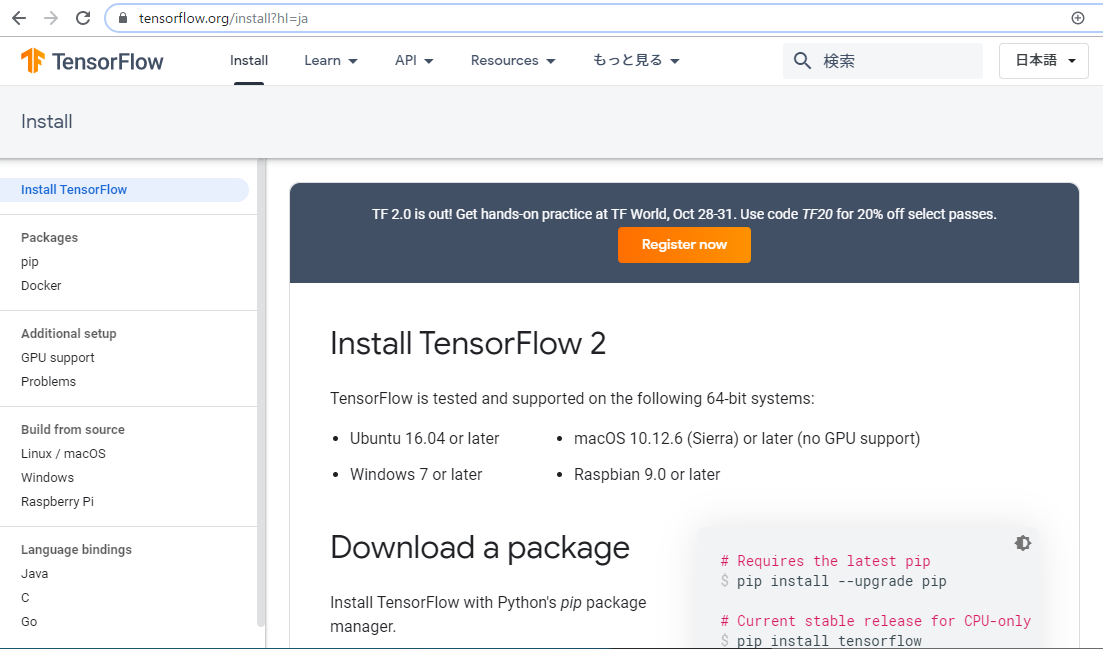
tensorflowのインストール

TensorFlowをインストールします。
https://www.tensorflow.org/install?hl=ja

osは、ubuntu, macos, windows, raspbian とある。
何故か、python使ってる人は、centosではなく、ubuntuで構築してますね。何故だろう。centosはRedhat系ですが、ubuntuはDebianです。
centosだけでなく、ubuntuにも慣れておかないといけないですな。
あああああああああああああ、やることがガンガン増えますね。

さて、tensoflowですが、pipで入れられるようです。少し重いようで、時間がかかります。
[vagrant@localhost python]$ pip install tensorflow
Successfully installed absl-py-0.8.1 astor-0.8.0 gast-0.3.2 google-pasta-0.1.7 grpcio-1.24.1 h5py-2.10.0 keras-applications-1.0.8 keras-preprocessing-1.1.0 markdown-3.1.1 setuptools-41.4.0 tensorboard-1.14.0 tensorflow-1.14.0 tensorflow-estimator-1.14.0 termcolor-1.1.0 werkzeug-0.16.0 wheel-0.33.6 wrapt-1.11.2

kerasのモジュールも入っていますね。

公式を見ると、preview build for cpu, gpuと記載があります。
Or preview build for CPU/GPU (unstable)
pip install tf-nightly

Chainerを始めよう3

-Chainerを使いこなすには、ニューラルネットワークの基礎知識が必要不可欠
-biasノードは通常は1 ex. ax + b のbのようなもの
-hiddenは受け取った入力値axに対し、活性化関数を掛ける:h(ax)
-誤差の計算は、cost function, lost functionなどと表現する
-重みはoptimizerとして定義

chainerのモデル定義

from chainer import Chain, Link, ChainList
import chainer.functions as F 
import chainer.links as L 

class MyChain(Chain):

	def __init__(self):
		super(MyChain, self).__init__(
			l1 = L.Linear(4,3),
			l2 = L.Linear(3,2),
		)

	def __call__(self, x):
		h = F.sigmoid(self.l1(x))
		o = self.l2(h)
		return o

l1, l2のところは、何層のNNか。

データをcsv形式ではけば、chainerで二値分類の学習ができる

Chainerを始めよう2

chainerでlinkはimportの際にLとする

import chainer.links as L

活性化関数はF

import chainer.functions as F

linkやfunctionをまとめて管理するのがchain

class MyNeuralNet(chainer.Chain):
from chainer import Chain, optimizers, Variable
import chainer.functions as F 
import chainer.links as L 

import numpy as np 

from sklearn import datasets, model_selection 

import seaborn as sns 
import matplotlib.pyplot as plt 

class MLP(Chain):
	def __init__(self, n_hid=100, n_out=10):
		super().__init__()
		<b>
		with self.init_scope():
			self.l1 = L.Liner(None, n_hid)
			self.l2 = L.Linear(n_hid, n_out)

	def __call__(self, x):
		hid = F.relu(self.l1(x))
		return self.l2(hid)</b>

iris = datasets.load_iris()

train_data, test_data, train_label, test_label = model_selection.train_test_split(iris.data.astype(np.float32),iris.target)

model = MLP(20, 3)

optimizer = optimizers.SGD()

optimizer.setup(model)

train_data_variable = Variable(train_data.astype(np.float32))
train_label_variable = Variable(train_label.astype(np.int32))

loss_log = []

for epoch in range(200):
	model.cleargrads()
	prod_label = model(train_data_variable)
	loss = F.softmax_cross_entropy(prod_label, train_label_variable)
	loss.backward()
	optimizer.update()

	loss_log.append(loss.data)

plt.plot(loss_log)

ん?
全結合層、ランプ関数の使い方、隠れ層の扱い、フォワードプロパゲーションなどがいまいち理解できん。。

損失関数を計算してから、パラメータを更新?

全結合層は、特徴量の取り出し(畳み込みフィルタ、ReLU、プーリング層)後に、特徴量に基づく分類を行う

ランプ関数は、f(x)= max(0,x)
一変数の実関数であり、独立変数とその絶対値の平均として容易に求められる?

隠れ層は、入力層、出力層の間

Softmax関数:多くの次元からなる入力のうち、自分の値が他の値たちに比べて一番目立っているならば、その値が11に近づく関数

フォワードプロパゲーション:レイヤーを進める方向に計算

あれ、NNでいう学習とは、パラメータの更新をforeachなどで繰り返し処理するってこと??

Chainerを始めよう1

Chainerとは
-> Deep learningのモデル、実行コードを直観的に記述できるpythonのフレームワーク
-> 使用することで、ニューラルネットワークやDeep learningの理解も深まる!?

ニューラルネットワークとは、脳のニューロンのネットワークをコンピュータ上で再現したモデル

ニューラルネットワークは、入力層(l-1層)で受け取り、隠れ層(l層)を通り、出力層(l+1層)から答えを返す

正しい答えと、NNの予想した答えとの誤差を損失関数と呼ぶ。損失関数の値が小さくなるよう値を変えていくことで、NNを学習させる


NNではWeight(結合重み)とBiasという二つのパラメータを使って、目的の値を出力する関数に近いものを作る
ニューロン同士のつながりの強さがweight
ニューロン・weightの出力に足すパラメーターbias
この関数をChainerではLinkと呼ぶ

ではchainerをインストールしましょう。

[vagrant@localhost python]$ pip install chainer
Collecting chainer
Downloading https://files.pythonhosted.org/packages/dc/bf/b561706d4e86f055841c7a5a414b5e5423bea230faa92abf5422c82cf995/chainer-6.4.0.tar.gz (876kB)
100% |████████████████████████████████| 880kB 641kB/s
Requirement already satisfied: setuptools in /home/vagrant/.pyenv/versions/3.5.2/lib/python3.5/site-packages (from chainer) (20.10.1)
Collecting typing<=3.6.6 (from chainer) Downloading https://files.pythonhosted.org/packages/4a/bd/eee1157fc2d8514970b345d69cb9975dcd1e42cd7e61146ed841f6e68309/typing-3.6.6-py3-none-any.whl Collecting typing_extensions<=3.6.6 (from chainer) Downloading https://files.pythonhosted.org/packages/62/4f/392a1fa2873e646f5990eb6f956e662d8a235ab474450c72487745f67276/typing_extensions-3.6.6-py3-none-any.whl Collecting filelock (from chainer) Downloading https://files.pythonhosted.org/packages/93/83/71a2ee6158bb9f39a90c0dea1637f81d5eef866e188e1971a1b1ab01a35a/filelock-3.0.12-py3-none-any.whl Requirement already satisfied: numpy>=1.9.0 in /home/vagrant/.pyenv/versions/3.5.2/lib/python3.5/site-packages (from chainer) (1.15.0)
Collecting protobuf<3.8.0rc1,>=3.0.0 (from chainer)
Downloading https://files.pythonhosted.org/packages/81/59/c7b0815a78fd641141f24a6ece878293eae6bf1fce40632a6ab9672346aa/protobuf-3.7.1-cp35-cp35m-manylinux1_x86_64.whl (1.2MB)
100% |████████████████████████████████| 1.2MB 1.2MB/s
Requirement already satisfied: six>=1.9.0 in /home/vagrant/.pyenv/versions/3.5.2/lib/python3.5/site-packages (from chainer) (1.11.0)
Installing collected packages: typing, typing-extensions, filelock, protobuf, chainer
Running setup.py install for chainer … done
Successfully installed chainer-6.4.0 filelock-3.0.12 protobuf-3.7.1 typing-3.6.6 typing-extensions-3.6.6

はや、数秒ですね。
[vagrant@localhost python]$ pip list
Package Version
—————– ———
awscli 1.16.198
beautifulsoup4 4.6.1
botocore 1.12.188
certifi 2018.4.16
chainer 6.4.0

import chainer

print(chainer.print_runtime_info())

Platform: Linux-2.6.32-754.14.2.el6.x86_64-x86_64-with-centos-6.10-Final
Chainer: 6.4.0
NumPy: 1.15.0
CuPy: Not Available
iDeep: Not Available
None

DNN(ディープニューラルネットワーク)

DNNはディープラーニングの一種
多数ライブラリが公開されているが、中でも”chainer”と”TensorFlow”が有名

chainerはPreferred Networksが開発、TensorFlowはGoogle

TensorFlow
https://www.tensorflow.org/

Chainer
https://tutorials.chainer.org/ja/

import data
import numpy as np 

mnist = data.load_mnist_data()
x_all = mnist['data'].astype(np.float32)/255
y_all = mnist['target'].astype(np.int32)

y_all = dense_to_one_hot(y_all)

x_train, x_test = np.split(x_all, [60000])
y_train, y_test = np.split(y_all, [60000])

tensorflowの特徴
– ニューラルネットワークだけでなく、機械学習、数値計算をカバー
– 低レベル処理も可能
– GPU利用が用意
– 複数デバイスの並列処理が容易
– 直観的に構築できる
– 難易度が高い
– 利用人口が多い

chainerの特徴
– 直観的かつシンプル
– 初心者に優しい
– 複雑な計算グラフに対応できる
– GPUでの高速処理
– 計算速度が遅い

いよいよ来たか、という感じです。
比較すると、まずはChainerで基礎をやって、それからTensorFlow って流れの方が良さそうですかね。

クロスエントロピー誤差

目的関数J(Θ)を最小にするには、
J(Θ)= 1/2m*mΣi=1(pxi – yi)^2

ただし、0≦pxi≦1でyiは0もしくは1の為、
L(Θ)= – mΣi=1(yilog(pxi)+(1-yi)log(1-pxi))を求めた方がより簡便な計算になる。
これをクロスエントロピー誤差関数という。

def cross_entropy_error(y,t):
	delta = le-7
	return -np.sum(t*np.log(y+delta))

うん、ここは後々復習が必要そうだな。