Register the current time in mysql datatime using PDO

From the PHP point of view, MySQL’s datetime type is just a string, so it is OK if you convert the current time to MySQL’s datetime type format using current time with date() and class DateTime.

Here is a solution.

$stmt->bindParam(':created_at',date('Y-m-d H:i:s'), PDO::PARAM_STR);

Connect and write

$last_name = $_POST['last_name'];
$first_name = $_POST['first_name'];
$flast_name = $_POST['flast_name'];
$ffirst_name = $_POST['ffirst_name'];
$birth = $_POST['birth'];
$mail = $_POST['mail'];
$tel = $_POST['tel'];
$job_place = $_POST['job-place'];
$salary = $_POST['salary'];
$filename = $_POST['filename'];
$upload = $_POST['upload'];

try {
	$pdo = new PDO('mysql:host=localhost;dbname=engineer;charset=utf8','root','',array(PDO::ATTR_EMULATE_PREPARES => false));
} catch (PDOException $e){
	exit('データベース接続失敗'. $e->getMessage());
}
$stmt = $pdo -> prepare("INSERT INTO register(last_name, first_name, flast_name, ffirst_name, birth, mail, tel, job_place, salary, filename, upload, created_at) values(:last_name, :first_name, :flast_name, :ffirst_name, :birth, :mail, :tel, :job_place, :salary, :filename, :upload, :created_at)");
$stmt->bindParam(':last_name',$last_name, PDO::PARAM_STR);
$stmt->bindParam(':first_name',$first_name, PDO::PARAM_STR);
$stmt->bindParam(':flast_name',$flast_name, PDO::PARAM_STR);
$stmt->bindParam(':ffirst_name',$ffirst_name, PDO::PARAM_STR);
$stmt->bindParam(':birth',$birth, PDO::PARAM_STR);
$stmt->bindParam(':mail',$mail, PDO::PARAM_STR);
$stmt->bindParam(':tel',$tel, PDO::PARAM_STR);
$stmt->bindParam(':job_place',$job_place, PDO::PARAM_STR);
$stmt->bindParam(':salary',$salary, PDO::PARAM_INT);
$stmt->bindParam(':filename',$filename, PDO::PARAM_STR);
$stmt->bindParam(':upload',$upload, PDO::PARAM_STR);
$stmt->bindParam(':created_at',date('Y-m-d H:i:s'), PDO::PARAM_STR);
$stmt->execute();

mysql> select * from register;
+----+-----------+------------+------------+-------------+-------+--------------      ------+---------------+-----------+--------+---------------+--------------------      -----------------+---------------------+
| id | last_name | first_name | flast_name | ffirst_name | birth | mail                     | tel           | job_place | salary | filename      | upload                                    | created_at          |
+----+-----------+------------+------------+-------------+-------+--------------      ------+---------------+-----------+--------+---------------+--------------------      -----------------+---------------------+
|  1 | 田中      | 太郎       | タナカ     | タロウ      |  1985 | engineer@gmai      l.com | 080-1234-5678 | 関東      |      0 |               | ./cfile/20190519071      727              | 2019-05-19 07:17:29 |
|  2 | 田中      | 太郎       | タナカ     | タロウ      |  1985 | engineer@gmai      l.com | 080-1234-5678 | 関東      |      0 | nightsky.jpeg | ./cfile/20190519071      835nightsky.jpeg | 2019-05-19 07:18:37 |
+----+-----------+------------+------------+-------------+-------+--------------      ------+---------------+-----------+--------+---------------+--------------------      -----------------+---------------------+
2 rows in set (0.00 sec)

Also want to send a email.

Transfer file to confirmation screen

index.php

<form action="confirm.php" enctype="multipart/form-data" method="post">
...

<p>
								職務経歴書<br>
								<label><input id="select-file" style="display:none" type="file" name="filename" onChange="file_selected()"><input id="file-name" type="text" value="ファイルを選択してください" readonly="readonly" onclick="file_select()"></label><span id="message">選択されていません</span>
							</p>
...
<p>
								「<a href="privacy.php">個人情報の取り扱い</a>」に同意の上、無料登録するのボタンをクリックしてください。
								<input type="submit" id="regist" value="同意して無料登録する">
							</p>
						</form>

confirm.php

 $upload = './cfile/'.$_FILES['filename']['name'];
 if(move_uploaded_file($_FILES['filename']['tmp_name'],$upload)){
 	echo 'success';
 } else {
 	echo 'failed';
 }

successed

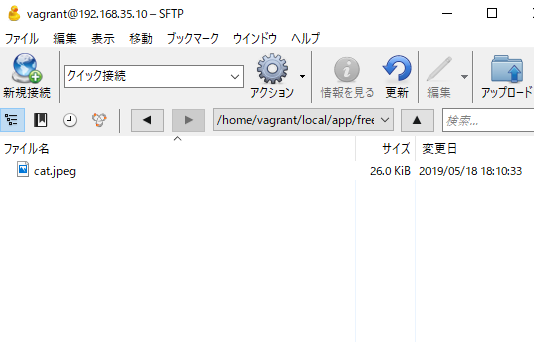
delete temporary file before upload.

 $dir = glob('./cfile/*');
 foreach($dir as $file){
 	unlink($file);
 }
 $upload = './cfile/'.$_FILES['filename']['name'];
 if(move_uploaded_file($_FILES['filename']['tmp_name'],$upload)){
 	echo 'success';
 } else {
 	echo 'failed';
 }

– If this is done, the uploaded file will disappear when multiple users operate, so it has to be deleted by cron batch etc.

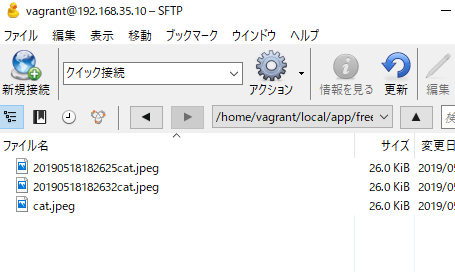
 $upload = './cfile/'.date("YmdHis").$_FILES['filename']['name'];
 if(move_uploaded_file($_FILES['filename']['tmp_name'],$upload)){
 	echo 'success';
 } else {
 	echo 'failed';
 }

PHP file upload process

Let’s upload the file while looking at the simplest code.

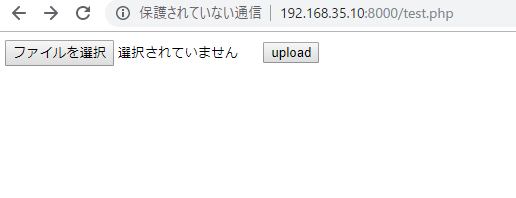
test.php

<form action="test2.php" enctype="multipart/form-data" method="post">
	<input name="file_upload" type="file">
	<input type="submit" value="upload">
</form>

test2.php

	$upload = './'.$_FILES['file_upload']['name'];
	if(move_uploaded_file($_FILES['file_upload']['tmp_name'], $upload)){
		echo 'upload success';
	} else {
		echo 'upload failed';
	}

well done.

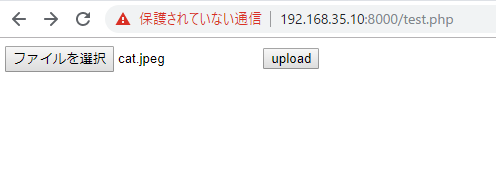
PHPでファイルアップロードに確認画面を挟む時

アップロードした一時ファイルは、PHPの実行が終わった時点で削除されてしまう。
よって、$_FILESを次画面に送ってもファイルがない。
よって、確認画面表示時には既にサーバーに仮アップして、完了後にしかるべき場所に移動、という方法がある。

index.php

<p>
								職務経歴書<br>
								<label><input id="select-file" style="display:none" type="file" onChange="file_selected()" name="filename"><input id="file-name" type="text" value="ファイルを選択してください" readonly="readonly" onclick="file_select()"></label><span id="message">選択されていません</span>
							</p>

confirm.php

<td>職務経歴書</td>
							<td>
								<?php
									if(!empty($_POST&#91;"filename"&#93;)){
									    echo $_POST&#91;"filename"&#93;; 
								    } else {
								        echo "-";
								    }   
							    ?>
								
							</td>

当然、これではあかん。。

CloudWatch Logs

CloudWatch Logs is a log monitoring service provided by AWS. Collect OS logs and application logs of EC2 instances and monitor them in real time.

Amazon CloudWatch is an application monitoring service that runs on AWS. Can use Amazon CloudWatch to gain visibility into resource utilization, application performance, and operation status across the system. Use these insights to respond and keep your application running smoothly.

With CloudWatch Logs, can mainly used for:
– Log accumulation (you can set the retention period)
– Specific character filtering
– Graph what matched the filter pattern
– Alert settings linked with Amazon SNS(Simple Notification Service)

CloudWatchの取り込みが1GBあたり91.2円、1GBあたりのアーカイブが3.96円。
あれ、これどーやって計算するんだろう。。
たとえば、データ量として大きくなりそうなのはELBだが、ELBでどれ位のボリュームでどれ位のデータ量になるんだろうか??

flush privileges

flush privileges
-> 権限の反映?
GRANT, REVOKE, or SET PASSWORDなどのステートメントでは必要ない??

手動で権限テーブルをリロードするには、FLUSH PRIVILEGESステートメントを発行?
ふーん、そうなのか。。

mysqlの権限設定

グローバルレベル
GRANT ALL ON *.* TO user;
GRANT SELECT, INSERT ON *.* TO user;

データベースレベル
GRANT ALL ON db_name.* TO user;
GRANT SELECT, INSERT ON mydb.* TO user;

テーブルレベル
GRANT ALL ON db_name.table_name TO user;
GRANT SELECT, INSERT ON db_name.mytbl TO user;

カラムレベル
GRANT SELECT (col1), INSERT (col1, col2) ON db_name.table_name TO user;

実際にやってみましょう。
mysql> create user saru@localhost identified by ‘monkey’;
Query OK, 0 rows affected (0.59 sec)

mysql> show grants for saru@localhost;
+————————————————————————————————————-+
| Grants for saru@localhost |
+————————————————————————————————————-+
| GRANT USAGE ON *.* TO ‘saru’@’localhost’ IDENTIFIED BY PASSWORD ‘*A5892368AE83685440A1E27D012306B073BDF5B7’ |
+————————————————————————————————————-+
1 row in set (0.09 sec)

mysql> grant create on *.* to saru@localhost;
Query OK, 0 rows affected (0.05 sec)

mysql> show grants for saru@localhost;
+————————————————————————————————————–+
| Grants for saru@localhost |
+————————————————————————————————————–+
| GRANT CREATE ON *.* TO ‘saru’@’localhost’ IDENTIFIED BY PASSWORD ‘*A5892368AE83685440A1E27D012306B073BDF5B7’ |
+————————————————————————————————————–+
1 row in set (0.00 sec)

なるほど、grant userの後に、grantで権限を付けるわけですね。
ちょっと感動しました。

RDSのエラーログ

cliでRDSのログを確認するには、describe-db-log-files

aws rds describe-db-log-files --db-instance-identifier rds001

jsonから、ログのみに変更することも可

aws rds describe-db-log-files --db-instance-identifier rds001 --filename-contains error --output text

エラーログはmysql-error-running.logという名前で1時間ごとに出力される。
エラーログの中身は download-db-log-file-portionというコマンドを使う。

aws rds download-db-log-file-portion --db-instance-identifier rds001 --log-file-name error/mysql-error-running.log.6

– Error logs are written to the mysql-error.log file.
– mysql-error.log is flushed every 5minutes.
– The flushed content is added to mysql-error-running.log
– mysql-error-running.log is rotated hourly.
– Rotaed logs are kept for 24 hours.
– Each log file has UTC time appended to the file name(% H of rotated UTC time)
– Writing to the error log is only performed at startup, at shutdown, and at error detection.

なんだこりゃ、超重要やんけ。

mysql show processlist

It is a command to view the list of currently running porcesses.
Used it to confirm that the batch is moving, or when didn’t get back a heavy query.

まず、show processlistとします。

mysql> show processlist
-> ;
+—-+——+———–+——+———+——+——-+——————+
| Id | User | Host | db | Command | Time | State | Info |
+—-+——+———–+——+———+——+——-+——————+
| 2 | root | localhost | demo | Query | 0 | init | show processlist |
+—-+——+———–+——+———+——+——-+——————+
1 row in set (0.21 sec)

続いて、別のユーザでログインしてみます。
mysql> show processlist;
+—-+——+———–+——+———+——+——-+——————+
| Id | User | Host | db | Command | Time | State | Info |
+—-+——+———–+——+———+——+——-+——————+
| 2 | root | localhost | demo | Query | 1 | init | show processlist |
| 3 | root | localhost | test | Sleep | 13 | | NULL |
+—-+——+———–+——+———+——+——-+——————+
2 rows in set (1.67 sec)

なるほど、状態が分かりますね。素晴らしい。