まず、グーチョキパーを180° rotateさせたpngを用意します。
assetの画像をrotateしたグーチョキパーに置き換えます。
続いて、rotateしないグーチョキパーをassetに保存します。
compileするとグーチョキパーが逆になります。
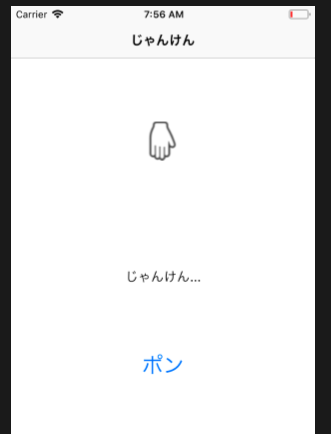
「ポン」をグーチョキパーにしたい。
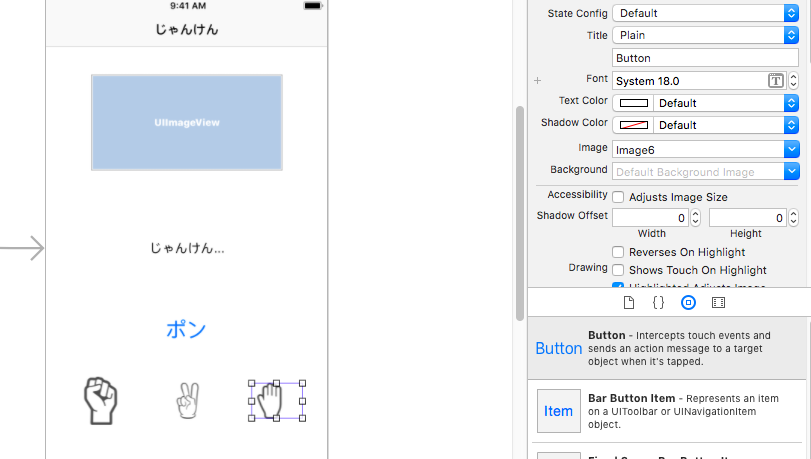
controllerviewにボタンを置いて、buttonのinspector painでimageを選択します。
なるほど!
ソフトウェアエンジニアの技術ブログ:Software engineer tech blog
随机应变 ABCD: Always Be Coding and … : хороший

まず、グーチョキパーを180° rotateさせたpngを用意します。
assetの画像をrotateしたグーチョキパーに置き換えます。
続いて、rotateしないグーチョキパーをassetに保存します。
compileするとグーチョキパーが逆になります。
「ポン」をグーチョキパーにしたい。
controllerviewにボタンを置いて、buttonのinspector painでimageを選択します。
なるほど!
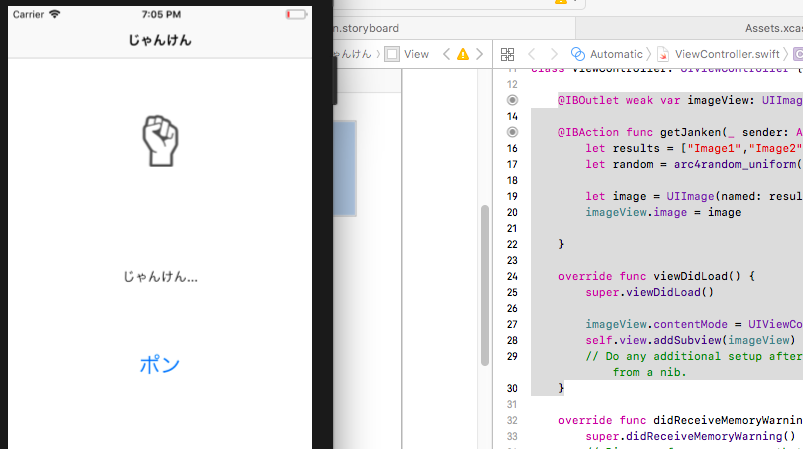
UIImage(named:)をarc4random_uniformで表示します。
@IBOutlet weak var imageView: UIImageView!

    @IBAction func getJanken(_ sender: Any) {
        let results = ["Image1","Image2","Image3"]
        let random = arc4random_uniform(UInt32(results.count))

        let image = UIImage(named: results[Int(random)])
        imageView.image = image

    }

    override func viewDidLoad() {
        super.viewDidLoad()

        imageView.contentMode = UIViewContentMode.center
        self.view.addSubview(imageView)
        // Do any additional setup after loading the view, typically from a nib.
    }
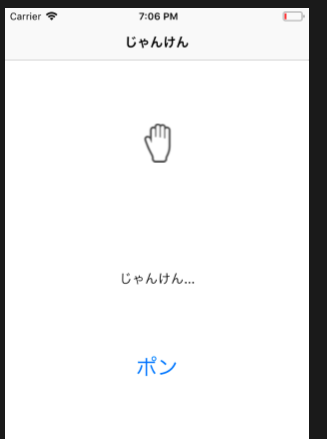
ポンのbuttonを押すとグーチョキパーがランダムに表示されます。
OK
ポンのテキストを自分の出すグーチョキパーのボタンに変えたいですね。
ところで、
viewDidLoad は、ViewControllerのviewがロードされた後に呼び出される。
override func viewDidLoad() {
        super.viewDidLoad()
ところで、このsuperだが、親クラスのviewDidLoadを呼び出している。
継承を行った時あるいはsystemのデフォルト処理をする為に記述する必要がある。
overrideしてますね。
続いてdidReceiveMemoryWarningだが、その名の通り、メモリ不足時にdidReceiveMemoryWarningメソッドが呼ばれる
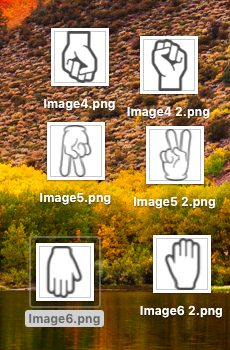
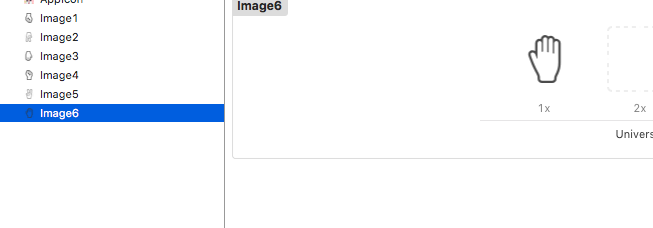
グー、チョキ、パーの画像を置いていきます。

これをどうやって、controller.swfitで呼び出すんだ?
let image = UIImage(named: “Image2”)でコンパイルしてみる。
override func viewDidLoad() {
        super.viewDidLoad()
        let image = UIImage(named: "Image2")
        imageView.image = image
        imageView.contentMode = UIViewContentMode.center
        self.view.addSubview(imageView)
        // Do any additional setup after loading the view, typically from a nib.
    }
あれ、UIImage(named: “ファイル名”)でいけますね。
すると、/app/hoge.jpg と /app/Aseets.xcassets/hoge 共にUIImage(named: “hoge”)で読み込める、ということですな。 詳細はわかりませんが、コンパイルする際に、同階層として扱っているんでしょう。
では、ボタンを押したら、グーチョキパーがランダムで表示されるよう作っていきたいと思います。
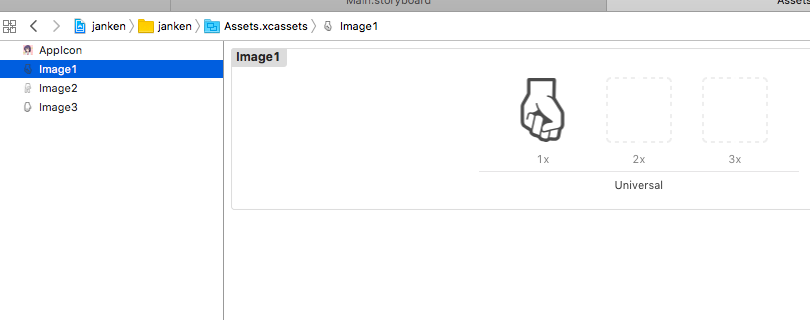
Asset Catalog ファイル(.xcassets):
画像を一元管理出来るようになり、画像ファイルの追加・削除・修正を行ってもプロジェクトファイル(.pbxproj)は変更されない
早速置いてみましょう。
Assets.xcassetsを押下すると、以下のような画面になります。
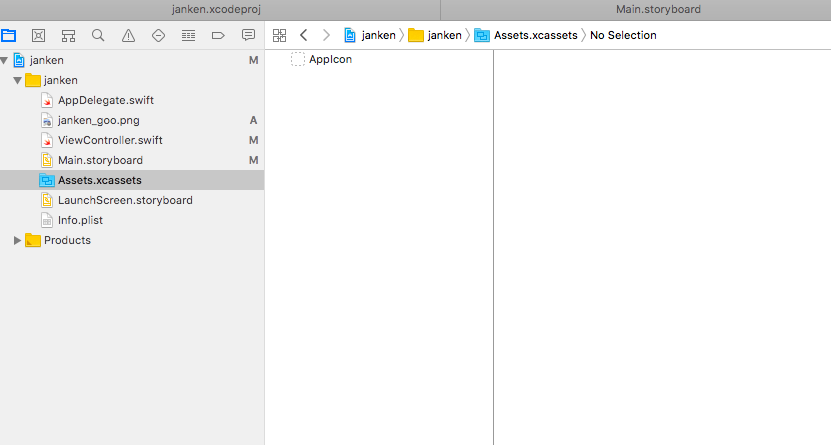
AppIconがデフォルトで入っています。AppIconをクリックすると

retina ディスプレイ対応を2x, 3xで表しています。
2xは、2倍ですね。
以下の画像をおきます。
![]()
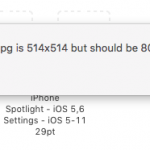
あら、should be 80 x 80pix と言われました。
とりあえず、エミュレーターをbuildして見ます。
なに、なんか知らんがエラーになった。
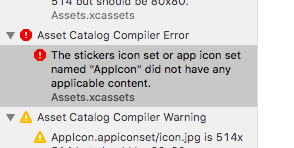
やっぱり120px x 120でないとダメみたい。
本当なら、psdで編集したいが、横着してtoolでresizeします。
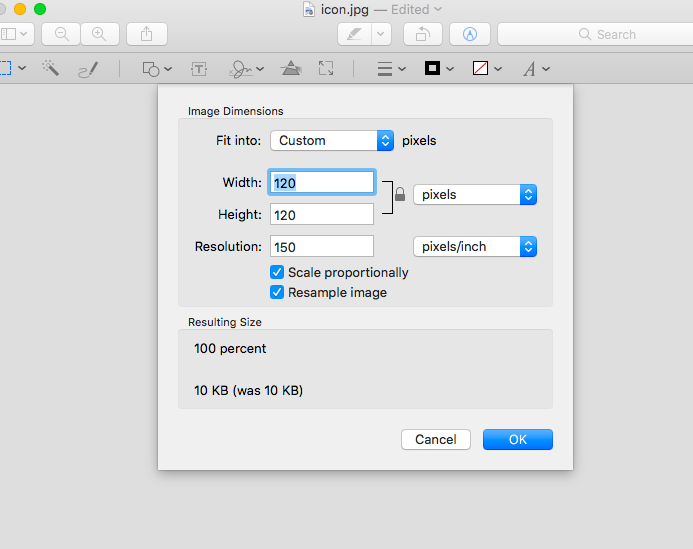
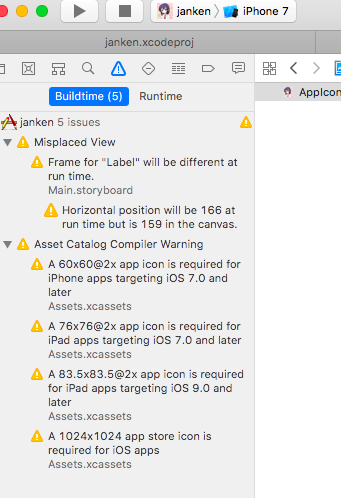
エラーが消えたのでコンパイルします。
bui1ld succeeded!
いいね、これ好きです。
うお、warningが出まくってる
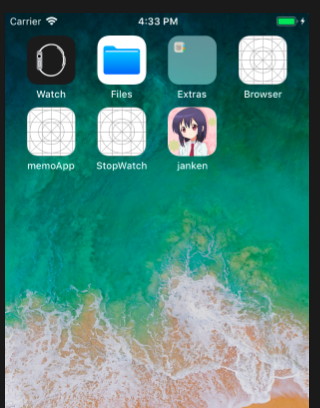
きた! icon変わりました。niceです。
まず画像を用意する
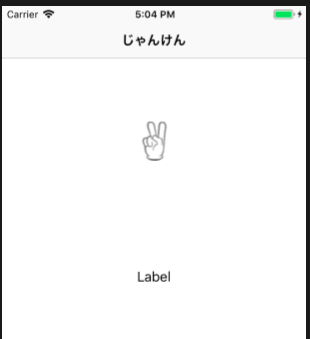
チョキは適当な画像が見当たらなかった為、ピースサイン
![]()
![]()

続いてStory boardにUIImageViewを配置する
control でviweController.swiftに繋げて、UIImage(named: “janken_goo”)と書く
let image = UIImage(named: “janken_goo”)
imageView.image = image
class ViewController: UIViewController {

    @IBOutlet weak var imageView: UIImageView!

    override func viewDidLoad() {
        super.viewDidLoad()
        let image = UIImage(named: "janken_goo")
        imageView.image = image
        // Do any additional setup after loading the view, typically from a nib.
    }

    override func didReceiveMemoryWarning() {
        super.didReceiveMemoryWarning()
        // Dispose of any resources that can be recreated.
    }


}
UIImageViewの画像サイズのままになっている。。
48x48pixなんだけどな。
それと、今日、本屋で立ち読みした本には、画像はAssets.xcassestsに置くと書いてあったが。。swift書くまえにいきなりつまづいた。
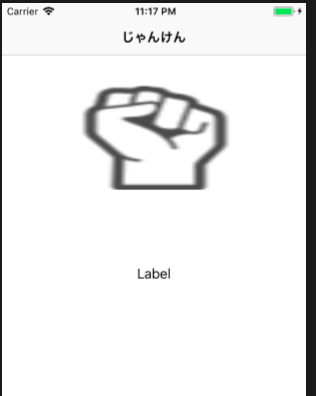
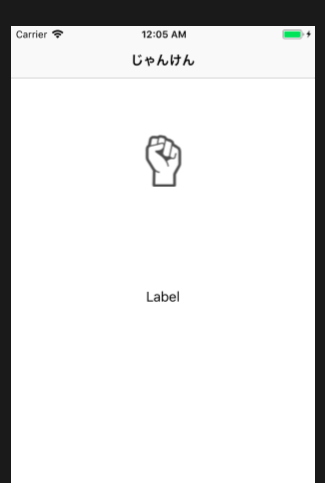
imageView.contentMode で画像の縦横サイズを指定出来るらしい。
override func viewDidLoad() {
        super.viewDidLoad()
        let image = UIImage(named: "janken_goo")
        imageView.image = image
        imageView.contentMode = UIViewContentMode.Center
        self.view.addSubview(imageView)
        // Do any additional setup after loading the view, typically from a nib.
    }
UIViewContentMode.Centerでerror, build出来ない。
なに???
いろいろなサイトを横断して、appleのdeveloper siteのuiviewcontentmodeを見てみる
https://developer.apple.com/documentation/uikit/uiviewcontentmode
case center
The option to center the content in the view’s bounds, keeping the proportions the same.
なに? centerは小文字?
imageView.contentMode = UIViewContentMode.centerで再度build
override func viewDidLoad() {
        super.viewDidLoad()
        let image = UIImage(named: "janken_goo")
        imageView.image = image
        imageView.contentMode = UIViewContentMode.center
        self.view.addSubview(imageView)
        // Do any additional setup after loading the view, typically from a nib.
    }
おおおお、ファイヤー
iOS開発で初めてちょっと仕事した!
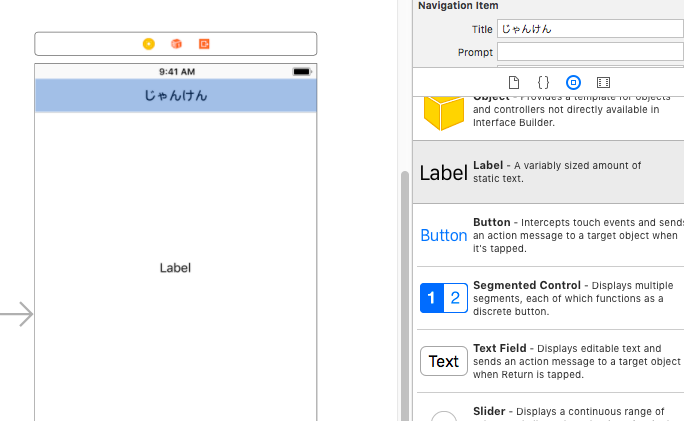
embed inでnavigation controllerを設置し、titleの個所をクリックしてもedit出来ないと思っていたら、attribute inspectorのNavigation itemで編集出来ますね。
これだけにずっと悩んでいた
 @IBAction func unwindToMemoList(sender: UIStoryboardSegue)
    {
        guard let sourceVC = sender.source as? memoViewController, let memo = sourceVC.memo else {
            return
        }
        if let selectedIndexPath = self.tableView.indexPathForSelectedRow {
            self.memos[selectedIndexPath.row] = memo
        } else {
            self.memos.append(memo)
        }
        self.tableView.reloadData()
    }
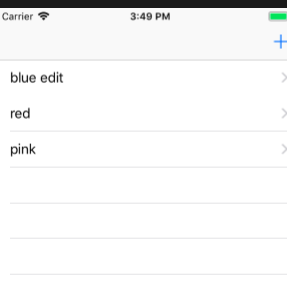
tableView.reloadDataでtableviewを表示
うーむ、windowsでudacityのiosコースのコードをなぞっていたのは全く時間の無駄だったな。
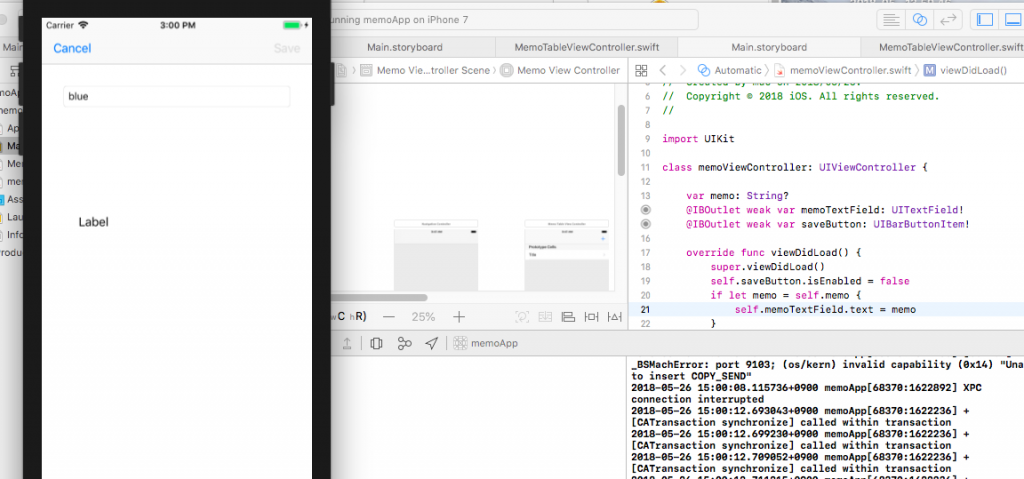
override func viewDidLoad() {
        super.viewDidLoad()
        self.saveButton.isEnabled = false
        if let memo = self.memo {
            self.memoTextField.text = memo
        }
        // Do any additional setup after loading the view.
    }
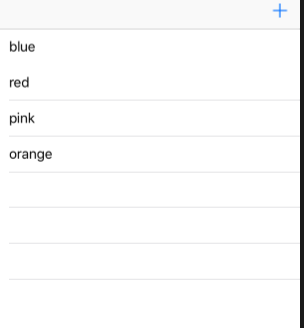
キャンセルを実行する
 @IBAction func cancel(_ sender: Any) {
        if self.presentingViewController is UINavigationController {
            self.dismiss(animated: true, completion: nil)
        } else {
            self.navigationController?.popViewController(animated: true)
        }
    }
お
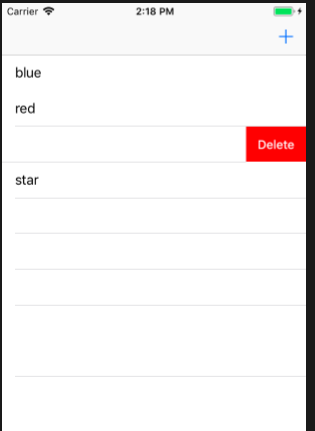
tableviewcontrollerのコメントをはずす
override func tableView(_ tableView: UITableView, commit editingStyle: UITableViewCellEditingStyle, forRowAt indexPath: IndexPath) {
        if editingStyle == .delete {
            // Delete the row from the data source
            self.memos.remove(at: indexPath.row)
            tableView.deleteRows(at: [indexPath], with: .fade)
        } else if editingStyle == .insert {
            // Create a new instance of the appropriate class, insert it into the array, and add a new row to the table view
        }
    }
おおお、すげー
機能ありすぎて整理出来んな
var memo: String?
    @IBOutlet weak var memoTextField: UITextField!
    @IBOutlet weak var saveButton: UIBarButtonItem!

    override func viewDidLoad() {
        super.viewDidLoad()
        self.saveButton.isEnabled = false
        // Do any additional setup after loading the view.
    }

    @IBAction func memoTextFieldChanged(_ sender: Any) {
        let memo = self.memoTextField.text ?? ""
        self.saveButton.isEnabled = !memo.isEmpty
    }

    @IBAction func cancel(_ sender: Any) {
        self.dismiss(animated: true, completion: nil)
    }

    override func didReceiveMemoryWarning() {
        super.didReceiveMemoryWarning()
        // Dispose of any resources that can be recreated.
    }

    override func prepare(for segue: UIStoryboardSegue, sender: Any?) {
        guard let button = sender as? UIBarButtonItem, button === self.saveButton else{
            return
        }
        self.memo = self.memoTextField.text ?? ""
    }
oh my goodness
i dont understand whats going on