jQuery マウスの座標軸の取得


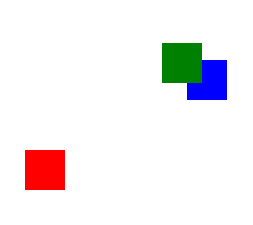
マウスの座標軸を$(‘#container’).mousemove(function(e){ console.log(e.clientX, e.clientY); で取得し、中心からの距離に合わせてオブジェクトの形状を変える処理です。

<!DOCTYPE html>
<html lang="ja">
  <head>
    <meta charset="utf-8">
    <meta name="viewport" content="width=device-width, initial-scale=1.0">
    <script src="https://ajax.googleapis.com/ajax/libs/jquery/3.1.1/jquery.min.js"></script>
    <title>パララックスサイト</title>
    <style>
    body {
      margin: 0;
      padding: 0;
    }
    #container {
      width: 600px;
      height: 280px;
      background: #eee;
    }
    .box {
      position: fixed;
      opacity: 0.6;
      left: 300px;
    }
    #box1 {
      width: 40px;
      height: 40px;
      top: 140px;
      background: red;
    }
    #box2 {
      width: 50px;
      height: 50px;
      top: 155px;
      background: blue;
    }
    #box3 {
      width: 60px;
      height: 60px;
      top: 165px;
      background: yellow;
    }
    </style>
    <link rel="stylesheet" href="styles.css">
  </head>
  <body>
    <div id="container">
    <div id="box1" class="box"></div>
    <div id="box2" class="box"></div>
    <div id="box3" class="box"></div>
    </div>
    <script>
    $(function(){
      $('#container').mousemove(function(e){
          console.log(e.clientX, e.clientY);
          var cx = $(this).width() / 2;
          var cy = $(this).height() / 2;
          var dx = e.clientX - cx;
          var dy = e.clientY - cy;
          $('#box1').css('left', cx + dx * 1.1);   
          $('#box2').css('left', cx + dx * 1.3); 
          $('#box3').css('left', cx + dx * 1.5);
          $('#box1').css('top', cy + dy * 1.0);   
          $('#box2').css('top', cy + dy * 1.1); 
          $('#box3').css('top', cy + dy * 1.2);        
      });
    });
    </script>
  </body>
</html>

jQuery パララックス2

cssのbackground-positionを$(window).scroll(function(){ var dy = $(this).scrollTop(); で操作します。

<!DOCTYPE html>
<html lang="ja">
  <head>
    <meta charset="utf-8">
    <meta name="viewport" content="width=device-width, initial-scale=1.0">
    <script src="https://ajax.googleapis.com/ajax/libs/jquery/3.1.1/jquery.min.js"></script>
    <title>パララックスサイト</title>
    <style>
    body {
      margin: 0;
      padding: 0;
      height: 3000px;
    }
    .box {
      padding: 0;
      margin:0;
      height: 340px;
    }
    #bg1 { background: url('p1.jpg') no-repeat; }
    #bg2 { background: url('p2.jpg') no-repeat; }
    #bg3 { background: url('p3.jpg') no-repeat; }
    #msg {
      font-size: 48px;
      font-weight: bold;
      font-family: Verdana, Arial, sans-serif;
      color: orange;
      opacity: 0;
      position: fixed;
    }
    </style>
    <link rel="stylesheet" href="styles.css">
  </head>
  <body>
    <div id="bg1" class="box"></div>
    <div id="bg2" class="box"></div>
    <div id="bg3" class="box"></div>
    <div id="msg" class="box">The End</div>
    <script>
    $(function(){
      $(window).scroll(function(){
        var dy = $(this).scrollTop();
        console.log(dy);

        $('#bg1').css('background-position', '0 '+dy+'px');

        if (dy > 340) {
          $('#bg2').css('background-position', (dy-340)+'px '+(dy-340)+'px');
        } else {
          $('#bg2').css('background-position', '0 0');
        }

        if (dy > 680) {
          $('#bg3').css('background-position', '0 '+(dy-680)*2+'px');
        } else {
          $('#bg3').css('background-position', '0 0');
        }
        if (dy > 680) {
          $('#msg').css('opacity', (dy-680)/340);
          $('#msg').css('top', 200);
          var dx = (dy -680) > 400 ? 400: (dy-680);
          $('#msg').css('left', dx);
        } else {
          $('#msg').css('opacity', 0);
        }

      });
    });
    </script>
  </body>
</html>

%e7%84%a1%e9%a1%8c

jQuery パララックス1

scrollTop();でスクロール位置を取得し、それに合わせてオブジェクトを変形します。

<!DOCTYPE html>
<html lang="ja">
  <head>
    <meta charset="utf-8">
    <meta name="viewport" content="width=device-width, initial-scale=1.0">
    <script src="https://ajax.googleapis.com/ajax/libs/jquery/3.1.1/jquery.min.js"></script>
    <title>パララックスサイト</title>
    <style>
    body {
      margin: 0;
      padding: 0;
      height: 3000px;
    }
    .box {
      height: 40px;
      width: 40px;
      position: fixed;
      top: 10px;
    }
    #box1 { left: 10px; background: red; }
    #box2 { left: 60px; background: blue; }
    #box3 { left: 110px; background: green; }
    </style>
    <link rel="stylesheet" href="styles.css">
  </head>
  <body>
    <div id="box1" class="box"></div>
    <div id="box2" class="box"></div>
    <div id="box3" class="box"></div>
    <script>
    $(function(){
      var pos1 = $('#box1').offset();
      var pos2 = $('#box2').offset();
      var pos3 = $('#box3').offset();
      $(window).scroll(function(){
        var dy = $(this).scrollTop();
        console.log(dy);

        $('#box1').css('top', pos1.top +dy / 2);
        $('#box1').css('left', pos1.left +dy / 8);
        $('#box2').css('top', pos2.top +dy / 5);
        $('#box2').css('left', pos2.left +dy / 2);
        $('#box3').css('top', pos3.top +dy / 7);
        $('#box3').css('left', pos3.left +dy / 4);
      });
    });
    </script>
  </body>
</html>
%e7%84%a1%e9%a1%8c

enchant.js 熊を探せ

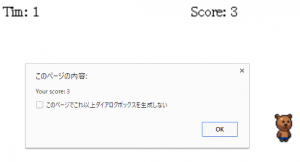
x軸y軸をランダムに表示させて、touchstartで、位置とスコアを変えていくゲームスクリプトです。

enchant();

window.onload = function(){
    var core = new Core(320, 320);
    core.preload('chara1.png');
    core.fps = 15;

    var score = 0;
    var timeLeft = 5 * core.fps;

    core.onload = function(){
        var bear = new Sprite(32, 32);
        bear.x = rand(320);
        bear.y = rand(320);
        bear.frame = 0;
        bear.image = core.assets['chara1.png'];

        bear.on('touchstart', function(){
            score++;
            scoreLabel.text = 'Score: ' + score;
            this.x = rand(320);
            this.y = rand(320);
        });

        var scoreLabel = new Label('Score: 0');
        scoreLabel.x = 200;
        scoreLabel.y = 5;

        var timeLabel = new Label('Time: 0');
        timeLabel.x = 5;
        timeLabel.y = 5;

        core.on('enterframe', function(){
            timeLeft--;
            timeLabel.text = 'Time: ' + timeLeft;
            if (timeLeft <= 0){
                alert('Your score: ' + score);
                this.stop();
            }
        });

        core.rootScene.addChild(scoreLabel);
        core.rootScene.addChild(timeLabel);
        core.rootScene.addChild(bear);


        core.rootScene.addChild(bear);
    }
    core.start();
}

function rand(n){
    return Math.floor(Math.random() * (n+1));
}
<!DOCTYPE html>
<html>
<head>
    <meta charset="UTF-8">
    <meta http-equiv="x-ua-compatible" content="IE=Edge">
    <meta name="viewport" content="width=device-width, user-scalable=no">
    <meta name="apple-mobile-web-app-capable" content="yes">
    <script type="text/javascript" src="enchant.js"></script>
    <script type="text/javascript" src="main.js"></script>
    <style type="text/css">
        body {
            margin: 0;
            padding: 0;
        }
    </style>
</head>
<body>
</body>
</html>

%e7%84%a1%e9%a1%8c

Unity Game作成

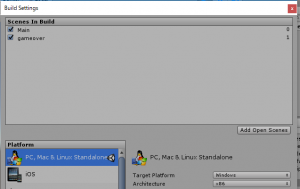
他のシーンを呼び出すには、build settingで設定します。
%e7%84%a1%e9%a1%8c

呼び出しのスクリプトです。

#pragma strict

var ball : Transform;
var n : int = 0;

function Update () {
	if (Input.GetButtonUp("Jump")){
	Instantiate(ball, transform.position, transform.rotation);
	n++;
	}

	if (n > 10){
	Application.LoadLevel("gameover");
	}
}

Gameの書き出しは、build and settingでbuidl and rundで行います。

player

#pragma strict

function Update () {
	var x: float = Input.GetAxis("Horizontal");
	transform.Translate(x * 0.2, 0, 0);

}

function OnCollisionEnter(obj: Collision) {
	if (obj.gameObject.name == "Enemy(Clone)"){
	 transform.localScale.x -= Random.Range(0.1, 0.5);
	 if (transform.localScale.x < 1.0) transform.localScale.x = 1.0;
	} 

}

enemy

#pragma strict


function Update () {
	transform.position.z -= 0.1;
	transform.Rotate(1, 1, 1);
	if (transform.position.z < -12.0){
	Application.LoadLevel("GameOver");
	}

}

function OnCollisionEnter(){
	Destroy(gameObject);
}
#pragma strict

var enemy: Transform;
function Update () {
	if(Time.frameCount % 60 == 0){
	Instantiate(enemy, Vector3(Random.Range(-5.0,5.0),1,8), transform.rotation);
	}
}
#pragma strict

var style: GUIStyle;

function OnGUI(){
	GUI.Label(Rect(10, 10, 100, 30), "GameOver", style);
}

unity JavaScript

Unityのスクリプトリファレンスです。
https://docs.unity3d.com/ScriptReference/index.html

objectに対するスクリプトを記述していきます。

#pragma strict

function Start () {
 Debug.Log("hello world");
}

function Update () {

}

unityのJSは変数の宣言など書き方が少し異なります。

#pragma strict

var x : int = 5;

function Start () {
 Debug.Log("hello world ->" + x);
}

function Update () {

}

オブジェクトを動かす際には、transformのポジションを動かします。

function Update () {
	transform.position.z += 0.1;
}

vector3でオブジェクトを移動させることもできます。

function Update () {
	transform.position += Vector3(0, 0, 0.1);
}

ユーザの入力受付

function Update () {
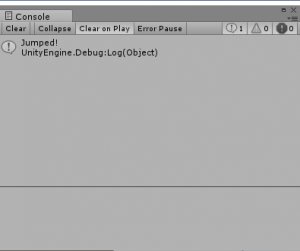
	if (Input.GetButtonUp("Jump")){
	Debug.Log("Jumped!");
	}
}

%e7%84%a1%e9%a1%8c

Edit->ProjectSetting->Inspectorで値を参照できます。

左右キーでオブジェクトを移動させます。

function Update () {
	if (Input.GetButtonUp("Jump")){
	Debug.Log("Jumped!");
	}

	var x : float = Input.GetAxis("Horizontal");
	transform.Translate(x * 0.2, 0, 0);
}

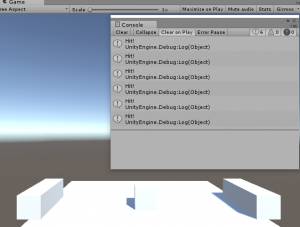
Digitbodyを設定して、以下のように記載すると、衝突判定ができます。

#pragma strict

function Start () {
 
}

function Update () {
	if (Input.GetButtonUp("Jump")){
	Debug.Log("Jumped!");
	}

	var x : float = Input.GetAxis("Horizontal");
	transform.Translate(x * 0.2, 0, 0);
}

function OnCollisionEnter(){
	Debug.Log("Hit!");
}

%e7%84%a1%e9%a1%8c

#pragma strict

var ball : Transform;

function Update () {
	if (Input.GetButtonUp("Jump")){
	Instantiate(ball, transform.position, transform.rotation);
	}
}

unity GameObjectの操作

%e7%84%a1%e9%a1%8c

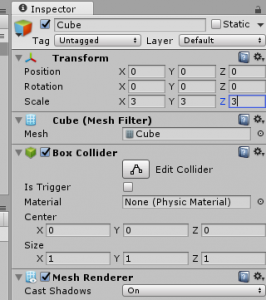
位置の調整はtransformでもできます。
%e7%84%a1%e9%a1%8c

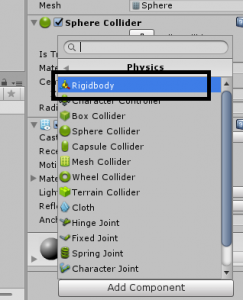
RigitBodyのコンポーネントの追加。Massを指定して、再生で動かすことができます。
%e7%84%a1%e9%a1%8c

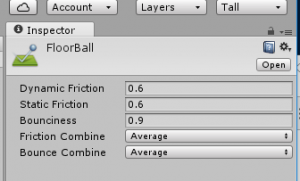
ボールが跳ねるには、physic materialでbouncinessを設定します。
bounciness

Directional rightで全方位的にライトを照らします。

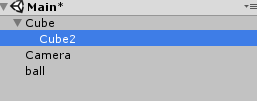
GameObjectは階層化させて一緒に動かすこともできます。カーレースで、車と一緒にカメラをつけて、動きに合わせて表示するというふうによく使われます。
%e7%84%a1%e9%a1%8c

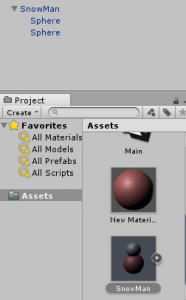
Prefabを使って、データをAssetに移動させて、複製することも可能です。
%e7%84%a1%e9%a1%8c

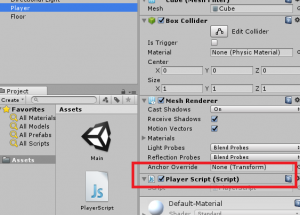
オブジェクトにスクリプトを書いて動かすには、Projectでscriptを選択し、動かしたいgameobjectにドラックします。
%e7%84%a1%e9%a1%8c

Google Apps Script

Google Apps ScriptはGoogleの各サービスを制御するスクリプトです。googleのサーバー上で動いており、JavaScriptで書いていきます。

Google Apps Script
%e7%84%a1%e9%a1%8c

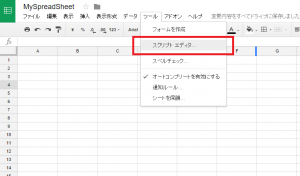
まずは、スプレッドシートから見てみます。
%e7%84%a1%e9%a1%8c

表示=>ログ で書いた内容を表示できます。

function hello() {
  Logger.log("hello world");
}

ブラウザ表示

function hello() {
  Browser.msgBox("Hello");
}

カスタム関数の作成

function getDouble(n){
  return n * 2;
}

任意のスプレッドシートへの値の挿入

function setData(){
  var ss = SpreadsheetApp.getActiveSpreadsheet();
  var sheet = ss.getActiveSheet();
  var range = sheet.getRange("A1");
  
  range.setValue(100);
}
function setData(){
  var ss = SpreadsheetApp.getActiveSpreadsheet();
  var sheet = ss.getActiveSheet();
  var range = sheet.getRange(1, 2);
  
  range.setValue(100);
  range.setBackground("red");
}
function getResults(){
  var sheet = SpreadsheetApp.getActiveSheet();
  for (var i = 1; i <= sheet.getLastRow(); i++){
    if(sheet.getRange(i, 2).getValue() >= 70){
     sheet.getRange(i, 3).setValue("OK").setBackground("green");
    } else {
      sheet.getRange(i, 3).setValue("NG").setBackground("red");
    }
  }
}

mailApp

function sendReport(){
  var sheet = SpreadsheetApp.getActiveSheet();
  var n = 0;
  for (var i = 1; i <= sheet.getLastRow(); i++){
    if(sheet.getRange(i, 2).getValue() >= 70){
      n++;
    }
  }
  MailApp.sendEmail(
    "hogehoge@gmail.com",
    "合格者の数",
    n + "名合格しました!"
   );
}

トリガーを設定して、毎日N時にメールを送ることも可能です。
%e7%84%a1%e9%a1%8c

Google Formの送信

function sendReport(e) {
  var rs = '';
  
  var name = e.namedValues['お名前'];
  var email = e.namedValues['メールアドレス'];
  var attend = e.namedValues['参加?'];
  
  rs = "name: "+name+"\nemail: "+email+"attend: "+attend;
  
  MailApp.sendEmail("hogehoge@gmail.com", "回答ありました", rs)
}

Excel VBA2

Select: Whenのようにcaseを書いていく構文です。

Sub SelectTest()
    Dim signal As String
    signal = Range("a1").Value
    
    Dim result As Range
    Set result = Range("a2")
    
    Select Case signal
    
    Case "red"
        result.Value = "Stop!"
    Case "green"
        result.Value = "Go"
    Case "yellow"
        result.Value = "Caution"
    Case Else
        result.Value = "n.a"
        
    End Select
    
End Sub

while文

Sub WhileTest()
    Dim i As Integer
    i = 1
    
    Do While i < 10
        Cells(i, 1).Value = i
        i = i + 1
    Loop
End Sub

For文

Sub ForTest()
    Dim i As Integer
    
    For i = 1 To 9
        Cells(i, 2).Value = i
    Next i

End Subl

ForEachによるループ

Sub EachTest()
    Dim names As Variant
    names = Array("yamada", "taro", "sakamoto")
    
    For Each Name In names
        Debug.Print Name
    Next Name
End Sub

プロシージャの呼び出し

Sub CallTest()
    Dim names As Variant
    names = Array("okamoto", "nakamura", "hayashi")
    
    For Each name In names
        Call SayHi(name)
    Next name
End Sub

Sub SayHi(ByVal name As String)
 Debug.Print "hi, " & name
End Sub

返り値を返すfunctionプロシージャ

Sub CallTest()
    Dim names As Variant
    names = Array("okamoto", "nakamura", "hayashi")
    
    For Each name In names
        Debug.Print SayHi(name)
    Next name
End Sub

Function SayHi(ByVal name As String)
  SayHi = "hi, " & name
End Function

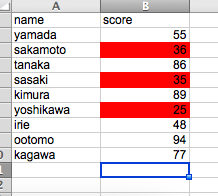
成績表 :一定数以下の数字をカウントして、メッセージ表示

Sub FindLowScores()
    Dim i As Long
    Dim n As Long
    i = 2
    n = 0
    
    Do While Cells(i, 1).Value <> ""
        If Cells(i, 2).Value < 40 Then
            Cells(i, 2).Interior.Color = vbRed
            n = n + 1
        End If
        i = i + 1
        Loop
    
    MsgBox (n & "件該当しました!")

End Sub

a

Excel VBA

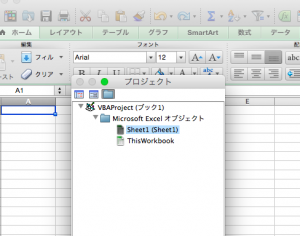
Excel VBAの開発には、Visual Basci Editorを使います。
ツール => マクロ => VBE

s

プログラムを書いていくには、標準モジュールを使います。プロシージャーはSubから書き始めていきましょう。

Sub HelloWorld()
    MsgBox ("hello wolrd")
End Sub

セルにデータを書き込む

Sub CellChange()
    Worksheets("Sheet1").Range("A1").Value = "hello"
    Range("A2").Value = "hello2"
    Cells(3, 1).Value = "hello3"
End Sub
Sub CellChange()
    Range("A1", "B3").Value = "hello"
    Range("A5:C7").Value = "hello2"
    Range("4:4").Value = "row 4"
    Range("C:C").Value = "Column C"
End Sub

withで複数の命令を重ねる

Sub WithTest()
    With Range("A1")
    .Value = "hello"
    With .Font
      .Bold = True
      .Size = 16
    End With
     .Interior.Color = vbRed
    End With
End Sub

値の取得

Sub GetTest()
    MsgBox (Range("A1").Value)
End Sub

メソッドで処理を呼び出し

Sub MethodTest()
    'Range("B3").Delete shift:=xlShiftUp
    Worksheets.Add after:=Worksheets("sheet1"), Count:=3
End Sub

変数計算

Sub VariableTest()
    Dim x As Integer
    x = 10 + 5
    x = x + 1
    'Range("A1").Value = x
    Debug.Print x
End Sub

配列

Sub VariableTest()
    Dim sales As Variant
    sales = Array(200, 150, 300)
    Debug.Print sales(2)
    
End Sub

条件分岐

Sub IfTest()
    If Range("A1").Value > 15 Then
        Range("A2").Value = "OK"
    Else
        Range("A2").Value = "NG!"
    End If
    
End Sub