sudo apt-get install apache2
随机应变 ABCD: Always Be Coding and … : хороший

sudo apt-get install apache2
vagrant@vagrant-ubuntu-trusty-64:~$ sudo cat /etc/sudoers
#
# This file MUST be edited with the 'visudo' command as root.
#
# Please consider adding local content in /etc/sudoers.d/ instead of
# directly modifying this file.
#
# See the man page for details on how to write a sudoers file.
#
Defaults        env_reset
Defaults        mail_badpass
Defaults        secure_path="/usr/local/sbin:/usr/local/bin:/usr/sbin:/usr/bin:/sbin:/bin:/snap/bin"

# Host alias specification

# User alias specification

# Cmnd alias specification

# User privilege specification
root    ALL=(ALL:ALL) ALL

# Members of the admin group may gain root privileges
%admin ALL=(ALL) ALL

# Allow members of group sudo to execute any command
%sudo   ALL=(ALL:ALL) ALL

# See sudoers(5) for more information on "#include" directives:

#includedir /etc/sudoers.d
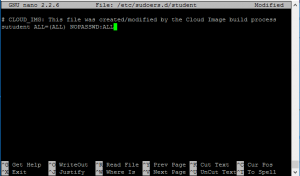
Change permission
vagrant@vagrant-ubuntu-trusty-64:~$ sudo cp /etc/sudoers.d/vagrant /etc/sudoers.    d/student
vagrant@vagrant-ubuntu-trusty-64:~$ sudo nano /etc/sudoers.d/student
student@vagrant-ubuntu-trusty-64:~$ sudo ufw status
Status: inactive
vagrant@vagrant-ubuntu-trusty-64:/$ echo $PATH
/usr/local/sbin:/usr/local/bin:/usr/sbin:/usr/bin:/sbin:/bin:/usr/games:/usr/local/games
All packages list below
vagrant@vagrant-ubuntu-trusty-64:/$ cat /etc/apt/sources.list
Update software
vagrant@vagrant-ubuntu-trusty-64:~$ sudo apt-get update
install
vagrant@vagrant-ubuntu-trusty-64:~$ sudo apt-get install finger
Apache HTTP Server apache2
PostgreSQL postgresql
Memcache memcached
type finger
vagrant@vagrant-ubuntu-trusty-64:~$ finger
Login     Name       Tty      Idle  Login Time   Office     Office Phone
vagrant              pts/0          Jan 18 12:14 (192.168.53.1)
vagrant@vagrant-ubuntu-trusty-64:~$ cat /etc/passwd
add user
vagrant@vagrant-ubuntu-trusty-64:~$ sudo adduser student
Adding user `student' ...
Adding new group `student' (1002) ...
Adding new user `student' (1002) with group `student' ...
Creating home directory `/home/student' ...
Copying files from `/etc/skel' ...
Enter new UNIX password:
Retype new UNIX password:
Sorry, passwords do not match
passwd: Authentication token manipulation error
passwd: password unchanged
Try again? [y/N] y
Enter new UNIX password:
Retype new UNIX password:
passwd: password updated successfully
Changing the user information for student
Enter the new value, or press ENTER for the default
        Full Name []:
        Room Number []:
        Work Phone []:
        Home Phone []:
        Other []:
Is the information correct? [Y/n]
sudo file
student@vagrant-ubuntu-trusty-64:~$ sudo cat /etc/passwd
[sudo] password for student:
student is not in the sudoers file.  This incident will be reported.
vagrant@vagrant-ubuntu-trusty-64:~$ pwd
/home/vagrant
show hidden file
vagrant@vagrant-ubuntu-trusty-64:~$ ls -a
.  ..  .bash_logout  .bashrc  .cache  .profile  .ssh
ls -al long command
vagrant@vagrant-ubuntu-trusty-64:~$ ls -al
total 28
drwxr-xr-x 4 vagrant vagrant 4096 Jan 18 12:09 .
drwxr-xr-x 4 root    root    4096 Jan 18 12:08 ..
-rw-r--r-- 1 vagrant vagrant  220 Apr  9  2014 .bash_logout
-rw-r--r-- 1 vagrant vagrant 3637 Apr  9  2014 .bashrc
drwx------ 2 vagrant vagrant 4096 Jan 18 12:09 .cache
-rw-r--r-- 1 vagrant vagrant  675 Apr  9  2014 .profile
drwx------ 2 vagrant vagrant 4096 Jan 18 12:09 .ssh
All file in root directory
Ubuntu:Ease of use on servers, desktops, laptops
https://www.ubuntu.com/
CentOS
https://www.centos.org/
RedHat:Large enterprise / corporate customers
https://www.redhat.com/en/technologies/linux-platforms/enterprise-linux
CoreOS
https://coreos.com/
getting started ubuntu
>vagrant init ubuntu/trusty64
then, start vagrant up command.
here comes
Welcome to Ubuntu 14.04.5 LTS (GNU/Linux 3.13.0-105-generic x86_64)

 * Documentation:  https://help.ubuntu.com/

  System information as of Wed Jan 18 12:13:23 UTC 2017

  System load:  0.09              Processes:           75
  Usage of /:   3.5% of 39.34GB   Users logged in:     0
  Memory usage: 26%               IP address for eth0: 10.0.2.15
  Swap usage:   0%                IP address for eth1: 192.168.53.10

  Graph this data and manage this system at:
    https://landscape.canonical.com/

  Get cloud support with Ubuntu Advantage Cloud Guest:
    http://www.ubuntu.com/business/services/cloud

New release '16.04.1 LTS' available.
Run 'do-release-upgrade' to upgrade to it.
Set Up Development Environment
Editor – Sublime Text
Python 2.7 – check your version by running python -V and if it’s not 2.7.
Git – download git from it’s official site.
SDK – download and install Google App Engine SDK for Python
https://cloud.google.com/appengine/downloads
def sumUp(n):
	total = 0
	for x in range(n):
		total += x
	return total
sumUp = timer.timedFunction(sumUp)
import endpoints
from protorpc import message
from protorpc import message_types
from protorpc import remote

REQUEST_CONTAINER = endpoints.ResourceContainer(
	message_types.VoidMessage,
	name=messages.StringField(1),
)

package = 'Hello'

class Hello(messages.Message):
	"""String that stores a message."""
	greeting = messages.StringField(1)

@endpoints.api(name='helloworldendpoints', version='v1')
class HelloWorldApi(remote.Service):
	"""Helloworld API v1."""

	@endpoints.method(message_types.VoidMessage, Hello,
		path = "sayHello", http_method='GET', name = "sayHello")
	def say_hello(self, request):
		return Hello(greeting="Hello World")

	@endpoints.method(REQUEST_CONTAINER, Hello,
		path = "sayHelloByName", http_method='GET', name = "sayHelloByName")
	def say_hello_by_name(self, request):
		greet = "Hello {}".format(request.name)
		return Hello(greeting=greet)

APPLICATION = endpoints.api_server([HelloWorldApi])
Field Classes
https://cloud.google.com/appengine/docs/python/tools/protorpc/messages/fieldclasses
API Explore
https://developers.google.com/apis-explorer/#p/
translate api
{
  "data": {
    "translations": [
      {
        "translatedText": "Hallo Welt"
      },
      {
        "translatedText": "Mein Name ist Jeff"
      }
    ]
  }
}
from google.appengine.ext import ndb

class Recipe(ndb.Model):
	name = StringProperty()
	ingredients = StringProperty(repeated=True)
	instructions = TextProperty()
	vegetarian = BooleanProperty()
	servings = IntegerProperty()
css trigger
https://csstriggers.com/
var isSetup = setupVariables(e);
if(isSetup){
	setInterval(captureFrame.bind(self), 4);
}
else {
	setTimeout(function(){
		setupVariables(e);

		setInterval(captureFrame.bind(self), 4);
	}, 100);
}
var captureFrame = function(){
	canvas.drawImage(cameraVideo, sx /scaleFactor, sy/scaleFactor, sWidth/scaleFactor,
		sHeight/scaleFactor, dx, dy, dWidth, dHeight);

		drawOverlay(dWidth, dHeight, scaleFactor);

		if(self.onframe) self.onframe();

		coordinatesHaveChanged = false;
};
gulp serve command
[vagrant@localhost qrcode]$ gulp serve
[21:54:17] Using gulpfile ~/webapp/app/qrcode/gulpfile.js
[21:54:17] Starting 'styles'...
[21:54:18] styles all files 26.07 kB
[21:54:18] Finished 'styles' after 1.46 s
[21:54:18] Starting 'serve'...
[21:54:19] Finished 'serve' after 505 ms
[WSK] Local URL: http://localhost:3000
[WSK] External URL: http://10.0.2.15:3000
[WSK] Serving files from: .tmp
[WSK] Serving files from: app
function loadImage(src, parent, callback){
	var img = document.createElement('img');
	img.src = src;
	img.onload = callback;
	parent.appendChild(img);
};
var sequence = get('example.json')
.then(doSomething)
.then(doSomethingElse);
Syntax
var promise = new Promise(function(resolve[, reject]){
	var value = doSomething();
	if (thingWorked){
		resolve(value);
	} else if (somethingWentWrong){
		reject();
	}
}).then(function(value) {
	return nextTing(value);
}).catch(rejectFunction);
Accessbility is hard to say, minimize A11y.
ChromeVox Lite
http://www.chromevox.com/
watch out screen reader
https://ja.osdn.net/projects/nvdajp/
Netcat is a utility that’s used for sending and receiving messages over a network connection. Netcat is known as the Swiss Army knife of networking tools, and we’ll be using it to communicate directly with a server.
# sudo yum install nc nmap
[vagrant@localhost]$ nc google.com 80 GET / HTTP/1.1 HTTP/1.1 302 Found Cache-Control: private Content-Type: text/html; charset=UTF-8 Location: http://www.google.co.jp/?gfe_rd=cr&ei=vdh5WPnNOK3K8gfgs5d4 Content-Length: 259 Date: Sat, 14 Jan 2017 07:52:29 GMT302 Moved 302 Moved
The document has moved here.
[vagrant@localhost ruby3]$ nc example.com 80
HEAD / HTTP/1.1
Host: example.com

HTTP/1.1 200 OK
Content-Encoding: gzip
Accept-Ranges: bytes
Cache-Control: max-age=604800
Content-Type: text/html
Date: Sat, 14 Jan 2017 07:55:51 GMT
Etag: "359670651+gzip"
Expires: Sat, 21 Jan 2017 07:55:51 GMT
Last-Modified: Fri, 09 Aug 2013 23:54:35 GMT
Server: ECS (rhv/818F)
X-Cache: HIT
x-ec-custom-error: 1
Content-Length: 606
[vagrant@localhost ruby3]$ nc example.com 80
OPTIONS / HTTP/1.1
Host: example.com

HTTP/1.1 200 OK
Allow: OPTIONS, GET, HEAD, POST
Cache-Control: max-age=604800
Date: Sat, 14 Jan 2017 07:59:08 GMT
Expires: Sat, 21 Jan 2017 07:59:08 GMT
Server: EOS (lax004/280C)
x-ec-custom-error: 1
Content-Length: 0
HTTP/2 was developed by the IETF’s HTTP Working Group, which maintains the HTTP protocol. It’s made up of a number of HTTP implementers, users, network operators and HTTP experts.
Note that while our mailing list is hosted on the W3C site, this is not a W3C effort. Tim Berners-Lee and the W3C TAG are kept up-to-date with the WG’s progress, however.
A large number of people have contributed to the effort, but the most active participants include engineers from “big” projects like Firefox, Chrome, Twitter, Microsoft’s HTTP stack, Curl and Akamai, as well as a number of HTTP implementers in languages like Python, Ruby and NodeJS.
To learn more about participating in the IETF, see the Tao of the IETF; you can also get a sense of who’s contributing to the specification on Github’s contributor graph, and who’s implementing on our implementation list