HTML側
<form action="/upload" method="post" enctype="multipart/form-data">
<div>
<p>name</p>
<input type="text" name="name"><br><br>
<input type="file" name="testfile" onchange="previewFile(this);">
</div>
<div>
<input type="submit" value="送信する">
</div>
</form>
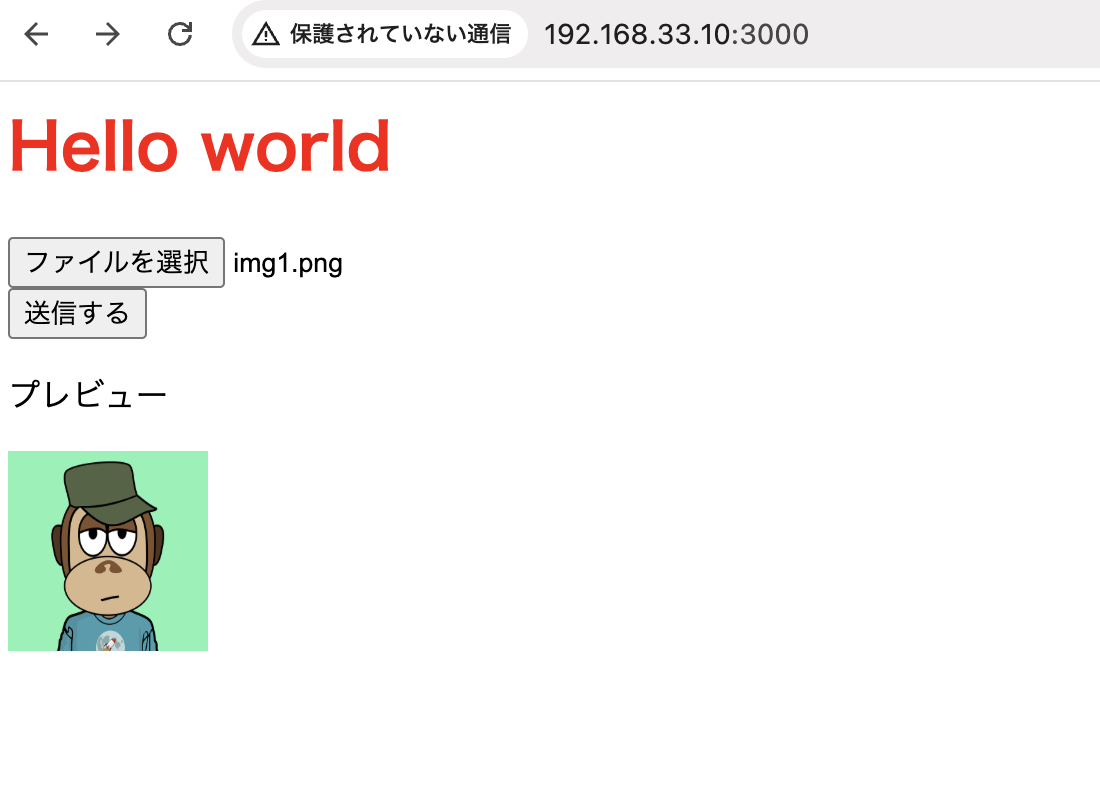
<p>プレビュー</p>
<img id="preview">
<script>
function previewFile(file) {
var fileData = new FileReader();
fileData.onload = (function() {
document.getElementById('preview').setAttribute("style","width:100px;height:100px");
document.getElementById('preview').src = fileData.result;
});
fileData.readAsDataURL(file.files[0]);
}
</script>
axum側
axum = { version=”0.8.1″, features = [“multipart”] }
tokio = { version = “1.25”, features = [“full”] }
use tower_http::services::{ServeDir, ServeFile};
use axum::{
extract::Multipart,
extract::DefaultBodyLimit,
routing::post,
routing::get,
Router,
};
use tokio::fs::File;
use tokio::io::AsyncWriteExt;
#[tokio::main]
async fn main() {
let serve_dir = ServeDir::new("static").not_found_service(ServeFile::new("static"));
let app = Router::new()
.route("/", get(handle_index))
.route("/upload", post(handle_upload))
.layer(DefaultBodyLimit::max(1024 * 1024 * 1024))
.nest_service("/static", serve_dir.clone())
.fallback_service(serve_dir);
let listener = tokio::net::TcpListener::bind("0.0.0.0:3000").await.unwrap();
axum::serve(listener, app).await.unwrap();
}
async fn handle_upload(mut multipart: Multipart)-> axum::response::Html<String> {
while let Some(field) = multipart.next_field().await.unwrap(){
let param_name = field.name().unwrap().to_string();
match param_name.as_str() {
"name" => {
let name = field.text().await.unwrap();
println!("tags: {}", name);
}
"testfile" => {
let file_name = match field.file_name() {
Some(name) => name.to_owned(),
None => panic!("file_name is None"),
};
match field.bytes().await {
Ok(data) => {
println!("Length of `{}` is {} bytes", param_name, data.len());
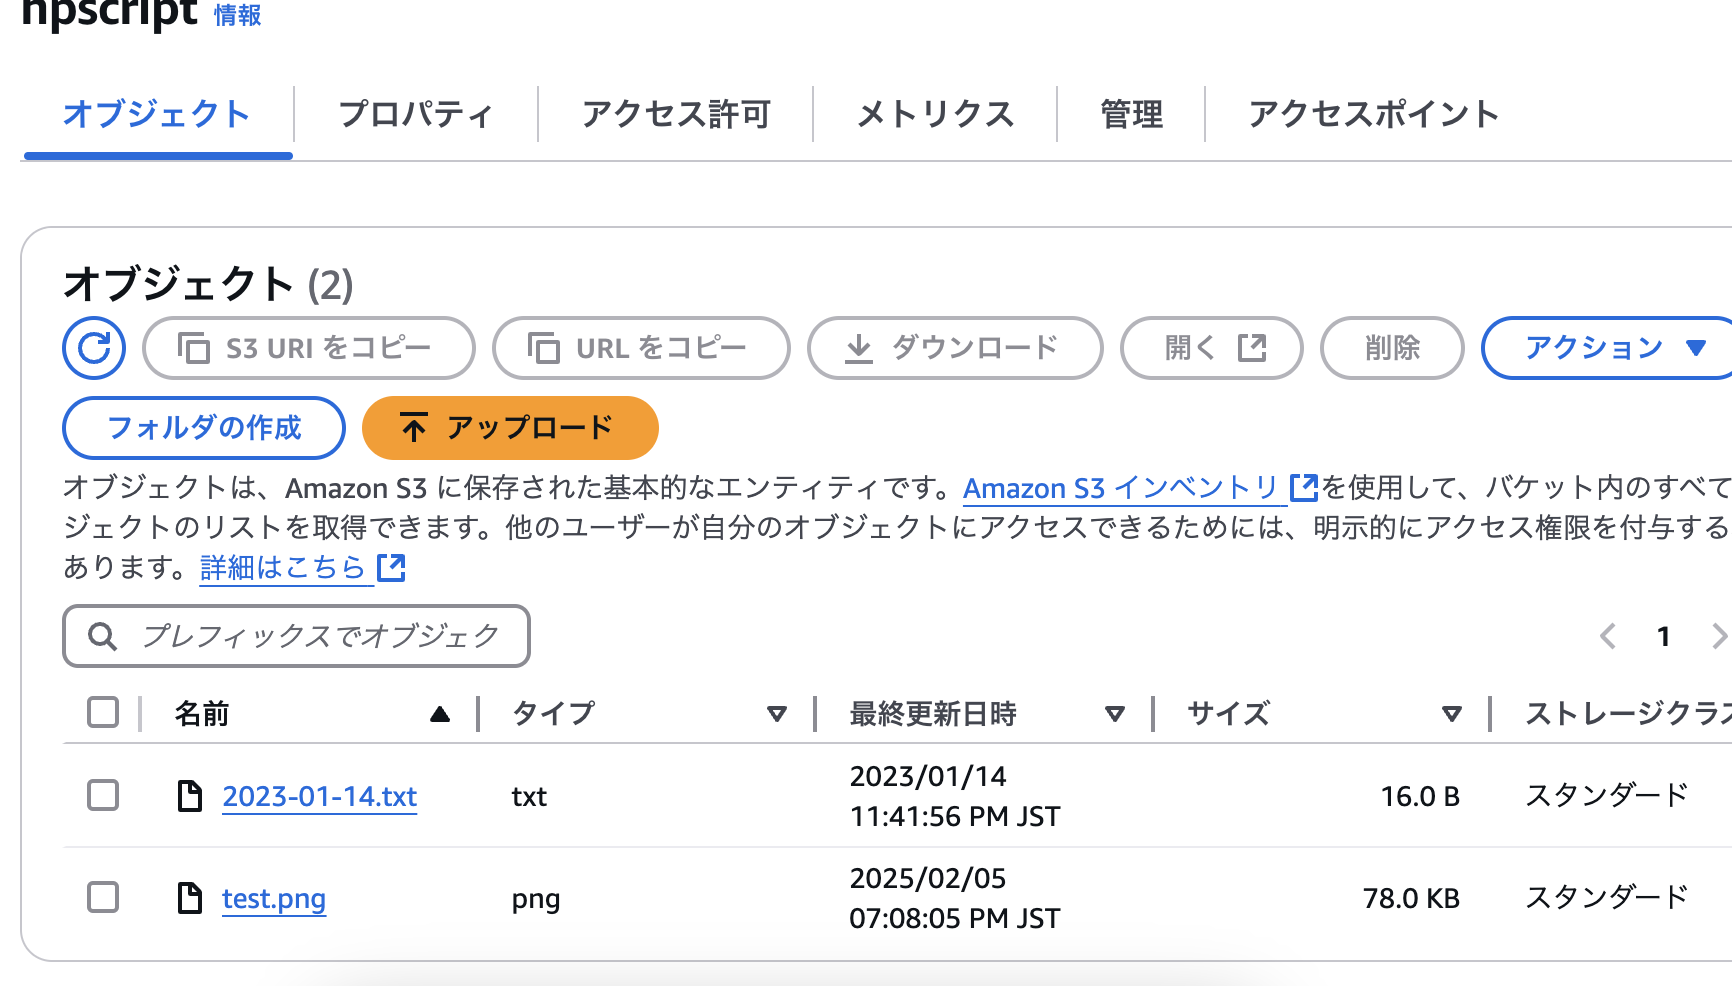
let mut file = File::create(format!("./tmp/{}", file_name)).await.unwrap();
file.write_all(&data).await.unwrap();
}
Err(e) => {
eprintln!("Error reading `{}`: {}", param_name, e);
// return;
}
}
}
_ => {
println!("unknown param_name: {}", param_name);
}
}
}
let tera = tera::Tera::new("templates/*").unwrap();
let mut context = tera::Context::new();
context.insert("title", "Index page");
let output = tera.render("test.html", &context);
axum::response::Html(output.unwrap())
}
なるほど、なかなか面白い。