docker pullでDocker Indexからimageを持ってくる
Containerができる。docker runで実行する。
docker commitでImageを作る。
docker pushでDocker indexにimageが入る。
あ、docker indexはdocker hub
docker hub
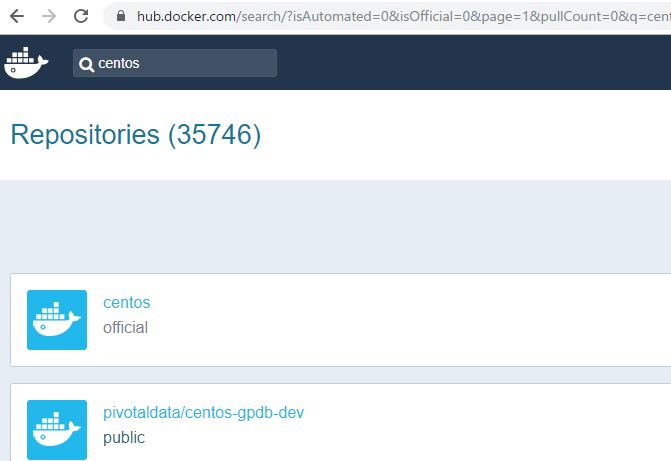
コマンドラインからもsearchできる。
vagrant@vagrant-ubuntu-trusty-64:~$ sudo docker search centos | more
Imageが取得できたかどうかは、sudo docker imagesで確認できる。
vagrant@vagrant-ubuntu-trusty-64:~$ sudo docker images
REPOSITORY TAG IMAGE ID CREATED SIZE
hello-world latest 4ab4c602aa5e 2 days ago 1.84kB
centos latest 5182e96772bf 4 weeks ago 200MB
sudo docker inspectで詳細を見ることができる。
vagrant@vagrant-ubuntu-trusty-64:~$ sudo docker inspect centos:latest
[
{
“Id”: “sha256:5182e96772bf11f4b912658e265dfe0db8bd314475443b6434ea708784192892”,
“RepoTags”: [
“centos:latest”
],
“RepoDigests”: [
“centos@sha256:6f6d986d425aeabdc3a02cb61c02abb2e78e57357e92417d6d58332856024faf”
],
“Parent”: “”,
“Comment”: “”,
“Created”: “2018-08-06T19:21:48.235227329Z”,
“Container”: “d60ffc9ddd12462af4bdcdbe45b74f3b3f99b46607ada80c3ed877b7def84250”,
“ContainerConfig”: {
“Hostname”: “d60ffc9ddd12”,
“Domainname”: “”,
“User”: “”,
“AttachStdin”: false,
“AttachStdout”: false,
“AttachStderr”: false,
“Tty”: false,
“OpenStdin”: false,
“StdinOnce”: false,
“Env”: [
“PATH=/usr/local/sbin:/usr/local/bin:/usr/sbin:/usr/bin:/sbin:/bin”
],
“Cmd”: [
“/bin/sh”,
“-c”,
“#(nop) “,
“CMD [\”/bin/bash\”]”
],
“ArgsEscaped”: true,
“Image”: “sha256:748eacc0f236df2fc9ba87c4d76a66cb10742120387e99e2acdb9454915c841d”,
“Volumes”: null,
“WorkingDir”: “”,
“Entrypoint”: null,
“OnBuild”: null,
“Labels”: {
“org.label-schema.build-date”: “20180804”,
“org.label-schema.license”: “GPLv2”,
“org.label-schema.name”: “CentOS Base Image”,
“org.label-schema.schema-version”: “1.0”,
“org.label-schema.vendor”: “CentOS”
}
},
“DockerVersion”: “17.06.2-ce”,
“Author”: “”,
“Config”: {
“Hostname”: “”,
“Domainname”: “”,
“User”: “”,
“AttachStdin”: false,
“AttachStdout”: false,
“AttachStderr”: false,
“Tty”: false,
“OpenStdin”: false,
“StdinOnce”: false,
“Env”: [
“PATH=/usr/local/sbin:/usr/local/bin:/usr/sbin:/usr/bin:/sbin:/bin”
],
“Cmd”: [
“/bin/bash”
],
“ArgsEscaped”: true,
“Image”: “sha256:748eacc0f236df2fc9ba87c4d76a66cb10742120387e99e2acdb9454915c841d”,
“Volumes”: null,
“WorkingDir”: “”,
“Entrypoint”: null,
“OnBuild”: null,
“Labels”: {
“org.label-schema.build-date”: “20180804”,
“org.label-schema.license”: “GPLv2”,
“org.label-schema.name”: “CentOS Base Image”,
“org.label-schema.schema-version”: “1.0”,
“org.label-schema.vendor”: “CentOS”
}
},
“Architecture”: “amd64”,
“Os”: “linux”,
“Size”: 199716491,
“VirtualSize”: 199716491,
“GraphDriver”: {
“Data”: {
“DeviceId”: “7”,
“DeviceName”: “docker-8:1-263323-d5a0c73632bbe71e2ab66b6f6d04da6bca10076e1f9f787ba6adcf10844a9b67”,
“DeviceSize”: “10737418240”
},
“Name”: “devicemapper”
},
“RootFS”: {
“Type”: “layers”,
“Layers”: [
“sha256:1d31b5806ba40b5f67bde96f18a181668348934a44c9253b420d5f04cfb4e37a”
]
},
“Metadata”: {
“LastTagTime”: “0001-01-01T00:00:00Z”
}
}
]