idとurlを格納

mysql

mysql> insert into url(id, url) values
-> (‘001’, ‘https://www.facebook.com/’),
-> (‘002’, ‘https://www.amazon.com/’),
-> (‘003’, ‘https://www.apple.com’),
-> (‘004’, ‘https://www.google.com’);
Query OK, 4 rows affected (0.15 sec)
Records: 4 Duplicates: 0 Warnings: 0

mysql> select * from url;
+—-+——+—————————+
| no | id | url |
+—-+——+—————————+
| 1 | 1 | https://www.facebook.com/ |
| 2 | 2 | https://www.amazon.com/ |
| 3 | 3 | https://www.apple.com |
| 4 | 4 | https://www.google.com |
+—-+——+—————————+
4 rows in set (0.00 sec)

あら、idが001ではなく、1になってますね。
drop tableしてvarchar(11)に変更します。

create table url (
no int unsigned auto_increment primary key,
id varchar(11),
url varchar(255)
);

パラメーターのURLをfetchする。

if(isset($_GET["id"])){
	$id = $_GET["id"];
} else {
	$id = "001";
}
try {
$pdo = new PDO('mysql:host=localhost;dbname=redirect;charset=utf8','root','',
array(PDO::ATTR_EMULATE_PREPARES => false));
} catch (PDOException $e) {
 exit('データベース接続失敗。'.$e->getMessage());
}
$stmt = $pdo->query("SELECT * FROM url where id = $id");
$row = $stmt -> fetch(PDO::FETCH_ASSOC);
echo $row["url"];

リダイレクト処理。awsでキャッシュさせれば、少し早くなるか。

if(isset($_GET["id"])){
	$id = $_GET["id"];
} else {
	$id = "001";
}
try {
$pdo = new PDO('mysql:host=localhost;dbname=redirect;charset=utf8','root','',
array(PDO::ATTR_EMULATE_PREPARES => false));
} catch (PDOException $e) {
 exit('データベース接続失敗。'.$e->getMessage());
}
$stmt = $pdo->query("SELECT * FROM url where id = $id");
$row = $stmt -> fetch(PDO::FETCH_ASSOC);
$url = "location: " .$row["url"]. "";
header($url);

Amazon ElastiCache:Amazon ElastiCache は、クラウドでのインメモリデータストアまたはキャッシュのデプロイ、運用、およびスケールを容易にするウェブサービスです。このサービスは、低速のディスクベースのデータベースに完全に依存せずに、高速のマネージド型インメモリデータストアから情報を取得できるようにすることで、ウェブアプリケーションのパフォーマンスを向上させます。
これか?
>メモリはディスク (磁気または SSD) よりも桁違いに高速であるため、インメモリキャッシュからのデータ読み取りは非常に高速 (ミリ秒以下) です。このきわめて高速なデータアクセスにより、アプリケーションの全体的なパフォーマンスが向上します。

TinyMCE

文章を見たまま編集(WYSIWYG。What you see is what you get)できるエディタのライブラリ

-プラグインなどによる機能が豊富
-WordPressに採用
-ツールバーの追加、ボタン位置の入替や削除、独自ボタンの追加などカスタマイズが柔軟

tinyMCEのself hostedからdownloadする
https://www.tiny.cloud/download/self-hosted/

4.8.2が最新版
CDNもあるようですが、今回は最新版パッケージをダウンロードします。

minifiedされた jquery.tinymce.min.jsを使うようですな。
プラグインはthemesなどバリエーションが豊富ですね。

githubはこちら
https://github.com/tinymce/tinymce
とりあえずforkしておきましょう。

早速vagrantで使ってみましょう。

<!Doctype html>
<html>
<head>
	<meta charset="UTF-8">
	<script src="tinymce/js/tinymce/tinymce.min.js"></script>
	<script>
	tinymce.init({
		selector: "#foo",
	});
</script>
</head>
<body>
	<h1>TinyMCEの動作テスト</h1>
	<textarea id="foo" name="foo">最初に入力する文章</textarea>
	<h2>入力チェック</h2>
</body>
</html>

devtoolで見てるが、仕組みがようわからん。。。

RDS リードレプリカを追加する

リードレプリカの作成を押下すると、
– 送信先リージョン
– サブネットグループ
– アベイラビリティーゾーン
– 暗号化
– インスタンスの仕様

インスタンスのクラスも設定できる

レプリケーションロールがマスタとレプリカとなる。

CPU クレジット残高は、CPU 利用率がベースラインを上回り、前の 5 分間に消費したクレジットが獲得したクレジットよりも多かった場合に減少します。

パラメーターの値を取得する

$_GET[“id”] で取得できます。

-サンプル

if(isset($_GET["id"])){
	$id = $_GET["id"];
}

echo $id;

次に、mysqlにidと紐づくURLを格納します。

まず、create tableします。
mysql> create database redirect;
Query OK, 1 row affected (0.11 sec)

続いてtableを作ります。
create table url (
no int unsigned auto_increment primary key,
id int,
url varchar(255)
);

次に、insert tableしていきます。

プルリク

[vagrant@localhost dev]$ git init
Initialized empty Git repository in /home/vagrant/dev/.git/
[vagrant@localhost dev]$ git add .
[vagrant@localhost dev]$ git commit -m “first commit”
[master (root-commit) 2b3c0b9] first commit
2 files changed, 8 insertions(+)
create mode 100644 .htaccess
create mode 100644 index.php
[vagrant@localhost dev]$ git remote add origin https://github.com/hoge/hoge.git

[vagrant@localhost dev]$ git push -u origin master
Password for ‘https://hoge@github.com’:
Counting objects: 4, done.
Compressing objects: 100% (4/4), done.
Writing objects: 100% (4/4), 420 bytes | 0 bytes/s, done.
Total 4 (delta 0), reused 0 (delta 0)
remote:
remote: Create a pull request for ‘master’ on GitHub by visiting:
remote: https://github.com/hoge/hoge/pull/new/master
remote:
To https://github.com/hoge/hoge.git
* [new branch] master -> master
Branch master set up to track remote branch master from origin.

プルリクとは?
開発者のローカルリポジトリでの変更を他の開発者に通知する機能です。 プルリクエストは次のような機能を提供します。 機能追加や改修など、作業内容をレビュー・マージ担当者やその他関係者に通知します。

Amazon Kinesis

動画とデータストリームをリアルタイムで容易に収集、処理、分析 Amazon Kinesis は、リアルタイムのストリーミングデータを容易に収集、処理、分析できるため、タイムリーな洞察を得て、新しい情報に迅速に対応することができる。

  • Generate streaming data containing stock quote information
  • Send the data to an Amazon Kinesis Firehose delivery stream
  • Amazon Kinesis Firehose will then call an AWS Lambda function to transform the data
  • Amazon Kinesis Firehose will then collect the data into batches and send the batches to an Amazon Elasticsearch service cluster
  • You will use Kibana to visualize the streaming data stored in the Elasticsearch cluster
  • Amazon Kinesis Firehose is a fully managed service that delivers real-time streaming data to destinations such as Amazon Simple Storage Service (Amazon S3), Amazon Elasticsearch Service and Amazon Redshift. With Firehose, you do not need to write any applications or manage any resources. You configure your data producers to send data to Firehose and it automatically delivers the data to the specified destination.

    jdbc

    JDBC (Java Database Connectivity) は、MySQLやPostgreSQLといった数々のSQLデータベース、あるいはスプレッドシートなどのデータファイルにJavaからアクセスするためのAPI。
    アクセス先ごとに専用のドライバが提供されているため、事前にインストールしておく必要がある。

    本家のサイトからMySQL Connectorsを押下する。

    eclipseでweb開発をする

    helpから行きます。

    これでいいのかな?

    入りました!!

    servletの作成

    run on servlet
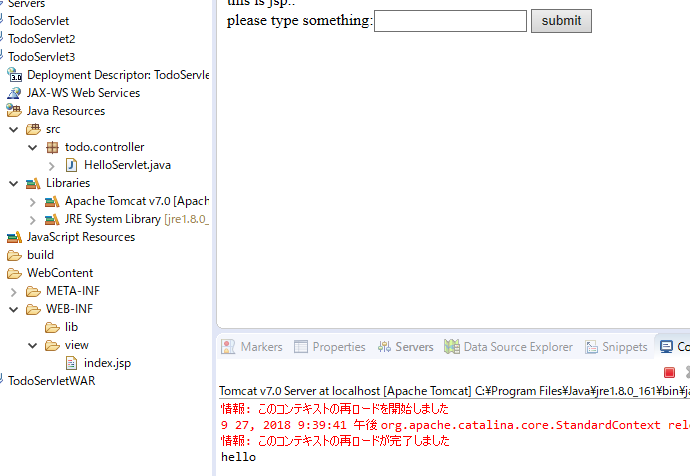
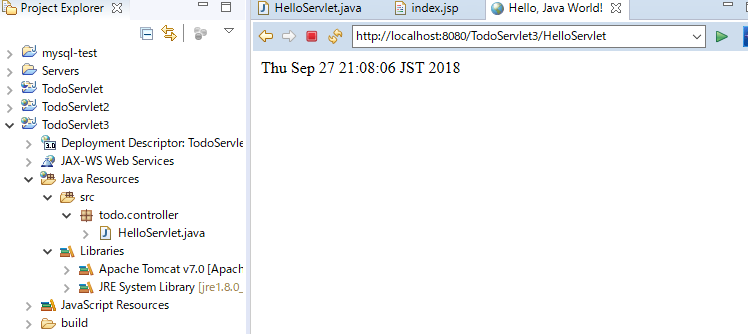
    tomcatが起動する。localhost:8080は404

    index.jsp

    <%@ page language="java" contentType="text/html; charset=UTF-8"
        pageEncoding="UTF-8"%>
    <!DOCTYPE html PUBLIC "-//W3C//DTD HTML 4.01 Transitional//EN" "http://www.w3.org/TR/html4/loose.dtd">
    <html>
    <head>
    <meta http-equiv="Content-Type" content="text/html; charset=UTF-8">
    <title>Hello, World!</title>
    </head>
    <body>
        <%= new java.util.Date() %>
    </body>
    </html>
    

    何故だ?ようわからん。。

    Eclipseを使おう

    txtファイルのエンコーディングを設定します。

    Caluclation.java

    package myPackage.calc;

    public class Calculation {
    protected int value = 0;
    protected int result = 0;

    /*
    * 計算に使用する値を取得します。
    * @return
    */
    public int getValue() {
    return value;
    }
    /*
    * 計算に使用する値を設定します。
    * @param value計算に使用する値
    */

    public void setValue(int value) {
    this.value = value;
    }
    /**
    * 計算結果をコンソールに出力します。
    */

    public void output(){
    System.out.println(this.result);
    }

    }
    [/java]

    package myPackage.calc;
    
    public class Square extends Calculation {
    	
    	/*
    	 * 値を二乗します。
    	 */
    	public void calculate(){
    		this.result = this.value * this.value;
    		this.output();
    	}
    
    }
    
    package myPackage.main;
    
    import myPackage.calc.Square;
    
    public class Program {
    
    	public static void main(String[] args) {
    		// TODO Auto-generated method stub
    		
    		Square square = new Square();
    		
    		square.setValue(Integer.parseInt(args[0]));
    		square.calculate();
    
    	}
    
    }
    

    Android studioにやや似ているから助かってるが、これどーしろっていうんだろう。。