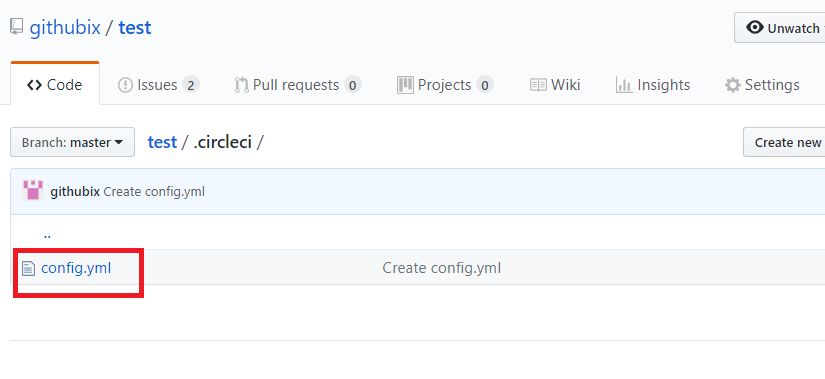
View config – make it too simple
language: php
php:
- 5.5
script: phpunit test.php
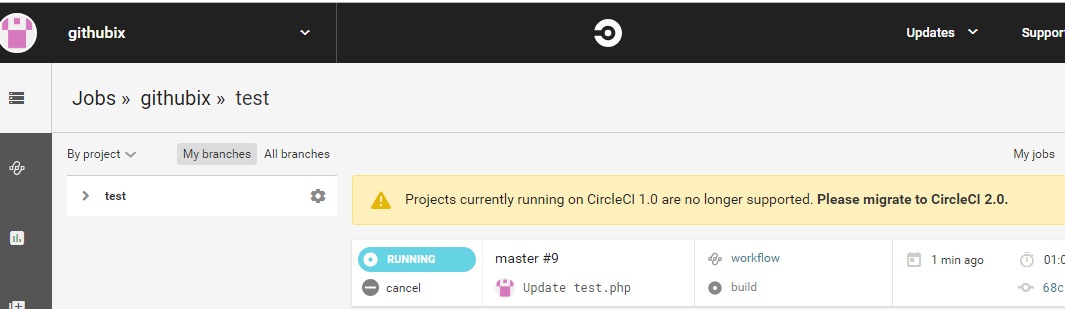
Job log
Worker information

Cookbooks Version
7c2c6a6 https://github.com/travis-ci/travis-cookbooks/tree/7c2c6a6
git version
git version 2.15.1
bash version
GNU bash, version 4.3.11(1)-release (x86_64-pc-linux-gnu)
gcc version
gcc (Ubuntu 4.8.4-2ubuntu1~14.04.3) 4.8.4
Copyright (C) 2013 Free Software Foundation, Inc.
This is free software; see the source for copying conditions.  There is NO
warranty; not even for MERCHANTABILITY or FITNESS FOR A PARTICULAR PURPOSE.
docker version
Client:
 Version:      17.09.0-ce
 API version:  1.32
 Go version:   go1.8.3
 Git commit:   afdb6d4
 Built:        Tue Sep 26 22:42:38 2017
 OS/Arch:      linux/amd64
Server:
 Version:      17.09.0-ce
 API version:  1.32 (minimum version 1.12)
 Go version:   go1.8.3
 Git commit:   afdb6d4
 Built:        Tue Sep 26 22:41:20 2017
 OS/Arch:      linux/amd64
 Experimental: false
clang version
clang version 5.0.0 (tags/RELEASE_500/final)
Target: x86_64-unknown-linux-gnu
Thread model: posix
InstalledDir: /usr/local/clang-5.0.0/bin
jq version
jq-1.5
bats version
Bats 0.4.0
shellcheck version
0.4.6
shfmt version
v2.0.0
ccache version
ccache version 3.1.9
Copyright (C) 2002-2007 Andrew Tridgell
Copyright (C) 2009-2011 Joel Rosdahl
This program is free software; you can redistribute it and/or modify it under
the terms of the GNU General Public License as published by the Free Software
Foundation; either version 3 of the License, or (at your option) any later
version.
cmake version
cmake version 3.9.2
CMake suite maintained and supported by Kitware (kitware.com/cmake).
heroku version
heroku-cli/6.14.39-addc925 (linux-x64) node-v9.2.0
imagemagick version
Version: ImageMagick 6.7.7-10 2017-07-31 Q16 http://www.imagemagick.org
md5deep version
4.2
mercurial version
Mercurial Distributed SCM (version 4.2.2)
(see https://mercurial-scm.org for more information)
Copyright (C) 2005-2017 Matt Mackall and others
This is free software; see the source for copying conditions. There is NO
warranty; not even for MERCHANTABILITY or FITNESS FOR A PARTICULAR PURPOSE.
mysql version
mysql  Ver 14.14 Distrib 5.6.33, for debian-linux-gnu (x86_64) using  EditLine wrapper
openssl version
OpenSSL 1.0.1f 6 Jan 2014
packer version
Packer v1.0.2
Your version of Packer is out of date! The latest version
is 1.1.2. You can update by downloading from www.packer.io
postgresql client version
psql (PostgreSQL) 9.6.6
ragel version
Ragel State Machine Compiler version 6.8 Feb 2013
Copyright (c) 2001-2009 by Adrian Thurston
subversion version
svn, version 1.8.8 (r1568071)
   compiled Aug 10 2017, 17:20:39 on x86_64-pc-linux-gnu
Copyright (C) 2013 The Apache Software Foundation.
This software consists of contributions made by many people;
see the NOTICE file for more information.
Subversion is open source software, see http://subversion.apache.org/
The following repository access (RA) modules are available:
* ra_svn : Module for accessing a repository using the svn network protocol.
  - with Cyrus SASL authentication
  - handles 'svn' scheme
* ra_local : Module for accessing a repository on local disk.
  - handles 'file' scheme
* ra_serf : Module for accessing a repository via WebDAV protocol using serf.
  - using serf 1.3.3
  - handles 'http' scheme
  - handles 'https' scheme
sudo version
Sudo version 1.8.9p5
Configure options: --prefix=/usr -v --with-all-insults --with-pam --with-fqdn --with-logging=syslog --with-logfac=authpriv --with-env-editor --with-editor=/usr/bin/editor --with-timeout=15 --with-password-timeout=0 --with-passprompt=[sudo] password for %p:  --without-lecture --with-tty-tickets --disable-root-mailer --enable-admin-flag --with-sendmail=/usr/sbin/sendmail --with-timedir=/var/lib/sudo --mandir=/usr/share/man --libexecdir=/usr/lib/sudo --with-sssd --with-sssd-lib=/usr/lib/x86_64-linux-gnu --with-selinux
Sudoers policy plugin version 1.8.9p5
Sudoers file grammar version 43
Sudoers path: /etc/sudoers
Authentication methods: 'pam'
Syslog facility if syslog is being used for logging: authpriv
Syslog priority to use when user authenticates successfully: notice
Syslog priority to use when user authenticates unsuccessfully: alert
Send mail if the user is not in sudoers
Use a separate timestamp for each user/tty combo
Lecture user the first time they run sudo
Root may run sudo
Allow some information gathering to give useful error messages
Require fully-qualified hostnames in the sudoers file
Visudo will honor the EDITOR environment variable
Set the LOGNAME and USER environment variables
Length at which to wrap log file lines (0 for no wrap): 80
Authentication timestamp timeout: 15.0 minutes
Password prompt timeout: 0.0 minutes
Number of tries to enter a password: 3
Umask to use or 0777 to use user's: 022
Path to mail program: /usr/sbin/sendmail
Flags for mail program: -t
Address to send mail to: root
Subject line for mail messages: *** SECURITY information for %h ***
Incorrect password message: Sorry, try again.
Path to authentication timestamp dir: /var/lib/sudo
Default password prompt: [sudo] password for %p:
Default user to run commands as: root
Value to override user's $PATH with: /usr/local/sbin:/usr/local/bin:/usr/sbin:/usr/bin:/sbin:/bin:/snap/bin
Path to the editor for use by visudo: /usr/bin/editor
When to require a password for 'list' pseudocommand: any
When to require a password for 'verify' pseudocommand: all
File descriptors >= 3 will be closed before executing a command
Environment variables to check for sanity:
	TZ
	TERM
	LINGUAS
	LC_*
	LANGUAGE
	LANG
	COLORTERM
Environment variables to remove:
	RUBYOPT
	RUBYLIB
	PYTHONUSERBASE
	PYTHONINSPECT
	PYTHONPATH
	PYTHONHOME
	TMPPREFIX
	ZDOTDIR
	READNULLCMD
	NULLCMD
	FPATH
	PERL5DB
	PERL5OPT
	PERL5LIB
	PERLLIB
	PERLIO_DEBUG
	JAVA_TOOL_OPTIONS
	SHELLOPTS
	GLOBIGNORE
	PS4
	BASH_ENV
	ENV
	TERMCAP
	TERMPATH
	TERMINFO_DIRS
	TERMINFO
	_RLD*
	LD_*
	PATH_LOCALE
	NLSPATH
	HOSTALIASES
	RES_OPTIONS
	LOCALDOMAIN
	CDPATH
	IFS
Environment variables to preserve:
	JAVA_HOME
	TRAVIS
	CI
	DEBIAN_FRONTEND
	XAUTHORIZATION
	XAUTHORITY
	PS2
	PS1
	PATH
	LS_COLORS
	KRB5CCNAME
	HOSTNAME
	HOME
	DISPLAY
	COLORS
Locale to use while parsing sudoers: C
Directory in which to store input/output logs: /var/log/sudo-io
File in which to store the input/output log: %{seq}
Add an entry to the utmp/utmpx file when allocating a pty
PAM service name to use
PAM service name to use for login shells
Create a new PAM session for the command to run in
Maximum I/O log sequence number: 0
Local IP address and netmask pairs:
	10.240.0.28/255.255.255.255
	172.17.0.1/255.255.0.0
Sudoers I/O plugin version 1.8.9p5
gzip version
gzip 1.6
Copyright (C) 2007, 2010, 2011 Free Software Foundation, Inc.
Copyright (C) 1993 Jean-loup Gailly.
This is free software.  You may redistribute copies of it under the terms of
the GNU General Public License <http://www.gnu.org/licenses/gpl.html>.
There is NO WARRANTY, to the extent permitted by law.
Written by Jean-loup Gailly.
zip version
Copyright (c) 1990-2008 Info-ZIP - Type 'zip "-L"' for software license.
This is Zip 3.0 (July 5th 2008), by Info-ZIP.
Currently maintained by E. Gordon.  Please send bug reports to
the authors using the web page at www.info-zip.org; see README for details.
Latest sources and executables are at ftp://ftp.info-zip.org/pub/infozip,
as of above date; see http://www.info-zip.org/ for other sites.
Compiled with gcc 4.8.2 for Unix (Linux ELF) on Oct 21 2013.
Zip special compilation options:
	USE_EF_UT_TIME       (store Universal Time)
	BZIP2_SUPPORT        (bzip2 library version 1.0.6, 6-Sept-2010)
	    bzip2 code and library copyright (c) Julian R Seward
	    (See the bzip2 license for terms of use)
	SYMLINK_SUPPORT      (symbolic links supported)
	LARGE_FILE_SUPPORT   (can read and write large files on file system)
	ZIP64_SUPPORT        (use Zip64 to store large files in archives)
	UNICODE_SUPPORT      (store and read UTF-8 Unicode paths)
	STORE_UNIX_UIDs_GIDs (store UID/GID sizes/values using new extra field)
	UIDGID_NOT_16BIT     (old Unix 16-bit UID/GID extra field not used)
	[encryption, version 2.91 of 05 Jan 2007] (modified for Zip 3)
Encryption notice:
	The encryption code of this program is not copyrighted and is
	put in the public domain.  It was originally written in Europe
	and, to the best of our knowledge, can be freely distributed
	in both source and object forms from any country, including
	the USA under License Exception TSU of the U.S. Export
	Administration Regulations (section 740.13(e)) of 6 June 2002.
Zip environment options:
             ZIP:  [none]
          ZIPOPT:  [none]
vim version
VIM - Vi IMproved 7.4 (2013 Aug 10, compiled Nov 24 2016 16:43:18)
Included patches: 1-52
Extra patches: 8.0.0056
Modified by pkg-vim-maintainers@lists.alioth.debian.org
Compiled by buildd@
Huge version without GUI.  Features included (+) or not (-):
+acl             +farsi           +mouse_netterm   +syntax
+arabic          +file_in_path    +mouse_sgr       +tag_binary
+autocmd         +find_in_path    -mouse_sysmouse  +tag_old_static
-balloon_eval    +float           +mouse_urxvt     -tag_any_white
-browse          +folding         +mouse_xterm     -tcl
++builtin_terms  -footer          +multi_byte      +terminfo
+byte_offset     +fork()          +multi_lang      +termresponse
+cindent         +gettext         -mzscheme        +textobjects
-clientserver    -hangul_input    +netbeans_intg   +title
-clipboard       +iconv           +path_extra      -toolbar
+cmdline_compl   +insert_expand   -perl            +user_commands
+cmdline_hist    +jumplist        +persistent_undo +vertsplit
+cmdline_info    +keymap          +postscript      +virtualedit
+comments        +langmap         +printer         +visual
+conceal         +libcall         +profile         +visualextra
+cryptv          +linebreak       +python          +viminfo
+cscope          +lispindent      -python3         +vreplace
+cursorbind      +listcmds        +quickfix        +wildignore
+cursorshape     +localmap        +reltime         +wildmenu
+dialog_con      -lua             +rightleft       +windows
+diff            +menu            -ruby            +writebackup
+digraphs        +mksession       +scrollbind      -X11
-dnd             +modify_fname    +signs           -xfontset
-ebcdic          +mouse           +smartindent     -xim
+emacs_tags      -mouseshape      -sniff           -xsmp
+eval            +mouse_dec       +startuptime     -xterm_clipboard
+ex_extra        +mouse_gpm       +statusline      -xterm_save
+extra_search    -mouse_jsbterm   -sun_workshop    -xpm
   system vimrc file: "$VIM/vimrc"
     user vimrc file: "$HOME/.vimrc"
 2nd user vimrc file: "~/.vim/vimrc"
      user exrc file: "$HOME/.exrc"
  fall-back for $VIM: "/usr/share/vim"
Compilation: gcc -c -I. -Iproto -DHAVE_CONFIG_H     -g -O2 -fstack-protector --param=ssp-buffer-size=4 -Wformat -Werror=format-security -U_FORTIFY_SOURCE -D_FORTIFY_SOURCE=1
Linking: gcc   -Wl,-Bsymbolic-functions -Wl,-z,relro -Wl,--as-needed -o vim        -lm -ltinfo -lnsl  -lselinux  -lacl -lattr -lgpm -ldl    -L/usr/lib/python2.7/config-x86_64-linux-gnu -lpython2.7 -lpthread -ldl -lutil -lm -Xlinker -export-dynamic -Wl,-O1 -Wl,-Bsymbolic-functions
iptables version
iptables v1.4.21
curl version
curl 7.35.0 (x86_64-pc-linux-gnu) libcurl/7.35.0 OpenSSL/1.0.1f zlib/1.2.8 libidn/1.28 librtmp/2.3
wget version
GNU Wget 1.15 built on linux-gnu.
rsync version
rsync  version 3.1.0  protocol version 31
gimme version
v1.2.0
nvm version
0.33.6
perlbrew version
/home/travis/perl5/perlbrew/bin/perlbrew  - App::perlbrew/0.80
phpenv version
rbenv 1.1.1-25-g6aa70b6
rvm version
rvm 1.29.3 (latest) by Michal Papis, Piotr Kuczynski, Wayne E. Seguin [https://rvm.io]
default ruby version
ruby 2.4.1p111 (2017-03-22 revision 58053) [x86_64-linux]
CouchDB version
couchdb 1.6.1
ElasticSearch version
5.5.0
Installed Firefox version
firefox 56.0.2
MongoDB version
MongoDB 3.4.10
PhantomJS version
2.1.1
Pre-installed PostgreSQL versions
9.2.24
9.3.20
9.4.15
9.5.10
9.6.6
RabbitMQ Version
3.6.14
Redis version
redis-server 4.0.6
riak version
2.2.3
Pre-installed Go versions
1.7.4
ant version
Apache Ant(TM) version 1.9.3 compiled on April 8 2014
mvn version
Apache Maven 3.5.2 (138edd61fd100ec658bfa2d307c43b76940a5d7d; 2017-10-18T07:58:13Z)
Maven home: /usr/local/maven-3.5.2
Java version: 1.8.0_151, vendor: Oracle Corporation
Java home: /usr/lib/jvm/java-8-oracle/jre
Default locale: en_US, platform encoding: UTF-8
OS name: "linux", version: "4.4.0-98-generic", arch: "amd64", family: "unix"
gradle version
------------------------------------------------------------
Gradle 4.0.1
------------------------------------------------------------
Build time:   2017-07-07 14:02:41 UTC
Revision:     38e5dc0f772daecca1d2681885d3d85414eb6826
Groovy:       2.4.11
Ant:          Apache Ant(TM) version 1.9.6 compiled on June 29 2015
JVM:          1.8.0_151 (Oracle Corporation 25.151-b12)
OS:           Linux 4.4.0-98-generic amd64
lein version
Leiningen 2.8.1 on Java 1.8.0_151 Java HotSpot(TM) 64-Bit Server VM
Pre-installed Node.js versions
v4.8.6
v6.12.0
v6.12.1
v8.9
v8.9.1
phpenv versions
  system
  5.6
* 5.6.32 (set by /home/travis/.phpenv/version)
  7.0
  7.0.25
  7.1
  7.1.11
  hhvm
  hhvm-stable
composer --version
Composer version 1.5.2 2017-09-11 16:59:25
Pre-installed Ruby versions
ruby-2.2.7
ruby-2.3.4
ruby-2.4.1
git.checkout
0.54s$ git clone --depth=50 --branch=master https://github.com/githubix/test.git githubix/test
Cloning into 'githubix/test'...
remote: Enumerating objects: 33, done.
remote: Counting objects: 100% (33/33), done.
remote: Compressing objects: 100% (25/25), done.
remote: Total 36 (delta 2), reused 4 (delta 0), pack-reused 3
Unpacking objects: 100% (36/36), done.
$ cd githubix/test
$ git checkout -qf 7e08ab350f9bc489d90f6bfb08b4ad0a22ac5060
0.02s$ phpenv global 5.5 2>/dev/null
5.5 is not pre-installed; installing
Downloading archive: https://s3.amazonaws.com/travis-php-archives/binaries/ubuntu/14.04/x86_64/php-5.5.tar.bz2
19.87s$ curl -s -o archive.tar.bz2 $archive_url && tar xjf archive.tar.bz2 --directory /
0.01s0.02s$ phpenv global 5.5
You are running composer with xdebug enabled. This has a major impact on runtime performance. See https://getcomposer.org/xdebug
1.22s$ composer self-update
You are running composer with xdebug enabled. This has a major impact on runtime performance. See https://getcomposer.org/xdebug
Updating to version 1.8.0 (stable channel).
    Downloading: 100%
Use composer self-update --rollback to return to version 1.2.0
$ php --version
PHP 5.5.38 (cli) (built: Aug 16 2016 19:20:01)
Copyright (c) 1997-2015 The PHP Group
Zend Engine v2.5.0, Copyright (c) 1998-2015 Zend Technologies
    with Zend OPcache v7.0.6-dev, Copyright (c) 1999-2015, by Zend Technologies
    with Xdebug v2.4.1, Copyright (c) 2002-2016, by Derick Rethans
$ composer --version
Composer version 1.8.0 2018-12-03 10:31:16
0.18s$ phpunit test.php
This is Travis ci first test2!Class 'test' could not be found in '/home/travis/build/githubix/test/test.php'.
The command "phpunit test.php" exited with 1.
Done. Your build exited with 1.
something wrong here, probably it cause by Travis.yml?