controllerとviewの操作を続けよう

namespace App\Http\Controllers;

use Illuminate\Http\Request;
use App\Article;

class ArticlesController extends Controller
{
    //
    public function index(){
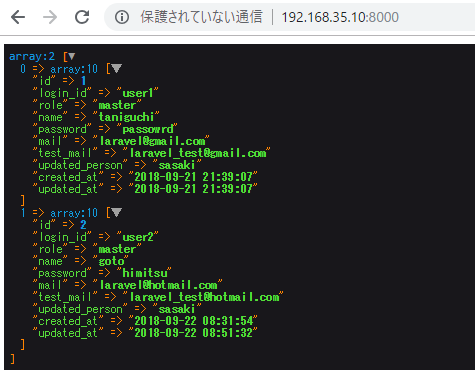
    	$articles = Article::all();
    	dd($articles->toArray());
    	return view('articles.index');
    }
}

<ul>
		@foreach ($articles as $article)
		<li><a href="">{{ $article->name }}</a></li>
		@endforeach
	</ul>

ほうほう、少しわかってきたぞー

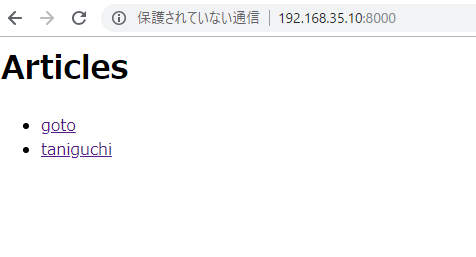
<h1>Articles</h1>
	<ul>
		@foreach ($articles as $article)
		<li><a href="">{{ $article->name }}</a></li>
		@endforeach
	</ul>

laravelでcontrollerをつくっていこう

まずrouting

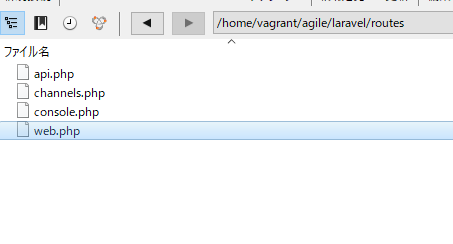
routesフォルダからweb.phpを開きます。ArticlesControllerを指定。

Route::get('/', 'ArticlesController@index');

make:controller
[vagrant@localhost laravel]$ php artisan make:controller ArticlesController
Controller created successfully.

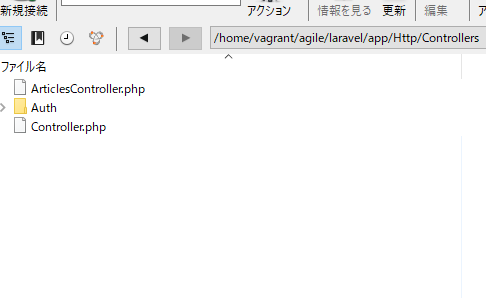
app/Http/Controllersに ArticlesController.phpがつくられる。

あーなるほど。

namespace App\Http\Controllers;

use Illuminate\Http\Request;

class ArticlesController extends Controller
{
    //
}
namespace App\Http\Controllers;

use Illuminate\Http\Request;

class ArticlesController extends Controller
{
    //
    public function index(){
    	return "hello";
    }
}
class ArticlesController extends Controller
{
    //
    public function index(){
    	return view('articles.index');
    }
}
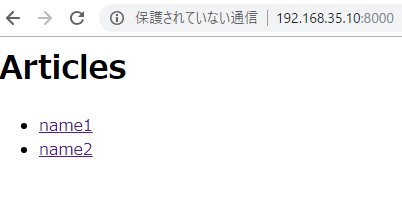
<!DOCTYPE>
<html>
<head>
	<meta charset="utf-8">
	<title>Articles</title>
</head>
<body>
	<h1>Articles</h1>
	<ul>
		<li><a href="">name1</a></li>
		<li><a href="">name2</a></li>
	</ul>
</body>
</html>

カスタマイズすると大分勝手が違うな~

tinkerから更新

>>> $article = App\Article::find(2);
=> App\Article {#2907
id: 2,
login_id: “user2”,
role: “master”,
name: “goto”,
password: “password”,
mail: “laravel@hotmail.com”,
test_mail: “laravel_test@hotmail.com”,
updated_person: “sasaki”,
created_at: “2018-09-22 08:31:54”,
updated_at: “2018-09-22 08:31:54”,
}
>>> $article->password = ‘himitsu’;
=> “himitsu”
>>> $article->save();
=> true
>>> App\Article::all()->toArray();
=> [
[
“id” => 1,
“login_id” => “user1”,
“role” => “master”,
“name” => “taniguchi”,
“password” => “passowrd”,
“mail” => “laravel@gmail.com”,
“test_mail” => “laravel_test@gmail.com”,
“updated_person” => “sasaki”,
“created_at” => “2018-09-21 21:39:07”,
“updated_at” => “2018-09-21 21:39:07”,
],
[
“id” => 2,
“login_id” => “user2”,
“role” => “master”,
“name” => “goto”,
“password” => “himitsu”,
“mail” => “laravel@hotmail.com”,
“test_mail” => “laravel_test@hotmail.com”,
“updated_person” => “sasaki”,
“created_at” => “2018-09-22 08:31:54”,
“updated_at” => “2018-09-22 08:51:32”,
],
]

ほう、sqlコマンドを打たなくてもOKだ。

php artisan tinker

php artisan tinkerとは?

-既に読み込まれているPHPアプリケーションのためのREPL (Read-Eval-Print Loop)を提供
-データベースへのアクセス、モデルを使うなどが可能

appにあるArticle.phpを編集する。protected $fillableを追加。

class Article extends Model
{
    //
    protected $fillable = ['loginid','role','name','password','mail','test_mail','updated_person']
}

再度artisan tinker
[vagrant@localhost laravel]$ php artisan tinker
Psy Shell v0.9.8 (PHP 7.1.21 — cli) by Justin Hileman
>>> App\Article::create([‘login_id’=>’user2′,’role’=>’master’,’name’=>’goto’,
… ‘password’=>’password’,’mail’=>’laravel@hotmail.com’,’test_mail’=>’laravel_test@hotmail.com’,
… ‘updated_person’=>’sasaki’]);
=> App\Article {#2913
login_id: “user2”,
role: “master”,
name: “goto”,
password: “password”,
mail: “laravel@hotmail.com”,
test_mail: “laravel_test@hotmail.com”,
updated_person: “sasaki”,
updated_at: “2018-09-22 08:31:54”,
created_at: “2018-09-22 08:31:54”,
id: 2,
}

うお!
mysql側で確認
mysql> select * from articles;
+—-+———-+——–+———–+———-+———————+————————–+—————-+———————+———————+
| id | login_id | role | name | password | mail | test_mail | updated_person | created_at | updated_at |
+—-+———-+——–+———–+———-+———————+————————–+—————-+———————+———————+
| 1 | user1 | master | taniguchi | passowrd | laravel@gmail.com | laravel_test@gmail.com | sasaki | 2018-09-21 21:39:07 | 2018-09-21 21:39:07 |
| 2 | user2 | master | goto | password | laravel@hotmail.com | laravel_test@hotmail.com | sasaki | 2018-09-22 08:31:54 | 2018-09-22 08:31:54 |
+—-+———-+——–+———–+———-+———————+————————–+—————-+———————+———————+
2 rows in set (0.00 sec)

抽出もできる。
>>> App\Article::where(‘id’, ‘>’, 1)->get()->toArray();
=> [
[
“id” => 2,
“login_id” => “user2”,
“role” => “master”,
“name” => “goto”,
“password” => “password”,
“mail” => “laravel@hotmail.com”,
“test_mail” => “laravel_test@hotmail.com”,
“updated_person” => “sasaki”,
“created_at” => “2018-09-22 08:31:54”,
“updated_at” => “2018-09-22 08:31:54”,
],
]

これでも取得できる。
>>> App\Article::orderBy(‘created_at’,’desc’)->get()->toArray();
artisanコマンドを実行しよう

[vagrant@localhost laravel]$ php artisan tinker
Psy Shell v0.9.8 (PHP 7.1.21 — cli) by Justin Hileman
>>> $article = new App\Article();
=> App\Article {#2900}
>>> $article->login_id = ‘user1’;
=> “user1”
>>> $article->role = ‘master’;
=> “master”
>>> $article->name = ‘taniguchi’;
=> “taniguchi”
>>> $article->password = ‘passowrd’;
=> “passowrd”
>>> $article->mail = ‘laravel@gmail.com’;
=> “laravel@gmail.com”
>>> $article->test_mail = ‘laravel_test@gmail.com’;
=> “laravel_test@gmail.com”
>>> $article->updated_person = ‘sasaki’;
=> “sasaki”
>>> $article->save();
=> true
>>> App\Article::all();
=> Illuminate\Database\Eloquent\Collection {#2908
all: [
App\Article {#2909
id: 1,
login_id: “user1”,
role: “master”,
name: “taniguchi”,
password: “passowrd”,
mail: “laravel@gmail.com”,
test_mail: “laravel_test@gmail.com”,
updated_person: “sasaki”,
created_at: “2018-09-21 21:39:07”,
updated_at: “2018-09-21 21:39:07”,
},
],
}

なるほど♪
mysqlにも入っています。

mysql> select * from articles;
+—-+———-+——–+———–+———-+——————-+————————+—————-+———————+———————+
| id | login_id | role | name | password | mail | test_mail | updated_person | created_at | updated_at |
+—-+———-+——–+———–+———-+——————-+————————+—————-+———————+———————+
| 1 | user1 | master | taniguchi | passowrd | laravel@gmail.com | laravel_test@gmail.com | sasaki | 2018-09-21 21:39:07 | 2018-09-21 21:39:07 |
+—-+———-+——–+———–+———-+——————-+————————+—————-+———————+———————+
1 row in set (0.00 sec)

php artisan migrateしよう

public function up()
    {
        Schema::create('articles', function (Blueprint $table) {
            $table->increments('id');
            $table->string('login_id');
            $table->string('role');
            $table->string('name');
            $table->string('password');
            $table->string('mail');
            $table->string('updated_person');
            $table->timestamps();
        });
    }

[vagrant@localhost laravel]$ php artisan migrate
Migration table created successfully.
Migrating: 2018_09_19_234806_create_articles_table
Migrated: 2018_09_19_234806_create_articles_table

.env

DB_CONNECTION=mysql
DB_HOST=127.0.0.1
DB_PORT=3306
DB_DATABASE=laravel57
DB_USERNAME=root
DB_PASSWORD=

table.php

{
        Schema::create('articles', function (Blueprint $table) {
            $table->increments('id');
            $table->string('login_id');
            $table->string('role');
            $table->string('name');
            $table->string('password');
            $table->string('mail');
            $table->string('test_mail');
            $table->string('updated_person');
            $table->timestamps();
        });
    }

mysql> show columns from articles
-> ;
+—————-+——————+——+—–+———+—————-+
| Field | Type | Null | Key | Default | Extra |
+—————-+——————+——+—–+———+—————-+
| id | int(10) unsigned | NO | PRI | NULL | auto_increment |
| login_id | varchar(255) | NO | | NULL | |
| role | varchar(255) | NO | | NULL | |
| name | varchar(255) | NO | | NULL | |
| password | varchar(255) | NO | | NULL | |
| mail | varchar(255) | NO | | NULL | |
| test_mail | varchar(255) | NO | | NULL | |
| updated_person | varchar(255) | NO | | NULL | |
| created_at | timestamp | YES | | NULL | |
| updated_at | timestamp | YES | | NULL | |
+—————-+——————+——+—–+———+—————-+
10 rows in set (0.00 sec)

increments(”)だとint(10) primary key auto_increment, string(”)だとvarchar(255)になりますね。

Laravelのカラム作成で使用できるデータ型

increment(‘id’)
binary(‘column’)
boolean(”)
char(”)
date(”)
time(”)
dateTime(”)
double(”)
enum(”)
integer(”)
json(”)
timestamp(”)
timestamps(”)
nullableTimestamps(”)
string(”) …varchar
string(”, )
text(”)

ということは、mysqlのid int primary key auto_incrementはincrement(‘id’)
varcharはstring(”)

あ、つまり、laravelはvarchar(‘n’)は表示する必要ないのね。
update_at、create_atはtimestamps()

tinyintはbooleanのようです。

create table profiles(
 id int primary key auto_increment,
 login_id varchar(30),
 role varchar(50),
 name varchar(20),
 password varchar(30),
 mail varchar(255),
 updated_at datetime,
 updated_person varchar(50)
);

これで行けるかな?
increment(‘id’)
string(‘login_id’)
string(‘role’)
string(‘name’)
string(‘password’)
string(‘mail’)
string(‘test_mail’)
timestamps()
string(‘updated_person’)

create tables

sqlでtableをつくっていく。いずれはconcatで結合する。

mysql> show tables;
+—————–+
| Tables_in_addb |
+—————–+
| account_lists |
| companies_lists |
| documents_lists |
| profiles |
| registers |
+—————–+
5 rows in set (0.05 sec)

– laravelで複数テーブルでやるところまで
– ER図を作れないといけない。
– mysqlだけでなく、oracleも
– concatも

mysqlの日付・時刻型

DATE: YYYY-MM-DD
TIME: HH:MM:SS
DATETIME: YYYY-MM-DD HH:MM:SS
TIMESTAMP: YYYY-MM-DD HH:MM:SS
YEAR: YYYY

なるほど、格納する値によって型も変わってくるのね♪

updated_at(更新日時)などはYYY-MM-DD HH:MM:SSで入力、
ラジオボタンなど選択肢が2択の場合は、tinyint(1)とする。
名前は日本人ならvarchar(20)で十分? まーmiddle nameがありませんからね。
会社名などもvarchar(50)で十分でしょうね。

あら、こう考えると、varchar(255)も殆ど必要なさそうな。。

emailは?
RFC 5321(Simple Mail Transfer Protocol)によると、
-ローカル部(@の前)64オクテット
-ドメイン部(@の後)255オクテット
-全体 256オクテット

よって、varchar(255)あれば十分だそうだ。

ああ、こりゃER図マスターしないとあかんな。。
ところで、 id int primary key auto_incrementって、すべてのテーブルに入れるのか?
例えば、profiles と accountsというtableがあった場合、両方 id int primary key auto_incrementとするのか、profile_id int primary key auto_increment, account_id int primary key auto_increment とした方が望ましいのか…

悩ましい。とりあえず、まずはid int primary key auto_incrementで行こう。

MySQLの文字列型

char 255
varchar 255
tinyblob 255
blob 65535
mediumblob 16777215
longblob 4294967295
tinytext 255
mediumtext 65535
mediumtext 16777215
logintext 4294967295
enum(“”,””…)
set(“”,””,…)

-CHAR型の特徴的な点は,値を格納された時に,もし文字列がテーブル作成時に指定された文字数よりも短かった場合,文字列の右側の末尾にスペースで補完
-VARCHAR型の特徴的な点として,CHAR型と違ってテーブル作成時に指定された文字列よりも短かった場合に,データに合わせた文字列として可変長で保存

こうみると、computer science的にはvarcharの方がメモリの無駄がないように見える。

varcharとtext
行の中身がdataか(varchar)、dataへのポインタか(text)
varchar:文字数で指定(日本語でも、最大65535文字まで入る)
text:byteで指定

あんまりcharやtextのメリットがわからん。。