[vagrant@localhost ~]$ rpm –import https://artifacts.elastic.co/GPG-KEY-elasticsearch
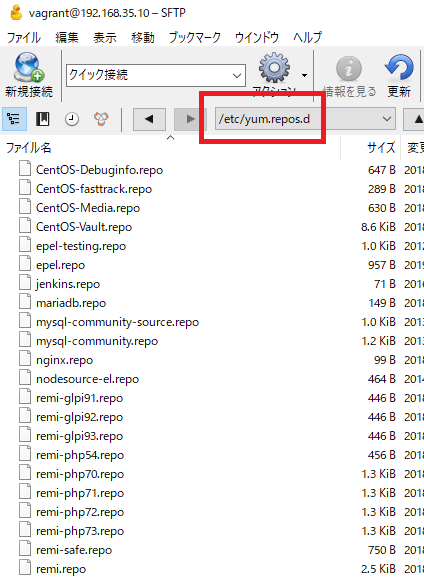
[vagrant@localhost ~]$ cd /etc/yum.repos.d/
[vagrant@localhost yum.repos.d]$ sudo touch elasticsearch.repo
[vagrant@localhost yum.repos.d]$ sudo vi elasticsearch.repo
[elasticsearch-7.x]
name=Elasticsearch repository for 7.x packages
baseurl=https://artifacts.elastic.co/packages/7.x/yum
gpgcheck=1
gpgkey=https://artifacts.elastic.co/GPG-KEY-elasticsearch
enabled=1
autorefresh=1
type=rpm-md
[vagrant@localhost yum.repos.d]$ sudo yum install elasticsearch
### NOT starting on installation, please execute the following statements to configure elasticsearch service to start automatically using chkconfig
sudo chkconfig –add elasticsearch
### You can start elasticsearch service by executing
sudo service elasticsearch start
Created elasticsearch keystore in /etc/elasticsearch
Verifying : elasticsearch-7.0.0-1.x86_64 1/1
インストール:
elasticsearch.x86_64 0:7.0.0-1
完了しました!
[vagrant@localhost yum.repos.d]$ sudo chkconfig –add elasticsearch
[vagrant@localhost yum.repos.d]$ sudo service elasticsearch start
elasticsearch を起動中: OpenJDK 64-Bit Server VM warning: Option UseConcMarkSweepGC was deprecated in version 9.0 and will likely be removed in a future release.
OpenJDK 64-Bit Server VM warning: INFO: os::commit_memory(0x00000000c5330000, 986513408, 0) failed; error=’Not enough space’ (errno=12)
#
# There is insufficient memory for the Java Runtime Environment to continue.
# Native memory allocation (mmap) failed to map 986513408 bytes for committing reserved memory.
# An error report file with more information is saved as:
# /var/log/elasticsearch/hs_err_pid5271.log
[失敗]
なにいいいいいいいいいいいいいいいいいいいいいいいいいい
最近メモリが足りないってエラーが多すぎるんだが。。
[vagrant@localhost ~]$ sudo cat /etc/elasticsearch/jvm.options
## JVM configuration

################################################################
## IMPORTANT: JVM heap size
################################################################
##
## You should always set the min and max JVM heap
## size to the same value. For example, to set
## the heap to 4 GB, set:
##
## -Xms4g
## -Xmx4g
##
## See https://www.elastic.co/guide/en/elasticsearch/reference/current/heap-size.html
## for more information
##
################################################################

# Xms represents the initial size of total heap space
# Xmx represents the maximum size of total heap space

-Xms1g
-Xmx1g

################################################################
## Expert settings
################################################################
##
## All settings below this section are considered
## expert settings. Don't tamper with them unless
## you understand what you are doing
##
################################################################

## GC configuration
-XX:+UseConcMarkSweepGC
-XX:CMSInitiatingOccupancyFraction=75
-XX:+UseCMSInitiatingOccupancyOnly

## G1GC Configuration
# NOTE: G1GC is only supported on JDK version 10 or later.
# To use G1GC uncomment the lines below.
# 10-:-XX:-UseConcMarkSweepGC
# 10-:-XX:-UseCMSInitiatingOccupancyOnly
# 10-:-XX:+UseG1GC
# 10-:-XX:InitiatingHeapOccupancyPercent=75

## DNS cache policy
# cache ttl in seconds for positive DNS lookups noting that this overrides the
# JDK security property networkaddress.cache.ttl; set to -1 to cache forever
-Des.networkaddress.cache.ttl=60
# cache ttl in seconds for negative DNS lookups noting that this overrides the
# JDK security property networkaddress.cache.negative ttl; set to -1 to cache
# forever
-Des.networkaddress.cache.negative.ttl=10

## optimizations

# pre-touch memory pages used by the JVM during initialization
-XX:+AlwaysPreTouch

## basic

# explicitly set the stack size
-Xss1m

# set to headless, just in case
-Djava.awt.headless=true

# ensure UTF-8 encoding by default (e.g. filenames)
-Dfile.encoding=UTF-8

# use our provided JNA always versus the system one
-Djna.nosys=true

# turn off a JDK optimization that throws away stack traces for common
# exceptions because stack traces are important for debugging
-XX:-OmitStackTraceInFastThrow

# flags to configure Netty
-Dio.netty.noUnsafe=true
-Dio.netty.noKeySetOptimization=true
-Dio.netty.recycler.maxCapacityPerThread=0

# log4j 2
-Dlog4j.shutdownHookEnabled=false
-Dlog4j2.disable.jmx=true

-Djava.io.tmpdir=${ES_TMPDIR}

## heap dumps

# generate a heap dump when an allocation from the Java heap fails
# heap dumps are created in the working directory of the JVM
-XX:+HeapDumpOnOutOfMemoryError

# specify an alternative path for heap dumps; ensure the directory exists and
# has sufficient space
-XX:HeapDumpPath=/var/lib/elasticsearch

# specify an alternative path for JVM fatal error logs
-XX:ErrorFile=/var/log/elasticsearch/hs_err_pid%p.log

## JDK 8 GC logging

8:-XX:+PrintGCDetails
8:-XX:+PrintGCDateStamps
8:-XX:+PrintTenuringDistribution
8:-XX:+PrintGCApplicationStoppedTime
8:-Xloggc:/var/log/elasticsearch/gc.log
8:-XX:+UseGCLogFileRotation
8:-XX:NumberOfGCLogFiles=32
8:-XX:GCLogFileSize=64m

# JDK 9+ GC logging
9-:-Xlog:gc*,gc+age=trace,safepoint:file=/var/log/elasticsearch/gc.log:utctime,pid,tags:filecount=32,filesize=64m
# due to internationalization enhancements in JDK 9 Elasticsearch need to set the provider to COMPAT otherwise
# time/date parsing will break in an incompatible way for some date patterns and locals
9-:-Djava.locale.providers=COMPAT
-Xms1g、-Xmx1gの箇所ね。
VMのメモリを変えたいところだ。
デフォルトで2Gってどういうことだよ。。
とりあえず、500mに変える。
[vagrant@localhost ~]$ sudo vi /etc/elasticsearch/jvm.options
[vagrant@localhost ~]$ sudo service elasticsearch start
elasticsearch を起動中: OpenJDK 64-Bit Server VM warning: Option UseConcMarkSweepGC was deprecated in version 9.0 and will likely be removed in a future release.
[ OK ]