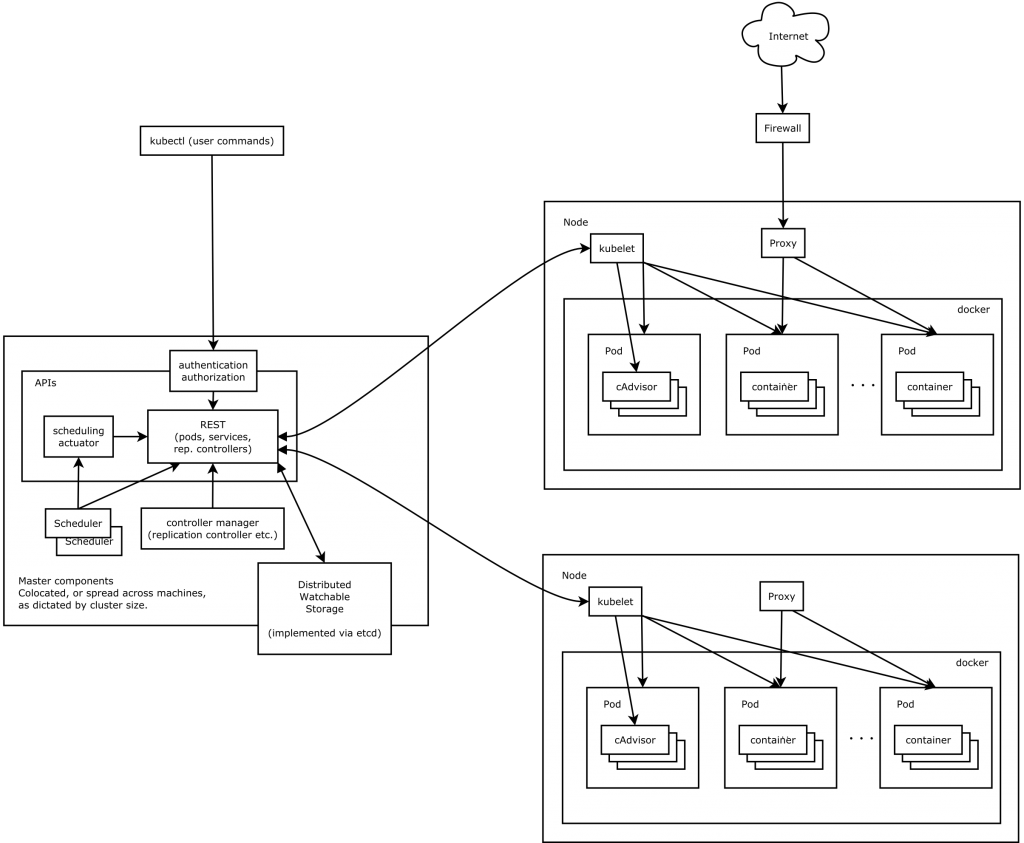
### Docker環境の構築
CircleCIを使うにあたって、Dockerで環境を構築する
– nginx:1.13.5-alpine、node:12.13.0-alpine + FROM php:7.3-fpm-alpin、mysql:5.7.19で作成
※docker-compose.yml, Dockerfileの記載は省略
$ sudo docker-compose build
$ sudo docker-compose up -d
$ sudo docker ps
$ sudo docker exec -it app-1 sh
$ curl -sS https://getcomposer.org/installer | php
$ php composer.phar create-project –prefer-dist laravel/laravel app
$ php artisan –version
Laravel Framework 7.2.0
$ /bin/dd if=/dev/zero of=/var/swap.1 bs=1M count=1024
$ /sbin/mkswap /var/swap.1
$ /sbin/swapon /var/swap.1
$ vi composer.json
"require": {
        "php": "^7.2.5",
        "fideloper/proxy": "^4.2",
        "fruitcake/laravel-cors": "^1.0",
        "guzzlehttp/guzzle": "^6.3",
        "laravel/framework": "^7.0",
        "laravel/tinker": "^2.0",
        "laravel/ui" : "^2.0"
   },
$ php composer.phar update
$ php artisan ui vue –auth
$ php artisan migrate
$ npm install
$ npm run dev
$ sudo docker exec -it db-1 bash
$ mysql -u root -p
mysql> use mydb
mysql> show tables;
+—————–+
| Tables_in_mydb |
+—————–+
| failed_jobs |
| migrations |
| password_resets |
| users |
+—————–+
4 rows in set (0.07 sec)
// 動作確認、日本語のレコードが問題なく入るか
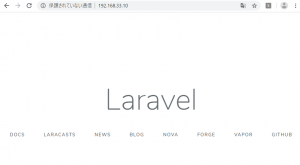
http://192.168.33.10/login
http://192.168.33.10/register
mysql> select * from users;
### Circle CI
– CircleCIでLaravelのMySQLを使ったテストを実行する
Experimental CircleCI images for MySQL
> The following is the customizations CircleCI applies in a Dockerfile:
FROM mysql:latest
ENV MYSQL_ALLOW_EMPTY_PASSWORD=true \
    MYSQL_DATABASE=circle_test \
    MYSQL_HOST=127.0.0.1 \
    MYSQL_ROOT_HOST=% \
    MYSQL_USER=root
config/database.php
'connections' => [

        'circle_test' => [
            'driver' => 'mysql',
            'host' => '127.0.0.1',
            'port' => '3306',
            'database' => 'circle_test',
            'username' => 'root',
            'password' => '',
            'charset' => 'utf8mb4',
            'collation' => 'utf8mb4_unicode_ci',
            'prefix' => '',
            'strict' => true,
            'engine' => null,
        ],
docker imageを選択する
-> laravelの環境に合わせてcircleci/php:7.3.9-apache-node-browsersにする
https://circleci.com/docs/ja/2.0/docker-image-tags.json
.circleci/config.yml
version: 2
jobs:
  build:
    docker:
      - image: circleci/php:7.3.9-apache-node-browsers
      - image: circleci/mysql:5.7

    environment:
      - APP_DEBUG: true
      - APP_ENV: testing
      - APP_KEY: base64:62bhVUIMcTWoVIzZm**************
      - DB_CONNECTION: circle_test
      - MYSQL_ALLOW_EMPTY_PASSWORD: true

    working_directory: ~/repo

    steps:
      - checkout

      - run: sudo docker-php-ext-install pdo_mysql

      - restore_cache:
          keys:
          - v1-dependencies-{{ checksum "composer.json" }}
          - v1-dependencies-

      - run: composer install -n --prefer-dist

      - save_cache:
          paths:
            - ./vendor
          key: v1-dependencies-{{ checksum "composer.json" }}

      - run: php artisan migrate
      - run: php artisan db:seed

      - run: php ./vendor/bin/phpunit
$ git add .
$ git config –global core.autoCRLF false
$ git commit -m “circleci”
$ git remote add origin https://github.com/hoge/circleci.git
$ git push -u origin master
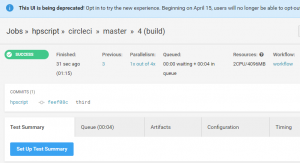
repositoryをprivateにして再度 git push。
-> success
private repoでもできるのね。
というか、CircleCI自体がDockerのimageを使っているだけで、別にプロジェクト自体はDocker環境だけでなく、Vagrantでも行けそうですね。