まず、postgres側でテーブルを作ってデータを入れます。
create table weather (
	id serial primary key,
	location_id int,
	name varchar(20),
	temperature int,
	humidity int,
	date_time timestamp
);
test=> insert into weather (location_id, name, temperature, humidity, date_time) values
(1, ‘東京’, 15, 55, ‘2021-02-02 09:00:00’),
(1, ‘東京’, 16, 53, ‘2021-02-02 10:00:00’),
(1, ‘東京’, 17, 40, ‘2021-02-02 11:00:00’),
(2, ‘那覇’, 20, 65, ‘2021-02-02 09:00:00’),
(2, ‘那覇’, 22, 67, ‘2021-02-02 10:00:00’),
(2, ‘那覇’, 25, 69, ‘2021-02-02 11:00:00’);
INSERT 0 6
test=> select * from weather;
id | location_id | name | temperature | humidity | date_time
—-+————-+——+————-+———-+———————
1 | 1 | 東京 | 15 | 55 | 2021-02-02 09:00:00
2 | 1 | 東京 | 16 | 53 | 2021-02-02 10:00:00
3 | 1 | 東京 | 17 | 40 | 2021-02-02 11:00:00
4 | 2 | 那覇 | 20 | 65 | 2021-02-02 09:00:00
5 | 2 | 那覇 | 22 | 67 | 2021-02-02 10:00:00
6 | 2 | 那覇 | 25 | 69 | 2021-02-02 11:00:00
application.properties
server.port=8080
spring.jpa.database=POSTGRESQL
spring.datasource.url=jdbc:postgresql://localhost:5432/test
spring.datasource.username=postgres
spring.datasource.password=
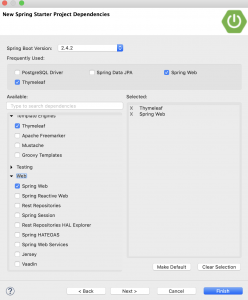
pom.xml
		<dependency>
			<groupId>org.springframework.boot</groupId>
			<artifactId>spring-boot-starter-data-jpa</artifactId>
		</dependency>
		<dependency>
			<groupId>org.postgresql</groupId>
			<artifactId>postgresql</artifactId>
			<scope>runtime</scope>
		</dependency>
model
Weather.java
package com.example.demo.model;

import java.sql.Timestamp;

import javax.persistence.Entity;
import javax.persistence.GeneratedValue;
import javax.persistence.GenerationType;
import javax.persistence.Id;
import javax.persistence.Table;

@Entity
@Table(name="weather")
public class Weather {
	@Id
	@GeneratedValue(strategy=GenerationType.IDENTITY)
	private Integer id;

	private Integer location_id;

	private String name;

	private Integer temperature;

	private Integer humidity;

	private Timestamp date_time;

	public Integer getId() {
		return id;
	}

	public void setId(Integer id) {
		this.id = id;
	}

	public Integer getLocation_id() {
		return location_id;
	}

	public void setLocation_id(Integer location_id) {
		this.location_id = location_id;
	}

	public String getName() {
		return name;
	}

	public void setName(String name) {
		this.name = name;
	}

	public Integer getTemperature() {
		return temperature;
	}

	public void setTemperature(Integer temperature) {
		this.temperature = temperature;
	}

	public Integer getHumidity() {
		return humidity;
	}

	public void setHumidity(Integer humidity) {
		this.humidity = humidity;
	}

	public Timestamp getDate_time() {
		return date_time;
	}

	public void setDate_time(Timestamp date_time) {
		this.date_time = date_time;
	}
}
repository/WeatherRepository.java
package com.example.demo.repository;

import org.springframework.data.jpa.repository.JpaRepository;
import org.springframework.stereotype.Repository;

import com.example.demo.model.Weather;

@Repository
public interface WeatherRepository extends JpaRepository<Weather, Integer>{}
service/WeatherService.java
package com.example.demo.service;

import java.util.List;

import org.springframework.beans.factory.annotation.Autowired;
import org.springframework.stereotype.Service;
import org.springframework.transaction.annotation.Transactional;

import com.example.demo.model.Weather;
import com.example.demo.repository.WeatherRepository;

@Service
@Transactional
public class WeatherService {

	@Autowired
	WeatherRepository weatherRepository;

	public List<Weather> findAllWeatherData(){
		return weatherRepository.findAll();
	}
}
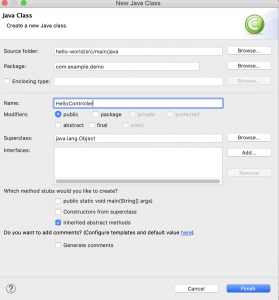
HelloController.java
package com.example.demo;

import java.util.List;

import org.springframework.beans.factory.annotation.Autowired;
import org.springframework.stereotype.Controller;
import org.springframework.ui.Model;
import org.springframework.web.bind.annotation.RequestMapping;

import com.example.demo.model.Weather;
import com.example.demo.service.WeatherService;

@Controller
public class HelloController {
	@Autowired
	WeatherService weatherService;

	@RequestMapping("/hello")
	public String hello(Model model) {

		model.addAttribute("hello", "Hello World!");

		List<Weather> weatherDataList = weatherService.findAllWeatherData();
		model.addAttribute("weatherDataList", weatherDataList);

		return "hello";
	}
}
hello.html
<!Doctype html>
<html xmlns:th="http://www.thymeleaf.org">
<head>
<title>SpringBoot</title>
<meta http-equiv="Content-Type" content="text/html; charset=UTF-8"/>
<meta charset="UTF-8">
<!-- <link th:href="@{/css/common.css}" rel="stylesheet"></link>
<script th:src="@{/js/common.js}"></script> -->
</head>
<body>
<p>
	<span th:text="${hello}">Hello World!</span>
</p>
<div>
	<table>
		<tr th:each="data: ${weatherDataList}" th:object="${data}">
			<td th:text="*{id}"></td>
			<td th:text="*{location_id}"></td>
			<td th:text="*{name}"></td>
			<td th:text="*{temperature}"></td>
			<td th:text="*{humidity}"></td>
			<td th:text="*{date_time}"></td>
		</tr>
	</table>
</div>
</body>
</html>
lsof -i:8080
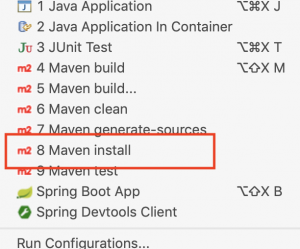
Run As -> SpringBoot app
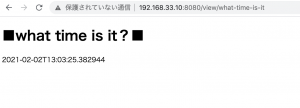
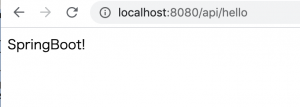
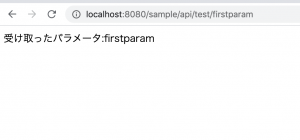
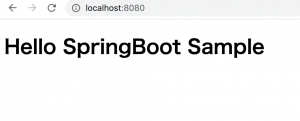
http://localhost:8080/hello
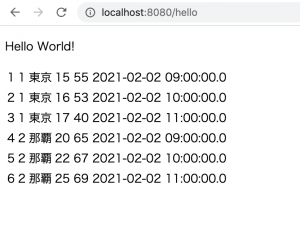
Hello World!
1 1 東京 15 55 2021-02-02 09:00:00.0
2 1 東京 16 53 2021-02-02 10:00:00.0
3 1 東京 17 40 2021-02-02 11:00:00.0
4 2 那覇 20 65 2021-02-02 09:00:00.0
5 2 那覇 22 67 2021-02-02 10:00:00.0
6 2 那覇 25 69 2021-02-02 11:00:00.0
うおおおおおおおおおおおおお
マジか。。。
これ、Javaでアプリ作れんじゃん。