pom.xml
		<dependency>
			<groupId>org.springframework.boot</groupId>
			<artifactId>spring-boot-starter-aop</artifactId>
		</dependency>
AOPファイル TestLog.java
package com.example.demo;
import org.aspectj.lang.annotation.After;
import org.aspectj.lang.annotation.Aspect;
import org.springframework.stereotype.Component;

@Aspect
@Component
public class TestLog {

	@After("within(com.example.demo.MainController)")
	public void write1() {
		System.out.println("ログイン後");
	}
}
@AspectはAOPとして動作
@After, @Before, @Around, @AfterReturning, @AfterThrowing などがある。
MainController.java
package com.example.demo;
import org.springframework.web.bind.annotation.GetMapping;
import org.springframework.web.bind.annotation.RestController;
@RestController
public class MainController {
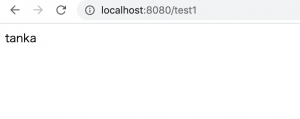
@GetMapping("/test1")
public String input1() {
return "test1";
}
@GetMapping("/test2")
public String input2(){
return "test2";
}
}
Error starting ApplicationContext. To display the conditions report re-run your application with ‘debug’ enabled.
2021-02-07 11:29:27.692 ERROR 43506 — [ restartedMain] o.s.boot.SpringApplication : Application run failed
org.springframework.beans.factory.BeanCreationException: Error creating bean with name ‘requestMappingHandlerMapping’ defined in class path resource [org/springframework/boot/autoconfigure/web/servlet/WebMvcAutoConfiguration$EnableWebMvcConfiguration.class]: Invocation of init method failed; nested exception is java.lang.IllegalStateException: Ambiguous mapping. Cannot map ‘test1’ method
com.example.demo.Test1#write1()
to {GET [/test2]}: There is already ‘mainController’ bean method
com.example.demo.MainController#input2() mapped.
ん? 何故だ??