8系がうまくいかないので、7系でやります。
$ composer create-project –prefer-dist laravel/laravel tenancy “7.*”
$ cd tenancy
$ php artisan -V
Laravel Framework 7.30.4
config/database.phpと.envを編集
$ composer require “hyn/multi-tenant:5.6.*”
$ php artisan vendor:publish –tag=tenancy
$ php artisan migrate –database=system
mysql> use tenancy
mysql> show tables;
mysql> describe users;
mysql> describe hostnames;
+————————-+—————–+——+—–+———+—————-+
| Field | Type | Null | Key | Default | Extra |
+————————-+—————–+——+—–+———+—————-+
| id | bigint unsigned | NO | PRI | NULL | auto_increment |
| fqdn | varchar(255) | NO | UNI | NULL | |
| redirect_to | varchar(255) | YES | | NULL | |
| force_https | tinyint(1) | NO | | 0 | |
| under_maintenance_since | timestamp | YES | | NULL | |
| website_id | bigint unsigned | YES | MUL | NULL | |
| created_at | timestamp | YES | | NULL | |
| updated_at | timestamp | YES | | NULL | |
| deleted_at | timestamp | YES | | NULL | |
+————————-+—————–+——+—–+———+—————-+
### テナントの作成
テナントを作成すると同時にデータベースにテーブルが作成されるが、テーブルの作成には前準備が必要となる。
テナント用のテーブルを作成するmigration fileはmigrations/tenant以下に作成する
https://tenancy.dev/docs/hyn/5.6/migrations
config/tenancy.php
'tenant-migrations-path' => database_path('migrations/tenant'),

'uuid-limit-length-to-32' => env('LIMIT_UUID_LENGTH_32', true),
$ cd database/migrations
$ mkdir tenant
$ ls
2014_10_12_000000_create_users_table.php
2014_10_12_100000_create_password_resets_table.php
2017_01_01_000003_tenancy_websites.php
2017_01_01_000005_tenancy_hostnames.php
2018_04_06_000001_tenancy_websites_needs_db_host.php
2019_08_19_000000_create_failed_jobs_table.php
tenant
// usersとpassword_resetsもtenantの中に入れる
$ cp 2014_10_12* tenant
### テナント作成
https://tenancy.dev/docs/hyn/5.6/creating-tenants
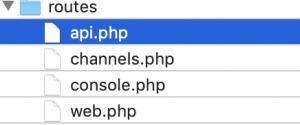
routes/web.php
use Hyn\Tenancy\Models\Hostname;
use Hyn\Tenancy\Contracts\Repositories\HostnameRepository;
use Hyn\Tenancy\Models\Website;
use Hyn\Tenancy\Contracts\Repositories\WebsiteRepository;


Route::get('create_tenant', function () {

    $website = new Website;
    app(WebsiteRepository::class)->create($website);

    $hostname = new Hostname;

    $hostname->fqdn = 'test.localhost';
    $hostname = app(HostnameRepository::class)->create($hostname);

    app(HostnameRepository::class)->attach($hostname, $website);

	return redirect('/');

});
$ php artisan serve –host 192.168.33.10 –port 8000
http://192.168.33.10:8000/create_tenant
mysql> select * from hostnames;
+—-+—————-+————-+————-+————————-+————+———————+———————+————+
| id | fqdn | redirect_to | force_https | under_maintenance_since | website_id | created_at | updated_at | deleted_at |
+—-+—————-+————-+————-+————————-+————+———————+———————+————+
| 1 | test.localhost | NULL | 0 | NULL | 1 | 2021-02-13 09:07:52 | 2021-02-13 09:07:52 | NULL |
+—-+—————-+————-+————-+————————-+————+———————+———————+————+
1 row in set (0.00 sec)
mysql> select * from websites;
+—-+———————————-+———————+———————+————+——————————–+
| id | uuid | created_at | updated_at | deleted_at | managed_by_database_connection |
+—-+———————————-+———————+———————+————+——————————–+
| 1 | 214594e5f86a418bbd990b6583d37131 | 2021-02-13 09:07:52 | 2021-02-13 09:07:52 | NULL | NULL |
+—-+———————————-+———————+———————+————+——————————–+
1 row in set (0.00 sec)
mysql> show databases;
OK, なんとなくマルチテナントの仕組みはわかったかも。
vagrantで開発している場合、mac側で名前解決せなあかんね。