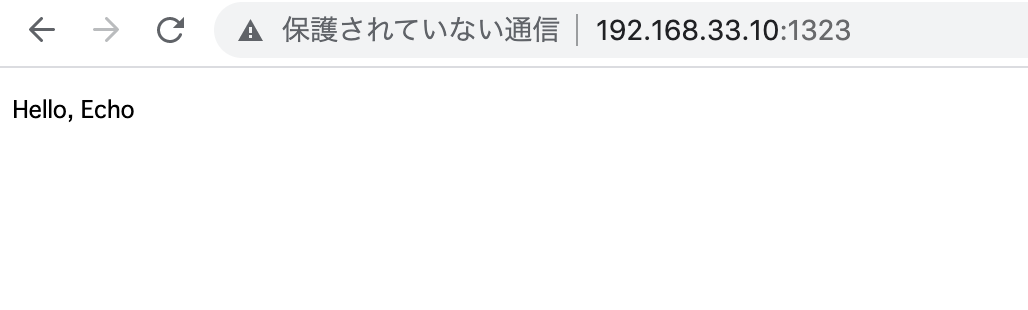
### Get
import (
	"net/http"
	"github.com/labstack/echo/v4"
)

func main() {
	e := echo.New()
	e.GET("/users/:name", getUserName)

	e.Logger.Fatal(e.Start(":1323"))
}

func getUserName(c echo.Context) error {
	name := c.Param("name")
	return c.JSON(http.StatusOK, name)
}
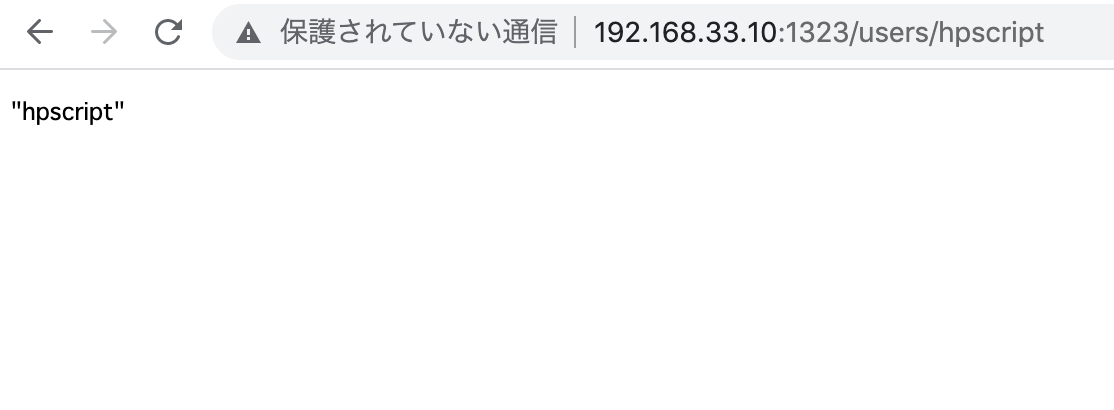
### QueryParamを使う場合
func main() {
	e := echo.New()
	e.GET("/show", show)

	e.Logger.Fatal(e.Start(":1323"))
}

func show(c echo.Context) error {
	team := c.QueryParam("team")
	member := c.QueryParam("member")
	return c.String(http.StatusOK, "team:"+team+", member:"+member)
}
http://192.168.33.10:1323/show?team=test&member=hpscript
### Post
FormValueで受け取る
func main() {
	e := echo.New()
	e.GET("/save", save)

	e.Logger.Fatal(e.Start(":1323"))
}

func save(c echo.Context) error {

	name := c.FormValue("name")
	email := c.FormValue("email")
	return c.String(http.StatusOK, "name:"+name+", email:"+email)
}
### JSONで返却
type User struct {
	Name string `json:"name"`
	Email string `json:"email"`
}

func main() {
	e := echo.New()
	e.GET("/users", saveUser)

	e.Logger.Fatal(e.Start(":1323"))
}

func saveUser(c echo.Context) error {

	u := new(User)
	if err := c.Bind(u); err != nil {
		return err
	}
	return c.JSON(http.StatusOK, u)
}
type Message struct {
	Name string `json:"name"`
	Email string `json:"email"`
	Message string `json:"message"`
}

type Response struct {
	Name string `json:"name"`
	Email string `json:"email"`
	Message string `json:message`
	Status string `json:status`
}

func main() {
	e := echo.New()
	e.GET("/send", sendMessage)

	e.Logger.Fatal(e.Start(":1323"))
}

func sendMessage(c echo.Context) error {

	m := new(Message)
	if error := c.Bind(m); error != nil {
		return error
	}
	r := new(Response)
	r.Name = m.Name
	r.Email = m.Email
	r.Message = m.Message
	r.Status = "success"
	return c.JSON(http.StatusOK, r)
}
なるほど、ルーティングの機能についてはある程度わかりました。
MVCに分かれているのではなく、1枚のファイルの中に書いていくのね。