sqlite3
create table results (
	id integer primary key autoincrement,
	title text,
	data text,
	img text,
	created datetime
);
models.py
def select(con, pk):
	cur = con.execute('select id, title, data, img, created from results where id=?', (pk,))
	return cur.fetchone()

def select_all(con):
	cur = con.execute('select id, title, data, img, created from results order by id desc')
	return cur.fetchall()

def delete(con, pk):
	cur = con.cursor()
	cur.execute('delete from results where id=?', (pk,))
	con.commit()
run.py
@app.route('/')
def index():
	con = get_db()
	results = models.select_all(con)
	return render_template('index.html', results=results)

@app.route('/delete/<pk>')
def delete(pk):
	con = get_db()
	models.delete(con, pk)
	return redirect(url_for('index'))

@app.route('/view/<pk>')
def view(pk):
	con = get_db()
	result = models.select(con, pk)
	return render_template("view.html", result=result)
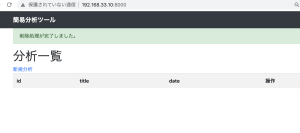
index.html
    {% for result in results %}
    <tr>
        <td>{{result.id}}</td>
        <td>{{result.title|safe}}</td>
        <td>{{result.rcreated}}</td>
        <td>
            <a href="/view/{{result.id}}"><button class="btn btn-primary">参照</button></a>
            <form action="/delete/{{result.id}}" style="display:inline" method="post">
                <input class="btn btn-danger" type="submit" value="削除" onclick='return confirm("削除しますがよろしいですか")';>
            </form>
        </td>
    </tr>
    {% endfor %}
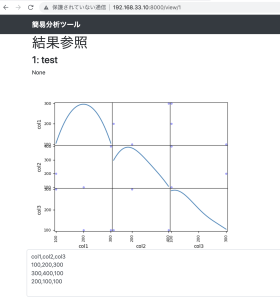
view.html
{% extends "base.html" %}
{% block body %}
<h1>結果参照</h1>

<h3>{{ result.id}}: {{ result.title|safe}}</h3>
<p>{{ result.created }}</p>
<div class="row">
	<img src="{{ url_for('static', filename=result.img)}}">
</div>

<div class="row">
	<textarea class="form-control" name="data" rows="5">{{result.data}}</textarea>
</div>
<br><br>
{% endblock %}
OK 一通り理解した
mysql & Dockerでやりたい