AWS Kinesis Firehouseとは?
ストリームデータをS3やRedshiftに送るサービス
import boto3
import uuid
import json

accesskey = "*"
secretkey = "*"
region = "ap-northeast-1"


client = boto3.client('firehose', aws_access_key_id=accesskey, aws_secret_access_key= secretkey, region_name=region)
data = {
	"musicID": 'xxxxxxxxxx',
	"userId": 1,
	"artistId": 1
}

response = client.put_record(
	DeliveryStreamName = "PUT-S3-UNJQf",
	Record = {
		'Data': f'{json.dumps(data)}\n'
	}
)
{
            "Effect": "Allow",
            "Action": [
                "firehose:PutRecord",
                "firehose:PutRecordBatch"
            ],
            "Resource": [
                "arn:aws:firehose:ap-northeast-1:*:deliverystream/PUT-S3-UNJQf"
            ]
        },
        {
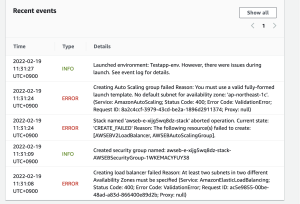
raise error_class(parsed_response, operation_name)
botocore.exceptions.ClientError: An error occurred (AccessDeniedException) when calling the PutRecord operation: User: arn:aws:iam::702423327513:user/kinesis is not authorized to perform: firehose:PutRecord on resource: arn:aws:firehose:ap-northeast-1:*:deliverystream/PUT-S3-UNJQf because no identity-based policy allows the firehose:PutRecord action
うむー なんかよくわからんが、どういうことができるかは何となく理解したかも