AWSTemplateFormatVersion: "2010-09-09"
Description:
  ALB and EC2 Instance Create

Metadata:
  "AWS::CloudFormation::Interface":
    ParameterGroups:
      - Label:
          default: "Project Name Prefix"
        Parameters:
          - PJPrefix
      - Label:
          default: "InternetALB Configuration"
        Parameters:
          - InternetALBName
      - Label:
          default: "EC2Instance Configuration"
        Parameters:
          - KeyPairName
          - EC2InstanceName
          - EC2InstanceAMI
          - EC2InstanceInstanceType
          - EC2InstanceVolumeType
          - EC2InstanceVolumeSize
          - SSHAccessSourceIP

    ParameterLabels:
      IneternetALBName:
        default: "InternetALBName"
      KeyPairName:
        default: "KeyPiarName"
      EC2InstanceName:
        default: "EC2 Name"
      EC2InstanceAMI:
        default: "EC2 AMI"
      EC2InstanceInstanceType:
        default: "EC2 InstanceType"
      EC2InstanceVolumeType:
        default: "EC2 VolumeType"
      EC2InstanceVolumeSize:
        default: "EC2 VolumeSize"
      SSHAccessSourceIP:
        default: "SSH AccessSourceIP"

# ------------------------------------------------------------#
# Input Parameters
# ------------------------------------------------------------#
Parameters:
  PJPrefix:
    Type: String
#InternetALB
  InternetALBName:
    Type: String
    Default: "web"


#EC2Instance
  KeyPairName:
    Type: AWS::EC2::KeyPair::KeyName
    Default: ""
  EC2InstanceName:
    Type: String
    Default: "web"
  EC2InstanceAMI:
    Type: String
    Default: ""
  EC2InstanceInstanceType:
    Type: String
    Default: "t2.micro"
  EC2InstanceVolumeType:
    Type: String
    Default: "gp2"
  EC2InstanceVolumeSize:
    Type: String
    Default: "30"
  SSHAccessSourceIP:
    Type: String

Resources:
# ------------------------------------------------------------#
#  IAM Role for EC2
# ------------------------------------------------------------#
  EC2IAMRole:
    Type: "AWS::IAM::Role"
    Properties:
      RoleName: !Sub "${PJPrefix}-${EC2InstanceName}-role"
      AssumeRolePolicyDocument:
        Version: "2012-10-17"
        Statement:
          - Effect: Allow
            Principal:
              Service:
                - "ec2.amazonaws.com"
            Action:
              - "sts:AssumeRole"

      Path: "/"
      ManagedPolicyArns:
        - "arn:aws:iam::aws:policy/service-role/AmazonEC2RoleforSSM"
        - "arn:aws:iam::aws:policy/AmazonEC2ReadOnlyAccess"

  EC2InstanceProfile:
    Type: "AWS::IAM::InstanceProfile"
    Properties:
      Path: "/"
      Roles:
        - Ref: EC2IAMRole
      InstanceProfileName: !Sub "${PJPrefix}-${EC2InstanceName}-profile"

# ------------------------------------------------------------#
#  EC2Instance AZ:A
# ------------------------------------------------------------#
  EC2Instance01:
    Type: "AWS::EC2::Instance"
    Properties:
      Tags:
        - Key: Name
          Value: !Sub "${PJPrefix}-${EC2InstanceName}-01"
      ImageId: !Ref EC2InstanceAMI
      InstanceType: !Ref EC2InstanceInstanceType
      KeyName: !Ref KeyPairName
      IamInstanceProfile: !Ref EC2InstanceProfile
      DisableApiTermination: false
      EbsOptimized: false
      BlockDeviceMappings:
        - DeviceName: /dev/xvda
          Ebs:
            DeleteOnTermination: true
            VolumeType: !Ref EC2InstanceVolumeType
            VolumeSize: !Ref EC2InstanceVolumeSize
      SecurityGroupIds:
        - !Ref ManagedSecurityGroup
        - !Ref WebSecurityGroup
      SubnetId: {"Fn::ImportValue": !Sub "${PJPrefix}-public-subnet-a"}
      UserData: !Base64 |
        #! /bin/bash
        yum update -y

# ------------------------------------------------------------#
#  EC2Instance AZ:C
# ------------------------------------------------------------#
  EC2Instance02:
    Type: "AWS::EC2::Instance"
    Properties:
      Tags:
        - Key: Name
          Value: !Sub "${PJPrefix}-${EC2InstanceName}-02"
      ImageId: !Ref EC2InstanceAMI
      InstanceType: !Ref EC2InstanceInstanceType
      KeyName: !Ref KeyPairName
      IamInstanceProfile: !Ref EC2InstanceProfile
      DisableApiTermination: false
      EbsOptimized: false
      BlockDeviceMappings:
        - DeviceName: /dev/xvda
          Ebs:
            DeleteOnTermination: true
            VolumeType: !Ref EC2InstanceVolumeType
            VolumeSize: !Ref EC2InstanceVolumeSize
      SecurityGroupIds:
        - !Ref ManagedSecurityGroup
        - !Ref WebSecurityGroup
      SubnetId: {"Fn::ImportValue": !Sub "${PJPrefix}-public-subnet-c"}
      UserData: !Base64 |
        #! /bin/bash
        yum update -y

# ------------------------------------------------------------#
#  SecurityGroup for Managed
# ------------------------------------------------------------#
  ManagedSecurityGroup:
    Type: "AWS::EC2::SecurityGroup"
    Properties:
      VpcId: {"Fn::ImportValue": !Sub "${PJPrefix}-vpc"}
      GroupName: !Sub "${PJPrefix}-managed-sg"
      GroupDescription: "-"
      Tags:
        - Key: "Name"
          Value: !Sub "${PJPrefix}-managed-sg"

# Rule
      SecurityGroupIngress:
        - IpProtocol: tcp
          FromPort: 22
          ToPort: 22
          CidrIp: !Ref SSHAccessSourceIP

# ------------------------------------------------------------#
#  SecurityGroup for ALB
# ------------------------------------------------------------#
  ALBSecurityGroup:
    Type: "AWS::EC2::SecurityGroup"
    Properties:
      VpcId: { "Fn::ImportValue": !Sub "${PJPrefix}-vpc" }
      GroupName: !Sub "${PJPrefix}-alb-sg"
      GroupDescription: "-"
      Tags:
        - Key: "Name"
          Value: !Sub "${PJPrefix}-alb-sg"

# Rule
      SecurityGroupIngress:
        - IpProtocol: tcp
          FromPort: 80
          ToPort: 80
          CidrIp: "0.0.0.0/0"

        - IpProtocol: tcp
          FromPort: 443
          ToPort: 443
          CidrIp: "0.0.0.0/0"

# ------------------------------------------------------------#
#  SecurityGroup for Web
# ------------------------------------------------------------#
  WebSecurityGroup:
    Type: "AWS::EC2::SecurityGroup"
    Properties:
      VpcId: { "Fn::ImportValue": !Sub "${PJPrefix}-vpc" }
      GroupName: !Sub "${PJPrefix}-web-sg"
      GroupDescription: "-"
      Tags:
        - Key: "Name"
          Value: !Sub "${PJPrefix}-web-sg"

# Rule
  WebSecurityGroupIngress:
    Type: "AWS::EC2::SecurityGroupIngress"
    Properties:
      IpProtocol: tcp
      FromPort: 80
      ToPort: 80
      SourceSecurityGroupId: !GetAtt [ ALBSecurityGroup, GroupId ]
      GroupId: !GetAtt [ WebSecurityGroup, GroupId ]

# ------------------------------------------------------------#
#  ElasticIP for EC2Instance01
# ------------------------------------------------------------#
  ElasticIP01:
    Type: "AWS::EC2::EIP"
    Properties:
      Domain: vpc

  ElasticIPAssociate01:
    Type: AWS::EC2::EIPAssociation
    Properties:
      AllocationId: !GetAtt ElasticIP01.AllocationId
      InstanceId: !Ref EC2Instance01

# ------------------------------------------------------------#
#  ElasticIP for EC2Instance02
# ------------------------------------------------------------#
  ElasticIP02:
    Type: "AWS::EC2::EIP"
    Properties:
      Domain: vpc

  ElasticIPAssociate02:
    Type: AWS::EC2::EIPAssociation
    Properties:
      AllocationId: !GetAtt ElasticIP02.AllocationId
      InstanceId: !Ref EC2Instance02

# ------------------------------------------------------------#
#  Target Group
# ------------------------------------------------------------#
  TargetGroup:
    Type: "AWS::ElasticLoadBalancingV2::TargetGroup"
    Properties:
      VpcId: { "Fn::ImportValue": !Sub "${PJPrefix}-vpc"}
      Name: !Sub "${PJPrefix}-${InternetALBName}-tg"
      Protocol: HTTP
      Port: 80
      HealthCheckProtocol: HTTP
      HealthCheckPath: "/"
      HealthCheckPort: "traffic-port"
      HealthyThresholdCount: 2
      UnhealthyThresholdCount: 2
      HealthCheckTimeoutSeconds: 5
      HealthCheckIntervalSeconds: 10
      Matcher:
        HttpCode: 200
      Tags:
        - Key: Name
          Value: !Sub "${PJPrefix}-${InternetALBName}-tg"
      TargetGroupAttributes:
        - Key: "deregistration_delay.timeout_seconds"
          Value: 300
        - Key: "stickiness.enabled"
          Value: false
        - Key: "stickiness.type"
          Value: lb_cookie
        - Key: "stickiness.lb_cookie.duration_seconds"
          Value: 86400
      Targets:
        - Id: !Ref EC2Instance01
        - Id: !Ref EC2Instance02
          Port: 80


# ------------------------------------------------------------#
#  Internet ALB
# ------------------------------------------------------------#
  InternetALB:
    Type: "AWS::ElasticLoadBalancingV2::LoadBalancer"
    Properties:
      Name: !Sub "${PJPrefix}-${InternetALBName}-alb"
      Tags:
        - Key: Name
          Value: !Sub "${PJPrefix}-${InternetALBName}-alb"
      Scheme: "internet-facing"
      LoadBalancerAttributes:
        - Key: "deletion_protection.enabled"
          Value: false
        - Key: "idle_timeout.timeout_seconds"
          Value: 60
      SecurityGroups:
        - !Ref ALBSecurityGroup
      Subnets:
        - { "Fn::ImportValue": !Sub "${PJPrefix}-public-subnet-a" }
        - { "Fn::ImportValue": !Sub "${PJPrefix}-public-subnet-c" }

  ALBListener:
    Type: "AWS::ElasticLoadBalancingV2::Listener"
    Properties:
      DefaultActions:
        - TargetGroupArn: !Ref TargetGroup
          Type: forward
      LoadBalancerArn: !Ref InternetALB
      Port: 80
      Protocol: HTTP

# ------------------------------------------------------------#
# Output Parameters
# ------------------------------------------------------------#
Outputs:
#InternetALB
  ALBDNSName:
    Value: !GetAtt InternetALB.DNSName
    Export:
      Name: !Sub "${PJPrefix}-${InternetALBName}-alb-dnsname"

#EC2Instance01
  EC2Instance01ID:
    Value: !Ref EC2Instance01
    Export:
      Name: !Sub "${PJPrefix}-${EC2InstanceName}-01-id"

  EC2Instance01PrivateIp:
    Value: !GetAtt EC2Instance01.PrivateIp
    Export:
      Name: !Sub "${PJPrefix}-${EC2InstanceName}-01-private-ip"

  EC2Instance01EIP:
    Value: !GetAtt EC2Instance01.PublicIp
    Export:
      Name: !Sub "${PJPrefix}-${EC2InstanceName}-01-eip"

  EC2Instance01RoleName:
    Value: !Sub "${PJPrefix}-${EC2InstanceName}-01-role"
    Export:
      Name: !Sub "${PJPrefix}-${EC2InstanceName}-01-role-name"

#EC2Instance02
  EC2Instance02ID:
    Value: !Ref EC2Instance02
    Export:
      Name: !Sub "${PJPrefix}-${EC2InstanceName}-02-id"

  EC2Instance02PrivateIp:
    Value: !GetAtt EC2Instance02.PrivateIp
    Export:
      Name: !Sub "${PJPrefix}-${EC2InstanceName}-02-private-ip"

  EC2Instance02EIP:
    Value: !GetAtt EC2Instance02.PublicIp
    Export:
      Name: !Sub "${PJPrefix}-${EC2InstanceName}-02-eip"

  EC2Instance02RoleName:
    Value: !Sub "${PJPrefix}-${EC2InstanceName}-02-role"
    Export:
      Name: !Sub "${PJPrefix}-${EC2InstanceName}-02-role-name"
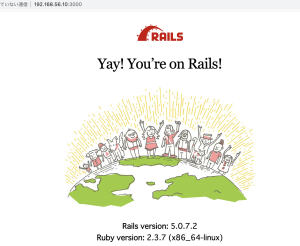
うん、ここまでは来る。
問題はこれから。