ContentView.swift
import SwiftUI
import MapKit
struct Spot: Identifiable {
let id = UUID()
let latitude: Double
let longitude: Double
var coordinate: CLLocationCoordinate2D {
CLLocationCoordinate2D(latitude: latitude, longitude: longitude)
}
}
struct ContentView: View {
let spotlist = [
Spot(latitude: 35.6834843, longitude: 139.7644207),
Spot(latitude: 35.6790079, longitude: 139.7675881),
Spot(latitude: 35.6780057, longitude: 139.7631035)
]
@State var region = MKCoordinateRegion(
center: CLLocationCoordinate2D(
latitude: 35.6805702,
longitude: 139.7675359
),
latitudinalMeters: 1000.0,
longitudinalMeters: 1000.0
)
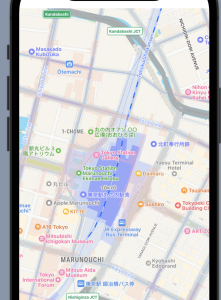
var body: some View {
Map(coordinateRegion: $region,
annotationItems: spotlist,
annotationContent: {spot in MapMarker(coordinate: spot.coordinate, tint: .orange)})
.edgesIgnoringSafeArea(.bottom)
}
}
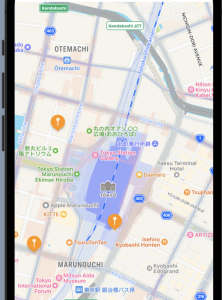
この辺はGoogleMapAPIと似てるなー