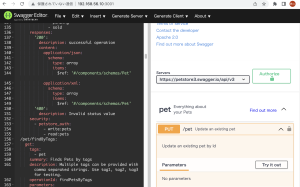
[CakePHP3.10] フォームヘルパーの使い方

### チェックボックス/ラジオボタン

			<?=$this->Form->create(null, ["type"=>"post", "url"=>["controller"=>"Hello", "action"=>"index"]])?>
				<input type="hidden" name="_csrfToken" value="<?= $this->request->getParam('_csrfToken') ?>">
				<tr><th>CheckBox</th><td><?=$this->Form->checkbox("Form1.check", ["id"=>"check1"]) ?>
					<?=$this->Form->label("check1", "check box") ?>
				</td></tr>
				<tr><th>RadioButton</th><td><?=$this->Form->radio("Form1.radio", [
						["text"=>"mail", "value"=>"男性", "checked"=>true],
						["text"=>"femail","value"=>"女性"]
					]) ?></td></tr>
				<tr><th></th><td><?=$this->Form->submit("送信") ?></td></tr>
			<?=$this->Form->end() ?>

### 選択リスト

			<?=$this->Form->create(null, ["type"=>"post", "url"=>["controller"=>"Hello", "action"=>"index"]])?>
				<input type="hidden" name="_csrfToken" value="<?= $this->request->getParam('_csrfToken') ?>">
				<tr><th>Select</th><td><?=$this->Form->select("Form1.select",
				 	["one"=>"最初","two"=>"真ん中","three"=>"最後"]) ?>
				</td></tr>
				<tr><th></th><td><?=$this->Form->submit("送信") ?></td></tr>
			<?=$this->Form->end() ?>

### 複数項目の選択

			<?=$this->Form->create(null, ["type"=>"post", "url"=>["controller"=>"Hello", "action"=>"index"]])?>
				<input type="hidden" name="_csrfToken" value="<?= $this->request->getParam('_csrfToken') ?>">
				<tr><th>Select</th><td><?=$this->Form->select("Form1.select",
				 	["one"=>"最初","two"=>"2番目","three"=>"真ん中","four"=>"4番目","five"=>"最後"],
				 	["multiple"=>true, "size"=>5]) ?>
				</td></tr>
				<tr><th></th><td><?=$this->Form->submit("送信") ?></td></tr>
			<?=$this->Form->end() ?>

[CakePHP3.10] フォームの利用

<body>
	<header class="row">
		<h1><?=$title ?></h1>
	</header>
	<div class="row">
		<table>
			<form method="post" action="/mycakeapp/hello/form">
                                <input type="hidden" name="_csrfToken" value="<?= $this->request->getParam('_csrfToken') ?>">
				<tr><th>name</th><td><input type="text" name="name"></td></tr>
				<tr><th>mail</th><td><input type="text" name="mail"></td></tr>
				<tr><th>age</th><td><input type="number" name="age"></td></tr>
				<tr><th></th><button>Click</button></tr>
			</form>
		</table>
	</div>
</body>
<body>
	<header class="row">
		<h1><?=$title ?></h1>
	</header>
	<div class="row">
		<p><?=$message ?></p>
	</div>
</body>

HelloController

class HelloController extends AppController {

	public function index(){
		$this->viewBuilder()->autoLayout(false);
		$this->set('title', 'Hello!');
	}

	public function form(){
		$this->viewBuilder()->autoLayout(false);
		$name = $this->request->data['name'];
		$mail = $this->request->data['mail'];
		$age = $this->request->data['age'];
		$res = "こんにちは、" . $name . "(" . $age . 
			")さん。メールアドレスは、" . $mail . " ですね?";
		$values = [
			"title" => "Result",
			"message" => $res
		];
		$this->set($values);
	}
}

$this->request->data[“name”] でデータを取り出している

### エスケープ処理

<body>
	<header class="row">
		<h1><?=h($title) ?></h1>
	</header>
	<div class="row">
		<p><?=h($message) ?></p>
	</div>
</body>

### フォームヘルパー

		<table>
			<?=$this->Form->create(null, ["type"=>"post", "url"=>["controller"=>"Hello", "action"=>"index"]])?>
				<input type="hidden" name="_csrfToken" value="<?= $this->request->getParam('_csrfToken') ?>">
				<tr><th>name</th><td><?=$this->Form->text("Form1.name") ?></td></tr>
				<tr><th>mail</th><td><?=$this->Form->text("Form1.mail") ?></td></tr>
				<tr><th>age</th><td><?=$this->Form->text("Form1.age") ?></td></tr>
				<tr><th></th><td><?=$this->Form->submit("送信") ?></td></tr>
			<?=$this->Form->end() ?>
		</table>

Controller

	public function index(){
		$this->viewBuilder()->autoLayout(false);
		$this->set('title', 'Hello!');

		if($this->request->isPost()) {
			$this->set('data', $this->request->data['Form1']);
		} else {
			$this->set('data', []);
		

フォームヘルパーはcontrollerで呼び出さずに利用できる
なるほど

[CakePHP3.10] ビューテンプレート

public $autoRender = false; を外すとviewテンプレートが使える様になる

view templateとlayoutがある
layoutにビューテンプレートをはめ込む

src/Template/Hello/index.ctp

<!DOCTYPE html>
<html lang="en">
<head>
	<meta charset="UTF-8">
	<meta name="viewport" content="width=device-width, initial-scale=1.0">
	<title>Hello</title>
	<style>
		h1 {
			font-size: 60pt;
			margin: 0px 0px 10px 0px; padding: 0px 20px; color: white;
			background: linear-gradient(to right, #aaa, #fff);
		}
		p { font-size: 14pt; color: #666; }
	</style>
</head>
<body>
	<header class="row">
		<h1><?=$title ?></h1>
	</header>
	<div class="row">
		<p><?=$message ?></p>
	</div>
</body>
</html>

HelloController.php

class HelloController extends AppController {

	public function index(){
		$this->viewBuilder()->autoLayout(false);
		$this->set('title', 'Hello!');
		$this->set('message', 'This is message!');
	}
}

配列で渡す場合

	public function index(){
		$this->viewBuilder()->autoLayout(false);
		$values = [
			'title' => "hello!",
			"message" => "this is message!!!"
		];
		$this->set($values);
	}

autoLayout(false);で自動レイアウトをoffにしている

OK, controllerとviewの関係性はなんとなく分かったぞ!

CakePHP3系

内蔵サーバー
$ php ./bin/cake.php server -H 0.0.0.0 –port 8080

### View
webroot/hello.html

<!DOCTYPE html>
<html lang="en">
<head>
	<meta charset="UTF-8">
	<meta name="viewport" content="width=device-width, initial-scale=1.0">
	<title>Hello</title>
	<style>
		h1 {
			font-size: 60pt;
			margin: 0px 0px 10px 0px; padding: 0px 20px; color: white;
			background: linear-gradient(to right, #aaa, #fff);
		}
		p { font-size: 14pt; color: #666; }
	</style>
</head>
<body>
	<header class="row">
		<h1>Welcome!</h1>
	</header>
	<div class="row">
		<p>This is sample HTML page.</p>
	</div>
</body>
</html>

### Controller
src/Controller/HelloController.php

namespace App\Controller;

use App\Controller\AppController;

class HelloController extends AppController {
	public $autoRender = false;

	public function index(){
		echo "<html><body><h1>Hello!</h1>";
		echo "<p>This is sample page.</p></body></html>";
	}
}

http://192.168.56.10:8080/hello
### クエリパラメータ

	public function index(){
		$id = $this->request->query['id'];
		$pass = $this->request->query['pass'];
		echo "<html><body><h1>Hello!</h1>";
		echo "<ul><li>your id: " . $id . "</li>";
		echo "<li>password: " . $pass . "</li></ul>";
		echo "</body></html>";
	}

http://192.168.56.10:8080/hello?id=taro&pass=yamada

パラメータなしに対応
-> if文で制御する

	public function index(){
		$id = "no name";
		if(isset($this->request->query['id'])){
			$id = $this->request->query['id'];
		}
		$pass = "no password";
		if(isset($this->request->query['pass'])){
			$id = $this->request->query['pass'];
		}

		echo "<html><body><h1>Hello!</h1>";
		echo "<ul><li>your id: " . $id . "</li>";
		echo "<li>password: " . $pass . "</li></ul>";
		echo "</body></html>";
	}

オブジェクトをjsonで返す

namespace App\Controller;

use App\Controller\AppController;

class HelloController extends AppController {
	public $autoRender = false;

	private $data = [
		["name"=>"taro", "mail"=>"taro@yamada", "tel"=>"090-999-999"],
		["name"=>"hanako", "mail"=>"hanako@flower", "tel"=>"080-888-888"],
		["name"=>"sachiko", "mail"=>"sachiko@happy", "tel"=>"070-777-777"]
	];

	public function index(){
		$id = 0;
		if(isset($this->request->query['id'])){
			$id = $this->request->query['id'];
		}
		echo json_encode($this->data[$id]);
	}
}

なるほどー ちょっと理解した

[git] hotfix

git hotfixとは?
– リリースされたバージョンで発生したバグを速やかに修正するブランチ
– 修正後すぐmaster, developブランチにマージ

なるほど、そういうことか、特別な機能があるわけではなく、そういう名称で運用するって取り決めのことね。理解した。

[git] branchのマージ

$ ls
program.txt
$ git branch
* master

// ブランチの作成
$ git branch develop
// ブランチの切り替え
$ git checkout develop

// developブランチで開発
$ cat program.txt
9104 商船三井
9107 川崎汽船
// commit
$ git add .
$ git commit -m “develop first commit”

// masterにブランチの切り替え
$ git checkout master
// masterにブランチのマージ
$ git merge develop
$ cat program.txt
9104 商船三井
9107 川崎汽船

$ git branch
develop
* master

「Automatically delete head branches」にチェックを入れておくと、pull requestがmergeされたときにブランチが消える。そうでなければ、branchはそのまま残る。

なるほど、 やってみないとわからんねこれ。

pkcs#5方式

ブロック暗号方式の場合、平文の文字数をブロック長の倍数に合わせるように、末尾に文字を足すなどの処理を行う必要がある。
ブロック暗号方式において文字を足すことをパディングと呼ぶ。

PKCS#7 パディングはRFC5652で定義されたパディング方式
pkcs#5 パディングは8バイトを倍数とした場合のパディング

なるほど、ちょっとモヤモヤしますな..

Rijndael-128とは

AESは鍵長128, 192, 256bitから選択できる
Rijndaelはブロック長も128, 192, 256bitから選択できる

$key = "秘密の合言葉";
$text = "暗号化するメッセージ";

srand();

$size = mcrypt_get_iv_size(MCRYPT_RIJNDAEL_128, MCRYPT_MODE_CBC);
$iv = mcrypt_create_iv($size, MCRYPT_RAND);

$encrypted = mcrypt_encrypt(MCRYPT_RIJNDAEL_128, $key, $text, MCRYPT_MODE_CBC, $iv);
$hex = bin2hex($encrypted);

$bin = pack("H*", $hex);
$decrptyed = mcrypt_decrypt(MCRYPT_RIJNDAEL_128, $key, $text, MCRYPT_MODE_CBC, $iv);

echo $text . "=>".rtrim($decrypted);

あれ、なんかおかしい。。

共通鍵暗号と公開鍵暗号とは?

インターネット上でデータ伝送するには、データを暗号化して送信することが一般的
データを暗号化して受信した際にデータの復号を行う
暗号化や復号は暗号化アルゴリズムと鍵によって行われる

### 2種類の暗号化方式
暗号化方式には共通鍵暗号と公開鍵暗号がある
共通鍵暗号は、暗号化と復号に同じ鍵を使用する 。第三者に知られないようにする
アルゴリズムにはRC4, DES, 3DES, AESなどがある AESが主流で無線LANやWPA2でも採用されている
通信接続先ごとに共通鍵を生成する必要がある
公開鍵暗号は、公開鍵と秘密鍵を生成する RSAやEIGamalなどのアルゴリズムがある
ハイブリット方式もある

なるほど、cryptの知識も大分必要だな

/dev/urandomとは

入力元として取ると乱数が返ってくるファイル
適当な値を取るときに使う

$ head -c 200m /dev/urandom > test.txt
$ cat test.txt
?x??y??Q%s}?Gz?¯???$?_?g7T!L??+\?*???f>?$????Q?7?????i%?M??X???? BY?P??”?gO?%Š??O??/??j?n??7??dnZ?…?
r????u??/???,O @ep?????>?;??’y?l?]?\e-).??Ѳ

なんかバグのようなファイルが生成される