dryrunとは予行練習のこと
–dryrunオプションでコマンドのシミュレーション結果が出力される
随机应变 ABCD: Always Be Coding and … : хороший
dryrunとは予行練習のこと
–dryrunオプションでコマンドのシミュレーション結果が出力される
$ pip install timeout-decorator
タイムアウトの時間が来たら突然終わららせるのではなく、処理中のものを保存してから終了
#!/usr/bin/env python3
# -*- coding: utf-8 -*-

import sys
import time
from time_decorator import timeout, TimeoutError

class TimeoutDecoratorTest(object):
	def test(self, sleep_sec, timeout_sec):
		@timeout(timeout_sec)
		def inner_test():
			print("Start sleep " + str(sleep_sec) + " seconds.")
			print("Timeout in " + str(timeout_sec) + " seconds.")
			time.sleep(sleep_sec)
		try:
			inner_test()
			print("End sleep.")
		except TimeoutError:
			print("Timeout!")

if __name__ == '__main__':
	sleep_sec = int(sys.argv[1])
	timeout_sec = int(sys.argv[2])
	t = TimeoutDecoratorTest()
	t.test(sleep_sec, timout_sec)
タイムアウト処理を行うためのライブラリ
pip install wrap-timeout-decorator
import wrapt_timeout_decorator
@wrapt_timeout_decorator.timeout(dec_timeout=30)
def func():
while True:
pass
if __name__ == ‘__main__’:
func()
タイムアウトの設定をするのね
データベースの機能の一つで、あるユーザが参照しているレコードに他のユーザがアクセスできないようにする
FOR UPDATE … 自分が更新する目的で行をロックしておく
FOR SHARE …他からの更新がかからないように行をロック
$ sudo -u postgres psql
psql (14.2 (Ubuntu 14.2-1.pgdg20.04+1))
Type “help” for help.
postgres=# \c testdb;
You are now connected to database “testdb” as user “postgres”.
testdb=#
CREATE TABLE book (
id serial NOT NULL,
name VARCHAR(30) NOT NULL,
author VARCHAR(30) NOT NULL,
age integer,
PRIMARY KEY (id)
);
INSERT INTO book(name, author, age) VALUES (‘SQL入門’, ‘Masumi’, 25);
INSERT INTO book(name, author, age) VALUES (‘Flutter入門’, ‘Masumi’, 25);
INSERT INTO book(name, author) VALUES (‘HTML入門’, ‘Hiro’);
INSERT INTO book(name, author, age) VALUES (‘Github入門2’, ‘Emma’, 22);
INSERT INTO book(name, author, age) VALUES (‘Flutter上級’, ‘Oliva’, 45);
testdb=# select * from book;
id | name | author | age
—-+————-+——–+—–
1 | SQL入門 | Masumi | 25
2 | Flutter入門 | Masumi | 25
3 | HTML入門 | Hiro |
4 | Github入門2 | Emma | 22
5 | Flutter上級 | Oliva | 45
(5 rows)
### BEGIN / COMMITとは?
beginはトランザクションを開始するコマンド。
beginが実行されると、自動コミットモードが解除され、それ以降のSQL文による変更が確定しない状態になる。beginをトランザクションを張ると表現することがある。
commitはトランザクションを終了し、変更を確定する
testdb=# begin;
BEGIN
testdb=*# update book set age=age+10 where author=’Emma’;
UPDATE 1
testdb=*# update book set age=age-10 where author=’Oliva’;
UPDATE 1
testdb=*# commit;
COMMIT
testdb=# select * from book;
id | name | author | age
—-+————-+——–+—–
1 | SQL入門 | Masumi | 25
2 | Flutter入門 | Masumi | 25
3 | HTML入門 | Hiro |
4 | Github入門2 | Emma | 32
5 | Flutter上級 | Oliva | 35
(5 rows)
ROLLBACKはトランザクションを終了し、変更を取り消すコマンド
beginとcommitはセットで見た方が良さそうやね
トランザクションとはデータベースのデータを利用するときに、複数の処理を一連のものとしてまとめる単位のこと
– Aさんの銀行口座から500万円出金
– Bさんの銀行口座に500万円入金
一連の処理が問題なく行われたときはコミットで終了、途中エラーが発生したときはロールバック
DBのトランザクションはACID特性がある
Atomicity … 完全に実行されるか
Consistency … 実行前後でデータの整合性が担保
Isolation … コミットが確実に保存される
### トランザクションのコマンド
BEGIN
START TRANSACTION
COMMIT
END
ROLLBACK
ABORT
### 分離レベル
READ UNCOMMITED
READ COMMITED
REPEATABLE READ
SERIALIZABLE
なるほど、概念はなんとなく理解した
字体とほぼ同義語だが、記述記号やスペースを含める
文字と記号を含めたものをグリフセットと呼ぶ
ビットパターンやアウトラインなども指す
Excelでも別フォントにフォールバックされる
いきなりグリフと言われても、celticsのグリフィンしか思いつかんわ
まずテーブルを作成します。
create table myschema.product (
  name varchar(10),
  price integer,
  stock integer
);
続いてデータを挿入します
insert into product values
  ('Orange', 200, 12),
  ('Melon', 450, 6),
  ('Grape', 320, 8),
  ('Apple', 180, 14),
  ('Peach', 380, 5);
testdb=# select * from product;
name | price | stock
——–+——-+——-
Orange | 200 | 12
Melon | 450 | 6
Grape | 320 | 8
Apple | 180 | 14
Peach | 380 | 5
(5 rows)
testdb=# update product set price=340 where name=’Grape’;
UPDATE 1
testdb=# select * from product;
name | price | stock
——–+——-+——-
Orange | 200 | 12
Melon | 450 | 6
Apple | 180 | 14
Peach | 380 | 5
Grape | 340 | 8
testdb=# update product set price=price-50 where stock < 10; UPDATE 3 testdb=# select * from product; name | price | stock --------+-------+------- Orange | 200 | 12 Apple | 180 | 14 Melon | 400 | 6 Peach | 330 | 5 Grape | 290 | 8 (5 rows) 複数更新する場合も条件式でできるのね。
Basic認証はWebの特定の領域にアクセス制限をかける認証方法
Basic認証が設定できる範囲は基本的にディレクトリ単位のみとなる
.htaccessファイルを設置したディレクトリ全体がBasic認証の範囲となる(ルートディレクトリに.htaccessを設置することで全体にベーシック認証をかけている)
### AWS WAFだけのBasic認証の設定
WAF Ruleの作成
– If a request: doesn’t match the statement(NOT)
– Inspect: Header
– Header field name: authorization
– Match type: Exactly matches string
– String to match: Basic xxxxxxx (User:PasswordをBase64エンコードした値を設定)
$ echo -n user:password | base64
Action
– Block
– Enable, 401
– Key: www-authenticate, Value: Basic
Basic認証完了後はブラウザを閉じるまで有効
ベーシック認証は、ユーザーが正しいIDとパスワードで認証に成功した場合、ブラウザを閉じるまでの間は再認証なしで何度でもアクセスすることが可能になります。ブラウザさえ閉じていなければ、仮に、違うWebサイトを閲覧した後でも認証なしで再びアクセスすることが可能です。
ブラウザがログイン情報を記録
一度ベーシック認証で認証に成功してしまえば、ユーザー名とパスワードはブラウザに記憶され、再び入力する手間を省くことができます。ただし、あくまでブラウザに依存する機能なので、ブラウザの種類やバージョン、ネットワークの状態によってはログイン情報が保存されない可能性があります。また、スマホではベーシック認証のログイン情報が保持されないことがほとんどですので、利用する際のブラウザやデバイスには注意が必要です。
なるほど、ブラウザ側の仕様なのね。少し理解した。
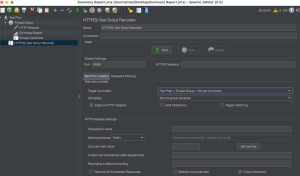
HTTPプロキシサーバ: HTTPリクエストとレスポンスを中継するが、その際にHTTPリクエストの内容を記録してシナリオを作ることができる
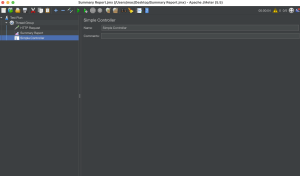
Simple Controllerを追加

HTTP(S) Test Script Recorder

なかなか難しいな