画像を用意します
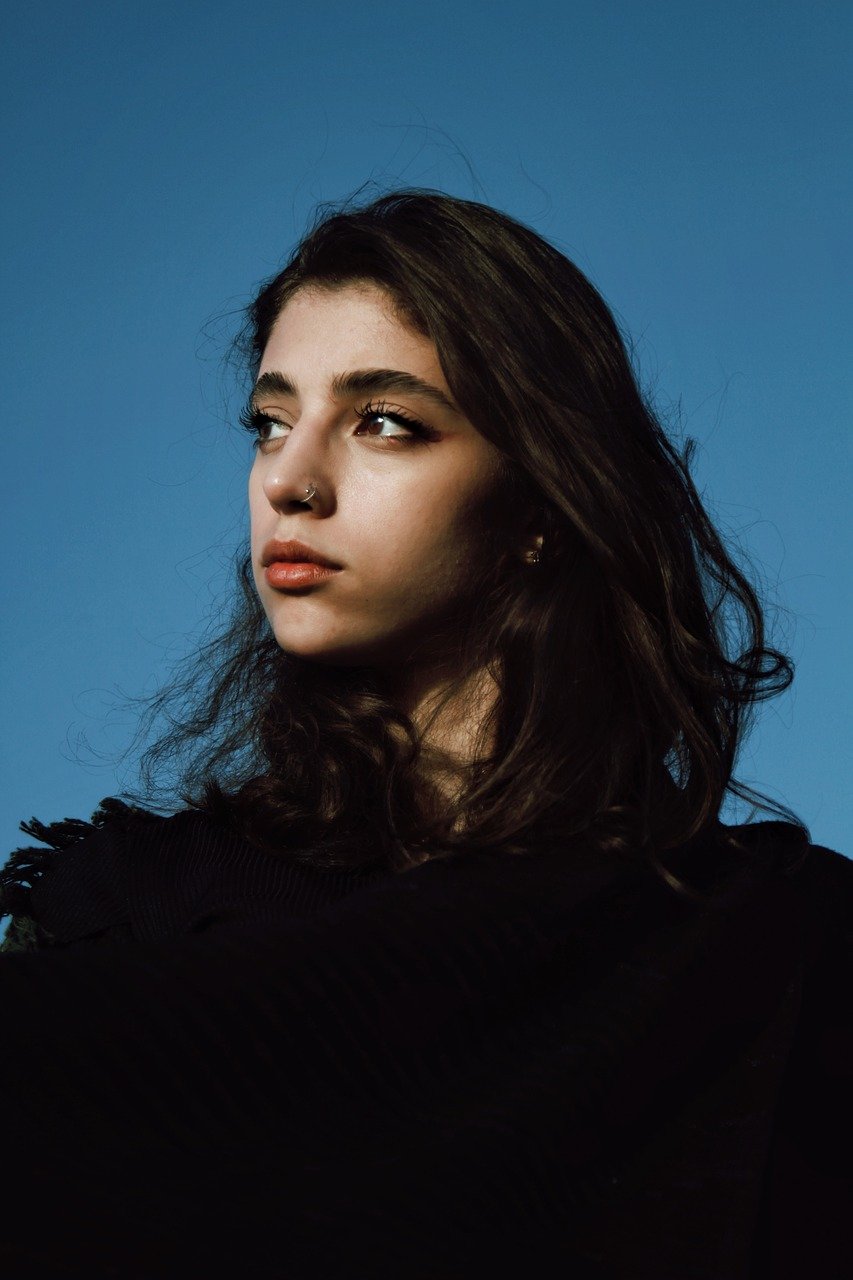
プロンプトを指定
=> 優しく笑った後に、熱心に自己紹介する
なるほど、動画は恐ろしく自然ですね
ソフトウェアエンジニアの技術ブログ:Software engineer tech blog
随机应变 ABCD: Always Be Coding and … : хороший

画像を用意します
プロンプトを指定
=> 優しく笑った後に、熱心に自己紹介する
なるほど、動画は恐ろしく自然ですね
AIアプリを使う価値を1分で伝える構成
0:00〜0:05 オープニング(問題提起)
視聴者の“共通の困りごと”を一言で刺す。
「日々の作業、時間が足りない…」
「資料作りやまとめ作業に追われてませんか?」
「動画編集・文章作成が苦手…」
👉 視聴者の現状(Before)を短く提示
0:05〜0:15 AIが解決する世界を提示(ベネフィット)
AIアプリを使うと“どう変わるのか”を先に出す。
「AIなら、数分であなたの作業を自動化できます」
「文章作成も、動画編集も、リサーチも一気に時短」
「あなたがすべきは“指示するだけ”」
👉 AIで得られる未来(After)を提示
0:15〜0:40 具体的価値(3点)
1分動画の核。価値は必ず「3つ」に絞ると伝わりやすい。
① 時間を圧倒的に短縮
例:1時間の作業 → 5分
レポート作成 → 自動要約
動画の企画 → AIが提案
② 誰でもクオリティUP
プロ品質の画像、動画、文章
企画・構成もアシスト
ミスが減る
③ すぐ使える・難しくない
テンプレを選ぶだけ
スマホ1台でOK
指示文(プロンプト)もサポート
👉 “難しそう”という不安の解消が重要
0:40〜0:50 実際の使い方(超シンプル)
操作画面(またはイメージ)を見せながら:
「やりたいことを入力」
「テンプレを選ぶ」
「AIが数秒で提案」
👉 操作ステップは3つ以内が鉄則
0:50〜1:00 クロージング(誘導)
目的に合わせて文言を変えます。
結果を強調して締める
「1日30分の時短を、今日から。」
「AIを使う人と使わない人の差は開く一方です。」
行動を促す(CTA)
「今すぐ無料で試せます」
「概要欄からダウンロードできます」
🎁 1分用 まとめテンプレ(そのまま使える)
① 「毎日の作業、時間が足りない…そんな悩みありませんか?」
② 「AIアプリなら、その作業を数分で自動化できます。」
③ 「価値は3つ。
1. 圧倒的な時短
2. プロ並みのクオリティ
3. すぐ使える簡単さ」
④ 「指示を入れるだけで、動画、文章、企画、デザインまで自動生成。」
⑤ 「仕事も作業も、もっと自由に。AIはもう“誰でも使える相棒”。」
⑥ 「今日から始めてみませんか?概要欄からどうぞ。」
Pexels Videos(ペクセル・ビデオ)は、著作権フリーの高品質な動画素材を無料でダウンロードできるウェブサイトです。
写真素材で有名な「Pexels」の動画版として公開されており、主な特徴は以下の通りです。
🎬 Pexels Videosの主な特徴
完全無料: 会員登録をしなくても、動画素材を無料でダウンロードできます。
高品質・高解像度: プロやアマチュアのクリエイターがアップロードした、質の高い動画素材が豊富に揃っています。
商用利用可能: ダウンロードした素材は、営利目的(ビジネス用途)でも安心して利用できます。
著作権フリー(ロイヤリティフリー):
クレジット表記(出典表示)が不要です。
素材の加工や編集も自由に行えます(一部を切り取る、色味を変えるなど)。
日本語検索対応: 海外のサイトですが、日本語でのキーワード検索に対応しており、素材を探しやすいです。
動画制作やプレゼンテーション、ソーシャルメディアへの投稿など、様々な用途でプロフェッショナルな映像を手軽に使用したい場合に非常に便利なサービスです。
なるほど、ここでDLして編集などに使えますね^^ OK
<!DOCTYPE html>
<html lang="ja">
<head>
    <meta charset="UTF-8">
    <meta name="viewport" content="width=device-width, initial-scale=1.0">
    <title>Live2Dデモ - Kalidokit</title>
    <style>
        * {
            margin: 0;
            padding: 0;
            box-sizing: border-box;
        }
        body {
            font-family: 'Segoe UI', Tahoma, Geneva, Verdana, sans-serif;
            background: linear-gradient(135deg, #667eea 0%, #764ba2 100%);
            min-height: 100vh;
            display: flex;
            justify-content: center;
            align-items: center;
            padding: 20px;
        }
        .container {
            background: white;
            border-radius: 20px;
            box-shadow: 0 20px 60px rgba(0,0,0,0.3);
            padding: 40px;
            max-width: 800px;
            width: 100%;
        }
        h1 {
            color: #667eea;
            margin-bottom: 30px;
            text-align: center;
            font-size: 2em;
        }
        .demo-section {
            background: #f8f9fa;
            border-radius: 15px;
            padding: 30px;
            margin-bottom: 20px;
        }
        .demo-section h2 {
            color: #764ba2;
            margin-bottom: 20px;
            font-size: 1.5em;
        }
        .canvas-container {
            background: #000;
            border-radius: 10px;
            overflow: hidden;
            margin: 20px 0;
            position: relative;
        }
        canvas {
            display: block;
            width: 100%;
            height: auto;
        }
        .controls {
            display: flex;
            gap: 10px;
            flex-wrap: wrap;
            margin-top: 20px;
        }
        button {
            background: #667eea;
            color: white;
            border: none;
            padding: 12px 24px;
            border-radius: 8px;
            cursor: pointer;
            font-size: 16px;
            font-weight: 600;
            transition: all 0.3s;
        }
        button:hover {
            background: #764ba2;
            transform: translateY(-2px);
            box-shadow: 0 4px 12px rgba(102, 126, 234, 0.4);
        }
        button:active {
            transform: translateY(0);
        }
        .info {
            background: #e3f2fd;
            border-left: 4px solid #2196f3;
            padding: 15px;
            margin: 20px 0;
            border-radius: 5px;
        }
        .info p {
            color: #1565c0;
            line-height: 1.6;
        }
        .slider-group {
            margin: 15px 0;
        }
        .slider-group label {
            display: block;
            color: #555;
            margin-bottom: 8px;
            font-weight: 600;
        }
        input[type="range"] {
            width: 100%;
            height: 8px;
            border-radius: 5px;
            background: #ddd;
            outline: none;
            -webkit-appearance: none;
        }
        input[type="range"]::-webkit-slider-thumb {
            -webkit-appearance: none;
            appearance: none;
            width: 20px;
            height: 20px;
            border-radius: 50%;
            background: #667eea;
            cursor: pointer;
        }
        .value-display {
            display: inline-block;
            background: #667eea;
            color: white;
            padding: 4px 12px;
            border-radius: 5px;
            font-size: 14px;
            margin-left: 10px;
        }
    </style>
</head>
<body>
    <div class="container">
        <h1>🎭 Live2Dスタイル アバターデモ</h1>

        <div class="info">
            <p><strong>このデモについて:</strong> Live2D SDKの代わりに、Canvas APIとJavaScriptでシンプルなアバターを作成しました。スライダーで表情や動きをコントロールできます。</p>
        </div>

        <div class="demo-section">
            <h2>アバタープレビュー</h2>
            <div class="canvas-container">
                <canvas id="avatar-canvas" width="400" height="500"></canvas>
            </div>

            <div class="slider-group">
                <label>
                    頭の角度 X: <span class="value-display" id="rotX-value">0°</span>
                </label>
                <input type="range" id="rotX" min="-30" max="30" value="0">
            </div>

            <div class="slider-group">
                <label>
                    頭の角度 Y: <span class="value-display" id="rotY-value">0°</span>
                </label>
                <input type="range" id="rotY" min="-30" max="30" value="0">
            </div>

            <div class="slider-group">
                <label>
                    目の開き具合: <span class="value-display" id="eyeOpen-value">100%</span>
                </label>
                <input type="range" id="eyeOpen" min="0" max="100" value="100">
            </div>

            <div class="slider-group">
                <label>
                    口の開き具合: <span class="value-display" id="mouthOpen-value">0%</span>
                </label>
                <input type="range" id="mouthOpen" min="0" max="100" value="0">
            </div>

            <div class="controls">
                <button onclick="setExpression('normal')">😊 通常</button>
                <button onclick="setExpression('happy')">😄 笑顔</button>
                <button onclick="setExpression('surprised')">😲 驚き</button>
                <button onclick="setExpression('wink')">😉 ウィンク</button>
                <button onclick="animate()">🎬 アニメーション</button>
            </div>
        </div>

        <div class="info">
            <p><strong>💡 ヒント:</strong> スライダーを動かして表情を変えたり、ボタンをクリックしてプリセット表情を試してみてください!</p>
        </div>
    </div>

    <script>
        const canvas = document.getElementById('avatar-canvas');
        const ctx = canvas.getContext('2d');

        let state = {
            rotX: 0,
            rotY: 0,
            eyeOpen: 1,
            mouthOpen: 0,
            leftEyeOpen: 1,
            rightEyeOpen: 1
        };

        // スライダーのイベントリスナー
        document.getElementById('rotX').addEventListener('input', (e) => {
            state.rotX = parseInt(e.target.value);
            document.getElementById('rotX-value').textContent = e.target.value + '°';
            draw();
        });

        document.getElementById('rotY').addEventListener('input', (e) => {
            state.rotY = parseInt(e.target.value);
            document.getElementById('rotY-value').textContent = e.target.value + '°';
            draw();
        });

        document.getElementById('eyeOpen').addEventListener('input', (e) => {
            state.eyeOpen = parseInt(e.target.value) / 100;
            state.leftEyeOpen = state.eyeOpen;
            state.rightEyeOpen = state.eyeOpen;
            document.getElementById('eyeOpen-value').textContent = e.target.value + '%';
            draw();
        });

        document.getElementById('mouthOpen').addEventListener('input', (e) => {
            state.mouthOpen = parseInt(e.target.value) / 100;
            document.getElementById('mouthOpen-value').textContent = e.target.value + '%';
            draw();
        });

        function draw() {
            ctx.clearRect(0, 0, canvas.width, canvas.height);

            ctx.save();
            ctx.translate(canvas.width / 2, canvas.height / 2);

            // 頭の回転を適用
            const rotXRad = (state.rotX * Math.PI) / 180;
            const rotYRad = (state.rotY * Math.PI) / 180;

            // 顔(楕円)
            ctx.fillStyle = '#ffd1a3';
            ctx.beginPath();
            ctx.ellipse(0, 0, 80 + state.rotY * 0.5, 100 - Math.abs(state.rotX) * 0.5, rotXRad, 0, Math.PI * 2);
            ctx.fill();

            // 髪
            ctx.fillStyle = '#4a2c2a';
            ctx.beginPath();
            ctx.ellipse(0, -40, 90 + state.rotY * 0.5, 70 - Math.abs(state.rotX) * 0.3, rotXRad, 0, Math.PI);
            ctx.fill();

            // 左目
            const leftEyeX = -30 + state.rotY * 0.8;
            const leftEyeY = -20 + state.rotX * 0.5;
            drawEye(leftEyeX, leftEyeY, state.leftEyeOpen);

            // 右目
            const rightEyeX = 30 + state.rotY * 0.8;
            const rightEyeY = -20 + state.rotX * 0.5;
            drawEye(rightEyeX, rightEyeY, state.rightEyeOpen);

            // 口
            drawMouth(0, 30 + state.rotX * 0.5, state.mouthOpen);

            // ほっぺ
            ctx.fillStyle = 'rgba(255, 182, 193, 0.5)';
            ctx.beginPath();
            ctx.arc(-50 + state.rotY * 0.5, 10, 15, 0, Math.PI * 2);
            ctx.fill();
            ctx.beginPath();
            ctx.arc(50 + state.rotY * 0.5, 10, 15, 0, Math.PI * 2);
            ctx.fill();

            ctx.restore();
        }

        function drawEye(x, y, openness) {
            ctx.fillStyle = '#ffffff';
            ctx.beginPath();
            ctx.ellipse(x, y, 12, 16 * openness, 0, 0, Math.PI * 2);
            ctx.fill();

            if (openness > 0.3) {
                ctx.fillStyle = '#4a2c2a';
                ctx.beginPath();
                ctx.arc(x, y, 6 * openness, 0, Math.PI * 2);
                ctx.fill();
            }
        }

        function drawMouth(x, y, openness) {
            ctx.strokeStyle = '#8b4513';
            ctx.lineWidth = 3;
            ctx.beginPath();

            if (openness < 0.3) {
                // 閉じた口(笑顔)
                ctx.arc(x, y, 25, 0.2, Math.PI - 0.2);
            } else {
                // 開いた口
                ctx.ellipse(x, y, 20, 15 * openness, 0, 0, Math.PI * 2);
            }

            ctx.stroke();

            if (openness > 0.5) {
                ctx.fillStyle = '#ff6b6b';
                ctx.fill();
            }
        }

        function setExpression(type) {
            switch(type) {
                case 'normal':
                    state.leftEyeOpen = 1;
                    state.rightEyeOpen = 1;
                    state.mouthOpen = 0;
                    updateSliders(0, 0, 100, 0);
                    break;
                case 'happy':
                    state.leftEyeOpen = 0.7;
                    state.rightEyeOpen = 0.7;
                    state.mouthOpen = 0.5;
                    updateSliders(0, 0, 70, 50);
                    break;
                case 'surprised':
                    state.leftEyeOpen = 1.2;
                    state.rightEyeOpen = 1.2;
                    state.mouthOpen = 0.8;
                    updateSliders(0, 0, 100, 80);
                    break;
                case 'wink':
                    state.leftEyeOpen = 0;
                    state.rightEyeOpen = 1;
                    state.mouthOpen = 0.2;
                    updateSliders(0, 0, 50, 20);
                    break;
            }
            draw();
        }

        function updateSliders(rotX, rotY, eyeOpen, mouthOpen) {
            document.getElementById('rotX').value = rotX;
            document.getElementById('rotY').value = rotY;
            document.getElementById('eyeOpen').value = eyeOpen;
            document.getElementById('mouthOpen').value = mouthOpen;

            document.getElementById('rotX-value').textContent = rotX + '°';
            document.getElementById('rotY-value').textContent = rotY + '°';
            document.getElementById('eyeOpen-value').textContent = eyeOpen + '%';
            document.getElementById('mouthOpen-value').textContent = mouthOpen + '%';

            state.rotX = rotX;
            state.rotY = rotY;
        }

        function animate() {
            let frame = 0;
            const duration = 120;

            function step() {
                frame++;

                // サインカーブでアニメーション
                state.rotY = Math.sin(frame * 0.1) * 20;
                state.rotX = Math.sin(frame * 0.05) * 10;

                // まばたき
                if (frame % 60 === 0) {
                    state.leftEyeOpen = 0;
                    state.rightEyeOpen = 0;
                } else if (frame % 60 === 5) {
                    state.leftEyeOpen = 1;
                    state.rightEyeOpen = 1;
                }

                draw();

                if (frame < duration) {
                    requestAnimationFrame(step);
                } else {
                    setExpression('normal');
                }
            }

            step();
        }

        // 初期描画
        draw();
    </script>
</body>
</html>
## モーショングラフィックスとは
モーショングラフィックス(Motion Graphics)とは、文字・図形・写真・イラストなどの静止したデザイン要素に「動き」をつけて映像として表現する手法
例:
TV番組のオープニング
YouTubeのアニメーションロゴ
CMのテキスト演出
UI(アプリ画面など)の動きの紹介動画
モーショングラフィックスの基本要素
要素 説明
レイアウト 画面のどこに何を置くか
タイポグラフィ 字体・文字間・サイズ・配置の工夫
色(カラーリング) 視認性と印象を決める
トランジション 要素の出入りの動きのつなぎ方
イージング(Easing) 動きを自然に見せるための速度の緩急
リズム 音楽やテンポとの同期
特にモーショングラフィックスでは
「イージング(速度の変化)」が超重要です。
✨例:同じ移動でも…
一定速度 → 機械的で不自然
ゆっくり→速く→ゆっくり → 目に優しい・意味が伝わる
🎬 制作の流れ(基本のワークフロー)
企画・目的を決める
何を伝えたい?誰に向けて?
絵コンテ・デザインを作る
Illustrator などで静止画デザインを用意
アニメーションをつける
After Effects で動きをつける
音や効果を加える
BGM・効果音で印象アップ
書き出し
mp4 / mov / GIF など用途に応じて
よく使われるソフト
用途 ソフト名
動きをつける(メイン) Adobe After Effects
素材(イラスト・形状)作成 Adobe Illustrator / Photoshop
動画編集・音合わせ Adobe Premiere Pro / DaVinci Resolve
3D 表現(必要な場合) Blender / Cinema 4D
初心者がまず練習すべきこと
文字(テキスト)の出し方・消し方
図形が動く基本アニメーション
時間曲線(イージング)の調整
シンプルなロゴアニメーション制作
最初から複雑な作品は必要ありません。
小さな動きを美しく → これが上達の鍵です。
ロングショット、バストアップショットのサイズの違うショットを組み合わせる
– どこで、誰が、何をしている というのをサイズを変えて動画を撮る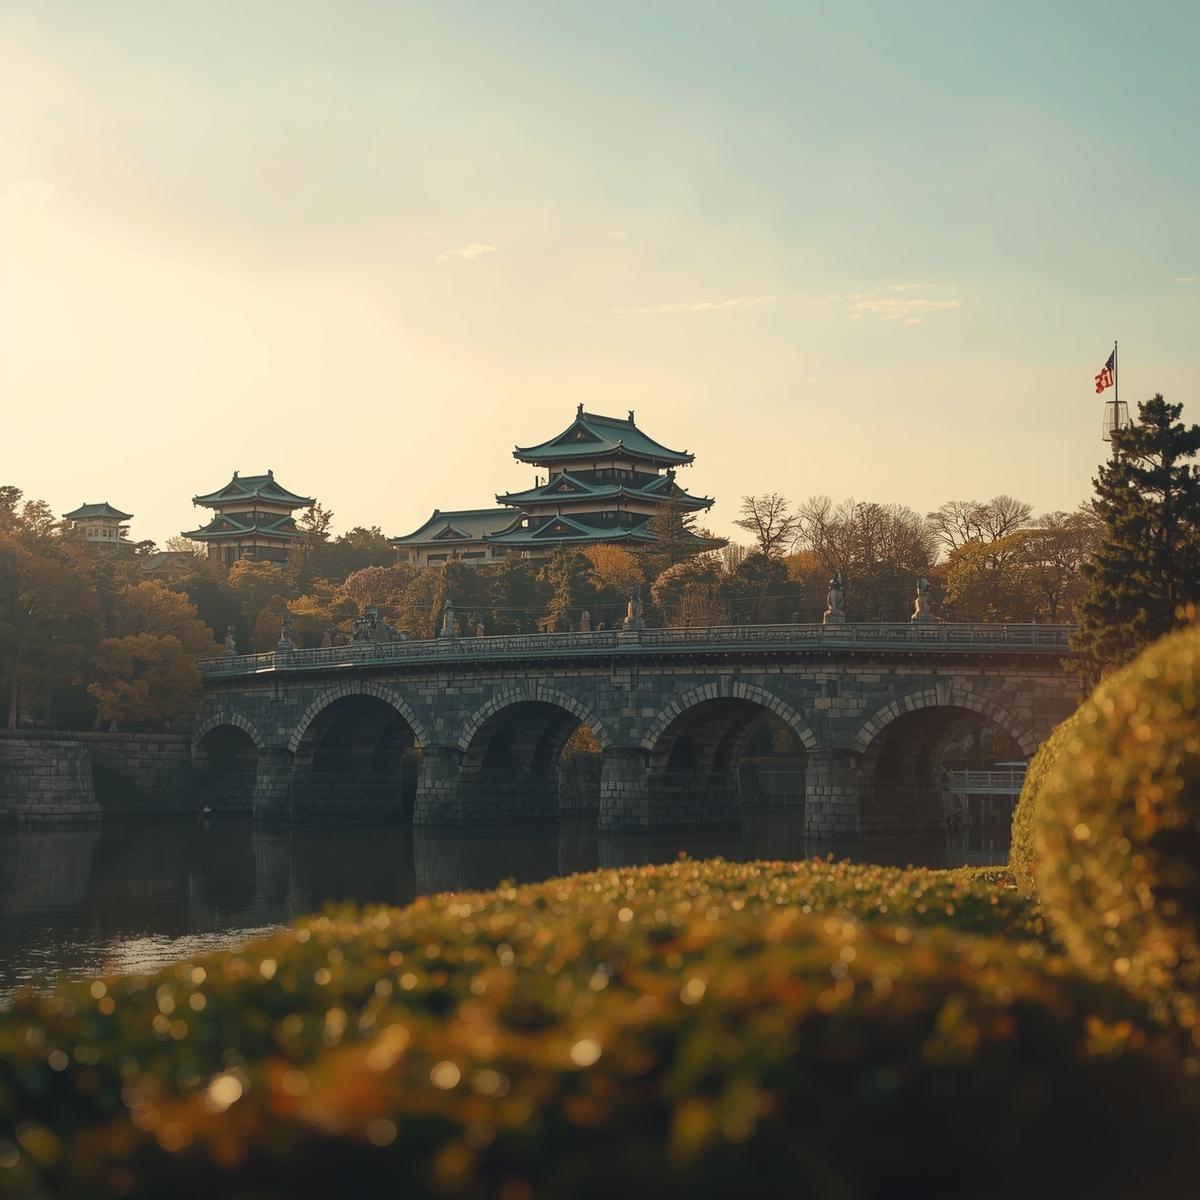
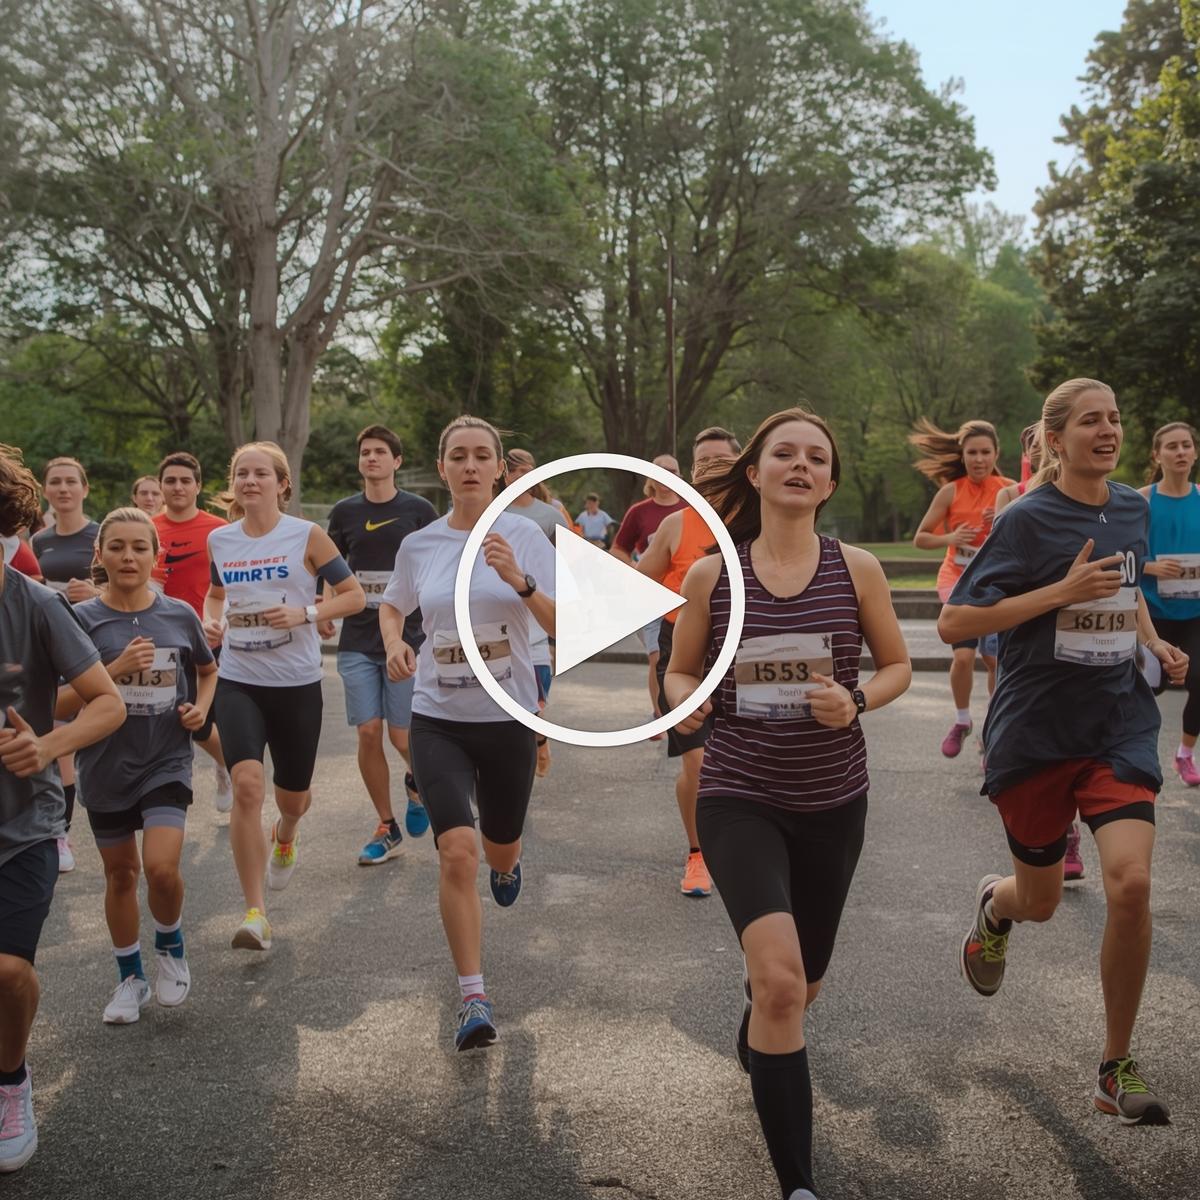
なるほど、ワンシーンではなく、シーンを切り替えるのね。これはめちゃくちゃ勉強になる。
// コマンドラインでffprobeを実行した場合
$ ffprobe src/video.mp4
ffprobe version 4.2.4-1ubuntu0.1 Copyright (c) 2007-2020 the FFmpeg developers
// 省略
Input #0, mov,mp4,m4a,3gp,3g2,mj2, from ‘src/video.mp4’:
Metadata:
major_brand : mp42
minor_version : 0
compatible_brands: mp42mp41isomavc1
creation_time : 2021-07-20T06:13:11.000000Z
Duration: 00:00:14.56, start: 0.000000, bitrate: 1530 kb/s
Stream #0:0(und): Video: h264 (High) (avc1 / 0x31637661), yuv420p(tv, bt709), 1280×720, 1527 kb/s, 25 fps, 25 tbr, 25 tbn, 50 tbc (default)
Metadata:
creation_time : 2021-07-20T06:13:11.000000Z
handler_name : L-SMASH Video Handler
encoder : AVC Coding
### goでffprobe
$ go get github.com/vansante/go-ffprobe
package main

import (
	"log"
	"time"
	"context"

	ffprobe "github.com/vansante/go-ffprobe"
)

func main() {
	ctx, cancelFn := context.WithTimeout(context.Background(), 5*time.Second)
	defer cancelFn()

	data, err := ffprobe.ProbeURL(ctx, "src/video.mp4")
	if err != nil {
	    log.Panicf("Error getting data: %v", data)
	}
	log.Print(data.Format.Duration())

}
$ go run test.go
2021/11/13 21:37:01 14.56s
mp4が作成された日時とdurationが表示される
OKKKKKKKKKKKKKKKKKKKK
macにvlcをdownloadします
https://vlc-media-player.jp.uptodown.com/mac/download
1. VLCを起動し、ファイル -> キャプチャーデバイスを開く
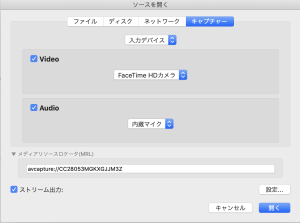
2. ストリーミングの設定
RTCで224.0.0.1でポートを1900に設定
### 受信側
稼働しているvlcとは別にもう一つのvlcを起動します
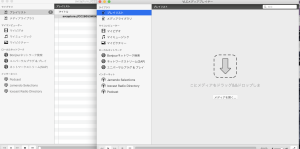
ファイル -> ネットワークを開く
rtp://@224.0.0.1:1900 を設定します
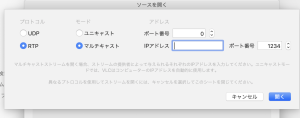
すると、rtpで受信できることがわかります
おおおおおおおおおおおおおおお
Sugeeeeeeeeeeeeeeeeee
RTSPでは224.0.0.0 ~ 239.255.255.255のアドレスを指定する
うん、これをAmazon Kinesis Video Streams で受信したい
RTSPとは
-> Real Time Streaming Protocol
-> 映像、音声のリアルタイムなストリーミング配信を制御する為のプロトコル
-> ネットワークカメラがクライアント(NVR, VMS)に配信
*NVRはNetwork Video Recoderの略で録画システム
*VMSはVideo Management Softwareで映像を録画、管理、閲覧するソフトウェア
動画はTCP通信ではなく、UDP通信
### 記述
– 要求資源の位置は「rtsp://」を用いて、TCP554ポート(5554)
なるほど、RTSPの概要はわかりました。