macでjmeterを使いたい

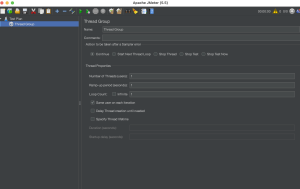
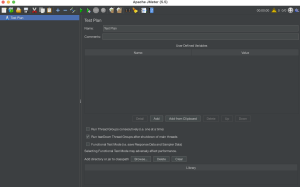
Test Plan -> Add -> Thread(Users) -> Thread Group

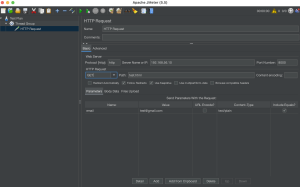
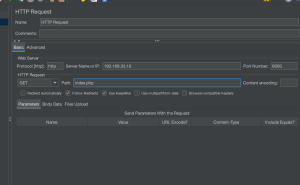
HTTP Request
HTTP RequestのGet, ip, path, paramなどを設定する

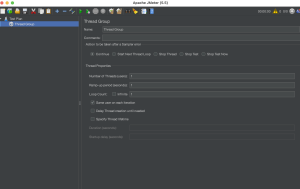
Thread Group
Thread Propertiesの Threads(リクエスト数), Ramp-up period(リクエストの作成期間), Loop Count(リクエスト量)を設定する

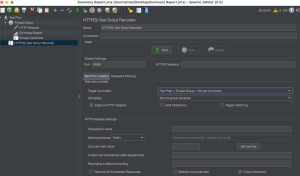
Listenerの追加: テスト結果を表示
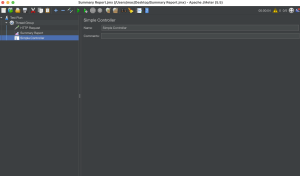
Summary Reportを追加

なるほど、一通りの機能はわかったが、複数画面はどうやるんだろうか?

スタブを使ってテストをしたい

外部連携APIを開発する際に、環境がないといったケースに対応するためスタブってテストを行う。そのために簡単なスタブを構築します。

<?php
/* スタブAPIが受け付けるPOSTパラメータ:name */

header('Access-Controll-Allow-Origin: *');
// header('Access-Controll-Allow-Origin: http://192.168.56.10:8000/post.php');
header('Access-Controll-Allow-Credentials: false'); // Basic認証やCookieのやりとりをする場合に必要
header('Access-Controll-Allow-Headers: Content-Type');
header('Content-Type: application/json; charset=utf-8');

date_default_timezone_set('Asia/Tokyo');

if(isset($_POST['name']) === false || $_POST['name'] === ''){
	$_POST['name'] = 'TEST_API';
}

$postName = htmlspecialchars($_POST['name'], ENT_QUOTES);

$array = [
	'name' => $postName . '_RECIEVED',
	'date' => date("Y-m-d H:i:s"),
];

$json = json_encode($array);

// $file = new SqlFileObject('log.txt', 'a');
// $file->fwrite(
// 	"【→API】RequestParameter:" . $postName .  "'\n【←API】ReturnParameter :" . $json . "\n----------\n"
// );

echo $json;
exit;
$url = "http://192.168.56.10:8000/api.php";

// 設定するHTTPヘッダフィールド
$headerdata = array(
	'Content-Type: application/json',
	'X-HTTP-Method-Override: GET'
);

$param = array(
	"name" => "taro"
);

$postdata = json_encode($param);

$ch = curl_init($url);
$options = array(
	CURLOPT_POST => true,
	CURLOPT_RETURNTRANSFER => true,
	CURLOPT_HEADER => true,
	CURLOPT_HTTPHEADER => $headerdata,
	CURLOPT_POSTFIELDS => $postdata
);
curl_setopt_array($ch, $options);

$response = curl_exec($ch);
$response_info = curl_getinfo($ch);
$response_code = $response_info['http_code'];
$response_header_size = $response_info['header_size'];
curl_close($ch);

if($response_code == 200){
	print "[Result] success.\n";
} else {
	print "[Result] failed [$response_code]. \n";
}

$response_body = substr($response, $response_header_size);
print "[ResponseData]\n".trim($response_body);

なるほど、このような仕組みなのか…

Xdebugとは

XdebugはPHPのエクステンションでデバッグ機能を提供
– スタックの追跡
– var_dumpを整形
– コードのボトルネックを提供

なるほど、vscodeでのxdebugも概要はなんとなく理解した

[負荷試験] jmeterを使ってみる

JMeterはapacheが開発しているオープンソースの負荷検証ツール
java8以上が必要

### UbuntuにJMeterをインストール
$ sudo apt install jmeter
あれ、エラーになるな…

macに入れてみる

thread groupを作成し、その後、 HTTP requestを設定する

Number of Threads(users), Ramp-up period(seconds), Loop Countを設定する
Ramp-Up期間が何秒かけてスレッドを送信するか

なるほど、考え方は多少わかった。

Apache Benchを使ってみる

-nには、Totalで発行するリクエスト数を指定
-cには、同時接続数を指定

$ ab -n -c <同時接続数>
Complete requestsがリクエストに成功

$ ab -n 100 -c 100 -P id:password https://*.co.jp/ 

$ ab -n 100 -c 100 https://www.google.com/
This is ApacheBench, Version 2.3 <$Revision: 1843412 $>
Copyright 1996 Adam Twiss, Zeus Technology Ltd, http://www.zeustech.net/
Licensed to The Apache Software Foundation, http://www.apache.org/

Benchmarking www.google.com (be patient)…..done

Server Software: gws
Server Hostname: www.google.com
Server Port: 443
SSL/TLS Protocol: TLSv1.2,ECDHE-ECDSA-CHACHA20-POLY1305,256,256
Server Temp Key: X25519 253 bits
TLS Server Name: www.google.com

Document Path: /
Document Length: 15095 bytes

Concurrency Level: 100
Time taken for tests: 5.690 seconds
Complete requests: 100
Failed requests: 99
(Connect: 0, Receive: 0, Length: 99, Exceptions: 0)
Total transferred: 1611214 bytes
HTML transferred: 1505980 bytes
Requests per second: 17.58 [#/sec] (mean)
Time per request: 5689.514 [ms] (mean)
Time per request: 56.895 [ms] (mean, across all concurrent requests)
Transfer rate: 276.55 [Kbytes/sec] received

Connection Times (ms)
min mean[+/-sd] median max
Connect: 534 1480 684.7 1113 2959
Processing: 189 1196 500.7 1350 3571
Waiting: 120 720 301.6 563 1339
Total: 723 2677 799.6 2599 5033

Percentage of the requests served within a certain time (ms)
50% 2599
66% 2936
75% 2958
80% 2977
90% 3549
95% 5022
98% 5032
99% 5033
100% 5033 (longest request)

Requests per second:17.58 [#/sec] (mean) が1秒間に捌けるリクエスト
Time per request: が1秒間に捌けるリクエスト

なるほど、apache benchの概念を理解した

テストコードの方針を考える

### テストコードの目的
– テストなしにリリースするのが不安な時
– 保守性の向上
– 障害時に不具合をテストコードで再現する

### テストコードの対象
– セキュリティ上重要な箇所(権限管理、決済、メール)
– 重要度の高いユースケース
– 複雑なロジックやトリッキーなコード
– 止むを得ずパッチを当てたところ
– 自動化した方が早いところ(手作業でのアカウント作成などを省略する)
– 例外処理(意図的にバグを発生させる時)
※シンプルなロジックや重要度の低いコードのテストは優先度が下げるか省略も検討する

### テストコードの留意点
– 閾値の境界、条件分岐の網羅
– before afterを検証する
– テストコードはシンプルにする
– privateメソッドはテストしない

なるほど、枠組みは大体理解しました。

sar -P all? (system admin reporter)

[vagrant@localhost ~]$ sar -q
-bash: sar: コマンドが見つかりません

あれ?インストールされてない?
インストールします。
[vagrant@localhost ~]$ sudo yum install -y sysstat
[vagrant@localhost ~]$ sudo vi /etc/cron.d/sysstat
# Run system activity accounting tool every 10 minutes
*/10 * * * * root /usr/lib64/sa/sa1 1 1
# 0 * * * * root /usr/lib64/sa/sa1 600 6 &
# Generate a daily summary of process accounting at 23:53
53 23 * * * root /usr/lib64/sa/sa2 -A
え、デフォルトでOK?

[vagrant@localhost ~]$ sudo service sysstat start
Calling the system activity data collector (sadc)…

[vagrant@localhost ~]$ sar
Linux 2.6.32-754.14.2.el6.x86_64 (localhost.localdomain) 2019年06月25日 _x86_64_ (1 CPU)

23時42分13秒 LINUX RESTART
[vagrant@localhost ~]$ sar -q
Linux 2.6.32-754.14.2.el6.x86_64 (localhost.localdomain) 2019年06月25日 _x86_64_ (1 CPU)

23時42分13秒 LINUX RESTART
おお、なんか来た。

[vagrant@localhost ~]$ sar -P ALL
Linux 2.6.32-754.14.2.el6.x86_64 (localhost.localdomain) 2019年06月25日 _x86_64_ (1 CPU)

23時42分13秒 LINUX RESTART
[vagrant@localhost ~]$ sar 1 1 -u -P ALL
Linux 2.6.32-754.14.2.el6.x86_64 (localhost.localdomain) 2019年06月25日 _x86_64_ (1 CPU)

23時43分53秒 CPU %user %nice %system %iowait %steal %idle
23時43分54秒 all 0.00 0.00 0.00 0.00 0.00 100.00
23時43分54秒 0 0.00 0.00 0.00 0.00 0.00 100.00

平均値: CPU %user %nice %system %iowait %steal %idle
平均値: all 0.00 0.00 0.00 0.00 0.00 100.00
平均値: 0 0.00 0.00 0.00 0.00 0.00 100.00

お、なんかCPU使用率が見えるっぽいですな。
[vagrant@localhost ~]$ sar 1 1 -q
Linux 2.6.32-754.14.2.el6.x86_64 (localhost.localdomain) 2019年06月25日 _x86_64_ (1 CPU)

23時44分46秒 runq-sz plist-sz ldavg-1 ldavg-5 ldavg-15
23時44分47秒 0 227 0.04 0.16 0.09
平均値: 0 227 0.04 0.16 0.09

[vagrant@localhost ~]$ sar 1 1 -q
Linux 2.6.32-754.14.2.el6.x86_64 (localhost.localdomain) 2019年06月25日 _x86_64_ (1 CPU)

23時45分04秒 runq-sz plist-sz ldavg-1 ldavg-5 ldavg-15
23時45分05秒 0 227 0.03 0.15 0.09
平均値: 0 227 0.03 0.15 0.09
すご。

Perform a simple test with PHPUnit

I already tried installing PHPUnit, so I will try simple samples.

message.php

class Message
{
	private $message;
	public function __construct(string $message){
		$this->message = $message;
	}

	public function get(){
		return $this->message;
	}
}

messageTest.php

require_once ('../vendor/autoload.php');
require_once (dirname(__FILE__) .'../src/message.php');

use PHPUnit\Framework\TestCase;

class MessageTest extends TestCase{
	public function testGet(){
		$message = new Message('hello, world');
		$this->assertEquals('hello, world', $message->get());
	}
}

command line
[vagrant@localhost app]$ vendor/bin/phpunit tests
PHP Warning: require_once(../vendor/autoload.php): failed to open stream: No such file or directory in /home/vagrant/local/app/tests/messageTest.php on line 3
PHP Fatal error: require_once(): Failed opening required ‘../vendor/autoload.php’ (include_path=’.:/usr/share/pear:/usr/share/php’) in /home/vagrant/local/app/tests/messageTest.php on line 3

fix

require_once ('./vendor/autoload.php');
require_once ('./src/message.php');

use PHPUnit\Framework\TestCase;

class MessageTest extends TestCase{
	public function testGet(){
		$message = new Message('hello, world');
		$this->assertEquals('hello, world', $message->get());
	}
}

[vagrant@localhost app]$ vendor/bin/phpunit tests
PHPUnit 7.1.4 by Sebastian Bergmann and contributors.

. 1 / 1 (100%)

Time: 35 ms, Memory: 4.00MB

OK (1 test, 1 assertion)

ohhhhhhhhhhhhhhhhhhhhhhhhhhhhhhh^^

What is PHPUnit

Unit test is a test to check the operation in units such as classes and functions that are the constituent elements of the program. By using PHPUnit, it is possible to create a unit test procedure as a PHP program and execute it as a batch process from a command line or the like.

Speaking of PHP program testing, it is common to manually check the screen transition by manipulating the browser manually, enter values in the form and check the result with the eyes. However, it is quite tedious task to open the page many times during development, enter the test data in the same way, and manually do all the results correctly.

The advantage of using PHPUnit that can automate and repetitively execute troublesome test procedures manually.

Since you can run the test as many times as you like with a single command, you can improve test efficiency and eliminate manual errors as well. In addition, the created test program replaces the specifications, confirming that existing process works correctly in the process of continually improving the program, so-called “degrate” it can also be used to prevent. It can lead to maintenance and improvement of program quality.

class Hello
{
	public function getMessage()
	{
		return "Hello world";
	}
}

It assumes that composer is already installed.
[vagrant@localhost app]$ php composer.phar require phpunit/phpunit:7.1.4
./composer.json has been updated
Loading composer repositories with package information
Updating dependencies (including require-dev)
Package operations: 29 installs, 0 updates, 0 removals
– Installing sebastian/version (2.0.1): Loading from cache
– Installing sebastian/resource-operations (1.0.0): Loading from cache
– Installing sebastian/recursion-context (3.0.0): Loading from cache
– Installing sebastian/object-reflector (1.1.1): Loading from cache
– Installing sebastian/object-enumerator (3.0.3): Loading from cache
– Installing sebastian/global-state (2.0.0): Loading from cache
– Installing sebastian/exporter (3.1.0): Loading from cache
– Installing sebastian/environment (3.1.0): Loading from cache
– Installing sebastian/diff (3.0.1): Loading from cache
– Installing sebastian/comparator (3.0.2): Loading from cache
– Installing doctrine/instantiator (1.1.0): Loading from cache
– Installing phpunit/php-text-template (1.2.1): Loading from cache
– Installing phpunit/phpunit-mock-objects (6.1.2): Downloading (100%)
– Installing phpunit/php-timer (2.0.0): Loading from cache
– Installing phpunit/php-file-iterator (1.4.5): Downloading (100%)
– Installing theseer/tokenizer (1.1.0): Loading from cache
– Installing sebastian/code-unit-reverse-lookup (1.0.1): Loading from cache
– Installing phpunit/php-token-stream (3.0.1): Downloading (100%)
– Installing phpunit/php-code-coverage (6.0.5): Downloading (100%)
– Installing symfony/polyfill-ctype (v1.10.0): Loading from cache
– Installing webmozart/assert (1.4.0): Downloading (100%)
– Installing phpdocumentor/reflection-common (1.0.1): Loading from cache
– Installing phpdocumentor/type-resolver (0.4.0): Loading from cache
– Installing phpdocumentor/reflection-docblock (4.3.0): Loading from cache
– Installing phpspec/prophecy (1.8.0): Loading from cache
– Installing phar-io/version (1.0.1): Downloading (100%)
– Installing phar-io/manifest (1.0.1): Downloading (100%)
– Installing myclabs/deep-copy (1.8.1): Loading from cache
– Installing phpunit/phpunit (7.1.4): Downloading (100%)
sebastian/global-state suggests installing ext-uopz (*)
phpunit/phpunit-mock-objects suggests installing ext-soap (*)
phpunit/php-code-coverage suggests installing ext-xdebug (^2.6.0)
phpunit/phpunit suggests installing phpunit/php-invoker (^2.0)
phpunit/phpunit suggests installing ext-xdebug (*)
Writing lock file
Generating autoload files

[vagrant@localhost app]$ vendor/bin/phpunit –version
PHPUnit 7.1.4 by Sebastian Bergmann and contributors.

What!?

Nest step, the path to use the phpunit command.