push通知を実装する

AppDelegate.swift で、UserNotifications, NCMBをimportする。

import UIKit
import UserNotifications
import NCMB

あれ、NCMBがインポートできない。
あれ、証明書が必要なの?

>証明書の取得
>参考1(GitHub):プッシュ通知の受信に必要な証明書の作り方(開発用)
>参考2(Qiita):プッシュ通知に必要な証明書の作り方2016
>ニフクラ mobile backend の無料登録(アカウント取得)
なに、事前準備がこんなにあるのか。。

そもそもCSRファイルとは?
>CSR には「公開鍵」とその所有者情報、及び申請者が対応する秘密鍵を持っていることを
>示すために申請者の署名が記載されています。 認証局は証明書にその所有者情報を
>署名することで、所有者の存在を証明しています。
>SSL 通信ではサーバが公開鍵を提示し、これを用いて暗号化通信を開始します。
公開鍵、所有者情報、秘密鍵を持っていることの証明か。

そもそも、CSRってなんの略? まさか企業の社会的責任じゃないよね? Corporate Social Responsibility?

Certificate Signing Request ですと。よかったー、安心♪

swiftでhttp通信

info.plistに追加します。

<key>NSAppTransportSecurity</key>
    <dict>
        <key>NSAllowsArbitraryLoads</key>
        <true/>
        <key>NSExceptionDomains</key>
        <dict>
            <key>http://hpscript.com/</key>
            <dict>
                <key>NSTemporaryExceptionAllowsInsecureHTTPLoads</key>
                <false/>
            </dict>
        </dict>
    </dict>

php

$response = array();

if($_SERVER['REQUEST_METHOD'] == 'POST'){
	$teamName = $_POST['name'];
	$member = $_POST['old'];

	$response['api'] = "succeeded";
	$response['member'] = $member . " years old!";
	echo json_encode($response);
}

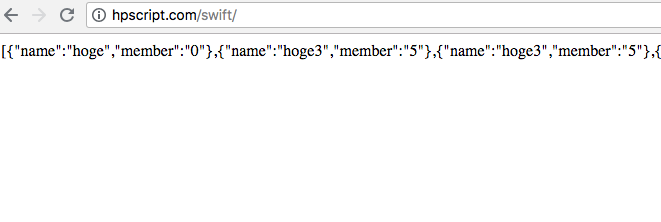
xcode console
っキタキタキタ!!!!!!!!!!!!!!!!!!!!!!!!

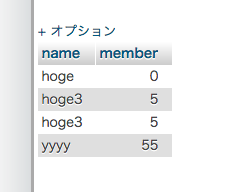
今回、php側はjsonで返してますが、mysqlへのinsert, fetchResultもできますね。iOSの光が見えてきた。

swiftでpostする

import UIKit

class ViewController: UIViewController {
    let URL_SAVE_BOY = "http://hpscript.com/swift/index.php"
    
    @IBOutlet weak var NameFeild: UITextField!
    @IBOutlet weak var oldFeild: UITextField!
    
    @IBAction func saveBtn(_ sender: Any) {
        let requestURL = NSURL(string: URL_SAVE_BOY)
        let request = NSMutableURLRequest(url: requestURL! as URL)
        
        request.httpMethod = "POST"
        
        let teamName = NameFeild.text
        let memberOld = oldFeild.text
        
        let postParameters = "name="+teamName!+"&old="+memberOld!;
        
        request.httpBody = postParameters.data(using: String.Encoding.utf8)
        
        let task = URLSession.shared.dataTask(with: request as URLRequest){
            data, response, error in
            
            if error != nil {
                print("error is \(error)")
                return;
            }
            
            do {
                let myJSON = try JSONSerialization.jsonObject(with: data!, options: .mutableContainers) as? NSDictionary
                
                if let parseJSON = myJSON {
                    var msg : String!
                    msg = parseJSON["message"] as! String?
                    print(msg)
                }
            } catch {
                print(error)
            }
        }
        task.resume()
    }
    
    override func viewDidLoad() {
        super.viewDidLoad()
        // Do any additional setup after loading the view, typically from a nib.
    }

    override func didReceiveMemoryWarning() {
        super.didReceiveMemoryWarning()
        // Dispose of any resources that can be recreated.
    }
}

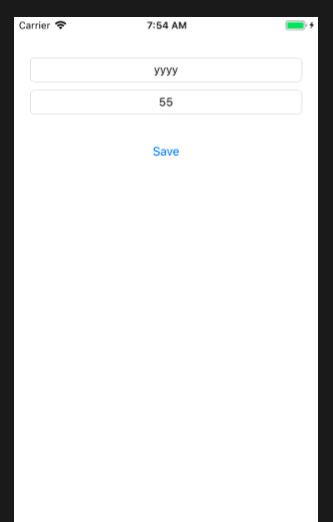
textFieldの値をpostしてreturnのjsonをparseする

URL.httpMethod = “POST”, postdata.data(using: String.Encoding.utf8) とします。
URLSession.shared.dataTask(with: request as URLRequest)

viewController.swift

let URL_SAVE_BOY = "http://www.hogehoge/api/savBoy.php"
    
    @IBOutlet weak var NameFeild: UITextField!
    @IBOutlet weak var oldFeild: UITextField!
    
    @IBAction func saveBtn(_ sender: Any) {
        let requestURL = NSURL(string: URL_SAVE_BOY)
        let request = NSMutableURLRequest(url: requestURL! as URL)
        
        request.httpMethod = "POST"
        
        let teamName = NameFeild.text
        let memberOld = oldFeild.text
        
        let postParameters = "name="+teamName!+"&old="+memberOld!;
        
        request.httpBody = postParameters.data(using: String.Encoding.utf8)
        
        let task = URLSession.shared.dataTask(with: request as URLRequest){
            data, response, error in
            
            if error != nil {
                print("error is \(error)")
                return;
            }
            
            do {
                let myJSON = try JSONSerialization.jsonObject(with: data!, options: .mutableContainers) as? NSDictionary
                
                if let parseJSON = myJSON {
                    var msg : String!
                    msg = parseJSON["message"] as! String?
                    print(msg)
                }
            } catch {
                print(error)
            }
        }
        task.resume()
    }

swiftとmysqlを連携する

まず、mysqlにdbをつくります。適当に、swiftとしておきます。

table名はどうしましょう。まあ、後で考えます。
続いて、phpファイルをvagrantにつくっていきます。
フォルダはapiとincludes


ok!

では、phpをつくっていきます。

swift4でyoutube api

import UIKit
import Alamofire

class Model: NSObject {
    private var youtubeNextPageToken: String?
    
    func loadYoutubeList(callback: (youtubeList: YoutubeList) -> (), fail:((error: NSError) ->())){
        
        let req = request(.GET, AppConfig.youtubeURL())
        req.response { (request, response, responseData, error) -> Void in
            do {
                let jsonResult = try NSJSONSerialization.JSONObjectWthData(responseData!, options: NSJSONReadingOptions.MutableContainers) as! NSMutableDictionary
                
                self.youtubeNextPageToken = jsonResult["nextPageToken"] as! String?
                let ary = jsonResult["items"] as! NSArray
                let youtubeList = YoutubeList(ary: ary)
                callback(youtubeList: youtubeList)
            } catch {
                print("loadYoutubeList error")
            }
        }
    }
}

constrainをつけて行きます。

swift4でカメラアプリ

import UIKit
import AVFoundation

class ViewController: UIViewController {
    
    var captureSession = AVCaptureSession()
    var mainCamera: AVCaptureDevice?
    var innerCamera: AVCaptureDevice?
    var currentDevice: AVCaptureDevice?
    var photoOutput : AVCapturePhotoOutput?
    var cameraPreviewLayer : AVCaptureVideoPreviewLayer?
    

    override func viewDidLoad() {
        super.viewDidLoad()
        setupCaptureSession()
        setupDevice()
        setupInputOutput()
        setupPreviewLayer()
        captureSession.startRunning()
        // Do any additional setup after loading the view, typically from a nib.
    }

    override func didReceiveMemoryWarning() {
        super.didReceiveMemoryWarning()
        // Dispose of any resources that can be recreated.
    }


}

extension ViewController {
    func setupCaptureSession(){
        captureSession.sessionPreset = AVCaptureSession.Preset.photo
    }
    
    func setupDevice(){
        let deviceDiscoverySession = AVCaptureDevice.DiscoverySession(deviceTypes: [AVCaptureDevice.DeviceType.builtInWideAngleCamera], mediaType: AVMediaType.video, position: AVCaptureDevice.Position.unspecified)
        let devices = deviceDiscoverySession.devices
        
        for device in devices {
            if device.position == AVCaptureDevice.Position.back {
                mainCamera = device
            } else if device.position == AVCaptureDevice.Position.front {
                innerCamera = device
            }
        }
        currentDevice = mainCamera
    }
    func setupInputOutput(){
        do {
            let captureDeviceInput = try AVCaptureDeviceInput(device: currentDevice!)
            captureSession.addInput(captureDeviceInput)
            photoOutput = AVCapturePhotoOutput()
            photoOutput!.setPreparedPhotoSettingsArray([AVCapturePhotoSettings(format: [AVVideoCodecKey : AVVideoCodecType.jpeg])], completionHandler: nil)
            captureSession.addOutput(photoOutput!)
        } catch {
            print(error)
        }
    }
    func setupPreviewLayer(){
        self.cameraPreviewLayer = AVCaptureVideoPreviewLayer(session: captureSession)
        self.cameraPreviewLayer?.videoGravity = AVLayerVideoGravity.resizeAspectFill
        self.cameraPreviewLayer?.connection?.videoOrientation = AVCaptureVideoOrientation.portrait
        self.cameraPreviewLayer?.frame = view.frame
        self.view.layer.insertSublayer(self.cameraPreviewLayer!, at: 0)
    }
}

CameraUsageDescription

Info.plistで設定を加える。
Privacy – Camera Usage Description
Privacy – Photo Library Usage Description

retakeとuse photoが出るが、わからん。

あ、info.plistは、Photo Library Usage Descriptionではなく、 Photo Library Additions Usage Descriptionですね。
Privacy – Photo Library Additions Usage Description
これで、簡単に写真が取れるようになりました!

camera機能は用途が多そうなので、もう少し深掘りしたいと思います。

UIImagePicker

import UIKit

class ViewController: UIViewController, UIImagePickerControllerDelegate, UINavigationControllerDelegate  {

    override func viewDidLoad() {
        super.viewDidLoad()
        // Do any additional setup after loading the view, typically from a nib.
    }
    override func viewDidAppear(_ animated: Bool) {
        let picker = UIImagePickerController()
        picker.sourceType = .camera
        picker.delegate = self
        
        present(picker, animated: true, completion: nil)
    }
    override func didReceiveMemoryWarning() {
        super.didReceiveMemoryWarning()
        // Dispose of any resources that can be recreated.
    }
    
    func imagePickerController(_ picker: UIImagePickerController, didFinishPickingMediaWithInfo info: [String : Any]) {
        print(#function)
        // print(info[UIImagePickerControllerMediaType]!)
        let image = info[UIImagePickerControllerOriginalImage] as! UIImage
        // 撮影した画像をカメラロールに保存
        UIImageWriteToSavedPhotosAlbum(image, nil, nil, nil)
    }

    func imagePickerControllerDidCancel(_ picker: UIImagePickerController) {
        print(#function)
    }
}

console // なに?
This app has crashed because it attempted to access privacy-sensitive data without a usage description. The app’s Info.plist must contain an NSCameraUsageDescription key with a string value explaining to the user how the app uses this data.

iosでmp3を再生しよう

projectの下に、ケツメイシの涙のmp3を置きます。

storyboardに、buttonを配置し、autletとactionで接続します。

コーディングしていきます。

var audioPlayer:AVAudioPlayer!

    @IBOutlet weak var button: UIButton!
    
    override func viewDidLoad() {
        super.viewDidLoad()
        
        let audioPath = Bundle.main.path(forResource: "namida", ofType:"mp3")!
        let audioUrl = URL(fileURLWithPath: audioPath)
        
        var audioError:NSError?
        do {
            audioPlayer = try AVAudioPlayer(contentsOf: audioUrl)
        } catch let error as NSError {
            audioError = error
            audioPlayer = nil
        }
        
        if let error = audioError {
            print("Error \(error.localizedDescription)")
        }
        
        audioPlayer.delegate = self
        audioPlayer.prepareToPlay()
        
    }
    
    @IBAction func buttonTapped(_ sender: Any) {
        if ( audioPlayer.isPlaying ){
            audioPlayer.stop()
            button.setTitle("Stop", for: UIControlState())
        }
        else {
            audioPlayer.play()
            button.setTitle("Play", for: UIControlState())
        }
    }

普通に再生できました。

ちょっとハイペースですが、次はカメラいきましょう。
どうやらカメラもAVFoundationのようですね。