$ node -v
v10.24.1
$ sudo npm install n -g
$ sudo n stable
$ sudo apt purge -y nodejs npm
$ exec $SHELL -l
$ node -v
v16.13.2
$ npm -v
8.1.2
うおおおおおおおおおおおおおおおお
$ npm install
$ npm run dev
OK
ソフトウェアエンジニアの技術ブログ:Software engineer tech blog
随机应变 ABCD: Always Be Coding and … : хороший
$ node -v
v10.24.1
$ sudo npm install n -g
$ sudo n stable
$ sudo apt purge -y nodejs npm
$ exec $SHELL -l
$ node -v
v16.13.2
$ npm -v
8.1.2
うおおおおおおおおおおおおおおおお
$ npm install
$ npm run dev
OK
Node.jsでは実行時に渡される引数の情報はprocess.argvにまとめられている
process.argv[0] = nodeコマンドのパス
process.argv[1] = スクリプトファイルのパス
process.argv[2]以降 = コマンド実行時に渡される引数
src/index.ts
console.log("Node path = " + process.argv[0]) console.log("Script file path = " + process.argv[1]) const data: number[] = [] for(var i = 2; i < process.argv.length; i++){ data.push(Number(process.argv[i])) } console.log(data) for (let item of data){ const res = primeFactor(item) console.log(item + '= ' + res) } function primeFactor(a: number): number[] { const v: number[ ] = [] let x = a let n = 2 while(x > n){ if(x % n == 0){ x = x / n v.push(n) } else { n += n == 2 ? 1 : 2 } } v.push(x) return v }
$ npm run build
$ node dist/main.js 100 1234 9876
Node path = /usr/bin/node
Script file path = /home/vagrant/dev/hands-on/dist/main.js
[ 100, 1234, 9876 ]
100= 2,2,5,5
1234= 2,617
9876= 2,2,3,823
console.log("Node path = " + process.argv[0]) console.log("Script file path = " + process.argv[1]) const data: number[] = [] for(var i = 2; i < process.argv.length; i++){ data.push(Number(process.argv[i])) } console.log('parameters: ' + data) const f = aggregate() for (let item of data){ const res = f(item) console.log(res) } function aggregate(): (n:number) => [number, number, number, number, number] { let total = 0 let totalp = 0 let totalt = 0 return (n:number):[number, number, number, number, number] => { total += n let tax = Math.floor(n - n / 1.1) totalp += n - tax totalt += tax return [n, tax, total, totalp, totalt] } }
$ node dist/main.js 1200 1870 3058 2765 1875
Node path = /usr/bin/node
Script file path = /home/vagrant/dev/hands-on/dist/main.js
parameters: 1200,1870,3058,2765,1875
[ 1200, 109, 1200, 1091, 109 ]
[ 1870, 170, 3070, 2791, 279 ]
[ 3058, 278, 6128, 5571, 557 ]
[ 2765, 251, 8893, 8085, 808 ]
[ 1875, 170, 10768, 9790, 978 ]
なるほど、ここまでの知識を使って何か作ってみたいですね
### kvs起動
gst-launch-1.0 avfvideosrc device-index=0 ! videoconvert ! video/x-raw,format=I420,width=1280,height=720 ! vtenc_h264_hw allow-frame-reordering=FALSE realtime=TRUE max-keyframe-interval=45 bitrate=512 ! h264parse ! video/x-h264,stream-format=avc,alignment=au,profile=baseline ! kvssink stream-name=MyKinesisVideoStream storage-size=512 access-key=”YourAccessKeyId” secret-key=”YourSecretAccessKey” aws-region=”ap-northeast-1″
### node.js側
const fs = require('fs'); const AWS = require('aws-sdk') AWS.config.update({accessKeyId: "***", secretAccessKey: "***",region: "ap-northeast-1"}); async function main(){ const streamName = 'MyKinesisVideoStream'; const kinesisvideo = new AWS.KinesisVideo(); const param = { APIName: "GET_CLIP", StreamName: streamName }; const e = await kinesisvideo.getDataEndpoint(param).promise(); const kinesisvideoarchivedmedia = new AWS.KinesisVideoArchivedMedia({endpoint: e.DataEndpoint}); startTime = new Date(2021, 10, 13, 23, 40, 30); // UTC時間 endTime = new Date(2021, 10, 13, 23, 41, 38); // UTC時間 const params = { ClipFragmentSelector: { FragmentSelectorType: "PRODUCER_TIMESTAMP", TimestampRange: { EndTimestamp: endTime, StartTimestamp: startTime } }, StreamName: streamName }; const data = await kinesisvideoarchivedmedia.getClip(params).promise(); const filePath = "test.mp4" fs.writeFileSync(filePath, data.Payload); } main()
$ node get-mp4.js
うおおおおおおおおおおおおおおおおおおおお
### トラブルシューティング
ずっとこれが出てたんだが、何かなと思ってたら
$ node get-mp4.js
(node:137900) UnhandledPromiseRejectionWarning: ResourceNotFoundException: No fragments found in the stream for the clip request.
jsでtimestampを作るとき、monthは -1なのね。
new Date(2021, 10, 13, 23, 40, 30); // 2021/11/13 23:40:30
new Date(2021, 11, 13, 23, 40, 30) でやってたから、No fragments foundだった。。あほやわ
よっしゃあああああああああああああああああああ
S3から複数のjsonをdownloadして、一つのjsonにまとめたい。
※後にgraphQLで出力する
objectを配列([])で宣言して、pushする
var object = []; const s3Client = new AWS.S3({ accessKeyId: 'fuga', secretAccessKey: 'hoge', region: 'ap-northeast-1' }) function getObject(params){ s3Client.getObject(params, function(err, data){ if(err){ console.log(err, err.stack); } else { object.push(JSON.parse(data.Body.toString()|| "null")); console.log(object) fs.writeFile('speech.json', JSON.stringify(object), function(err, result){ if(err) console.log('error', err); }); } }) } const params1 = { Bucket: 'speech-dnn', Key: 'speech.json', } const params2 = { Bucket: 'speech-dnn', Key: 'speech2.json', } getObject(params1); getObject(params2);
$ node test.js
Server Now Running
$ node test.js
Server Now Running
[ { id: 1, text: ‘ 凄い技術ですね。\n’ } ]
[ { id: 1, text: ‘ 凄い技術ですね。\n’ }, { id: 2, text: ‘ びっくりしました。\n’ } ]
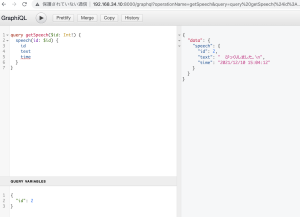
なるほど、これをgraphQLに入れる
※timeを追加
$ node server5.js
Express GraphQL Server Now Running On 192.168.34.10:8000/graphql
[ { id: 1, text: ‘ 凄い技術ですね。\n’, time: ‘2021/12/10 15:04:10’ } ]
[
{ id: 1, text: ‘ 凄い技術ですね。\n’, time: ‘2021/12/10 15:04:10’ },
{ id: 2, text: ‘ びっくりしました。\n’, time: ‘2021/12/10 15:04:12’ }
http://192.168.34.10:8000/graphql
OK、
### ローカル環境
挙動テスト用に簡単にインストールしてコードを書きます。
$ node –version
v14.17.6
$ npm install express
var express = require('express') var app = express() app.get('/', function(req, res){ res.send('hello world') }) app.listen(3000)
http://192.168.34.10:3000/
### vps
$ curl -sL https://deb.nodesource.com/setup_14.x -o nodesource_setup.sh
$ sudo bash nodesource_setup.sh
$ sudo apt install nodejs
$ node -v
v14.18.1
$ cd /var/www/app
$ sudo npm install express
$ sudo touch app.js
$ sudo vi app.js // 上記と同じ
$ sudo vi /etc/apache2/sites-available/virtual.host.conf
<VirtualHost *:80> DocumentRoot /var/www/app ServerName ****-test.site ServerAlias www.****-test.site ProxyPass / http://***.**.***.**:3000/ ProxyPassReverse / http://***.**.***.**:3000/ # Other directives here </VirtualHost>
Invalid command ‘ProxyPass’, perhaps misspe>
$ sudo a2enmod proxy_http
$ sudo systemctl restart apache2
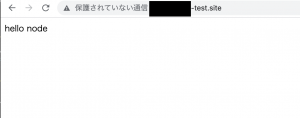
$ node app.js
var express = require('express') var app = express() app.get('/', function(req, res){ res.send('hello node') }) app.listen(3000)
OK
$ sudo vi /etc/apache2/sites-available/virtual.host.conf
<VirtualHost *:80> DocumentRoot /var/www/app ServerName ****-test.site ServerAlias www.sample-test.site ProxyPass / http://***.**.**.***:3000 ProxyPassReverse / http://***.**.**.***:3000 # Other directives here </VirtualHost> <VirtualHost *:80> DocumentRoot /var/www/node ServerName ***.****-test.site # Other directives here </VirtualHost>
こうすることで、一つのディレクトリはnodeで動かし、サブドメインの方はapacheで動かすということもできる
OKKKKKKKKKKK
さ、ラズパイやろう
$ npm install aws-sdk
s3.js
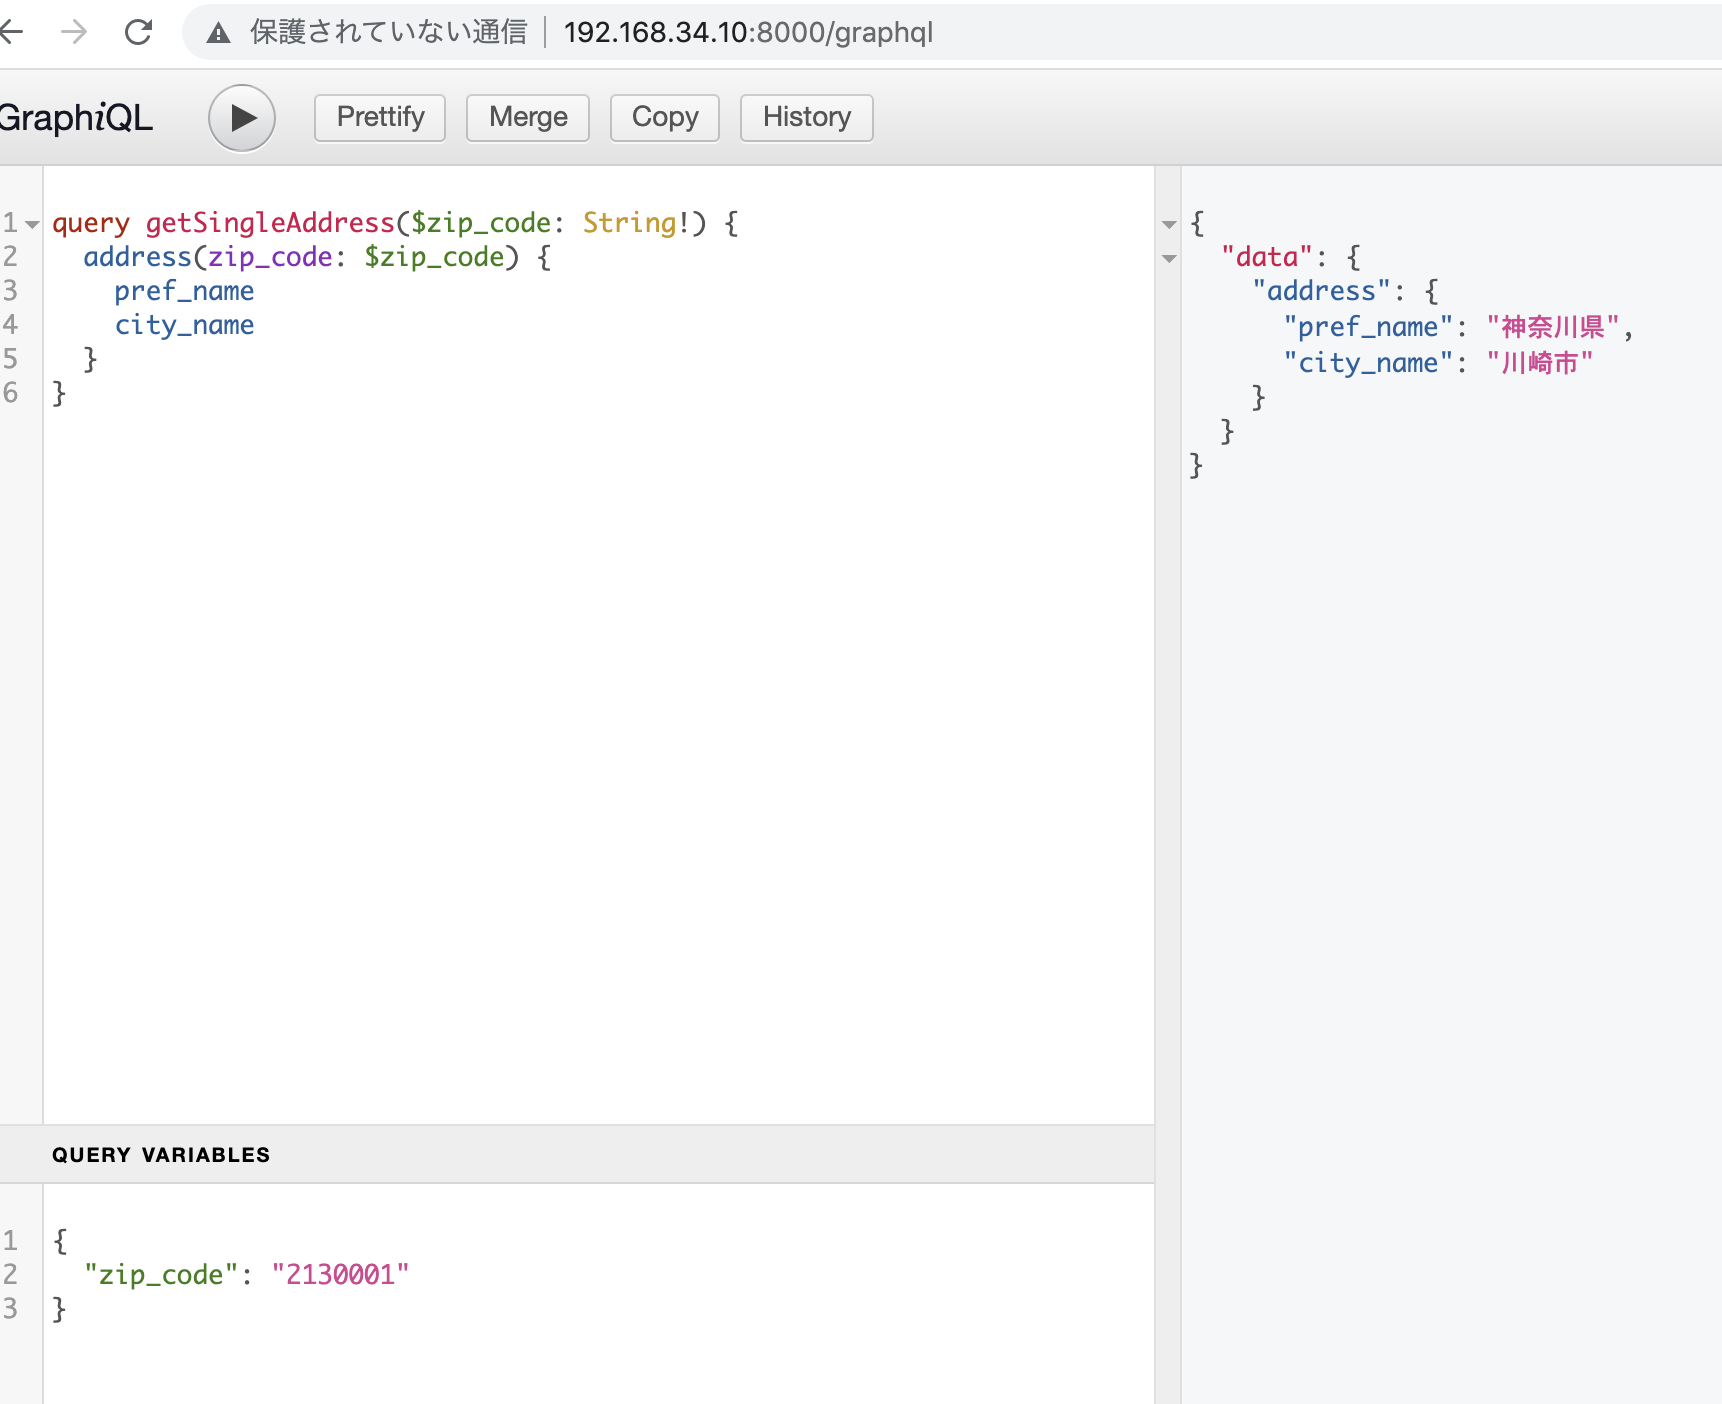
const express = require('express') const AWS = require('aws-sdk') var fs = require('fs') const app = express() const s3Client = new AWS.S3({ accessKeyId: '', secretAccessKey: '', region: 'ap-northeast-1' }) const params = { Bucket: 'hogehoge', Key: 'address.json', } s3Client.getObject(params, function(err, data){ if(err){ console.log(err, err.stack); } else { var object = JSON.parse(data.Body.toString()); fs.writeFile('hoge.json', JSON.stringify(object), function(err, result){ if(err) console.log('error', err); }); } }) const jsonObject = JSON.parse(fs.readFileSync('hoge.json', 'utf8')); console.log(jsonObject); app.listen(8000, () => console.log('Server Now Running'));
これをgraphQLに応用すると、mysqlから取得した場合も、connection.queryで一時保存し、jsonを読み込んでfilterで処理できますね。ちょっと冗長ではありますが。
connection.query( 'SELECT * FROM master_zip', (error, results) => { var object = JSON.parse(JSON.stringify(results)); fs.writeFile('address.json', JSON.stringify(object), function(err, result){ if(err) console.log('error', err); }); } ); var getAddress = function(args){ var zip_code = args.zip_code; const jsonObject = JSON.parse(fs.readFileSync('address.json', 'utf8')); return jsonObject.filter(address => { return address.zip_code == zip_code; })[0]; }
$ npm install mysql2
接続
var express = require('express'); const mysql = require('mysql2'); const app = express(); const db_setting = { host: 'localhost', user: 'root', password: 'hoge', database: 'test' } let mycon = null; (async() => { try { mycon = await mysql.createConnection(db_setting); mycon.connect(function(err){ if(err){ console.log(err); } else { console.log("success"); } }); } catch(e){ console.log(e); } if(mycon){ mycon.end(); } })(); app.listen(8000);
うーむ、asyncの外で使いたいんだよなあ
1. mysqlパッケージをインストール
$ npm install mysql
var express = require('express'); var mysql = require('mysql'); const app = express(); const connection = mysql.createConnection({ host: 'localhost', user: 'root', password: 'hoge', database: 'test' }); connection.connect((err) => { if(err){ console.log('error connecting:' + err.stack); return; } console.log('success'); }); app.get('/', (req, res) => { connection.query( 'SELECT * FROM master_zip', (error, results) => { console.log(results); } ); }); app.listen(8000);
$ node app.js
success
[
RowDataPacket {
zip_code: ‘1690075’,
pref_name: ‘東京都’,
city_name: ‘新宿区’,
town_name: ”,
area_name: ‘高田馬場’
},
// 省略
]
mysql.createConnectionで接続して、connection.queryでqueryを実行するのね
基本はわかりました。
ただ、これをconnection.queryの外に変数を出そうとするとできない。
var getAddress = function(args){ var zip_code = args.zip_code; const connection = mysql.createConnection({ host: 'localhost', user: 'root', password: 'password', database: 'test' }); // conection.queryは非同期関数なので外に出せない connection.query( 'SELECT * FROM master_zip', (error, results) => { var db_results = JSON.parse(JSON.stringify(results)); } ); return db_results.filter(address => { return address.zip_code == zip_code; })[0]; }
なかなか複雑…
$ npm init
$ npm install graphql express express-graphql -save
server.js
var express = require('express'); var express_graphql = require('express-graphql').graphqlHTTP; var { buildSchema } = require('graphql'); var schema = buildSchema(` type Query { message: String } `); var root = { message: () => 'Hello World!' }; var app = express(); app.use('/graphql', express_graphql({ schema: schema, rootValue: root, graphiql: true })); app.listen(8000, () => console.log('Express GraphQL Server Now Running On 192.168.34.10:8000/graphql'))
{ message }
{ "data": { "message": "Hello World!" } }
$ curl -XPOST -H “Content-Type:application/json” ‘http://192.168.34.10:8000/graphql’ -d ‘{“query”: “query { message }”}’
{“data”:{“message”:”Hello World!”}}
L jsonでクエリをリクエストすると返ってくる
### パラメータを受け取る
var express = require('express'); var express_graphql = require('express-graphql').graphqlHTTP; var { buildSchema } = require('graphql'); var schema = buildSchema(` type Query { course(id: Int!): Course courses(topic: String):[Course] }, type Course { id: Int title: String author: String description: String topic: String url: String } `); var coursesData = [ { id: 1, title: '初めてのGraphQL ―Webサービスを作って学ぶ新世代API', author: 'Eve Porcello', description: '本書で紹介するGraphQLは2015年にFacebookによって公開されたRESTとは異なるアプローチのアーキテクチャです。', topic: 'GraphQL', url: 'https://www.amazon.co.jp/%E5%88%9D%E3%82%81%E3%81%A6%E3%81%AEGraphQL-%E2%80%95Web%E3%82%B5%E3%83%BC%E3%83%93%E3%82%B9%E3%82%92%E4%BD%9C%E3%81%A3%E3%81%A6%E5%AD%A6%E3%81%B6%E6%96%B0%E4%B8%96%E4%BB%A3API-Eve-Porcello/dp/487311893X/ref=sr_1_1?__mk_ja_JP=%E3%82%AB%E3%82%BF%E3%82%AB%E3%83%8A&dchild=1&keywords=graphql&qid=1633041782&sr=8-1' }, { id: 2, title: '基礎からはじめるGraphQL', author: '志村翔太', description: '本書ではGraohQLの基礎文法や概念を学び、実際にGraohQLを利用したアプリケーションの完成を目指していきます。', topic: 'GraphQL', url: 'https://www.amazon.co.jp/%E5%9F%BA%E7%A4%8E%E3%81%8B%E3%82%89%E3%81%AF%E3%81%98%E3%82%81%E3%82%8BGraphQL-%E5%BF%97%E6%9D%91%E7%BF%94%E5%A4%AA-ebook/dp/B08PC8H5HF/ref=sr_1_2?__mk_ja_JP=%E3%82%AB%E3%82%BF%E3%82%AB%E3%83%8A&dchild=1&keywords=graphql&qid=1633071074&sr=8-2' }, { id: 3, title: 'Node.js超入門 第3版', author: '掌田津耶乃', description: 'Node.jsの入門者向け書籍です。2018/8に出た「Node.js超入門 第2版」の改訂版です。改訂内容は新バージョン14対応、データベースはSQLite3、ORMはSequelizeに変更しています。CSS関連はBootstrap利用、Expressは最初からGeneratorを使う形で解説しています。', topic: 'NodeJS', url: 'https://www.amazon.co.jp/Node-js%E8%B6%85%E5%85%A5%E9%96%80-%E7%AC%AC3%E7%89%88-%E6%8E%8C%E7%94%B0%E6%B4%A5%E8%80%B6%E4%B9%83/dp/479806243X/ref=sr_1_1_sspa?__mk_ja_JP=%E3%82%AB%E3%82%BF%E3%82%AB%E3%83%8A&dchild=1&keywords=nodejs&qid=1633071225&sr=8-1-spons&psc=1&spLa=ZW5jcnlwdGVkUXVhbGlmaWVyPUEyNEMxVzdLVUtWOU1ZJmVuY3J5cHRlZElkPUEwNjIwNjAzMkhaN1dYSzZVSEw2NiZlbmNyeXB0ZWRBZElkPUExSkVDRkoyVzMwTlBBJndpZGdldE5hbWU9c3BfYXRmJmFjdGlvbj1jbGlja1JlZGlyZWN0JmRvTm90TG9nQ2xpY2s9dHJ1ZQ==' } ] var getCourse = function(args){ var id = args.id; return coursesData.filter(course => { return course.id == id; })[0]; } var getCourses = function(args){ if(args.topic){ var topic = args.topic; return coursesData.filter(course = course.topic === topic); } else { return coursesData; } } var root = { course: getCourse, courses: getCourses }; var app = express(); app.use('/graphql', express_graphql({ schema: schema, rootValue: root, graphiql: true })); app.listen(8000, () => console.log('Express GraphQL Server Now Running On 192.168.34.10:8000/graphql'))
query getSingleCourse($courseID: Int!) { course(id: $courseID) { title author description topic url } } { "topic":"Node.js" }
$ curl -XPOST -H “Content-Type:application/json” ‘http://192.168.34.10:8000/graphql’ -d ‘{“query”: “query getSingleCourse($courseID:Int!){course(id:$courseID){title author description topic url}}”, “variables”: {“courseID”:1}}’
{“data”:{“course”:{“title”:”初めてのGraphQL ―Webサービスを作って学ぶ新世代API”,”author”:”Eve Porcello”,”description”:”本書で紹介するGraphQLは2015年にFacebookによって公開されたRESTとは異なるアプローチのアーキテクチャです。”,”topic”:”GraphQL”,”url”:”https://www.amazon.co.jp/%E5%88%9D%E3%82%81%E3%81%A6%E3%81%AEGraphQL-%E2%80%95Web%E3%82%B5%E3%83%BC%E3%83%93%E3%82%B9%E3%82%92%E4%BD%9C%E3%81%A3%E3%81%A6%E5%AD%A6%E3%81%B6%E6%96%B0%E4%B8%96%E4%BB%A3API-Eve-Porcello/dp/487311893X/ref=sr_1_1?__mk_ja_JP=%E3%82%AB%E3%82%BF%E3%82%AB%E3%83%8A&dchild=1&keywords=graphql&qid=1633041782&sr=8-1″}}}
query getCourses($topic: String!) { courses(topic: $topic) { title url } } { "topic": "GraphQL" }
{
“errors”: [
{
“message”: “course is not defined”,
“locations”: [
{
“line”: 2,
“column”: 2
}
],
“path”: [
“courses”
]
}
],
“data”: {
“courses”: null
}
}
なんやろう、ようわからんね
RGBを入力するのは、RGBを調べるという手間が入るので、color pickerを実装したい。
pickrというライブラリがある様なので、それを使う。
$ npm install @simonwep/pickr
githubそのままですが、
<!DOCTYPE html> <html lang="en"> <head> <meta name="viewport" content="width=device-width, initial-scale=1, shrink-to-fit=no"> <meta charset="UTF-8"> <title>Document</title> <link href="/node_modules/@simonwep/pickr/dist/themes/classic.min.css" rel="stylesheet"> <link href="/node_modules/@simonwep/pickr/dist/themes/monolith.min.css" rel="stylesheet"> <link href="/node_modules/@simonwep/pickr/dist/themes/nano.min.css" rel="stylesheet"> <script src="/node_modules/@simonwep/pickr/dist/pickr.min.js"></script> <script src="/node_modules/@simonwep/pickr/dist/pickr.es5.min.js"></script> </head> <body> <div class="color-picker"></div> <script> const pickr = Pickr.create({ el: '.color-picker', theme: 'classic', swatches: [ 'rgba(244, 67, 54, 1)', 'rgba(233, 30, 99, 0.95)', 'rgba(156, 39, 176, 0.9)', 'rgba(103, 58, 183, 0.85)', 'rgba(63, 81, 181, 0.8)', 'rgba(33, 150, 243, 0.75)', 'rgba(3, 169, 244, 0.7)', 'rgba(0, 188, 212, 0.7)', 'rgba(0, 150, 136, 0.75)', 'rgba(76, 175, 80, 0.8)', 'rgba(139, 195, 74, 0.85)', 'rgba(205, 220, 57, 0.9)', 'rgba(255, 235, 59, 0.95)', 'rgba(255, 193, 7, 1)' ], components: { // Main components preview: true, opacity: true, hue: true, // Input / output Options interaction: { hex: true, rgba: true, hsla: true, hsva: true, cmyk: true, input: true, clear: true, save: true } } }); </script> </body> </html>
これは凄い。使いたいな。