vmstat

“vmstat” is a command to display statistics of virtual memory, CPU, and disk I/O.

By default, the average value from startup(result) is displayed. You can display the value in real time by specifying the update interval like “vmstat 1”.

[vagrant@localhost ~]$ vmstat
procs ———–memory———- —swap– —–io—- –system– —–cpu—–
r b swpd free buff cache si so bi bo in cs us sy id wa st
1 1 584880 46328 36088 82136 20 21 94 28 46 97 0 0 97 3 0

procs -> process
 r -> 実行中と実行待ち中のプロセス数
 b -> 割り込み不可能なスリープ状態にあるプロセス数
memory -> memory
 swpd -> 仕様中の仮想メモリの量
 free -> 空きメモリの量
 buff -> バッファとして使用しているメモリの量
 cache -> キャッシュに使用している量
swap -> swap
 si -> ディスクからスワップインしているメモリの量
 so -> スワップアウトしている量
io -> input out
 bi -> HDDのようなブロック型デバイスから受けっとたブロック数
 bo -> ブロック型デバイスに送ったブロック数
system -> system
 in -> 1秒あたりの割り込み回数
 cs -> コンテクストスイッチの回数
CPU -> CPU
 us -> カーネルコード以外の実行に使用した時間
 sy -> カーネルコードの実行に使用した時間(システム時間)
 id -> 空転していたアイドル時間
 wa -> I/O待ち時間
 st -> 仮想マシンから盗まれた時間

メモリの単位ってなんだ?kバイト?

proc_open(): fork failed – Cannot allocate memory

[vagrant@localhost test]$ sudo /bin/dd if=/dev/zero of=/var/swap.1 bs=1M count=1024
1024+0 records in
1024+0 records out
1073741824 bytes (1.1 GB) copied, 17.3872 s, 61.8 MB/s
[vagrant@localhost test]$ sudo /sbin/mkswap /var/swap.1
スワップ空間バージョン1を設定します、サイズ = 1048572 KiB
ラベルはありません, UUID=4b1bec65-8ded-4ff2-8ed8-49e83f909f09
[vagrant@localhost test]$ sudo /sbin/swapon /var/swap.1

[vagrant@localhost test]$ free
total used free shared buffers cached
Mem: 501796 493940 7856 4 1184 402464
-/+ buffers/cache: 90292 411504
Swap: 2064376 735636 1328740

で、再度いれます。
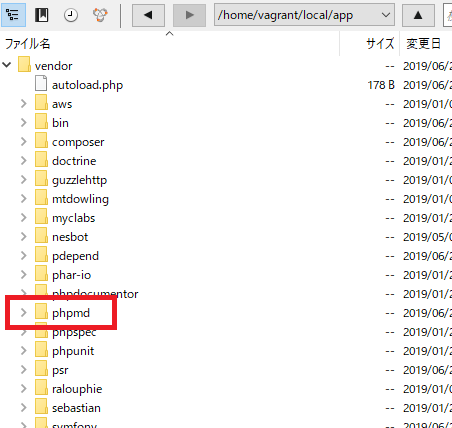
php composer.phar require “phpmd/phpmd=~2.0”
今度は上手くいきそうです。
入りましたかね。

linux cp command

[vagrant@localhost test]$ ls
[vagrant@localhost test]$ touch fileA.txt
[vagrant@localhost test]$ ls
fileA.txt
[vagrant@localhost test]$ cp fileA.txt fileA_copy.txt
[vagrant@localhost test]$ ls
fileA.txt fileA_copy.txt

ディレクトリ先にもコピーできる。
[vagrant@localhost test]$ mkdir dir
[vagrant@localhost test]$ ls
dir fileA.txt fileA_copy.txt
[vagrant@localhost test]$ cp fileA.txt dir/fileA_cp.txt
[vagrant@localhost test]$ cd dir
[vagrant@localhost dir]$ ls
fileA_cp.txt

cpコマンドオプション -rでディレクトリごとコピー
[vagrant@localhost test]$ ls
dir fileA.txt fileA_copy.txt
[vagrant@localhost test]$ cp -r dir dir2
[vagrant@localhost test]$ ls
dir dir2 fileA.txt fileA_copy.txt
[vagrant@localhost test]$ cd dir2
[vagrant@localhost dir2]$ ls
fileA_cp.txt

-f:コピー先に同じ名前のファイルがあっても警告なしで上書きをする。
[vagrant@localhost test]$ ls
dir dir2 fileA.txt fileA_copy.txt
[vagrant@localhost test]$ cp -f fileA.txt fileA_copy.txt
[vagrant@localhost test]$ ls
dir dir2 fileA.txt fileA_copy.txt
[vagrant@localhost test]$ cp -rf dir dir2
[vagrant@localhost test]$ ls
dir dir2 fileA.txt fileA_copy.txt

なるほど、ディレクトリのコピーはcp -rfが良さそうですな。

env command

The env command sets an environment variable and executes a program.

option
– 0 : Make the end of the displayed line not a new line but a byte with a value of 0.
– i : Run the program without envrionment variables.
– u : variable name if the specified variable name is in the list of environment variables, delete it.

[vagrant@localhost ~]$ env
HOSTNAME=localhost.localdomain
NVM_CD_FLAGS=
PYENV_ROOT=/home/vagrant/.pyenv
TERM=xterm
SHELL=/bin/bash
HISTSIZE=1000
SSH_CLIENT=192.168.35.1 63549 22
SSH_TTY=/dev/pts/0
NVM_DIR=/home/vagrant/.nvm
USER=vagrant
LS_COLORS=rs=0:di=01;34:ln=01;36:mh=00:pi=40;33:so=01;35:do=01;35:bd=40;33;01:cd=40;33;01:or=40;31;01:mi=01;05;37;41:su=37;41:sg=30;43:ca=30;41:tw=30;42:ow=34;42:st=37;44:ex=01;32:*.tar=01;31:*.tgz=01;31:*.arj=01;31:*.taz=01;31:*.lzh=01;31:*.lzma=01;31:*.tlz=01;31:*.txz=01;31:*.zip=01;31:*.z=01;31:*.Z=01;31:*.dz=01;31:*.gz=01;31:*.lz=01;31:*.xz=01;31:*.bz2=01;31:*.tbz=01;31:*.tbz2=01;31:*.bz=01;31:*.tz=01;31:*.deb=01;31:*.rpm=01;31:*.jar=01;31:*.rar=01;31:*.ace=01;31:*.zoo=01;31:*.cpio=01;31:*.7z=01;31:*.rz=01;31:*.jpg=01;35:*.jpeg=01;35:*.gif=01;35:*.bmp=01;35:*.pbm=01;35:*.pgm=01;35:*.ppm=01;35:*.tga=01;35:*.xbm=01;35:*.xpm=01;35:*.tif=01;35:*.tiff=01;35:*.png=01;35:*.svg=01;35:*.svgz=01;35:*.mng=01;35:*.pcx=01;35:*.mov=01;35:*.mpg=01;35:*.mpeg=01;35:*.m2v=01;35:*.mkv=01;35:*.ogm=01;35:*.mp4=01;35:*.m4v=01;35:*.mp4v=01;35:*.vob=01;35:*.qt=01;35:*.nuv=01;35:*.wmv=01;35:*.asf=01;35:*.rm=01;35:*.rmvb=01;35:*.flc=01;35:*.avi=01;35:*.fli=01;35:*.flv=01;35:*.gl=01;35:*.dl=01;35:*.xcf=01;35:*.xwd=01;35:*.yuv=01;35:*.cgm=01;35:*.emf=01;35:*.axv=01;35:*.anx=01;35:*.ogv=01;35:*.ogx=01;35:*.aac=01;36:*.au=01;36:*.flac=01;36:*.mid=01;36:*.midi=01;36:*.mka=01;36:*.mp3=01;36:*.mpc=01;36:*.ogg=01;36:*.ra=01;36:*.wav=01;36:*.axa=01;36:*.oga=01;36:*.spx=01;36:*.xspf=01;36:
PYENV_VIRTUALENV_INIT=1
MAIL=/var/spool/mail/vagrant
PATH=/home/vagrant/.nvm/versions/node/v10.12.0/bin:/home/vagrant/.pyenv/plugins/pyenv-virtualenv/shims:/home/vagrant/.pyenv/shims:/home/vagrant/.pyenv/bin:/home/vagrant/.rbenv/shims:/home/vagrant/.rbenv/bin:/usr/local/bin:/bin:/usr/bin:/usr/local/sbin:/usr/sbin:/sbin:/home/vagrant/bin
PWD=/home/vagrant
LANG=ja_JP.UTF-8
RBENV_SHELL=bash
HISTCONTROL=ignoredups
PYENV_SHELL=bash
SHLVL=1
HOME=/home/vagrant
LOGNAME=vagrant
SSH_CONNECTION=192.168.35.1 63549 192.168.35.10 22
NVM_BIN=/home/vagrant/.nvm/versions/node/v10.12.0/bin
LESSOPEN=||/usr/bin/lesspipe.sh %s
G_BROKEN_FILENAMES=1
_=/bin/env

setting virtual host

# sudo cat /etc/httpd/conf.d/hoge.conf
<VirtualHost *:80>
DocumentRoot /var/www/html/tv
DirectoryIndex index.html index.php
ServerName www.hoge
ServerAlias on-tv.fun
CustomLog logs/hoge-access.log common
ErrorLog  logs/hoge-error.log
AddDefaultCharset UTF-8
<Directory "/var/www/html/tv/">
AllowOverride All
</Directory>
</VirtualHost>

# /etc/init.d/httpd graceful

Not reflected unless restart.
Also modify google developer console.

openssl-devel

Files needed to develop applications that use OpenSSL

OpenSSL is a toolkit to support cryptography. The openssl-devel package contains the static libraries and header files needed to develop applications that support various encryption algorithms and protocols.

yum list installed | grep ${package}

yum update “software”
→ update software

yum remove “software”
-> Uninstall software

yum list installed
-> display a list of already installed

yum list installed | grep “software name”
-> display the version name of the specified software

yum list
-> display a list of installable software

yum list updates
-> this is a list of installed software that requires update

[vagrant@localhost ~]$ yum list installed
読み込んだプラグイン:fastestmirror
Repository nodesource is listed more than once in the configuration
Repository nodesource-source is listed more than once in the configuration
Loading mirror speeds from cached hostfile
* base: ty1.mirror.newmediaexpress.com
* extras: ty1.mirror.newmediaexpress.com
* remi-safe: ftp.riken.jp
* updates: ty1.mirror.newmediaexpress.com

[vagrant@localhost ~]$ rpm -qa | grep openssl
openssl-devel-1.0.1e-57.el6.x86_64
openssl-1.0.1e-57.el6.x86_64

[vagrant@localhost ~]$ yum list installed | grep openssl
openssl.x86_64 1.0.1e-57.el6 @base
openssl-devel.x86_64 1.0.1e-57.el6 @base

centOS iptables and firewalld

firewalld can not be used with iptables.
By default, firewalld is enabled, so disabled firewalld if using iptables, you must install iptables-service and enable iptables.

If you want to configure easily to work with external services with api, firewalld.

If you want to configure easy + to work with external service with api, firewalld.

If you want to do complex things, it is better to use iptables.

[vagrant@localhost ~]$ cat /etc/redhat-release
CentOS release 6.10 (Final)

[vagrant@localhost ~]$ sudo /etc/rc.d/init.d/iptables status
iptables: ファイアウォールが稼働していません。

Linux command systemctl

NAME
       systemctl - Control the systemd system and service manager

SYNOPSIS
       systemctl [OPTIONS...] COMMAND [NAME...]

DESCRIPTION
       systemctl may be used to introspect and control the state of the "systemd" system and service manager. Please refer to systemd(1) for an introduction into the basic concepts
       and functionality this tool manages.

service start: systemctl start ${unit}
service stop: systemctl stop ${unit}
service restart: systemctl restart ${unit}
service reload: systemctl reload ${unit}
service status display: systemctl status ${unit}
service auto start: systemctl enable ${unit}
reject service auto start: sytemctl disable ${unit}
confirm service auto start: system is-enabled ${unit}
service list display: system list-unit-files –type=service
reload setting file: systemctl daemon-reload

[vagrant@localhost ~]$ ls /etc/init.d/
auditd iptables messagebus ntpdate rsyslog
blk-availability jenkins mysqld postfix sandbox
crond kdump netconsole rdisc saslauthd
elasticsearch kibana netfs rdma single
functions killall network restorecond sshd
halt lsyncd nfs rpcbind udev-post
htcacheclean lvm2-lvmetad nfs-rdma rpcgssd vboxadd
httpd lvm2-monitor nfslock rpcidmapd vboxadd-service
ip6tables mdmonitor ntpd rpcsvcgssd vboxadd-x11

[vagrant@localhost ~]$ sudo /etc/init.d/elasticsearch
使い方: /etc/init.d/elasticsearch {start|stop|status|restart|condrestart|try-restart|reload|force-reload}

[vagrant@localhost ~]$ sudo /etc/init.d/elasticsearch start
elasticsearch を起動中: OpenJDK 64-Bit Server VM warning: Option UseConcMarkSweepGC was deprecated in version 9.0 and will likely be removed in a future release.
OpenJDK 64-Bit Server VM warning: INFO: os::commit_memory(0x00000000e5f30000, 437059584, 0) failed; error=’Not enough space’ (errno=12)
#
# There is insufficient memory for the Java Runtime Environment to continue.
# Native memory allocation (mmap) failed to map 437059584 bytes for committing reserved memory.
# An error report file with more information is saved as:
# /var/log/elasticsearch/hs_err_pid10362.log
[失敗]

ls -lhs

[vagrant@localhost test]$ ls -lhs
合計 20K
4.0K -rw-rw-r– 1 vagrant vagrant 104 4月 26 08:44 2019 index.php
4.0K -rw-rw-r– 1 vagrant vagrant 18 4月 29 11:39 2019 test
12K -rw-r–r– 1 vagrant vagrant 11K 4月 24 08:36 2019 test.swf

-lオプション:ファイルの詳細も表示
-hオプション:単位を読みやすい形式で表示
-sオプション:ファイルサイズ順で表示

なるほどーーーーーーー