Browser Tests

Introduction
Laravel Dusk provides an expressive, easy-to-use browser automation and testing API. By default, Dusk does not require you to install JDK or Selenium on your machine. Instead, Dusk uses a standalone ChromeDriver installation. However, you are free to utilize any other Selenium compatible driver you wish.

composer require –dev laravel/dusk

php artisan dusk:install

A Browser directory will be created within your tests directory and will contain an example test. Next, set the APP_URL environment variable in your .env file. This value should match the URL you use to access your application in a browser.

To run your tests, use the dusk Artisan command. The dusk command accepts any argument that is also accepted by the phpunit command:

php artisan dusk

php artisan dusk:fails

Using Other Browsers
By default, Dusk uses Google Chrome and a standalone ChromeDriver installation to run your browser tests. However, you may start your own Selenium server and run your tests against any browser you wish.

To get started, open your tests/DuskTestCase.php file, which is the base Dusk test case for your application. Within this file, you can remove the call to the startChromeDriver method. This will stop Dusk from automatically starting the ChromeDriver:

public static function prepare()
{
    // static::startChromeDriver();
}

protected function driver()
{
    return RemoteWebDriver::create(
        'http://localhost:4444/wd/hub', DesiredCapabilities::phantomjs()
    );
}

Getting Started
Generating Tests
To generate a Dusk test, use the dusk:make Artisan command. The generated test will be placed in the tests/Browser directory:

php artisan dusk:make LoginTest

Environment Handling
To force Dusk to use its own environment file when running tests, create a .env.dusk.{environment} file in the root of your project. For example, if you will be initiating the dusk command from your local environment, you should create a .env.dusk.local file.

When running tests, Dusk will back-up your .env file and rename your Dusk environment to .env. Once the tests have completed, your .env file will be restored.

Creating Browsers
To get started, let’s write a test that verifies we can log into our application. After generating a test, we can modify it to navigate to the login page, enter some credentials, and click the “Login” button. To create a browser instance, call the browse method:

namespace Tests\Browser;

use App\User;
use Tests\DuskTestCase;
use Laravel\Dusk\Chrome;
use Illuminate\Foundation\Testing\DatabaseMigrations;

class ExampleTest extends DuskTestCase
{
    use DatabaseMigrations;

    /**
     * A basic browser test example.
     *
     * @return void
     */
    public function testBasicExample()
    {
        $user = factory(User::class)->create([
            'email' => 'taylor@laravel.com',
        ]);

        $this->browse(function ($browser) use ($user) {
            $browser->visit('/login')
                    ->type('email', $user->email)
                    ->type('password', 'secret')
                    ->press('Login')
                    ->assertPathIs('/home');
        });
    }
}
$this->browse(function ($first, $second) {
    $first->loginAs(User::find(1))
          ->visit('/home')
          ->waitForText('Message');

    $second->loginAs(User::find(2))
           ->visit('/home')
           ->waitForText('Message')
           ->type('message', 'Hey Taylor')
           ->press('Send');

    $first->waitForText('Hey Taylor')
          ->assertSee('Jeffrey Way');
});
$this->browse(function ($first, $second) {
    $first->loginAs(User::find(1))
          ->visit('/home');
});

Database Migrations
When your test requires migrations, like the authentication example above, you should never use the RefreshDatabase trait. The RefreshDatabase trait leverages database transactions which will not be applicable across HTTP requests. Instead, use the DatabaseMigrations trait:

namespace Tests\Browser;

use App\User;
use Tests\DuskTestCase;
use Laravel\Dusk\Chrome;
use Illuminate\Foundation\Testing\DatabaseMigrations;

class ExampleTest extends DuskTestCase
{
    use DatabaseMigrations;
}

vailable Assertions
Dusk provides a variety of assertions that you may make against your application. All of the available assertions are documented in the list below:

assertTitleassertTitleContainsassertUrlIsassertSchemeIsassertSchemeIsNotassertHostIsassertHostIsNotassertPortIsassertPortIsNotassertPathBeginsWithassertPathIsassertPathIsNotassertRouteIsassertQueryStringHasassertQueryStringMissingassertFragmentIsassertFragmentBeginsWithassertFragmentIsNotassertHasCookieassertCookieMissingassertCookieValueassertPlainCookieValueassertSeeassertDontSeeassertSeeInassertDontSeeInassertSourceHasassertSourceMissingassertSeeLinkassertDontSeeLinkassertInputValueassertInputValueIsNotassertCheckedassertNotCheckedassertRadioSelectedassertRadioNotSelectedassertSelectedassertNotSelectedassertSelectHasOptionsassertSelectMissingOptionsassertSelectHasOptionassertValueassertVisibleassertPresentassertMissingassertDialogOpenedassertEnabledassertDisabledassertFocusedassertNotFocusedassertVueassertVueIsNotassertVueContainsassertVueDoesNotContain

Laravel Cashier

Introduction
Laravel Cashier provides an expressive, fluent interface to Stripe’s and Braintree’s subscription billing services. It handles almost all of the boilerplate subscription billing code you are dreading writing. In addition to basic subscription management, Cashier can handle coupons, swapping subscription, subscription “quantities”, cancellation grace periods, and even generate invoice PDFs.

Note: If you’re only performing “one-off” charges and do not offer subscriptions, you should not use Cashier. Instead, use the Stripe and Braintree SDKs directly.

Stripe
Composer
First, add the Cashier package for Stripe to your dependencies:
composer require laravel/cashier

Database Migrations
Before using Cashier, we’ll also need to prepare the database. We need to add several columns to your users table and create a new subscriptions table to hold all of our customer’s subscriptions:

Schema::table('users', function ($table) {
    $table->string('stripe_id')->nullable()->collation('utf8mb4_bin');
    $table->string('card_brand')->nullable();
    $table->string('card_last_four', 4)->nullable();
    $table->timestamp('trial_ends_at')->nullable();
});

Schema::create('subscriptions', function ($table) {
    $table->increments('id');
    $table->unsignedInteger('user_id');
    $table->string('name');
    $table->string('stripe_id')->collation('utf8mb4_bin');
    $table->string('stripe_plan');
    $table->integer('quantity');
    $table->timestamp('trial_ends_at')->nullable();
    $table->timestamp('ends_at')->nullable();
    $table->timestamps();
});

Billable Model
Next, add the Billable trait to your model definition. This trait provides various methods to allow you to perform common billing tasks, such as creating subscriptions, applying coupons, and updating credit card information:

use Laravel\Cashier\Billable;
class User extends Authenticatable
{
    use Billable;
}
'stripe' => [
    'model'  => App\User::class,
    'key' => env('STRIPE_KEY'),
    'secret' => env('STRIPE_SECRET'),
],

Plan Credit Coupon
Before using Cashier with Braintree, you will need to define a plan-credit discount in your Braintree control panel. This discount will be used to properly prorate subscriptions that change from yearly to monthly billing, or from monthly to yearly billing.

The discount amount configured in the Braintree control panel can be any value you wish, as Cashier will override the defined amount with our own custom amount each time we apply the coupon. This coupon is needed since Braintree does not natively support prorating subscriptions across subscription frequencies.

Database Migrations
Before using Cashier, we’ll need to prepare the database. We need to add several columns to your users table and create a new subscriptions table to hold all of our customer’s subscriptions:

Schema::table(‘users’, function ($table) {
$table->string(‘braintree_id’)->nullable();
$table->string(‘paypal_email’)->nullable();
$table->string(‘card_brand’)->nullable();
$table->string(‘card_last_four’)->nullable();
$table->timestamp(‘trial_ends_at’)->nullable();
});

Schema::create(‘subscriptions’, function ($table) {
$table->increments(‘id’);
$table->unsignedInteger(‘user_id’);
$table->string(‘name’);
$table->string(‘braintree_id’);
$table->string(‘braintree_plan’);
$table->integer(‘quantity’);
$table->timestamp(‘trial_ends_at’)->nullable();
$table->timestamp(‘ends_at’)->nullable();
$table->timestamps();
});

Billable Model
Next, add the Billable trait to your model definition:

use Laravel\Cashier\Billable;

class User extends Authenticatable
{
use Billable;
}

braintree’ => [
‘model’ => App\User::class,
‘environment’ => env(‘BRAINTREE_ENV’),
‘merchant_id’ => env(‘BRAINTREE_MERCHANT_ID’),
‘public_key’ => env(‘BRAINTREE_PUBLIC_KEY’),
‘private_key’ => env(‘BRAINTREE_PRIVATE_KEY’),
],

Subscriptions
Creating Subscriptions
To create a subscription, first retrieve an instance of your billable model, which typically will be an instance of App\User. Once you have retrieved the model instance, you may use the newSubscription method to create the model’s subscription:

$user = User::find(1);
$user->newSubscription(‘main’, ‘premium’)->create($stripeToken);

Checking Subscription Status
Once a user is subscribed to your application, you may easily check their subscription status using a variety of convenient methods. First, the subscribed method returns true if the user has an active subscription, even if the subscription is currently within its trial period:

if ($user->subscribed(‘main’)) {
//
}

If you would like to determine if a user is still within their trial period, you may use the onTrial method. This method can be useful for displaying a warning to the user that they are still on their trial period:

Changing Plans
After a user is subscribed to your application, they may occasionally want to change to a new subscription plan. To swap a user to a new subscription, pass the plan’s identifier to the swap method:

Handling Stripe Webhooks
Both Stripe and Braintree can notify your application of a variety of events via webhooks. To handle Stripe webhooks, define a route that points to Cashier’s webhook controller. This controller will handle all incoming webhook requests and dispatch them to the proper controller method:

Route::post(
    'stripe/webhook',
    '\Laravel\Cashier\Http\Controllers\WebhookController@handleWebhook'
);

Laravel Mocking

Introduction
When testing Laravel applications, you may wish to “mock” certain aspects of your application so they are not actually executed during a given test. For example, when testing a controller that dispatches an event, you may wish to mock the event listeners so they are not actually executed during the test. This allows you to only test the controller’s HTTP response without worrying about the execution of the event listeners, since the event listeners can be tested in their own test case.

Laravel provides helpers for mocking events, jobs, and facades out of the box. These helpers primarily provide a convenience layer over Mockery so you do not have to manually make complicated Mockery method calls. Of course, you are free to use Mockery or PHPUnit to create your own mocks or spies.

Bus Fake
As an alternative to mocking, you may use the Bus facade’s fake method to prevent jobs from being dispatched. When using fakes, assertions are made after the code under test is executed:

namespace Tests\Feature;
use Tests\TestCase;
use App\Jobs\ShipOrder;
use Illuminate\Support\Facades\Bus;
use Illuminate\Foundation\Testing\RefreshDatabase;
use Illuminate\Foundation\Testing\WithoutMiddleware;
class ExampleTest extends TestCase
{
    public function testOrderShipping()
    {
        Bus::fake();
        // Perform order shipping...
        Bus::assertDispatched(ShipOrder::class, function ($job) use ($order) {
            return $job->order->id === $order->id;
        });
        // Assert a job was not dispatched...
        Bus::assertNotDispatched(AnotherJob::class);
    }
}

Event Fake
As an alternative to mocking, you may use the Event facade’s fake method to prevent all event listeners from executing. You may then assert that events were dispatched and even inspect the data they received. When using fakes, assertions are made after the code under test is executed:

namespace Tests\Feature;
use Tests\TestCase;
use App\Events\OrderShipped;
use App\Events\OrderFailedToShip;
use Illuminate\Support\Facades\Event;
use Illuminate\Foundation\Testing\RefreshDatabase;
use Illuminate\Foundation\Testing\WithoutMiddleware;
class ExampleTest extends TestCase
{
    /**
     * Test order shipping.
     */
    public function testOrderShipping()
    {
        Event::fake();
        // Perform order shipping...
        Event::assertDispatched(OrderShipped::class, function ($e) use ($order) {
            return $e->order->id === $order->id;
        });
        // Assert an event was dispatched twice...
        Event::assertDispatched(OrderShipped::class, 2);
        // Assert an event was not dispatched...
        Event::assertNotDispatched(OrderFailedToShip::class);
    }
}

After calling Event::fake(), no event listeners will be executed. So, if your tests use model factories that rely on events, such as creating a UUID during a model’s creating event, you should call Event::fake() after using your factories.

public function testOrderProcess()
{
    Event::fake([
        OrderCreated::class,
    ]);

    $order = factory(Order::class)->create();

    Event::assertDispatched(OrderCreated::class);

    // Other events are dispatched as normal...
    $order->update([...]);
}
namespace Tests\Feature;

use App\Order;
use Tests\TestCase;
use App\Events\OrderCreated;
use Illuminate\Support\Facades\Event;
use Illuminate\Foundation\Testing\RefreshDatabase;
use Illuminate\Foundation\Testing\WithoutMiddleware;
class ExampleTest extends TestCase
{
    /**
     * Test order process.
     */
    public function testOrderProcess()
    {
        $order = Event::fakeFor(function () {
            $order = factory(Order::class)->create();

            Event::assertDispatched(OrderCreated::class);

            return $order;
        });

        // Events are dispatched as normal and observers will run ...
        $order->update([...]);
    }
}

Resetting The Database After Each Test

It is often useful to reset your database after each test so that data from a previous test does not interfere with subsequent tests. The RefreshDatabase trait takes the most optimal approach to migrating your test database depending on if you are using an in-memory database or a traditional database. Use the trait on your test class and everything will be handled for you:

namespace Tests\Feature;

use Tests\TestCase;
use Illuminate\Foundation\Testing\RefreshDatabase;
use Illuminate\Foundation\Testing\WithoutMiddleware;

class ExampleTest extends TestCase
{
    use RefreshDatabase;

    /**
     * A basic functional test example.
     *
     * @return void
     */
    public function testBasicExample()
    {
        $response = $this->get('/');

        // ...
    }
}

Writing Factories
When testing, you may need to insert a few records into your database before executing your test. Instead of manually specifying the value of each column when you create this test data, Laravel allows you to define a default set of attributes for each of your Eloquent models using model factories. To get started, take a look at the database/factories/UserFactory.php file in your application. Out of the box, this file contains one factory definition:

use Faker\Generator as Faker;
$factory->define(App\User::class, function (Faker $faker) {
    return [
        'name' => $faker->name,
        'email' => $faker->unique()->safeEmail,
        'email_verified_at' => now(),
        'password' => '$2y$10$TKh8H1.PfQx37YgCzwiKb.KjNyWgaHb9cbcoQgdIVFlYg7B77UdFm', // secret
        'remember_token' => str_random(10),
    ];
});

Within the Closure, which serves as the factory definition, you may return the default test values of all attributes on the model. The Closure will receive an instance of the Faker PHP library, which allows you to conveniently generate various kinds of random data for testing.
You may also create additional factory files for each model for better organization. For example, you could create UserFactory.php and CommentFactory.php files within your database/factories directory. All of the files within the factories directory will automatically be loaded by Laravel.

Using Factories
Creating Models
Once you have defined your factories, you may use the global factory function in your tests or seed files to generate model instances. So, let’s take a look at a few examples of creating models. First, we’ll use the make method to create models but not save them to the database:

public function testDatabase()
{
    $user = factory(App\User::class)->make();

    // Use model in tests...
}
// Create three App\User instances...
$users = factory(App\User::class, 3)->make();
$users = factory(App\User::class, 5)->states('delinquent')->make();
$users = factory(App\User::class, 5)->states('premium', 'delinquent')->make();
$user = factory(App\User::class)->make([
    'name' => 'Abigail',
]);

Database Testing

Introduction
Laravel provides a variety of helpful tools to make it easier to test your database driven applications. First, you may use the assertDatabaseHas helper to assert that data exists in the database matching a given set of criteria. For example, if you would like to verify that there is a record in the users table with the email value of sally@example.com, you can do the following:

public function testDatabase()
{
    // Make call to application...

    $this->assertDatabaseHas('users', [
        'email' => 'sally@example.com'
    ]);
}

You can also use the assertDatabaseMissing helper to assert that data does not exist in the database.

Of course, the assertDatabaseHas method and other helpers like it are for convenience. You are free to use any of PHPUnit’s built-in assertion methods to supplement your tests.

Generating Factories
To create a factory, use the make:factory Artisan command:
php artisan make:factory PostFactory
The new factory will be placed in your database/factories directory.
The –model option may be used to indicate the name of the model created by the factory. This option will pre-fill the generated factory file with the given model:
php artisan make:factory PostFactory –model=Post

Resetting The Database After Each Test
It is often useful to reset your database after each test so that data from a previous test does not interfere with subsequent tests. The RefreshDatabase trait takes the most optimal approach to migrating your test database depending on if you are using an in-memory database or a traditional database. Use the trait on your test class and everything will be handled for you:

Browser Tests (Laravel Dusk)

Introduction
Laravel Dusk provides an expressive, easy-to-use browser automation and testing API. By default, Dusk does not require you to install JDK or Selenium on your machine. Instead, Dusk uses a standalone ChromeDriver installation. However, you are free to utilize any other Selenium compatible driver you wish.

Seleniumはwebのuiテスト自動化。
Installation
To get started, you should add the laravel/dusk Composer dependency to your project:
composer require –dev laravel/dusk

If you are manually registering Dusk’s service provider, you should never register it in your production environment, as doing so could lead to arbitrary users being able to authenticate with your application.

After installing the Dusk package, run the dusk:install Artisan command:
php artisan dusk:install

A Browser directory will be created within your tests directory and will contain an example test. Next, set the APP_URL environment variable in your .env file. This value should match the URL you use to access your application in a browser.

To run your tests, use the dusk Artisan command. The dusk command accepts any argument that is also accepted by the phpunit command:

php artisan dusk
If you had test failures the last time you ran the dusk command, you may save time by re-running the failing tests first using the dusk:fails command:
php artisan dusk:fails

Using Other Browsers
By default, Dusk uses Google Chrome and a standalone ChromeDriver installation to run your browser tests. However, you may start your own Selenium server and run your tests against any browser you wish.

To get started, open your tests/DuskTestCase.php file, which is the base Dusk test case for your application. Within this file, you can remove the call to the startChromeDriver method. This will stop Dusk from automatically starting the ChromeDriver:

public static function prepare()
{
    // static::startChromeDriver();
}

Next, you may modify the driver method to connect to the URL and port of your choice. In addition, you may modify the “desired capabilities” that should be passed to the WebDriver:

protected function driver()
{
    return RemoteWebDriver::create(
        'http://localhost:4444/wd/hub', DesiredCapabilities::phantomjs()
    );
}

php artisan dusk
If you had test failures the last time you ran the dusk command, you may save time by re-running the failing tests first using the dusk:fails command:

php artisan dusk:fails
The dusk command accepts any argument that is normally accepted by the PHPUnit test runner, allowing you to only run the tests for a given group, etc:

php artisan dusk –group=foo

protected function driver()
{
    return RemoteWebDriver::create(
        'http://localhost:9515', DesiredCapabilities::chrome()
    );
}

Environment Handling
To force Dusk to use its own environment file when running tests, create a .env.dusk.{environment} file in the root of your project. For example, if you will be initiating the dusk command from your local environment, you should create a .env.dusk.local file.

When running tests, Dusk will back-up your .env file and rename your Dusk environment to .env. Once the tests have completed, your .env file will be restored.

$this->browse(function ($first, $second) {
    $first->loginAs(User::find(1))
          ->visit('/home')
          ->waitForText('Message');

    $second->loginAs(User::find(2))
           ->visit('/home')
           ->waitForText('Message')
           ->type('message', 'Hey Taylor')
           ->press('Send');

    $first->waitForText('Hey Taylor')
          ->assertSee('Jeffrey Way');
});

Resizing Browser Windows
You may use the resize method to adjust the size of the browser window:

$browser->resize(1920, 1080);
The maximize method may be used to maximize the browser window:

$browser->maximize();

Authentication
Often, you will be testing pages that require authentication. You can use Dusk’s loginAs method in order to avoid interacting with the login screen during every test. The loginAs method accepts a user ID or user model instance:

$this->browse(function ($first, $second) {
    $first->loginAs(User::find(1))
          ->visit('/home');
});

Database Migrations
When your test requires migrations, like the authentication example above, you should never use the RefreshDatabase trait. The RefreshDatabase trait leverages database transactions which will not be applicable across HTTP requests. Instead, use the DatabaseMigrations trait:

namespace Tests\Browser;

use App\User;
use Tests\DuskTestCase;
use Laravel\Dusk\Chrome;
use Illuminate\Foundation\Testing\DatabaseMigrations;

class ExampleTest extends DuskTestCase
{
use DatabaseMigrations;
}

Text, Values, & Attributes
Retrieving & Setting Values
Dusk provides several methods for interacting with the current display text, value, and attributes of elements on the page. For example, to get the “value” of an element that matches a given selector, use the value method:

Retrieving Text
The text method may be used to retrieve the display text of an element that matches the given selector:
$text = $browser->text(‘selector’);

Retrieving Attributes
Finally, the attribute method may be used to retrieve an attribute of an element matching the given selector:
$attribute = $browser->attribute(‘selector’, ‘value’);

Using Forms
Typing Values
Dusk provides a variety of methods for interacting with forms and input elements. First, let’s take a look at an example of typing text into an input field:

$browser->type(’email’, ‘taylor@laravel.com’);
Note that, although the method accepts one if necessary, we are not required to pass a CSS selector into the type method. If a CSS selector is not provided, Dusk will search for an input field with the given name attribute. Finally, Dusk will attempt to find a textarea with the given name attribute.

To append text to a field without clearing its content, you may use the append method:
$browser->type(‘tags’, ‘foo’)
->append(‘tags’, ‘, bar, baz’);
You may clear the value of an input using the clear method:
$browser->clear(’email’);

Laravel Console Tests

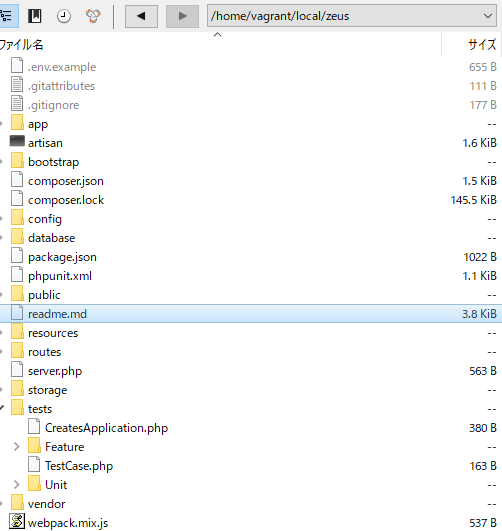
Laravelのドキュメント見てて思ったが、framework以外でもソースコード使用する場合、githubのdocumentやreadme.mdなどは見ておいた方が良さそうだ。

Expecting Input / Output
Laravel allows you to easily “mock” user input for your console commands using the expectsQuestion method. In addition, you may specify the exit code and text that you expect to be output by the console command using the assertExitCode and expectsOutput methods. For example, consider the following console command:

Artisan::command('question', function () {
    $name = $this->ask('What is your name?');

    $language = $this->choice('Which language do you program in?', [
        'PHP',
        'Ruby',
        'Python',
    ]);

    $this->line('Your name is '.$name.' and you program in '.$language.'.');
});
public function test_console_command()
{
    $this->artisan('question')
         ->expectsQuestion('What is your name?', 'Taylor Otwell')
         ->expectsQuestion('Which language do you program in?', 'PHP')
         ->expectsOutput('Your name is Taylor Otwell and you program in PHP.')
         ->assertExitCode(0);
}

Laravel HTTP Tests

Laravel provides a very fluent API for making HTTP requests to your application and examining the output. For example, take a look at the test defined below:

namespace Tests\Feature;
use Tests\TestCase;
use Illuminate\Foundation\Testing\RefreshDatabase;
use Illuminate\Foundation\Testing\WithoutMiddleware;
class ExampleTest extends TestCase
{
    /**
     * A basic test example.
     *
     * @return void
     */
    public function testBasicTest()
    {
        $response = $this->get('/');
        $response->assertStatus(200);
    }
}

The get method makes a GET request into the application, while the assertStatus method asserts that the returned response should have the given HTTP status code. In addition to this simple assertion, Laravel also contains a variety of assertions for inspecting the response headers, content, JSON structure, and more.

You may use the withHeaders method to customize the request’s headers before it is sent to the application. This allows you to add any custom headers you would like to the request:

class ExampleTest extends TestCase
{
    /**
     * A basic functional test example.
     *
     * @return void
     */
    public function testBasicExample()
    {
        $response = $this->withHeaders([
            'X-Header' => 'Value',
        ])->json('POST', '/user', ['name' => 'Sally']);
        $response
            ->assertStatus(201)
            ->assertJson([
                'created' => true,
            ]);
    }
}

Session / Authentication
Laravel provides several helpers for working with the session during HTTP testing. First, you may set the session data to a given array using the withSession method. This is useful for loading the session with data before issuing a request to your application:

class ExampleTest extends TestCase
{
    public function testApplication()
    {
        $response = $this->withSession(['foo' => 'bar'])
                         ->get('/');
    }
}

Of course, one common use of the session is for maintaining state for the authenticated user. The actingAs helper method provides a simple way to authenticate a given user as the current user. For example, we may use a model factory to generate and authenticate a user:

use App\User;

class ExampleTest extends TestCase
{
    public function testApplication()
    {
        $user = factory(User::class)->create();

        $response = $this->actingAs($user)
                         ->withSession(['foo' => 'bar'])
                         ->get('/');
    }
}

Laravel also provides several helpers for testing JSON APIs and their responses. For example, the json, get, post, put, patch, and delete methods may be used to issue requests with various HTTP verbs. You may also easily pass data and headers to these methods. To get started, let’s write a test to make a POST request to /user and assert that the expected data was returned:

class ExampleTest extends TestCase
{
    /**
     * A basic functional test example.
     *
     * @return void
     */
    public function testBasicExample()
    {
        $response = $this->json('POST', '/user', ['name' => 'Sally']);

        $response
            ->assertStatus(201)
            ->assertJson([
                'created' => true,
            ]);
    }
}

The assertJson method converts the response to an array and utilizes PHPUnit::assertArraySubset to verify that the given array exists within the JSON response returned by the application. So, if there are other properties in the JSON response, this test will still pass as long as the given fragment is present.

Verifying An Exact JSON Match
If you would like to verify that the given array is an exact match for the JSON returned by the application, you should use the assertExactJson method:

class ExampleTest extends TestCase
{
    /**
     * A basic functional test example.
     *
     * @return void
     */
    public function testBasicExample()
    {
        $response = $this->json('POST', '/user', ['name' => 'Sally']);

        $response
            ->assertStatus(201)
            ->assertExactJson([
                'created' => true,
            ]);
    }

Testing File Uploads
The Illuminate\Http\UploadedFile class provides a fake method which may be used to generate dummy files or images for testing. This, combined with the Storage facade’s fake method greatly simplifies the testing of file uploads. For example, you may combine these two features to easily test an avatar upload form:

namespace Tests\Feature;

use Tests\TestCase;
use Illuminate\Http\UploadedFile;
use Illuminate\Support\Facades\Storage;
use Illuminate\Foundation\Testing\RefreshDatabase;
use Illuminate\Foundation\Testing\WithoutMiddleware;

class ExampleTest extends TestCase
{
    public function testAvatarUpload()
    {
        Storage::fake('avatars');

        $file = UploadedFile::fake()->image('avatar.jpg');

        $response = $this->json('POST', '/avatar', [
            'avatar' => $file,
        ]);

        // Assert the file was stored...
        Storage::disk('avatars')->assertExists($file->hashName());

        // Assert a file does not exist...
        Storage::disk('avatars')->assertMissing('missing.jpg');
    }
}

Fake File Customization
When creating files using the fake method, you may specify the width, height, and size of the image in order to better test your validation rules:

UploadedFile::fake()->image('avatar.jpg', $width, $height)->size(100);
UploadedFile::fake()->create('document.pdf', $sizeInKilobytes);

Response Assertions
Laravel provides a variety of custom assertion methods for your PHPUnit tests. These assertions may be accessed on the response that is returned from the json, get, post, put, and delete test methods:
assertCookieassertCookieExpiredassertCookieNotExpiredassertCookieMissingassertDontSeeassertDontSeeTextassertExactJsonassertForbiddenassertHeaderassertHeaderMissingassertJsonassertJsonCountassertJsonFragmentassertJsonMissingassertJsonMissingExactassertJsonStructureassertJsonValidationErrorsassertLocationassertNotFoundassertOkassertPlainCookieassertRedirectassertSeeassertSeeInOrderassertSeeTextassertSeeTextInOrderassertSessionHasassertSessionHasAllassertSessionHasErrorsassertSessionHasErrorsInassertSessionHasNoErrorsassertSessionMissingassertStatusassertSuccessfulassertViewHasassertViewHasAllassertViewIs

Authentication Assertions
Laravel also provides a variety of authentication related assertions for your PHPUnit tests:

Method Description
$this->assertAuthenticated($guard = null); Assert that the user is authenticated.
$this->assertGuest($guard = null); Assert that the user is not authenticated.
$this->assertAuthenticatedAs($user, $guard = null); Assert that the given user is authenticated.
$this->assertCredentials(array $credentials, $guard = null); Assert that the given credentials are valid.
$this->assertInvalidCredentials(array $credentials, $guard = null); Assert that the given credentials are invalid.

Laravel Testing: Getting Started

Laravel is built with testing in mind. In fact, support for testing with PHPUnit is included out of the box and a phpunit.xml file is already set up for your application. The framework also ships with convenient helper methods that allow you to expressively test your applications.

By default, your application’s tests directory contains two directories: Feature and Unit. Unit tests are tests that focus on a very small, isolated portion of your code. In fact, most unit tests probably focus on a single method. Feature tests may test a larger portion of your code, including how several objects interact with each other or even a full HTTP request to a JSON endpoint.

An ExampleTest.php file is provided in both the Feature and Unit test directories. After installing a new Laravel application, run phpunit on the command line to run your tests.

When running tests via phpunit, Laravel will automatically set the configuration environment to testing because of the environment variables defined in the phpunit.xml file. Laravel also automatically configures the session and cache to the array driver while testing, meaning no session or cache data will be persisted while testing.

You are free to define other testing environment configuration values as necessary. The testing environment variables may be configured in the phpunit.xml file, but make sure to clear your configuration cache using the config:clear Artisan command before running your tests!

In addition, you may create a .env.testing file in the root of your project. This file will override the .env file when running PHPUnit tests or executing Artisan commands with the --env=testing option.

To create a new test case, use the make:test Artisan command:

// Create a test in the Feature directory…
php artisan make:test UserTest

// Create a test in the Unit directory…
php artisan make:test UserTest –unit
Once the test has been generated, you may define test methods as you normally would using PHPUnit. To run your tests, execute the phpunit command from your terminal:

namespace Tests\Unit;
use Tests\TestCase;
use Illuminate\Foundation\Testing\RefreshDatabase;
class ExampleTest extends TestCase
{
    /**
     * A basic test example.
     *
     * @return void
     */
    public function testBasicTest()
    {
        $this->assertTrue(true);
    }
}

Eloquent: Serialization

Eloquent: Serializationを学んでいきます。
Serializing Models & Collections
Serializing To Arrays

To convert a model and its loaded relationships to an array, you should use the toArray method. This method is recursive, so all attributes and all relations (including the relations of relations) will be converted to arrays:

$user = App\User::with('roles')->first();
return $user->toArray();
$users = App\User::all();
return $users->toArray();
$user = App\User::find(1);
return $user->toJson();
return $user->toJson(JSON_PRETTY_PRINT);

Hiding Attributes From JSON
Sometimes you may wish to limit the attributes, such as passwords, that are included in your model’s array or JSON representation. To do so, add a $hidden property to your model:

namespace App;
use Illuminate\Database\Eloquent\Model;
class User extends Model
{
    /**
     * The attributes that should be hidden for arrays.
     *
     * @var array
     */
    protected $hidden = ['password'];
}
namespace App;
use Illuminate\Database\Eloquent\Model;
class User extends Model
{
    /**
     * The attributes that should be visible in arrays.
     *
     * @var array
     */
    protected $visible = ['first_name', 'last_name'];
}
namespace App;
use Illuminate\Database\Eloquent\Model;
class User extends Model
{
    /**
     * Get the administrator flag for the user.
     *
     * @return bool
     */
    public function getIsAdminAttribute()
    {
        return $this->attributes['admin'] == 'yes';
    }
}
namespace App\Providers;
use Illuminate\Support\Carbon;
use Illuminate\Support\ServiceProvider;
class AppServiceProvider extends ServiceProvider
{
    /**
     * Perform post-registration booting of services.
     *
     * @return void
     */
    public function boot()
    {
        Carbon::serializeUsing(function ($carbon) {
            return $carbon->format('U');
        });
    }

    /**
     * Register bindings in the container.
     *
     * @return void
     */
    public function register()
    {
        //
    }
}