NuxtJSを触ってみる

公式: NUXT JS
Vue.js に基づいたプログレッシブフレームワーク
Universalモード、SPAモード、Generateモードの3つのモードで柔軟にサイトを設計できる

### 機能
– Vue ファイルで記述できること(*.vue)
– コードを自動的に分割すること
– サーバーサイドレンダリング
– 非同期データをハンドリングするパワフルなルーティング
– 静的ファイルの配信
– ES2015+ のトランスパイレーション
– JS と CSS のバンドル及びミニファイ化
– 要素の管理
– 開発モードにおけるホットリローディング
– プリプロセッサ: Sass, Less, Stylus など
– HTTP/2 push headers ready
– モジュール構造で拡張できること

### 動作
Vue2(Vue本体), Vue Router(Routing), Vuex(Vue版Flux), Vue Server Render(ServerSideレンダリング), Vue Meta(メタ情報管理)

### NuxtJSを始めよう
$ cat /etc/os-release
NAME=”Ubuntu”
VERSION=”18.04.4 LTS (Bionic Beaver)”
// 以下略

// npm, nodejsインストール
$ sudo apt install -y nodejs npm
$ node -v
v8.10.0
$ npm -v
3.5.2

// npmを最新化
$ sudo npm install npm@latest -g

$ sudo npm install -g vue-cli // sudo権限がないとエラーになる

$ vue init nuxt-community/starter-template sample
? Project name sample
? Project description Nuxt.js project
? Author hpscript

$ cd sample
$ ls
README.md components middleware package.json plugins store
assets layouts nuxt.config.js pages static
$ sudo npm install
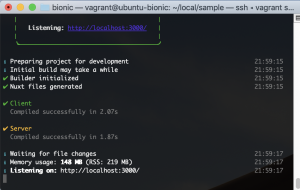
$ sudo npm run dev

> sample@1.0.0 dev /home/vagrant/local/sample
> nuxt

FATAL Unexpected token { 13:12:14

} catch {
^

ん? nodeがv8.10.0では古いよう。
最新に上げます。

$ sudo npm install n -g
$ sudo n stable
$ sudo apt purge -y nodejs npm
$ exec $SHELL -l
$ node -v
v12.18.3
$ npm -v
6.14.6
$ sudo npm run dev

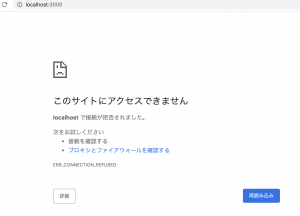
vagrantのprivate networkが192.168.33.10なので、
nust.config.jsのサーバの設定も変更する必要があります。

module.exports = {
  // 省略
  server: {
    port: 8000, // デフォルト: 3000
    host: '192.168.33.10' // デフォルト: localhost
  },
  // 省略 
}

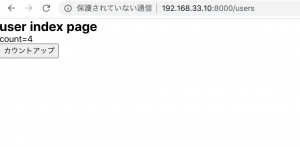
/pages/users/index.vue

<template>
	<section class="container">
		<div>
			<h1>user index page</h1>
			<p>count={{count}}</p>
			<button @click="addCount">カウントアップ</button>
		</div>
	</section>
</template>

<script>
export default {
	computed: {
		count() { return this.$store.state.counter.count }
	},
	methods: {
		addCount(e){
			this.$store.commit('counter/add')
		}
	}
}
</script>

/store/counter.js

export const state = () => ({
	count: 0
})

export const mutations = {
	add (state){
		state.count += 1
	}
}

Vue.jsでtinymce-vueを使ってv-modelをaxiosでpost

問題:TinyMCEのTextareaをVue.jsのv-modelで取得してaxiosでpostしようとしたが上手くいかない。
->TinyMCEでVue.jsを使えるようにできるパッケージ[tinymce-vue]があるらしい

まず、Vue.jsでのtinymce-vueの使い方のテスト。

$ npm install –dev @tinymce/tinymce-vue

/node_modules/@tinymce/tinymce-vue/lib/browser/tinymce-vue.min.js
の 「tinymce-vue.min.js」を任意の場所(tinymce-vue/)に移動

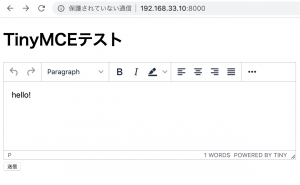
tinymce-vue.min.jsを読み込んで、後はTinyMCEのQuick Guideの通りに書いてみる。

    <h1>TinyMCEテスト</h1>
    <form method="post" action="confirm.php">
    <div id="app">
        <editor
          api-key="no-api-key"
          :init="{
            heigt: 500,
            menubar: false,
            plugins: &#91;
               'advlist autolink lists link image charmap print preview anchor',
               'searchreplace visualblocks code fullscreen',
               'insertdatetime media table paste code help wordcount'
             &#93;,
             toolbar:
               'undo redo | formatselect | bold italic backcolor | \
               alignleft aligncenter alignright alignjustify | \
               bullist numlist outdent indent | removeformat | help'
          }"
          :other_options="other_options"
          v-model="message"
        />
    </div>
    <input type="submit" value="送信">
    </form>
<script src="tinymce-vue/tinymce-vue.min.js"></script>
<script src="https://cdn.jsdelivr.net/npm/vue/dist/vue.js"></script>
<script>
var app = new Vue({
    el: '#app',
    components: {
        'editor': Editor
        
    },
    data: {
        message: 'hello!',
        other_options: {
            language_url: 'tinymce-vue/ja.js'
        }
    },
})
</script>

あれ? v-modelは上手くいってる? other_optionsでlanguage_urlを指定しているけど、これは上手くいってない??

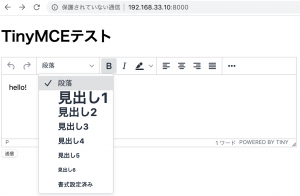
あ、optionではなく、:initの方に書いたらlanguage_urlもできた。

<editor
          api-key="no-api-key"
          :init="{
            heigt: 500,
            menubar: false,
            language: 'ja',
            language_url: 'js/tinymce/langs/ja.js',
            plugins: &#91;
               'advlist autolink lists link image charmap print preview anchor',
               'searchreplace visualblocks code fullscreen',
               'insertdatetime media table paste code help wordcount'
             &#93;,
             toolbar:
               'undo redo | formatselect | bold italic backcolor | \
               alignleft aligncenter alignright alignjustify | \
               bullist numlist outdent indent | removeformat | help',
            
          }"
          v-model="message"
        />

これを実装してテスト
VueでTinyMCE使えないとなり一瞬諦めかけましたが、一つ一つ公式のチュートリアル、Githubからクリアーしていくと、意外と簡単に行けました。
やっぱり入力フォームに絵文字がないとね🙋‍♂️

Vue.jsでTinyMCEを使いたい

– TinyMCEのTextareaをVue.jsのv-modelで取得してaxiosでpostしようとしたが上手くいかない。
– TinyMCEでVue.jsを使えるようにできるパッケージがあるらしい。

Official: tinymce-vue
Get started: TinyMCE Vue.js integration quick start guide
Reference: TinyMCE Vue Technical Reference
Demo: Controlled input

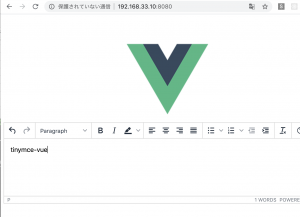
quick start guideに沿ってやっていきます。
$ npm -v
6.13.4
$ sudo npm install -g @vue/cli
$ vue create –default tinymce-vue-demo
$ cd tinymce-vue-demo
$ npm install –save @tinymce/tinymce-vue

// Vueがインストールされたか挙動確認
$ npm run serve
http://192.168.33.10:8080/

//公式通りに書いていきます。
src/App.vue

<template>
  <div id="app">
    <img alt="Vue logo" src="./assets/logo.png">
    <editor
      api-key="no-api-key"
      :init="{
        heigt: 500,
        menubar: false,
        plugins: &#91;
           'advlist autolink lists link image charmap print preview anchor',
           'searchreplace visualblocks code fullscreen',
           'insertdatetime media table paste code help wordcount'
         &#93;,
         toolbar:
           'undo redo | formatselect | bold italic backcolor | \
           alignleft aligncenter alignright alignjustify | \
           bullist numlist outdent indent | removeformat | help'
      }"
    />
  </div>
</template>

<script>
import Editor from '@tinymce/tinymce-vue'

export default {
  name: 'app',
  components: {
    'editor': Editor
  }
}
</script>

なんとなく行けそうなのはわかった。

さて、これをどうやって実装するかだな。。

Vue.jsでCarbonの代わりにmoment.jsを使用する

### view

<template v-for="m in messages>
  // 省略
  <span>@{{ m.created_at |  moment  }}</span>
  // 省略
</template>

### script
– Vueのmethods内でmoment()を呼び出し、filtersでformatを指定する

<script src="https://cdnjs.cloudflare.com/ajax/libs/moment.js/2.24.0/moment.min.js" type="text/javascript"></script>
<script>
new Vue({
  el: '#app',
  filters: {
   moment: function (date) {
   return moment(date).format('MM/DD HH:mm');
   }
  },
  data: {
  // 省略
  },
   methods: {
   // 省略
   moment: function () {
    return moment();
   }
   },
   mounted(){
   // 省略
   }
});
</script>

momentはvueの中で指定しないとうまく動かない。
make:resourceでサーバ側でcarbonで整形することも考えたが、コントローラの処理が複雑な為、クライアント側でフォーマット化する。

Promiseとは?

### 「同期処理」と「非同期処理」
– 同期処理は上から下へ順番に1つずつ処理
– 非同期処理は時間が掛かりそうな処理を実行した後に、結果を待たずにすぐ次の処理を実行

## promise
引数「resolve」に取得したい値を設定することで、非同期処理の結果を格納

var result = new Promise(function(resolve){
		resolve(new Date);
	});

	result.then(function(data){
		console.log(data.getFullYear());
	});

then()の処理を実行することで、階層が複雑化しない

axiosとは?

– axiosは、HTTP通信を簡単に行うことができるJavascriptライブラリ
https://github.com/axios/axios
– 主にJsonの取得に利用される

### Features
– Make XMLHttpRequests from the browser
– Make http requests from node.js
– Supports the Promise API
– Intercept request and response
– Transform request and response data
– Cancel requests
– Automatic transforms for JSON data
– Client side support for protecting against XSRF

## サンプル
### npm install
$ npm install axios –save

### index.js
– axios.get(‘${url}’), axios.post(‘${url}’)と実装する
– get, post以外にも、request, delete, head, options, put, patch, getUriなどがある

var express = require('express');
var router = express.Router();

// axiosのインスタンス生成
const axiosBase = require('axios');
const axios = axiosBase.create({
	baseURL = '192.168.33.10:8000',
	headers: {
		'Content-Type' : 'application/json',
		'X-Requested-With': 'XMLHttpRequest'
	},
	responseType: 'json'
});

router.get('/', function(req, res, next){
	axios.get('/title')
	.then(function(response){
		res.render('index', response.data);
	})

	.catch(function(error){
		console.log('Error!! occurred in Backend.')
	});
});

module.exports = router;

### res, err, finally

<script>
		axios.get(${url})
		.then(res => console.log(res.data))
		.catch(err => console.error(err))
		.finally(res => console.log('finally'))
	</script>

XMLHttpRequestを生成せずに処理できるので、確かに使い勝手良さそうです。

ESLint + gulp

$ npm i -D gulp-eslint

var gulp = require('gulp');
var imagemin = require('gulp-imagemin');
var webserver = require('gulp-webserver');
var sass = require('gulp-sass');
var sassLint = require('gulp-sass-lint');
var eslint = require('gulp-eslint');
var plumber = require('gulp-plumber');

gulp.task('html', function(done){
	gulp.src('./src/*.html')
		.pipe(gulp.dest('./dest'))
	done();
});

gulp.task('js', function(done){
	gulp.src(['./src/*.js','!node_modules/**'])
		.pipe(eslint({ useEslintrc: true }))
		.pipe(eslint.format())
		.pipe(eslint.failAfterError())
		.pipe(gulp.dest('./dest/js'))
	done();
});

gulp.task('img', function(done){
	gulp.src('./src/img/*.png')
		.pipe(imagemin())
		.pipe(gulp.dest('./dest/img'))
	done();
});

gulp.task('sass', function(done){
	gulp.src('./src/sass/*.scss')
		.pipe(plumber())
		.pipe(sassLint())
		.pipe(sassLint.format())
		.pipe(sassLint.failOnError())
		.pipe(sass({outputStyle: 'expand'}))
		.pipe(gulp.dest('./dest/css'))
	done();
});

gulp.task('watch', function(done){
	gulp.watch('./src/*.html', gulp.task('html'))
	gulp.watch('./src/js/*.html', gulp.task('js'))
	gulp.watch('./src/sass/*.scss', gulp.task('sass'))
	done();
});

gulp.task('webserver', function(done){
	gulp.src('./dest')
		.pipe(webserver({
			host:'192.168.34.10',
			port: 8000,
			livereload: true,
		}));
	done();
});

gulp.task('default', gulp.series('html','js','img','sass','watch','webserver'));

gulpにsass-lintを導入する

stylelintとは?
-lint工程を追加することで、コードを綺麗にし、保守性を高める
-styleの重複を減らす

csslintとは?
$ npm install -g csslint
$ csslint main.css

sasslintを導入
$ npm install gulp-sass-lint –save-dev
$ gulp

var sassLint = require('gulp-sass-lint');

gulp.task('sass', function(done){
	gulp.src('./src/sass/*.scss')
		.pipe(plumber())
		.pipe(sassLint())
		.pipe(sassLint.format())
		.pipe(sassLint.failOnError())
		.pipe(sass({outputStyle: 'expand'}))
		.pipe(gulp.dest('./dest/css'))
	done();
});

src/sass/main.scss
2:2 warning Mixed tabs and spaces indentation
2:20 warning Color ‘red’ should be written in its hexadecimal form #ff0000 no-color-keywords
2:20 warning Color literals such as ‘red’ should only be used in variable declarations no-color-literals
3:2 warning Mixed tabs and spaces indentation
4:2 warning Mixed tabs and spaces indentation
5:1 warning Files must end with a new line final-newline

✖ 6 problems (0 errors, 6 warnings)

ああああああ、これスゲー

ボタン押下時に挙動を変える

<html>
<head>
	<title>二重送信を防ぐ</title>
	<style>
		.btn-wrap {
			width: 300px;
			margin: 0 auto;
			text-align: center;
		}
		.loading {
			display:none;
		}
	</style>
</head>
<body>
	<div class="btn-wrap">
		<button class="btn">送信</button>
		<div class="loading">
			<img src="loading.gif">
		</div>
	</div>
<script src="http://ajax.googleapis.com/ajax/libs/jquery/1.11.1/jquery.min.js"></script>
<script>
$(function(){
	$('.btn').on('click', function(){
		$('.btn').hide();
		$('.loading').show();
	});
});
</script>
</body>
</html>

多重クリック防止

<html>
<head>
	<title>二重送信を防ぐ</title>
<script>
var flag = false;
function send(){
	if(flag){
		alert("送信済みです");
		return false;
		flag = true;
	}
}
</script>
</head>
<body>
	<a href="javascript:send()">データを送信</a>
</body>
</html>

あれ、上手くいかない。。

書き方を変えます。

<html>
<head>
	<title>二重送信を防ぐ</title>
<script>
var set=0:
function double(){
	if(set==0){
		set=1;
	} else{
		alert("只今処理中です。\nそのままおまちください");
		return false;
	}
}
</script>
</head>
<body>
	<form action="" method="post">
		<input type="submit" name="go" class="test" value="送信" onClick="javascript:double(this)">
	</form>
</body>
</html>

うーんちょっと違うようです。

<body>
	<form action="" method="post">
		<input type="submit" name="go" id="login_submit" class="" value="送信">
	</form>
<script
  src="https://code.jquery.com/jquery-3.4.1.min.js"
  integrity="sha256-CSXorXvZcTkaix6Yvo6HppcZGetbYMGWSFlBw8HfCJo="
  crossorigin="anonymous"></script>
<script>
$('#login_a').on('click', function(){
	if($(this).hasClass('double_click')){
		return false;
	}
	$(this).text("送信中...");
	$(this).addClass('double_click');
});
</script>
</body>

あれーーーーーーーーー